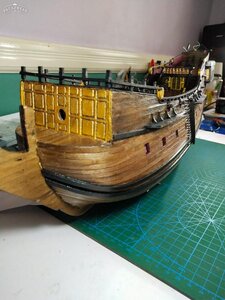
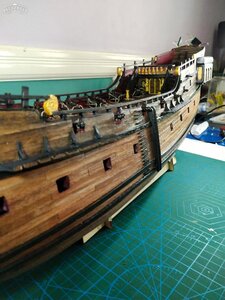
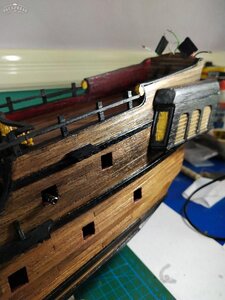
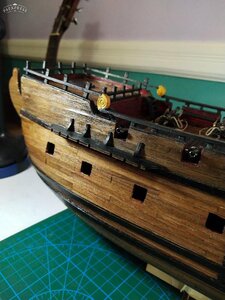
ZHL Black Pearl 2019 Golden Edition-Newbie build [COMPLETED BUILD]

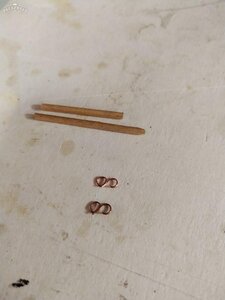
Next was installing the hull ladders and the two verticle strips (I don't know what they are called nor their purpose). The verticle strips that came with the kit seemed too small so I replaced them with diy one
Great work Warrlight - coming along nicely - and I believe the vertical strips are called skids - they were to protect the hull when launching the ships boats.
 
Hello Reggie
I became aware to your blog just today and I must point out that you are doing a most impressive job and reaching for the most beautiful achievements.Thumbsup:)
I will continue to follow
 
Hello friends. It's been almost 4 weeks since my last update. I've been working on a lot of small stuff that have taken a lot more time than I initially thought. I guess with inexperience, one has to do quite a bit more preparing, thinking, researching, planning and doing trial and error in order to do seemingly basic stuff. I must have spent hours and hours trying to figure out how to do some things, doing a trial run, only to find out it won't work. So off to try another approach. I must say though, that I am actually enjoying the learning process.... even the mistakes.

So, onwards to my build. Next up for me was to finish the railings. This was a tedious task that required patience in bending strips and pinning every baluster with copper wire and glue. To bend the strips, I soaked them in water and used my soldering iron to slowly bend it to shape (I don't have a plank bender tool yet).

View attachment 166276
View attachment 166277
View attachment 166278View attachment 166279

I think I did this part wrong. I put the rail too far out where it starts to bend upwards, so it's just hanging out there. Perhaps I should have added another post towards the edge to get the railing closer to the edge.
View attachment 166280
View attachment 166281

At this point, I thought it will be a good time to apply a second coat of tung oil on the hull and deck. I must say, tung oil dries to a very nice satiny finish.

View attachment 166294
View attachment 166295
View attachment 166296

Next was installing the hull ladders and the two verticle strips (I don't know what they are called nor their purpose). The verticle strips that came with the kit seemed too small so I replaced them with diy ones.

View attachment 166282
View attachment 166283
View attachment 166284
View attachment 166285

Then it was on to installing the channels. These were pinned with copper wire and glued to the hull. They sit on top of the wale to give them more support.

View attachment 166286
View attachment 166287
View attachment 166290


I painted the deck grates using black acrilyc and topped off with rust colored weathering powder.

View attachment 166291
View attachment 166292
View attachment 166293

The ladders were quite a bit of a challenge for me, especially the one going up to the poop deck. The balusters were each pinned to the bottom rail at a precise angle so they will appear vertically aligned when the ladder is installed.

View attachment 166297
View attachment 166298


Oops... I've reached the maximum 25 photo attachments.. Will continue in another post.
What I like about doing the Black Pearl is that it’s a fictional ship. You can make it any way you want it. It’s a great learning experience and I think when we do our second ship we will be better for the experiences we’ve had working on the Pearl don’t you think?
 
What I like about doing the Black Pearl is that it’s a fictional ship. You can make it any way you want it. It’s a great learning experience and I think when we do our second ship we will be better for the experiences we’ve had working on the Pearl don’t you think?

You are absolutely right @Jay... The Black Pearl makes for an excellent first build... simple enough that even newbies like me can navigate their way through it most of the time... And yet challenging enough that one gets a lot of satisfaction in the build process and the results. Besides, being somewhat free of requirements for historical accuracy gives one the flexibility of expressing one's personal taste and preferences. Thanks Jay for dropping in.
 
For a first build you are doing just fine. Looks better than my first wooden ship, of course that was some 35 years ago...lol. I still have issues with hull planking at times even though I do enjoy butchering wood. One mistake that I have seen most beginners make is in the building of gun carriages. They usually taper to the front of the carriage and not the rear. I wouldn't worry about it at this stage, even I have done it and actually have about 1/2 dozen of them in a drawer somewhere. lol

Thanks @Jim J....... ha ha ha... Funny you mention gun carriages, as I was just in the middle of rigging my cannons and I had to do a double take to make sure I did the carriages right. Glad to see that I didnt mess that up. Thanks for dropping in.
 
I concur with all comments regarding first build, your progress is awesome considering its your first build, my aim is to improve a little on each build it does'nt have to be a lot as long there is improvement on the last build project keep going we are all waiting for the next update.
 
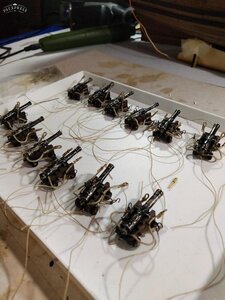
Next up on my build is installing the deck cannons. I had actually assembled the gun carriages a while back and previously posted some pictures. But in order to provide a fuller picture of my work on the guns, I will repost some of the older pictures here.

The guns were painted using gunmetal black acrylic and then brushed lightly with a burnished copper powder.
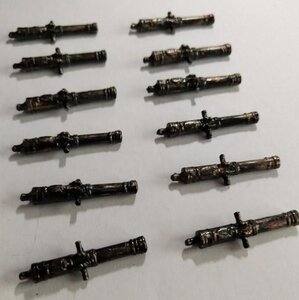
IMG_20200607_150632.JPG

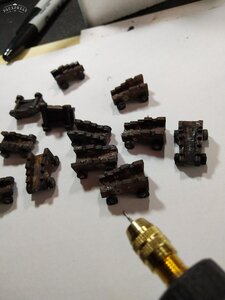
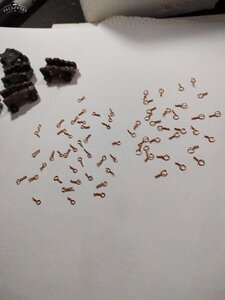
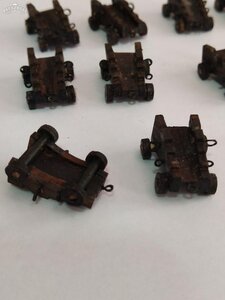
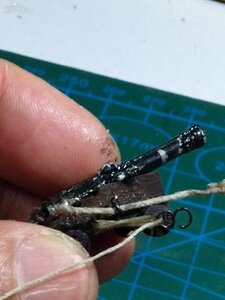
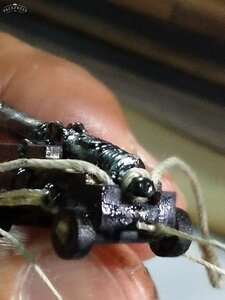
Assembling the carriages was fairly straightforward. The kit comes with a small wooden dowel that is used to make axles for the carriage. I planned to rig the carriages with breeching ropes and tackles, so I drilled tiny holes on the side and rear, which will receive the little copper rings that I made by twisting a piece of wire around a small dowel (actually a big ring for the breeching rope and a smaller one for the tackles). The rings are glued on the carriage.
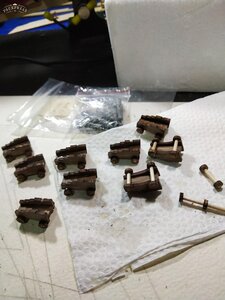
PSX_20200531_205354.jpg
PSX_20200531_204956.jpg
PSX_20200531_204900.jpg
PSX_20200602_114634.jpg

I spent the last week working on installing and rigging the cannons. This was clearly a much more challenging task than I expected. With my level of experience, every single step had to be thought out, tried out, retried, did, undid. I must admit, in the end, I didn't do it 100% technically correct, but I tried to incorporate as many elements as I could.

Please bear with me as I try to walk through it step by step. I wanted to share how a newbie would tackle a task, the thought process that goes into it, the frustration of certain methods not working out, the joy of learning from mistakes and the eventual sigh of relief once the task is completed.

This part of the build might seem very basic and second nature to the more experienced modelers. But to the newbie, it requires breaking up the job into many smaller tasks.

The first question is will I rig the guns with ropes? ....Yes
What color ropes?.... Light colored ropes
How do I attach the breeching rope?...I decided I will prepare the rope with both ends rounded and seized. These will hook up to small copper wire hooks on the bulwark. The breeching rope will be glued to the back of the cannon.
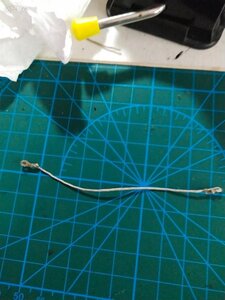
PSX_20200712_130551.jpg

Here's how I prepared the ropes.
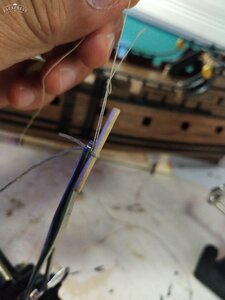
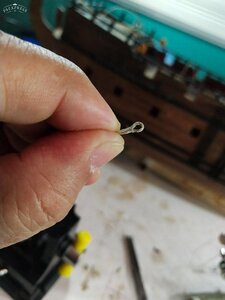
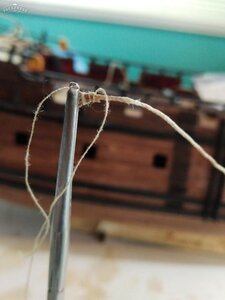
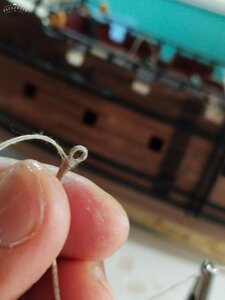
I took the rope and wrapped it around a small dowel, then clipped the end with a locking forcep(I think they call it a hemostat). The forcep is clamped on a mini vise, then a thin piece of thread is tied around it to form a nice circle. Then the ends are seized using a thin thread.
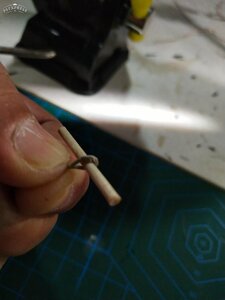
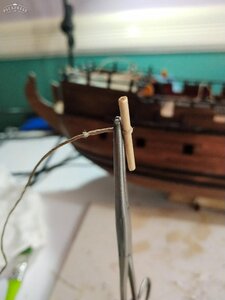
PSX_20200712_130247.jpg
PSX_20200712_130707.jpg
PSX_20200712_130349.jpg
PSX_20200712_130739.jpg
PSX_20200712_130757.jpg
PSX_20200712_130810.jpg
PSX_20200712_130822.jpg

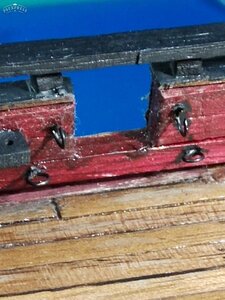
Next question... how do I attach the breeching rope to the bulwark. I thought I will make some round rings pinned and glued on the bulwark...the rounded ends of the breeching rope will attach to these. But the rings will need to be nipped to allow the rope to slide in(this can be done later).
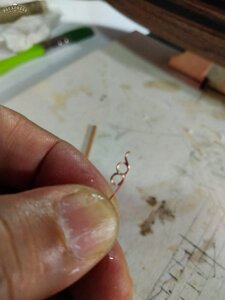
The rings were made by twisting copper wire around a small dowel.
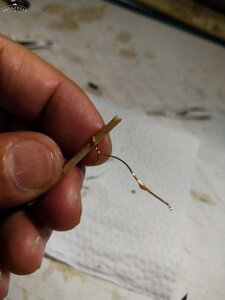
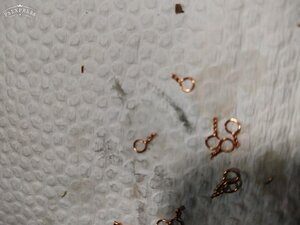
PSX_20200712_130029.jpg
PSX_20200712_130053.jpg

Next question... How to do the tackle ropes?.... First off, I need smaller rope. Then I need to decide how to attach the blocks to the rope. After much thought, I decided to skip the blocks since I don't have blocks small enough so they look proportional. I wasn't a fan of oversized blocks and I thought that the casual observer will notice the oversized blocks more than they will notice that they are not there. So, in the end I faked the tackle ropes as you can see in the following pictures.

I also needed to figure out how I will attach the tackle ropes to the bulwark. For this, I decided on an S-shaped hook that will attach to a ring on the bulwark. (By the way, I am unable to buy metal blackener where I am, so I just painted the copper wires... not very good because the paint tends to flake off).
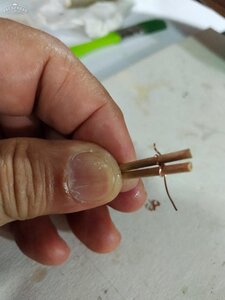
PSX_20200722_201923.jpgPSX_20200722_201937.jpgPSX_20200722_202003.jpgPSX_20200722_210954.jpg

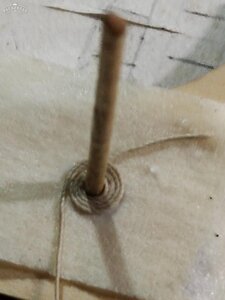
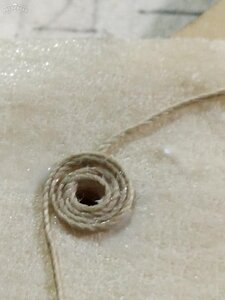
Next up... how do I make the rope coils? I tried several different ways to do this, all to no avail. In the end, this is how I did this. I drilled a small hole on a piece of 4mm wood...big enough to hold a small dowel. I taped a piece of masking tape on the wood then stuck the dowel through the tape and into the drilled hole. I slowly wound the rope around the dowel, making sure I only did it in very small increments so the rope stayed in place. After a few circles, I slowly remove the dowel and put a few drops of white glue.
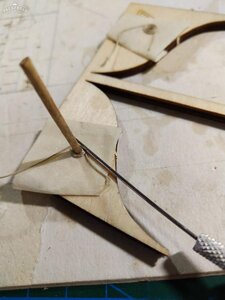
PSX_20200722_202159.jpg
PSX_20200722_202104.jpg
PSX_20200722_202053.jpg

Next step... finish rigging the ropes onto the carriage. To secure the ropes, I applied a little CA glue to certain points of the rope. But, with my inexperience, the glue ran into the rope threads and smeared it into an ugly mess. Perhaps my CA glue was too thin? Maybe I should have used CA gel or PVA glue? Some members in the group suggested using acetone to clean up the smear, but in the end, I just decided to redo the ones that looked really bad.
In the following pictures, you can also see the missing blocks on the tackle lines.
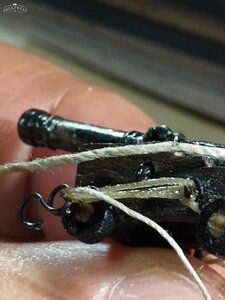
PSX_20200722_210931.jpg
PSX_20200722_210900.jpg
PSX_20200725_211712.jpg

Will continue to the next post with the actual installation of the guns on the deck.
 
Onwards to installing the guns on the deck.
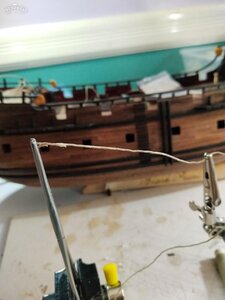
First I installed the rings and the hooks on the bulwark. Drilled small holes and glued the rings.
PSX_20200722_210841.jpg

Now time to install the guns. First I hooked the tackle lines to the bottom rings. Once hooked, I tried to close the hook a bit by crimping it with a forcep, otherwise the hook will just slip out of the ring.

Then hook up the breeching ropes.
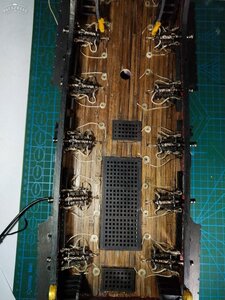
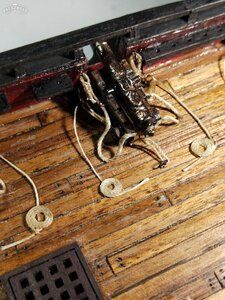
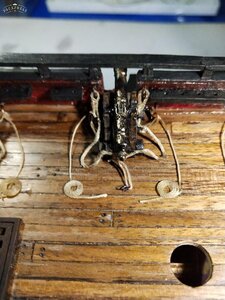
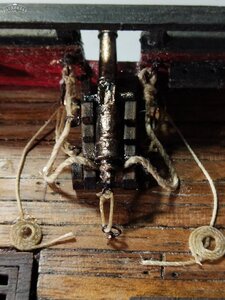
Once these are attached, I put a dab of CA glue on one wheel of the carriage to glue it to the deck. I also put a dab of glue on the breeching rope in order to keep its shape. Then I put on the rope coils by gluing to the deck (I slip the end of the tackle line under the coil to hide it). Finally, I attach the tackle line at the rear of the carriage.

PSX_20200725_211832.jpg

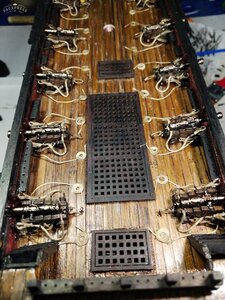
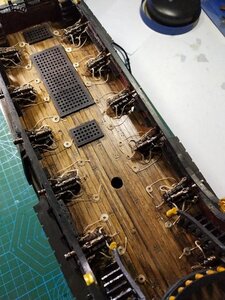
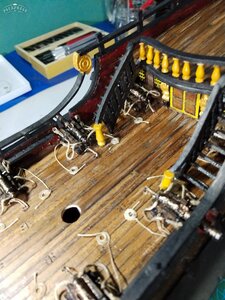
Here's all 12 guns installed.

PSX_20200725_212006.jpg
PSX_20200725_211940.jpg
PSX_20200725_212115.jpg
PSX_20200725_212158.jpg
PSX_20200725_212240.jpg
PSX_20200725_212214.jpg

Oh, by the way.... another rookie mistake... I failed to install the 2 guns under the stairs before I installed the stairs. So I had to cheat and fake the rigging on these 2 guns.


PSX_20200725_212053.jpg

This completes the cannon portion of my build. I know I didn't do some things the right way. I was a little messy in my use of glue. But I will take note of my mistakes and learn from them. I take a lot of joy from figuring out how to do things, even the mistakes. This hobby is a God send, especially at this stage of my life when I need to keep my mind working and my hands steady. God bless you all, my friends.
 
Great work and detail. I myself did not have the patience or skill to go to that level on my build but I also enjoyed the challenge of creating hooks, ropes etc. I'm almost up to installing the guns on deck. Keep up the good work.
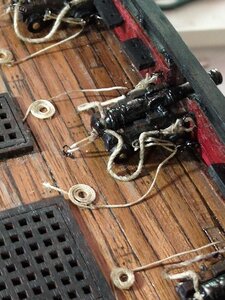
Thanks @Soozook... It took me over a week to finish my cannons... A lot of time trying to figure out how to do certain things, especially considering the task requires working with such small parts in such tight quarters... And I didn't even do it 100% correct and had to do some shortcuts. I found out, though, that my most useful tools in this task were my hemostats(locking forceps), my Gorilla gel glue, and my mini drill. I really messed up with my use of CA glue smearing all over the place... but lessons learned. But such is the fun in this hobby. Good luck on your build and I am following your posts with great interest.
 
Back
Top