ZHL Black Pearl 2020 Golden Edition [COMPLETED BUILD]

Back to the shipyard this afternoon and set about fixing up the ships bell.

View attachment 213471
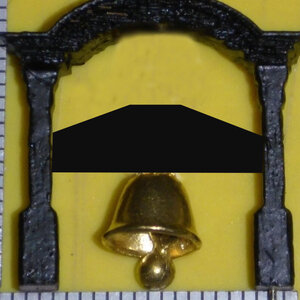
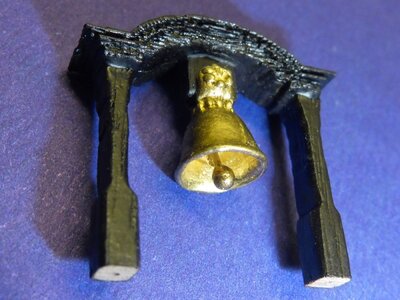
The supplied one was to big for the stand and had to be modified.

View attachment 213472
This is how I modified the the bell, first I cut off the crown and reshaped the pivot hole so it would fit on a piece of 2*3.5mm walnut which was fitted to the top of the stand.

View attachment 213473
Next the clapper was removed and a smaller one installed, this is made from a brass pin dipped in epoxy resin and formed into a small ball. Finally the bell was painted to look more like brass as I didn't like the original finish.

Overall I think it came up quite well I have been looking at photos of other BPs to see what the bells looked like but couldn't find a clear one, I'll have to see the movie again sometime.
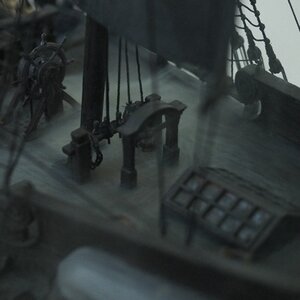
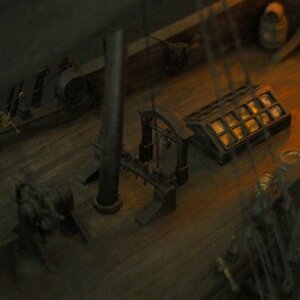
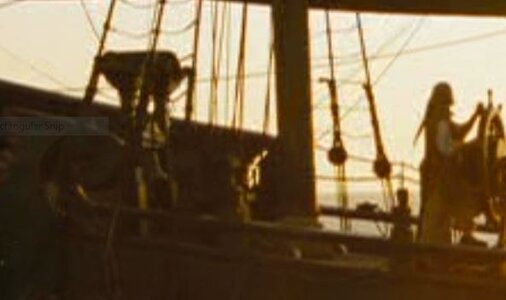
I spent a bit of time looking though the movies and managed to find a couple of instances of the bell and its mounting. I have attached a clip from the movie and my mock-up (using your photo) of what I think see from this view as well as from a few background scenes that were not very clear.

BP Bell.JPG
BP Bell Mockup.jpg
 
I spent a bit of time looking though the movies and managed to find a couple of instances of the bell and its mounting. I have attached a clip from the movie and my mock-up (using your photo) of what I think see from this view as well as from a few background scenes that were not very clear.

View attachment 213676
View attachment 213675
Hi Jeff I wanted to put a bar across the posts for the bell to pivot on but it didn't look right the bell was to low and the posts where to skinny. I think the problem is that the belfry is to out of scale, full size it would only be 1.5m high. Placed next to the ships wheel the belfry only comes up to the centre line of the wheel. My fix is a bit of a compromise but I didn't want to make a new belfry and the scale issue doesn't look too bad when placed on the deck.

HTB1R85GXITxK1Rjy0Fgq6yovpXa3~2.jpgHTB1GBQJgkKWBuNjy1zjq6AOypXa4~2.jpg
I found some photos of the larger scale BP (funny how you find them when you don't need them anymore) it's how I would scratch build one.
I'll be very interested to see how you do yours I took the easy way out.
Tony
 
Hi Jeff I wanted to put a bar across the posts for the bell to pivot on but it didn't look right the bell was to low and the posts where to skinny. I think the problem is that the belfry is to out of scale, full size it would only be 1.5m high. Placed next to the ships wheel the belfry only comes up to the centre line of the wheel. My fix is a bit of a compromise but I didn't want to make a new belfry and the scale issue doesn't look too bad when placed on the deck.

View attachment 213794View attachment 213796
I found some photos of the larger scale BP (funny how you find them when you don't need them anymore) it's how I would scratch build one.
I'll be very interested to see how you do yours I took the easy way out.
Tony
It's highly likely that I will take the easy way out as well. I am not so skilled in scratch building parts. Even in the movie snip I showed, I thought the bar is mounted very low.
 
While I was waiting for the LEDs to arrive I started to plank the deck and some other small items. Only the main deck was glued in place at this time. I started from the centre working out on a 4 plank shift. As some of the bulkheads had to be cut down to deck level only the centre half of the deck can be done now. Each decking plank was cut to a length of 82mm the last piece was left long incase l needed some longer planks.


View attachment 205977
The planks where stacked up and clamped to the bench where I ran a Sharpie across the edge. Some of the planks edges marked more than others but overall I was happy with the results.


View attachment 205980
The front of the cabin was assembled and clear plastic placed behind the windows, this has to be installed before the top deck.


View attachment 205982
Before removing the these parts I painted the gun supports black.

View attachment 205983
A piece of 12mm Perspex was used to assemble them, I chose Perspex because the glue does not stick to it. Only one has to be glued onto the aft port of part 23 before it's assembled. I found some of the gun ports where close to the frames so it was better to glue them on after the bulwarks where in place.


View attachment 205981
View attachment 205978
After the decks are fitted the bulwarks can be done. Check the alignment with the fore and aft frames. It is very important that part 26 only contacts half of frame 5.


View attachment 205979
With the bulwarks in place the frames can be cut down and the decking finished. The walnut planks splintered very easily great care had to be taken while trimming around the openings.


View attachment 205988
View attachment 205987
The insides of the bulwarks are now planked , at this stage I gave the decks a couple of coats of polyurethane to protect it during the rest of the build.
Tony, you are doing some fine work. I wish I had your craftmanship.
 
Can anyone help me I've been making up some of the small parts for the deck and found the ships bell looks to big.

View attachment 207712
I think I might have the part from the larger scale model, can anyone who has built either one check the size for me I have tried looking at photos but it's not clear. I can modify the part or message Max at ZHL if it's wrong. Thanks
The bell they gave me is shorter and silver. Mine is a larger scale model and the bell doesn't look anything like this one. "The rhyming and the chiming of the bells, bells, bells." (Poe)
 
It took longer than I expected to finish and sand down the second planking, next job was fixing the whales. Bending the planks was no problem, I used a piece of copper wire bent to the radius of the hull and use that to find something to bend the plank around. I've used pipes, tins and whatever else I can find. Planks where placed in hot water for two hours before bending and clamped until dry. View attachment 209412
The instructions where no help in positioning the whales so I went with what looked right. Spacers maintained the distance between the two pieces the hard part was clamping them in position. The best method I came up with was to make some 1.5mm wooden dowles to hold it in place while the glue set, real functioning treenails.

View attachment 209415View attachment 209416
Lower rails attached.

View attachment 209423
Getting the hull ready for polyurethane finish I will do the lower part first and the rest after the channels have been fitted.

View attachment 209440
On the main mast channel one of the deadeyes is in front of a cannon and has to be moved.


View attachment 209442
View attachment 209444
The Pearl is starting to take shape channels have been modified and fitted along with a few other parts.


View attachment 209445View attachment 209446
Whales painted black, I kinda wanted to do the whole ship black but I like the way it looks now. If the planks didn't go well I would have gone with the black all over.
Nice job, Tony. I'll reference some of your posts when working on my Soleil after I finish the BP. I'll probably switch from tung oil to poly and try irl treenails on my wales. Good job!
 
Today I noticed the windows in the captain's cabin where getting dusty on the inside so it's time to finish it by installing the two shutters on ether end. The reason this had not been done was the gold pattern needed painting and it looked fiddly.


View attachment 212660
After cleaning the inside of the windows I was thinking about an easy way to do this and in the end it took less than a minute to do.


View attachment 212661
First I marked the shape of the sutter on a piece of plastic then painted it gold.

View attachment 212662
Then placed the shutter on top of the painted surface and lightly push down.

View attachment 212663
Job done, if I knew it was going to be that easy I would have done it sooner.
Now you tell me! I wound up using a tiny brush and an hour's worth of painting!
 
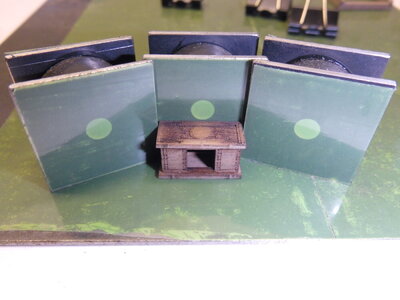
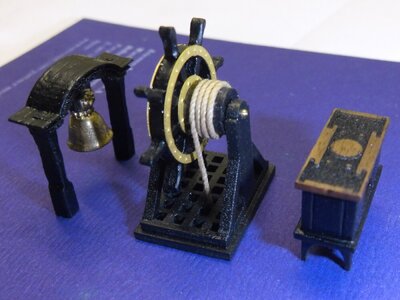
I have just about finished the deck fittings which will be attached later as I have a tendency to brake things that get in my way. Wherever possible I use aids to keep parts square while the glue sets.


P1190252.JPG
P1190254.JPG
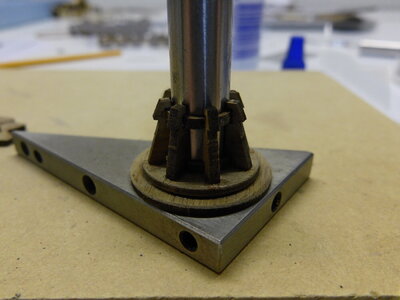
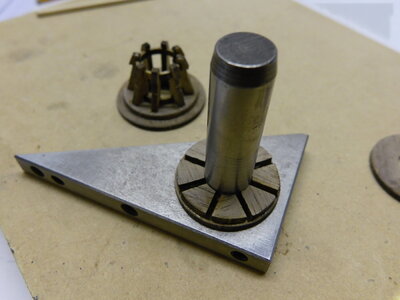
This is how I assembled the capstan I have a small set square with a ten mm dowel pin in it, the parts are placed on the dowel and glued. verything is lined up and square. PVA does not stick to metal parts.


P1190421.JPG
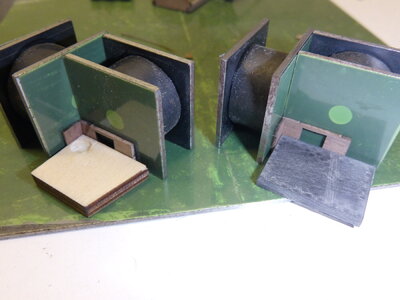
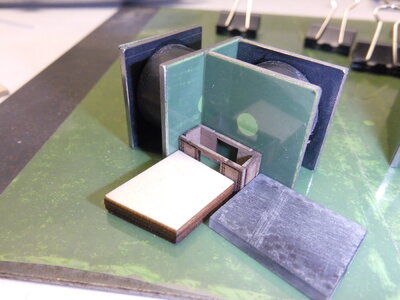
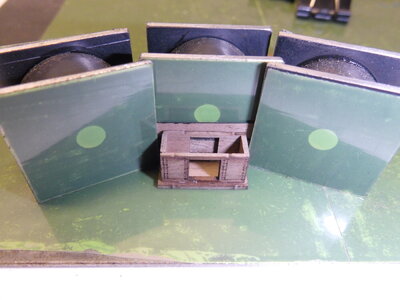
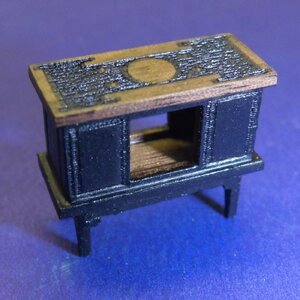
I made up some magnetic blocks which I use to keep parts square this is how the binnacle was put together, the hardest part was the fact it's quite small. The blocks have plastic tape on them because PVA can be corrosive to steel.
P1190424.JPGP1190425.JPG
In this photo l have glued the bottom piece on and using a small spacer behind it to keep it central.


P1190426.JPG

Top piece is attached next. The legs where done in the same manner and the two parts joined together.

P1210023~2.JPGP1210011~2.JPG
P1210033.JPGP1190712~2.JPG
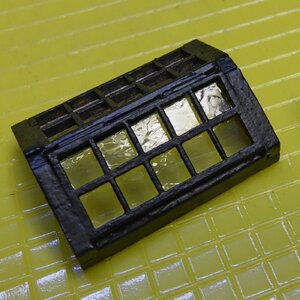
On the skylight I tried to age the glass with a coating of PVA.

P1210019~2.JPGP1210020~2.JPG
 
Nice. I built my capstan yesterday. Some of these same parts are on my construction plan for the next couple of weeks.
Thanks I forgot to mention that I've drilled small holes for reinforcing pins in the bottom of some parts these make the joint stronger and simpler to locate when gluing. The pins are made from brass nails with the head cut off.
 
Hi Tony, I just found your log and I have to say how much I appreciate your craftsmanship. The cabin you built is fantastic, the correction on the bell brilliant, and all the little detailed bits just turned out great. Keep it up - you have a fine build here!
 
I love your binnacle. My legs broke off so I wound up discarding them. The wheel looks great too.
Thanks I was playing with the finish and could not decide between polyurethane or black so I went with the polyurethane which was so so, did it black and lost the detail on top. Then lightly sanded the top till the black was removed another coat of polyurethane and it was finished it was a lot easier than it looks.
 
Thanks I was playing with the finish and could not decide between polyurethane or black so I went with the polyurethane which was so so, did it black and lost the detail on top. Then lightly sanded the top till the black was removed another coat of polyurethane and it was finished it was a lot easier than it looks.
Yes. Nice touch, though.
 
Hi Tony, I just found your log and I have to say how much I appreciate your craftsmanship. The cabin you built is fantastic, the correction on the bell brilliant, and all the little detailed bits just turned out great. Keep it up - you have a fine build here!
Thanks I've seen your build and I can't believe the amount of detail in those tiny carvings, that is going to be a truly great model. The cabin was a lot easier than I expected even with the LEDs mounted up high.
 
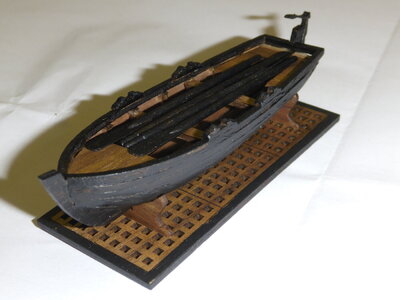
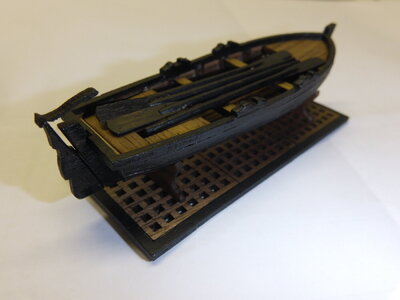
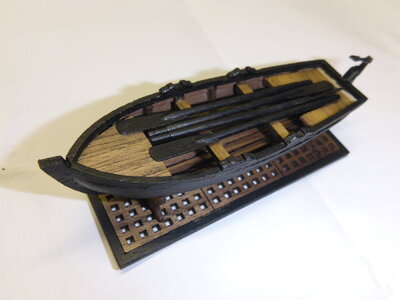
Next up is the ships boat.
P1210006.JPG
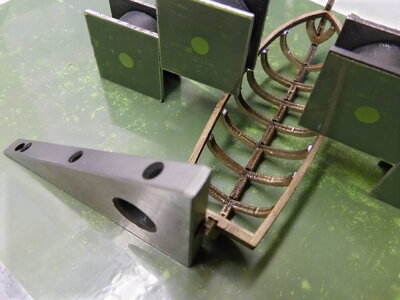
It was a nightmare it really needed a jig to hold the ribs in place while gluing and attaching the planks.


P1190260.JPG
I used my magnetic blocks while the glue set. It worked but as it's a very delicate structure the seats any bow piece went in before planking. The planks are only 0.5mm and as it's single planked care must be taken only sand to a minimum. When the planking is complete it is surprisingly strong.


P1210035~2.JPG

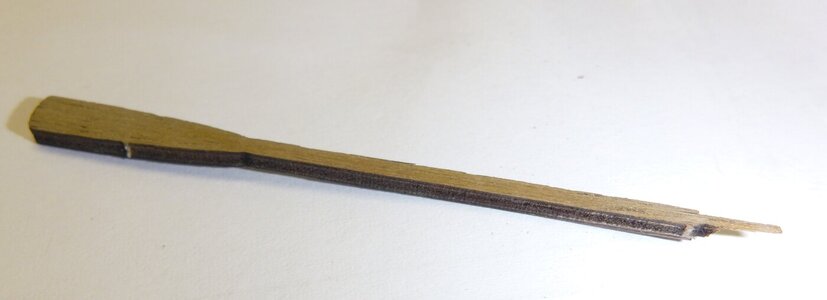
I tried rounding off the oars it broke straight away maybe I should have used a longitudinally sanding motion as the ply is fragile. As I didn't like the look of the oars and it would taken a lot of time to fix them up new ones where made. The rudder was attached as is, it would have been nice to sand it to shape but after what happened to the oar l thought best leave it alone.


P1210002.JPG

This has been one of the most challenging parts to make so far, considering I nearly bined it a few times it doesn't look to bad.
P1200004.JPG
 
Back
Top