I'm thinking to buy the cheap model of it and make the parts i will miss from scrap wood. I have a since a few days a 3d printer so the other stuff who zhl give with the original model i can try to print [like the crates and barrels]. But like i said, i'm thinking about it. Not really sure what to do. Anyone experience with the cheap Chinese model?
You are using an out of date browser. It may not display this or other websites correctly.
You should upgrade or use an alternative browser.
You should upgrade or use an alternative browser.
Hi ZHL make 3 versions of the Black Pearl the first two are 1/50 scale, one has the internal details with part of the hull removed the other is the same without the hull opening. The last one the golden edition is smaller (the one I am building) and is the cheapest version at 209 US$ plus postage. All the parts are included with the kit but lots of small improvements can be made. With the Chinese kits you have to be careful who you buy from some sellers sell older versions or incomplete kits. The best advice I can give is read the reviews / build logs and get the one you like the most, don't worry to much about the cost you'll be spending a lot of time building it and it will be something you will be very proud of.I'm thinking to buy the cheap model of it and make the parts i will miss from scrap wood. I have a since a few days a 3d printer so the other stuff who zhl give with the original model i can try to print [like the crates and barrels]. But like i said, i'm thinking about it. Not really sure what to do. Anyone experience with the cheap Chinese model?
Tony
I wanted first to build it of all the wood i have left, But its easier to have the basic already complete.
That's the only reason why i'm thinking of it.
i'm also sure i want the one with the open hull.
I'm working on a very small black pearl right now. But it's really small and fragile.
My hand are to big to get between the masts and making almost everything with tweezers.
It is a very detailed one but way to small and not a beautiful one.
The good thing is i know how he must look, and where everything goes .
I read a lot of you guy's here (the building logs). They are really useful.
I will think about buying the one off ZHL. ..i didn't buy anything yet.
And i already asked here for the drawings, The big schematics .
First i want those drawings and see if i can make it totally off scrap.
But i will stay following your log, its fun to read and to see how you solve the problems of the model
The open hull Black Pearl is an impressive looking model, make a log of your build I'll be sure to keep an eye on it.I wanted first to build it of all the wood i have left, But its easier to have the basic already complete.
That's the only reason why i'm thinking of it.
i'm also sure i want the one with the open hull.
I'm working on a very small black pearl right now. But it's really small and fragile.
My hand are to big to get between the masts and making almost everything with tweezers.
It is a very detailed one but way to small and not a beautiful one.
The good thing is i know how he must look, and where everything goes .
I read a lot of you guy's here (the building logs). They are really useful.
I will think about buying the one off ZHL. ..i didn't buy anything yet.
And i already asked here for the drawings, The big schematics .
First i want those drawings and see if i can make it totally off scrap.
But i will stay following your log, its fun to read and to see how you solve the problems of the model
My BP is on hold for the next few weeks I've got a couple of decks to rebuild and brownie points to earn, I can still do some small parts and managed to get the deadeyes mounted.
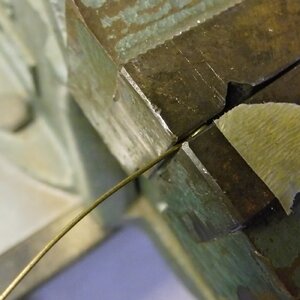
First a piece of masking tape was used to mark the length required, the eyepin is placed in a vice up to the marker.
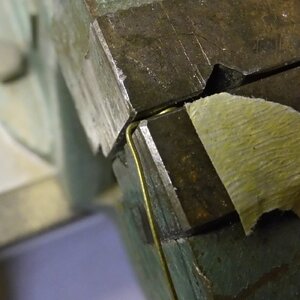
Pin is bent at 90 degrees.
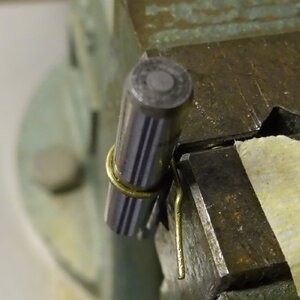
Then I used a 5mm pin to pre form the ring this is a bit bigger than required but it's easier than using the deadeye.
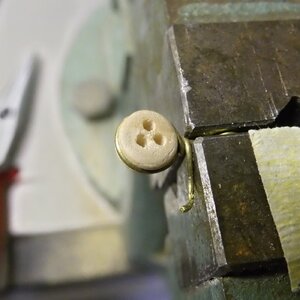
Deadeye is now inserted and the wire twisted round to secure the deadeye in place.
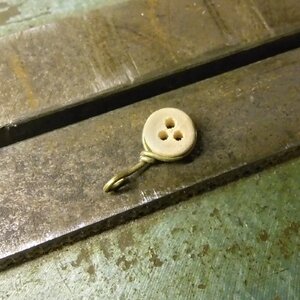
Cut off excess wire and deadeye is completed.
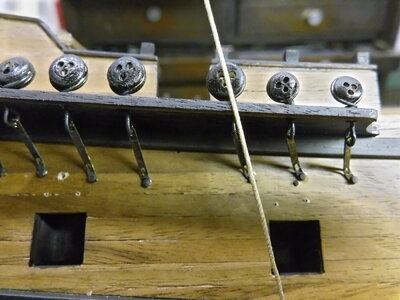
When setting the chainplate I used a a temporary mast and a piece of rope tied at mast height, the chainplate should line up to the rope.
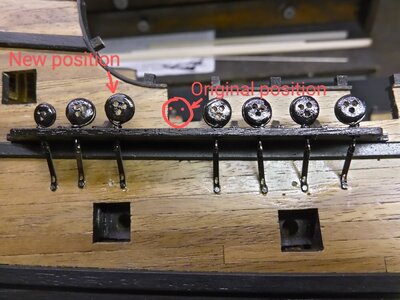
On the main mast I needed to move a deadeye as it was blocking the gunport.
Overall I wasn't really happy with mounting the deadeyes this way and would not use this method again on a future model.
I am trying to complete all the operations that require turning the ship on its side or upside down before fitting all the deck fittings.

First a piece of masking tape was used to mark the length required, the eyepin is placed in a vice up to the marker.

Pin is bent at 90 degrees.

Then I used a 5mm pin to pre form the ring this is a bit bigger than required but it's easier than using the deadeye.

Deadeye is now inserted and the wire twisted round to secure the deadeye in place.

Cut off excess wire and deadeye is completed.

When setting the chainplate I used a a temporary mast and a piece of rope tied at mast height, the chainplate should line up to the rope.

On the main mast I needed to move a deadeye as it was blocking the gunport.
Overall I wasn't really happy with mounting the deadeyes this way and would not use this method again on a future model.
I am trying to complete all the operations that require turning the ship on its side or upside down before fitting all the deck fittings.
You did a excellent job on the deadeyes! Did your kit not come with prefabricated deadeye holders?
In the All-Scenario Version, my chain plates were also too long and would interfere with my gun ports if I slanted them correctly. If you had moved the channels back a smidge, would the deadeyes and lanyards have still blocked the gun? That's similar to how I made my deadeye holders, but with a lot more precision. I just eyeballed it. I used to tell the Admiral I had calibrated eyeballs. In actuality, I'm glad I had extra eye pins.
These are the parts that came with the kit after making them all up and fixing them in place I didn't want to replace them, but wouldn't do it like this again.You did a excellent job on the deadeyes! Did your kit not come with prefabricated deadeye holders?
I tried it in different positions and as a last resort filled in the old deadeye slot and cut a new one.In the All-Scenario Version, my chain plates were also too long and would interfere with my gun ports if I slanted them correctly. If you had moved the channels back a smidge, would the deadeyes and lanyards have still blocked the gun? That's similar to how I made my deadeye holders, but with a lot more precision. I just eyeballed it. I used to tell the Admiral I had calibrated eyeballs. In actuality, I'm glad I had extra eye pins.
- Joined
- Feb 3, 2021
- Messages
- 2
- Points
- 3
Nice job, perfect.
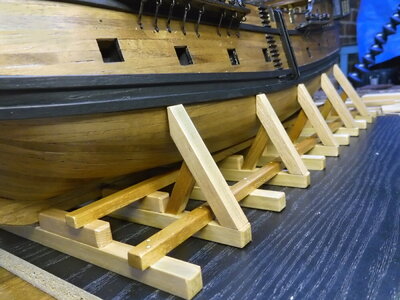
I've been thinking about how to make a stand for my BP didn't like the ZHL approach or a pedestal, so thought I'd have a go at making one. I am basing this on one I had seen on a website that would suit my BP.
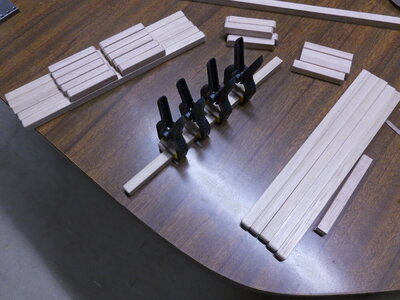
This project started simply enough but then got a bit out of control.
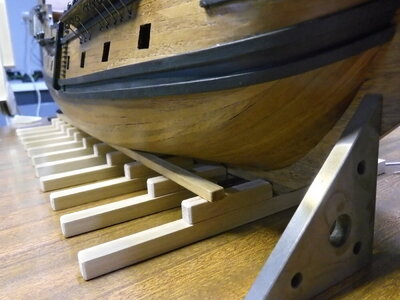
This is all I really needed it held the ship well, the keel was locked in place and the bottom of the ship rested on rails keeping it nice and square.
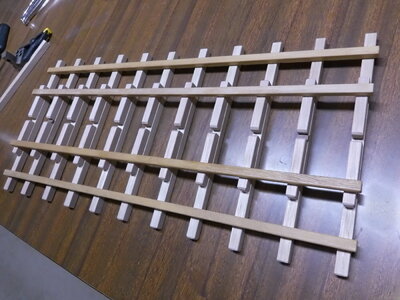
A second rail was added for strength. To reinforce the glue I tried brass nails but didn't like the way they looked. Next best thing I made some 1.8mm wooden pins from toothpicks and pinned the joints.
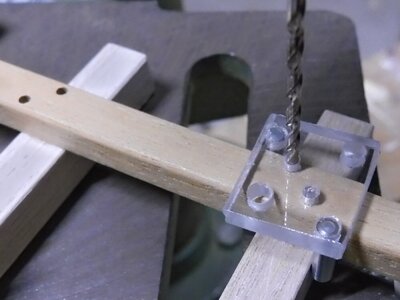
A jig was made to drill the pinholes.
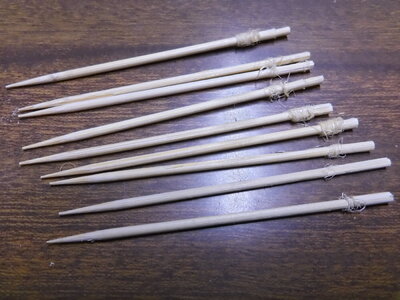
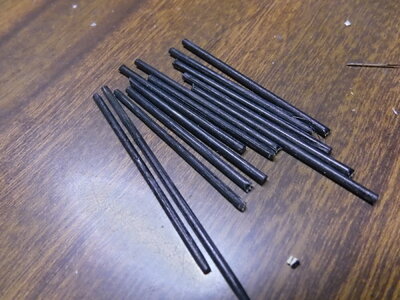
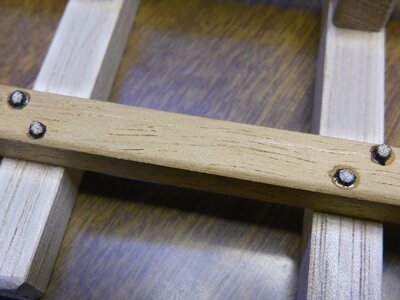
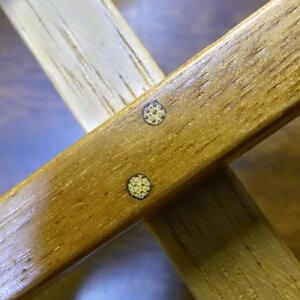
Toothpicks reduced to 1.8mm blackened and glued in place.
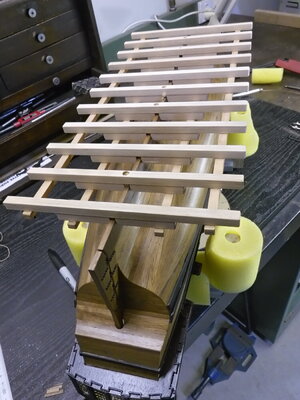
Placed stand on keel and drilled 4 screw holes and one for a location pin, it's not going to move.
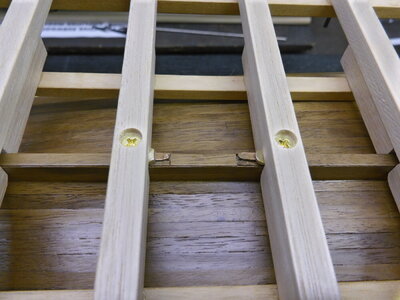
These are the contacts for the LEDs, the wires are not fitted yet.
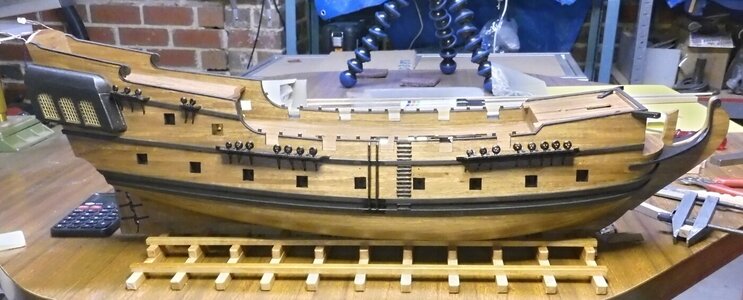
This is how I planned it to be but felt that it didn't do justice to the ship.
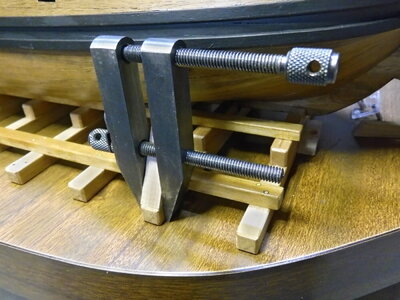
Since I had wood left over some supports where added the problem was being on an angle glue wasn't able to hold them securely so these are also pinned in place. First I drilled holes (using the jig) where the supports are going, the support was positioned correctly and clamped in place.
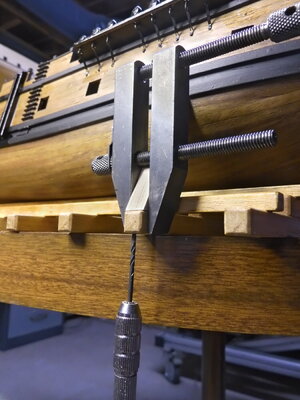
The holes are transferred into the support.
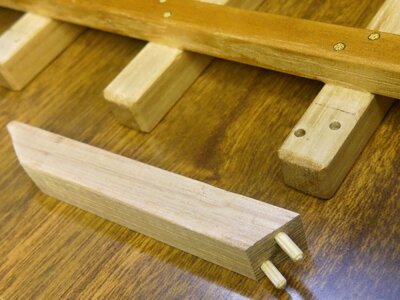
Pins added ready to glue. After the supports where finished I added a brace to each one.
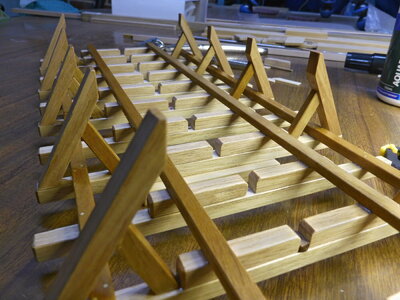
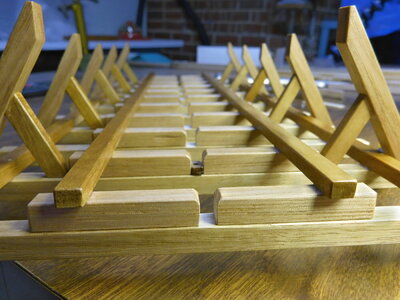
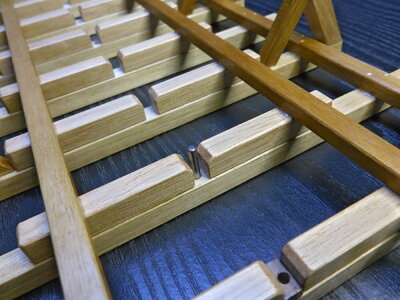
The pin is used to position the model so the contacts for the LEDs line up.
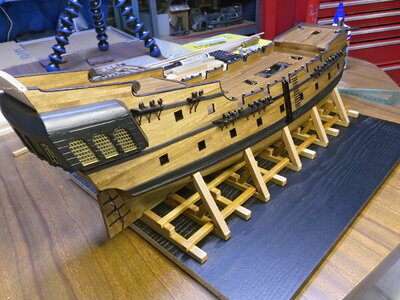
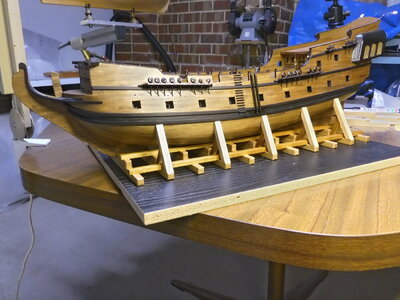
Like I said a simple job that wasn't so simple but I'm pleased with the way it turned out.

This project started simply enough but then got a bit out of control.

This is all I really needed it held the ship well, the keel was locked in place and the bottom of the ship rested on rails keeping it nice and square.

A second rail was added for strength. To reinforce the glue I tried brass nails but didn't like the way they looked. Next best thing I made some 1.8mm wooden pins from toothpicks and pinned the joints.

A jig was made to drill the pinholes.


Toothpicks reduced to 1.8mm blackened and glued in place.

Placed stand on keel and drilled 4 screw holes and one for a location pin, it's not going to move.

These are the contacts for the LEDs, the wires are not fitted yet.

This is how I planned it to be but felt that it didn't do justice to the ship.

Since I had wood left over some supports where added the problem was being on an angle glue wasn't able to hold them securely so these are also pinned in place. First I drilled holes (using the jig) where the supports are going, the support was positioned correctly and clamped in place.

The holes are transferred into the support.

Pins added ready to glue. After the supports where finished I added a brace to each one.


The pin is used to position the model so the contacts for the LEDs line up.


Like I said a simple job that wasn't so simple but I'm pleased with the way it turned out.
Wow! I love this Tony. You've got skills!
I can echo Paul, WOW! Great craftsmanship, Tony.
Tony, you need a hobby!I've been thinking about how to make a stand for my BP didn't like the ZHL approach or a pedestal, so thought I'd have a go at making one. I am basing this on one I had seen on a website that would suit my BP.
View attachment 220011
This project started simply enough but then got a bit out of control.
View attachment 220012
This is all I really needed it held the ship well, the keel was locked in place and the bottom of the ship rested on rails keeping it nice and square.
View attachment 220013
A second rail was added for strength. To reinforce the glue I tried brass nails but didn't like the way they looked. Next best thing I made some 1.8mm wooden pins from toothpicks and pinned the joints.
View attachment 220016
A jig was made to drill the pinholes.
View attachment 220014View attachment 220015View attachment 220017View attachment 220018
Toothpicks reduced to 1.8mm blackened and glued in place.
View attachment 220019
Placed stand on keel and drilled 4 screw holes and one for a location pin, it's not going to move.
View attachment 220020
These are the contacts for the LEDs, the wires are not fitted yet.
View attachment 220021
This is how I planned it to be but felt that it didn't do justice to the ship.
View attachment 220027
Since I had wood left over some supports where added the problem was being on an angle glue wasn't able to hold them securely so these are also pinned in place. First I drilled holes (using the jig) where the supports are going, the support was positioned correctly and clamped in place.
View attachment 220028
The holes are transferred into the support.
View attachment 220029
Pins added ready to glue. After the supports where finished I added a brace to each one.
View attachment 220031View attachment 220032View attachment 220030
The pin is used to position the model so the contacts for the LEDs line up.
View attachment 220033View attachment 220034View attachment 220035
Like I said a simple job that wasn't so simple but I'm pleased with the way it turned out.
Good clean tight work Tony! I really like the chamfered edges on the support frame pieces.
WOW! I love this build, can't wait 'till the rigging and sails! Most builds peter out at that stage, speaking of petering out, I hope to resume my builds on this forum and others, we will see.
First I would like to thank everyone for the likes and kind comments. This week I have been working on the gunport lids for me the biggest challenge was making the PE brass strips look more like hinges, just bending them at 90 degrees wasn't going to work.
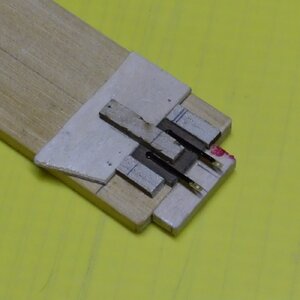
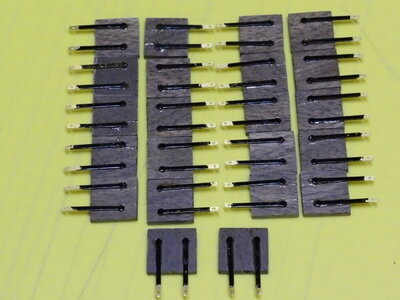
The PE hinges where painted black and glued to the gunport lids using a jig this kept the lids looking the same.
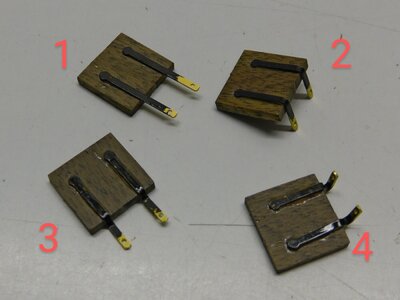
The strips have been bent to simulate a hinge I did this in 3 stages.
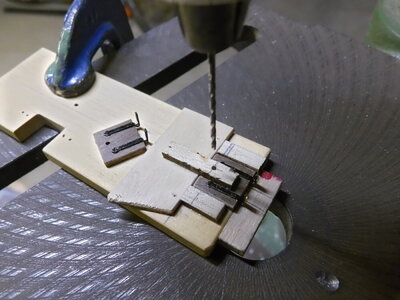
I reused the jig to drill a hole for the lifting rope.
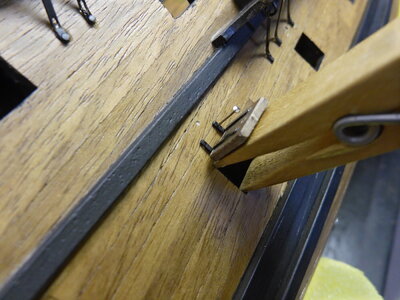
To position the lid I used a clothespeg filed down to fit in the gunport then marked the position of the holes with a pin.
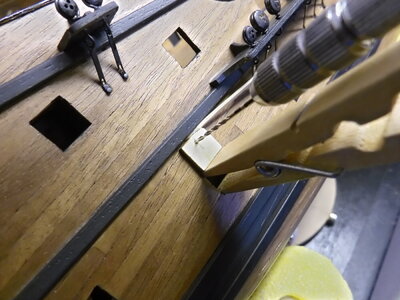
A small piece of wood with a hole positioned for the lifting rope was used to mark where the hole should go.
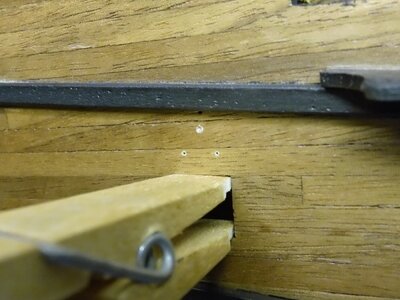
The holes are only marked at this stage they can be repositioned if required.
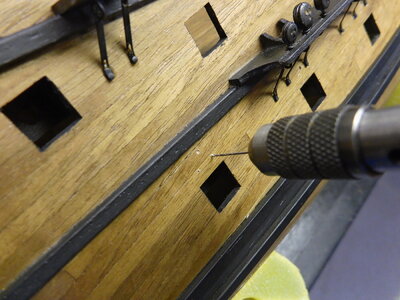
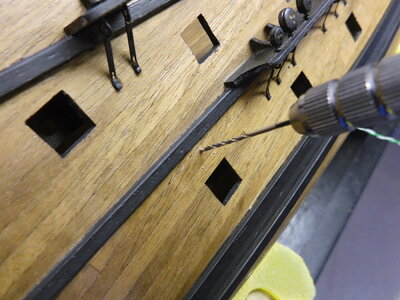
The holes are now drilled, I predrill the pin holes to make knocking in the pins easier.
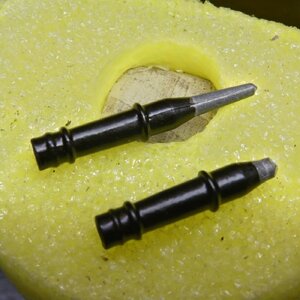
While test fitting the cannons I found six needed cutting down as four were hitting the bulkheads and two where just touching the LEDs I mounted behind the centre cabin windows, I didn't think of this when I put the LEDs in.
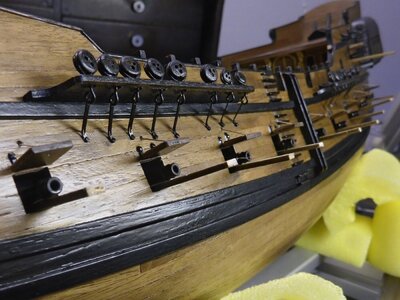
Gunport lids pinned and glued in place with epoxy, lifting rope was next then the cannons went in. I placed a piece of scrap wood under each cannon while the epoxy set.
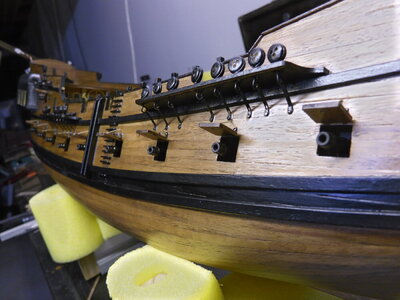
As I was installing the lifting rope l realise that I had forgotten about the eyebolts on the lids, to late now lesson learnt for next time.
My respect for anyone who builds a 100 gun ship has grown I only did 20 simple ones and that was an effort but I'm pleased with how it came out.


The PE hinges where painted black and glued to the gunport lids using a jig this kept the lids looking the same.

The strips have been bent to simulate a hinge I did this in 3 stages.

I reused the jig to drill a hole for the lifting rope.

To position the lid I used a clothespeg filed down to fit in the gunport then marked the position of the holes with a pin.

A small piece of wood with a hole positioned for the lifting rope was used to mark where the hole should go.

The holes are only marked at this stage they can be repositioned if required.


The holes are now drilled, I predrill the pin holes to make knocking in the pins easier.

While test fitting the cannons I found six needed cutting down as four were hitting the bulkheads and two where just touching the LEDs I mounted behind the centre cabin windows, I didn't think of this when I put the LEDs in.

Gunport lids pinned and glued in place with epoxy, lifting rope was next then the cannons went in. I placed a piece of scrap wood under each cannon while the epoxy set.

As I was installing the lifting rope l realise that I had forgotten about the eyebolts on the lids, to late now lesson learnt for next time.
My respect for anyone who builds a 100 gun ship has grown I only did 20 simple ones and that was an effort but I'm pleased with how it came out.
A fine bit of work here Tony! Congratulations! I especially liked your clothespin idea - I may end up borrowing that one.
I really enjoy your inventive use of jigs. Well done Tony.


