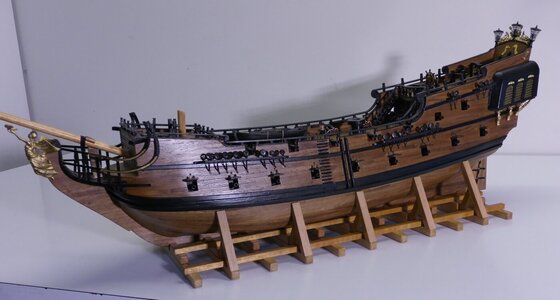
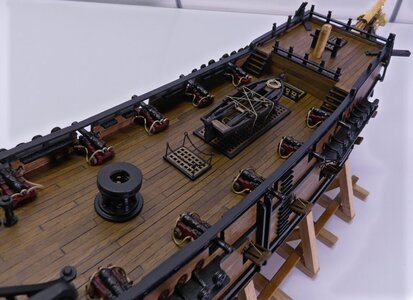
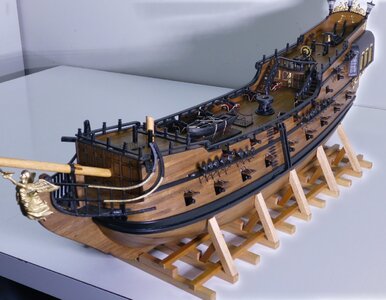
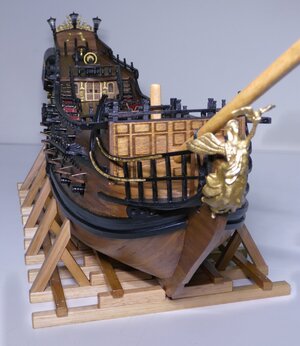
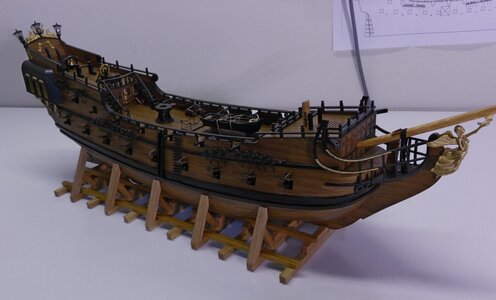
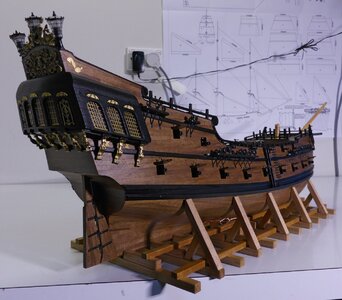
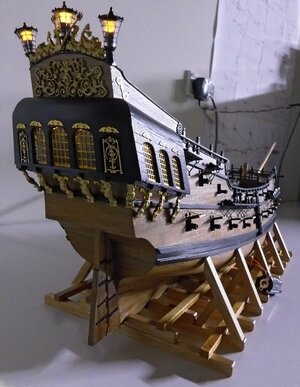
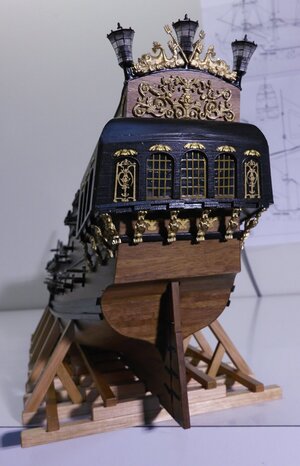
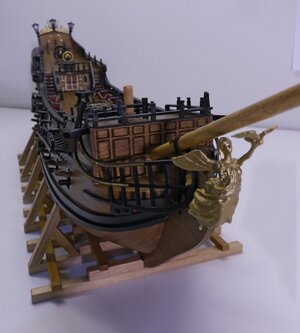
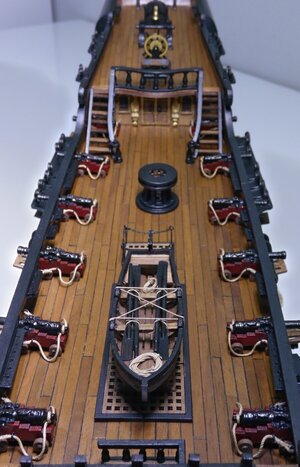
ZHL Black Pearl 2020 Golden Edition [COMPLETED BUILD]

I’m going to fab some parts and do
all the painting but I’m not going to install them until the end.... I know I will break them if I don’t.
 
The whole time I was reading your post I kept thinking - I hope he doesn't break them later. And then you wrote the same thing! Is there any way to protect them? Pack out the area with something? Build a little cover?

The only way I'm not going to brake them is put some mast stumps in and make it an Admiralty style ship but where's the fun in that? LOL
 
Just about finished the hull today so time for a few photos. I achieved something I don't do very often, see if you can spot it in the photos.

P1230021~2.JPG
P1230018~2.JPG
P1230033~2.JPG
P1230032~2.JPG
P1230016~2.JPG
P1230019~2.JPG
P1230047~2.JPG
P1230020~2.JPG
P1230017~2.JPG
P1230026~2.JPG


So what was my achievement? In order to take the photos I had to have a tidy up and put all my stuff away, first time since I started my BP. Next week will be spent looking for the tools I put away.
 
Just about finished the hull today so time for a few photos. I achieved something I don't do very often, see if you can spot it in the photos.

View attachment 228287
View attachment 228286
View attachment 228285
View attachment 228289
View attachment 228291
View attachment 228292
View attachment 228293
View attachment 228288
View attachment 228294
View attachment 228290


So what was my achievement? In order to take the photos I had to have a tidy up and put all my stuff away, first time since I started my BP. Next week will be spent looking for the tools I put away.
I noticed your clean workspace right away. I'm wondering what it is like to have one? Great job! Are you planning on going admiralty after all? My Admiral wanted the sails.
 
Just about finished the hull today so time for a few photos. I achieved something I don't do very often, see if you can spot it in the photos.

View attachment 228287
View attachment 228286
View attachment 228285
View attachment 228289
View attachment 228291
View attachment 228292
View attachment 228293
View attachment 228288
View attachment 228294
View attachment 228290


So what was my achievement? In order to take the photos I had to have a tidy up and put all my stuff away, first time since I started my BP. Next week will be spent looking for the tools I put away.
Amazing, I hope mine turns out half as good. I love the walnut finish, way better than all black.

Larry
 
G'day installing the LEDs gave me a few headaches first I was not sure if I would fit them but it would be a good learning experience as I have never used them before. I ordered100 5mm yellow flickering LEDs from eBay but with the lock down delivery took over 3 weeks which slowed down the build.

View attachment 205501

I made a test rig to run 17 LEDs on a USB, I chose USB because there's always a power supply or power pack around I'll have no trouble lighting this BP up. The wire from a Cat5 cable was used for the LEDs


View attachment 205490

I soon realised I should have planned out the LED locations and wiring before glueing the bulkheads that way drilling the holes for the wires would be easy I also had to cut away some of the wood under the grates.

View attachment 205493View attachment 205495
I made a box to go under the grates with the LED on one side and reflective material to bounce the light up on the other side.


View attachment 205502

For the lamps I drilled 3 2.5mm holes in part 17 if I hadn't glued it on slots may have been better, I also used the wire that came with the kit for these.


View attachment 205503

6 LEDs have been used for the cabin, as it not fitted to the ship and there is a lot more work to do on it the LEDs can be easily removed.


View attachment 205504

As I didn't want wires coming out of the hull I made two copper contacts on the bottom of the keel to power the LEDs.


View attachment 205505

View attachment 205506

Ready for the next part

TonyH:
This is a very impressive build with lots of lights that makes it look alive.
I have a question fir you: Where did you purchase your long drill bits from?
Keep up the excellent work.
 
I noticed your clean workspace right away. I'm wondering what it is like to have one? Great job! Are you planning on going admiralty after all? My Admiral wanted the sails.

I'm tempted but the main reason I started this kit was because I had not built a model for 25 years I wasn't sure how I'd go. As this is a learning experience for me I want to go all the way. Rigging is the part that will be the hardest part for me and the instructions are poor. I'll take my time and read some of the books that I keep buying and not looking at.
 
Will
I'm tempted but the main reason I started this kit was because I had not built a model for 25 years I wasn't sure how I'd go. As this is a learning experience for me I want to go all the way. Rigging is the part that will be the hardest part for me and the instructions are poor. I'll take my time and read some of the books that I keep buying and not looking at.
you do buntlines and clew lines? I passed on them.
 
TonyH:
This is a very impressive build with lots of lights that makes it look alive.
I have a question fir you: Where did you purchase your long drill bits from?
Keep up the excellent work.

Thanks for the encouraging comments as I'm heading into uncharted waters ( rigging ) without a good map (instructions) but if I get into trouble I'll use the stars (forum members) to find my way.
I ordered most of my drills through work but most engineering supplier's should stock them, I also found them on EBay just look for long series drills. I have long series drills from 1/16 up they are very handy for getting into tight spots just rember to take the drill out of the hole to keep the flutes clear.
Tony
 
Back
Top