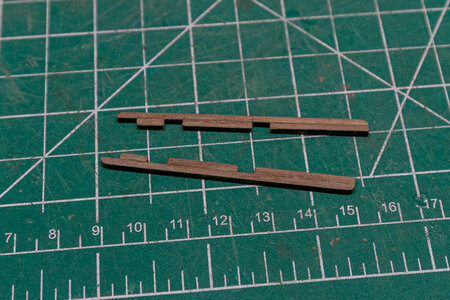
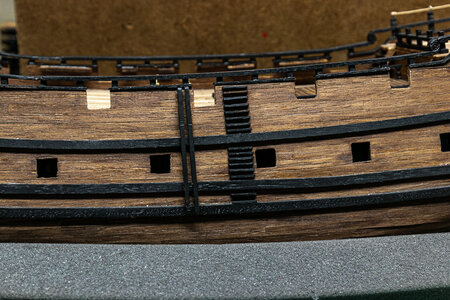
Mine didn’t even fit. I basically manufactured pieces from scrap after everything broke.It is amazing what black stain and sandpaper can cover up. I cracked 2 of the pieces getting them into place.
You are using an out of date browser. It may not display this or other websites correctly.
You should upgrade or use an alternative browser.
You should upgrade or use an alternative browser.
ZHL Black Pearl Golden 2021 - 1:64 - JeffT [COMPLETED BUILD]
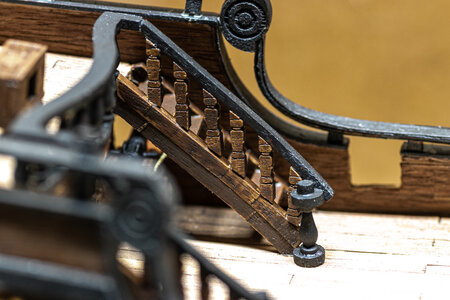
I have most of my deck furniture/fittings in place (sans the guns). Notice I fitted the guns under the stern stairs before constructing the stairs. I discussed in a previous post, I raised these guns with pieces of wood to fit the gun ports. The strips barely show with the stairs in place.
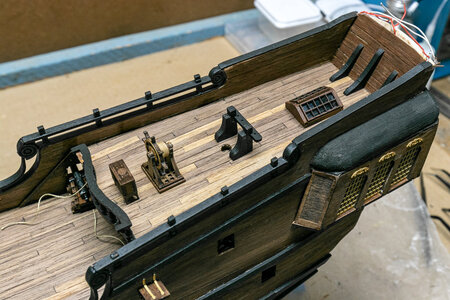
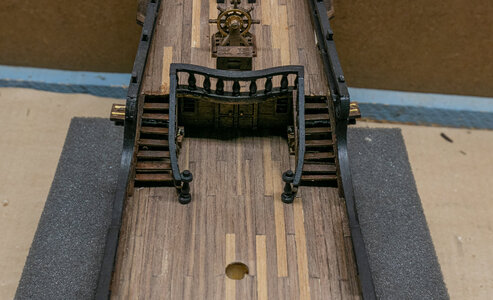
I found a problem with the height of the railing only after construction of the stairs. The upper railing was not going to meet the quarterdeck railing. After some head scratching, I remembered that the kit had another 2 copies of the inner stair support for these stairs. I glued a second piece on each which raised the railing to just the height I needed. I am not certain this is the correct way to do this, but it worked for me. It would have been a lot cleaner if I had seen this before completing the stair treads.
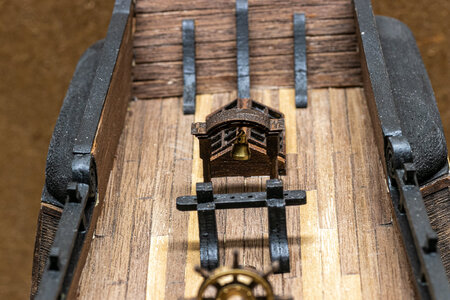
I tossed the oversized ship's bell in the kit and used one that I have had in spare parts from when I did some plastic ship models years ago. I used a nail as a clapper inside the bell. In hindsight, I could have added a crossbar in the bell arch, but I am not planning to do so at this time.


I found a problem with the height of the railing only after construction of the stairs. The upper railing was not going to meet the quarterdeck railing. After some head scratching, I remembered that the kit had another 2 copies of the inner stair support for these stairs. I glued a second piece on each which raised the railing to just the height I needed. I am not certain this is the correct way to do this, but it worked for me. It would have been a lot cleaner if I had seen this before completing the stair treads.

I tossed the oversized ship's bell in the kit and used one that I have had in spare parts from when I did some plastic ship models years ago. I used a nail as a clapper inside the bell. In hindsight, I could have added a crossbar in the bell arch, but I am not planning to do so at this time.

Nice work, Jeff!I have most of my deck furniture/fittings in place (sans the guns). Notice I fitted the guns under the stern stairs before constructing the stairs. I discussed in a previous post, I raised these guns with pieces of wood to fit the gun ports. The strips barely show with the stairs in place.
View attachment 239775
View attachment 239776
I found a problem with the height of the railing only after construction of the stairs. The upper railing was not going to meet the quarterdeck railing. After some head scratching, I remembered that the kit had another 2 copies of the inner stair support for these stairs. I glued a second piece on each which raised the railing to just the height I needed. I am not certain this is the correct way to do this, but it worked for me. It would have been a lot cleaner if I had seen this before completing the stair treads.
View attachment 239778
I tossed the oversized ship's bell in the kit and used one that I have had in spare parts from when I did some plastic ship models years ago. I used a nail as a clapper inside the bell. In hindsight, I could have added a crossbar in the bell arch, but I am not planning to do so at this time.
View attachment 239777
- Joined
- Mar 19, 2021
- Messages
- 98
- Points
- 113

That looks really good, I’m about ready to tackle the stairs also.
Larry
Larry
Nice progress, this is the point where I stopped looking at the instructions and things got easier LOL
On mine, the strakes were supposed to be a bit wider, Jeff. I wonder if they're supposed to be there for hauling things up into the ship without damaging the hull.I formed the vertical pieces that fit between the strakes. They were made by gluing together square pieces as opposed to trying to cut out the necessary parts from a wider strip. They were stained black and glued to the ship. The steps were also added to both sides of the ship.View attachment 241927View attachment 241928
I could not find these parts as the layout was different from that shown in the instructions so I made them from leftover stock. It was only when l had finished all the deck fittings that I found the parts and realised they where made up by gluing parts together.I formed the vertical pieces that fit between the strakes. They were made by gluing together square pieces as opposed to trying to cut out the necessary parts from a wider strip. They were stained black and glued to the ship. The steps were also added to both sides of the ship.View attachment 241927View attachment 241928
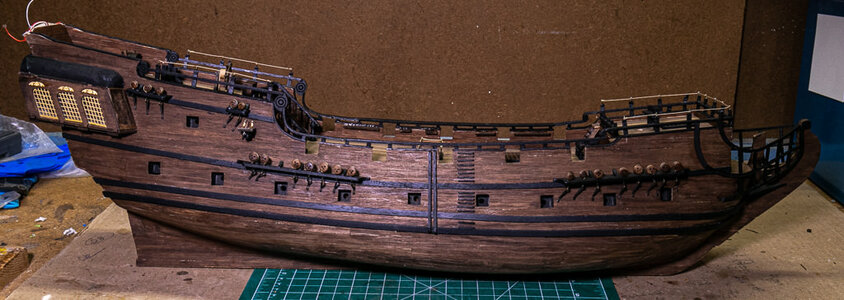
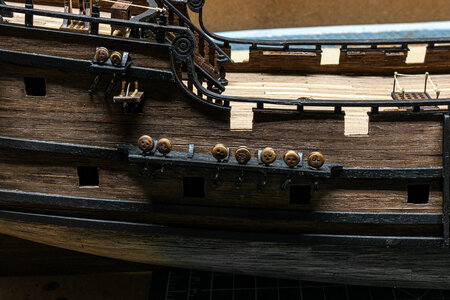
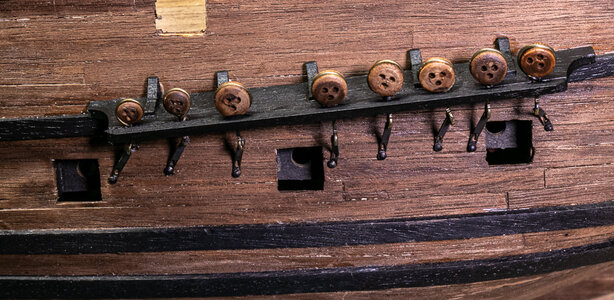
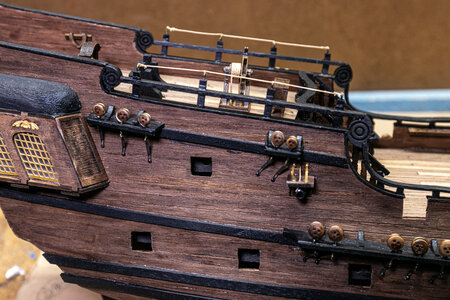
Channels and deadeyes added. First really major error that I do not see a way to correct at this point. I lined the channels up with positions shown in the plans and for some reason with the ports below the channel so that the chain plates would align well. I should have aligned with the upper ports so the guns would be at a point where the gap is between deadeyes. A very rookie mistake. I have thought about moving the deadeyes, but I think I will leave them alone. Only someone with some knowledge of the placement of deadeyes around gun ports will likely notice. I can "aim" the guns between the deadeyes to make it look less obvious.


Been there, done that. Luckily I caught it before it was too late.
I've made similar mistakes myself. Kind of like the life boats I did over the weekend, but that is a whole other story. I left a set of deadeyes in the wrong place on my constitution for literally 20 years and it never quit bothering me. It sure felt good when I finally fixed it.
Soaking with water or isopropyl alcohol along the glue lines might soften the glue and you can just try cutting with an exactly and just gently work around the glue joints. On the rear you could just remove the one deadeye in front of the canon. If you leave them the bigger problem though is likely the foremast set because some of the shrouds will be forward of the mast. I'd be concerned it would make the ratlines look really weird, and possibly interfere with the sails. I know it's a pain, but I think you can move them easier than you might expect.
Soaking with water or isopropyl alcohol along the glue lines might soften the glue and you can just try cutting with an exactly and just gently work around the glue joints. On the rear you could just remove the one deadeye in front of the canon. If you leave them the bigger problem though is likely the foremast set because some of the shrouds will be forward of the mast. I'd be concerned it would make the ratlines look really weird, and possibly interfere with the sails. I know it's a pain, but I think you can move them easier than you might expect.
Last edited:
Agreed
I moved one deadeye for the mainmast as it was in front of the cannon. Try checking the foremast deadeyes by putting the mast in and running a line down to the deadeyes, it mainly the front ones that may be a problem. If the deadeyes are forward of the mast then the yard may interfere with the shrouds. Hope it works OK.
I worked on the rudder and got it mounted to the ship. The last model (actually my first) with a rudder didn't go very well, so I approached this with some trepidation.
The rudder itself was straight forward. Just some straight planking and trimming.
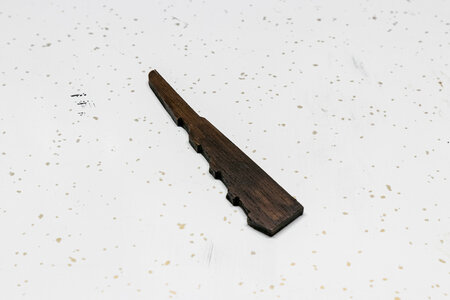
The next step was to drill and shape the hole in the stern to fit into. It probably should have been a rounder hole, but I'm not looking to have a moving rudder.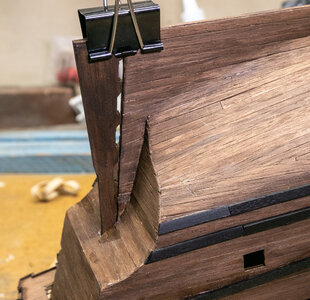 for the rudder
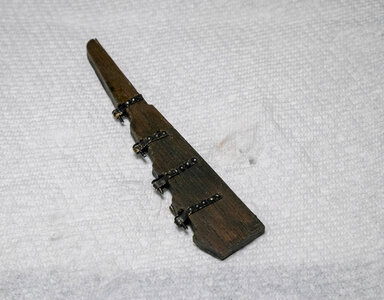
Here's the rudder with the brass strips attached. The brass (as for a lot of parts on the ship) was darkened with Brass Black.
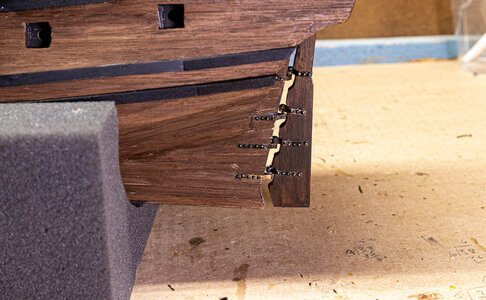
And lastly, the rudder attached to the stern. Not as nice as I might like, but I'll take it after the last time.
The rudder itself was straight forward. Just some straight planking and trimming.

The next step was to drill and shape the hole in the stern to fit into. It probably should have been a rounder hole, but I'm not looking to have a moving rudder.
 for the rudder
Here's the rudder with the brass strips attached. The brass (as for a lot of parts on the ship) was darkened with Brass Black.

And lastly, the rudder attached to the stern. Not as nice as I might like, but I'll take it after the last time.

Looking good! Maybe mine will be that good on my third!I worked on the rudder and got it mounted to the ship. The last model (actually my first) with a rudder didn't go very well, so I approached this with some trepidation.
The rudder itself was straight forward. Just some straight planking and trimming.
View attachment 246136
The next step was to drill and shape the hole in the stern to fit into. It probably should have been a rounder hole, but I'm not looking to have a moving rudder.View attachment 246138 for the rudder
Here's the rudder with the brass strips attached. The brass (as for a lot of parts on the ship) was darkened with Brass Black.
View attachment 246139
And lastly, the rudder attached to the stern. Not as nice as I might like, but I'll take it after the last time.
View attachment 246141
Your rudder came up well, I attached mine before I did the rails as I didn't want to brake anything when it was turned over.I worked on the rudder and got it mounted to the ship. The last model (actually my first) with a rudder didn't go very well, so I approached this with some trepidation.
The rudder itself was straight forward. Just some straight planking and trimming.
View attachment 246136
The next step was to drill and shape the hole in the stern to fit into. It probably should have been a rounder hole, but I'm not looking to have a moving rudder.View attachment 246138 for the rudder
Here's the rudder with the brass strips attached. The brass (as for a lot of parts on the ship) was darkened with Brass Black.
View attachment 246139
And lastly, the rudder attached to the stern. Not as nice as I might like, but I'll take it after the last time.
View attachment 246141
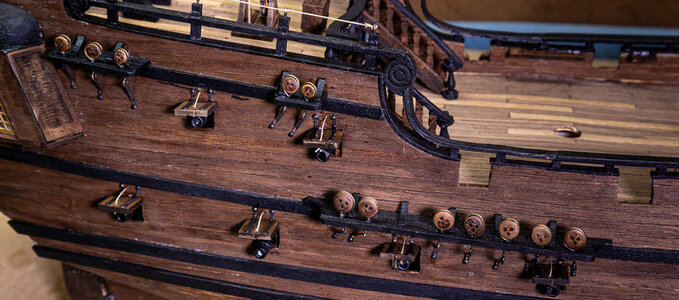
I added the gun port covers. I initially installed a couple with brass colored hinges, but later removed them and put all of the hinges into Brass Black to take off the shine in keeping with the dark color scheme on the ship. I also added a rope to each gun port cover.
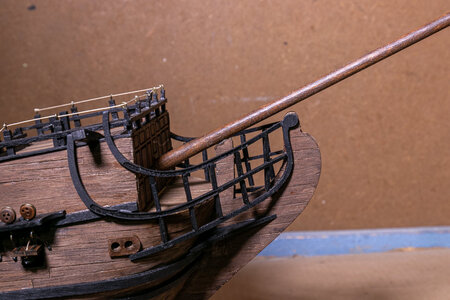
Next, I added the bowsprit to the front of the ship.
With the hull mostly done, I began working on the masts. I tapered according to the plans as best I could, but I ran into some issues with the sizes of the precut mast caps and trees and the diameters called for in the plans. I made a trip to the store for some more dowels of various sizes and I ended up with what I needed to make the mast parts according to actual pieces supplies in the kit vs. the actual dowels supplied. It also looked like I might not have the sizes I need for the spars, so I made sure I got (extra) dowel for the spars. I find getting spars correct to be somewhat challenging as you have to taper then from the middle to each end. I stained the masts dark walnut and the tops, trees and caps black. The wooldings were wrapped around the lower masts according to the plan and the rails added to the back of the of the tops. Note that the capstan on the main mast was slipped on before the top and wooldings were secured, otherwise it would not have fit right due to tapering of the mast.
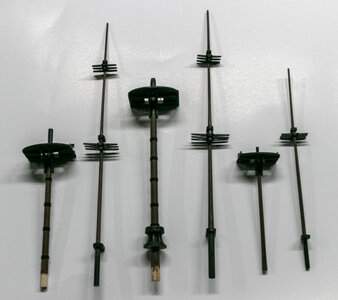
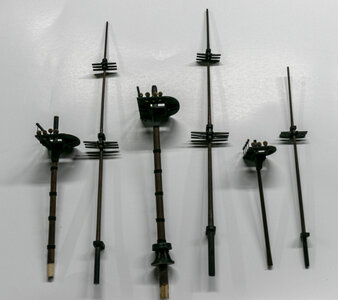
I assembled the masts in 2 sections so that I can place the lower masts into the hull and get the shrouds in place before adding the rest of the masts. The fit is tight enough that the upper portions stay in place as a dry fit. In the picture, the mast are just fit into holes and not yet aligned or glued.
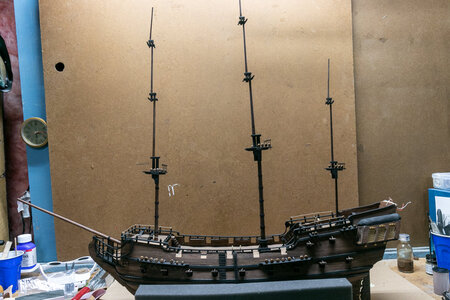

Next, I added the bowsprit to the front of the ship.

With the hull mostly done, I began working on the masts. I tapered according to the plans as best I could, but I ran into some issues with the sizes of the precut mast caps and trees and the diameters called for in the plans. I made a trip to the store for some more dowels of various sizes and I ended up with what I needed to make the mast parts according to actual pieces supplies in the kit vs. the actual dowels supplied. It also looked like I might not have the sizes I need for the spars, so I made sure I got (extra) dowel for the spars. I find getting spars correct to be somewhat challenging as you have to taper then from the middle to each end. I stained the masts dark walnut and the tops, trees and caps black. The wooldings were wrapped around the lower masts according to the plan and the rails added to the back of the of the tops. Note that the capstan on the main mast was slipped on before the top and wooldings were secured, otherwise it would not have fit right due to tapering of the mast.


I assembled the masts in 2 sections so that I can place the lower masts into the hull and get the shrouds in place before adding the rest of the masts. The fit is tight enough that the upper portions stay in place as a dry fit. In the picture, the mast are just fit into holes and not yet aligned or glued.

It's looking good I was surprised at how high the masts are when I assembled them for the first time. If I remember correctly there wasn't enough 4mm dia dowel provided in the kit.I added the gun port covers. I initially installed a couple with brass colored hinges, but later removed them and put all of the hinges into Brass Black to take off the shine in keeping with the dark color scheme on the ship. I also added a rope to each gun port cover.
View attachment 247856
Next, I added the bowsprit to the front of the ship.
View attachment 247857
With the hull mostly done, I began working on the masts. I tapered according to the plans as best I could, but I ran into some issues with the sizes of the precut mast caps and trees and the diameters called for in the plans. I made a trip to the store for some more dowels of various sizes and I ended up with what I needed to make the mast parts according to actual pieces supplies in the kit vs. the actual dowels supplied. It also looked like I might not have the sizes I need for the spars, so I made sure I got (extra) dowel for the spars. I find getting spars correct to be somewhat challenging as you have to taper then from the middle to each end. I stained the masts dark walnut and the tops, trees and caps black. The wooldings were wrapped around the lower masts according to the plan and the rails added to the back of the of the tops. Note that the capstan on the main mast was slipped on before the top and wooldings were secured, otherwise it would not have fit right due to tapering of the mast.
View attachment 247858View attachment 247859
I assembled the masts in 2 sections so that I can place the lower masts into the hull and get the shrouds in place before adding the rest of the masts. The fit is tight enough that the upper portions stay in place as a dry fit. In the picture, the mast are just fit into holes and not yet aligned or glued.
View attachment 247860
I tied the guns to the deck. I debated long and hard about whether to add more tackle to the guns, but in the end I decided that I would not add more since it would require purchasing appropriately sized blocks.
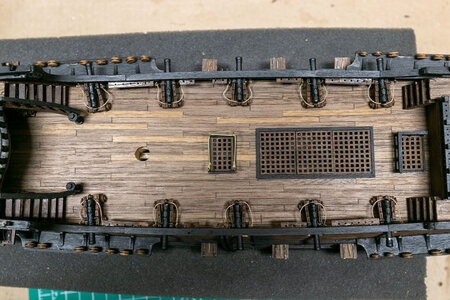
I also constructed the two anchors. They took some time to complete even though they are fairly simple to make. I added a bit of detail (nails and wrapping) not shown in the plans. The detail definitely adds to the look of the anchors. I touched up the paint after the pictures was taken.
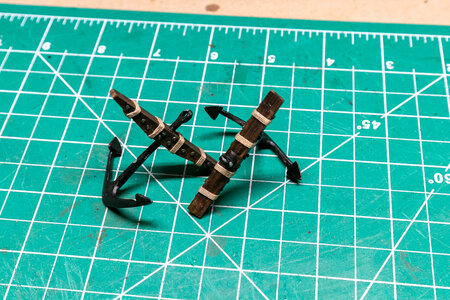

I also constructed the two anchors. They took some time to complete even though they are fairly simple to make. I added a bit of detail (nails and wrapping) not shown in the plans. The detail definitely adds to the look of the anchors. I touched up the paint after the pictures was taken.

Looking good, Jeff! I just faked having the blocks on my Pearl. Tying them down helped keep them in place. Love your anchors.I tied the guns to the deck. I debated long and hard about whether to add more tackle to the guns, but in the end I decided that I would not add more since it would require purchasing appropriately sized blocks.
View attachment 248120
I also constructed the two anchors. They took some time to complete even though they are fairly simple to make. I added a bit of detail (nails and wrapping) not shown in the plans. The detail definitely adds to the look of the anchors. I touched up the paint after the pictures was taken.
View attachment 248119


