
I'm going to follow BigMikes planking sequence.

You are using an out of date browser. It may not display this or other websites correctly.
You should upgrade or use an alternative browser.
You should upgrade or use an alternative browser.
Soleil Royal - ZHL 1/90 Scale by Paulb [COMPLETED BUILD]
After looking at other builds of this kit I’ve realized my bow is waaaaay too blunt. This is where I’m at after some serious sanding....

Looking good Paul, I really like the improvements you have done. Be thrifty with the first planking that was the only material that I just had enough off.I'm going to follow BigMikes planking sequence.
Ok - thanks for the heads up.
- Joined
- Nov 25, 2018
- Messages
- 598
- Points
- 403

I'm a little confused.No, I didn't change the planking.They are what were in the set.I advise you to paste inserts under the headpiece pad.To them to glue the first covering.After the first plating, I first glued Barot.The size between them was taken from the drawing.Then between them pasted the rails of the second skin.If necessary, it was cut off.Sorry to mess with my photos.Don't forget to paint the simulated gun ports black.


.JPG")
I've got the planking stuff figured out. Fabulous pictures - they will help a lot!!! You are right about painting the simulated gun port interiors - I'll do that today. I will post my progress later today.
Last edited:
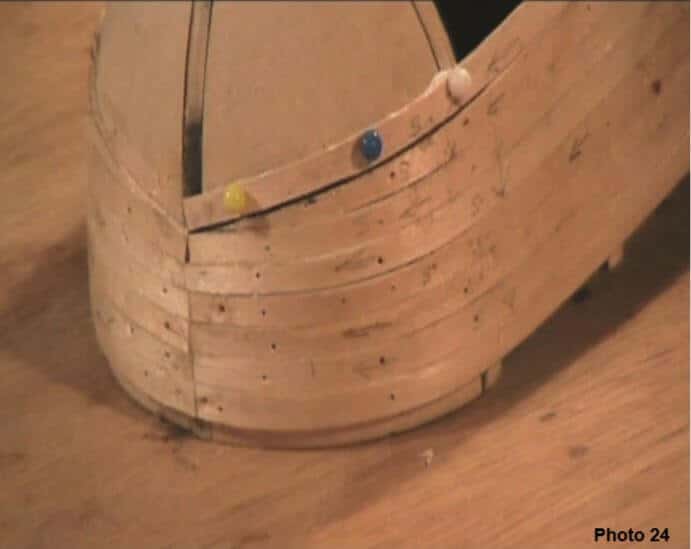
Progress so far today...


- Joined
- Nov 25, 2018
- Messages
- 598
- Points
- 403
Hello Paul
 .So far, everything is great with you.In the gun ports on the quarter going to do?The frames should already be pasted in.Check the port dimensions from the drawing.If the size of the frame allows it.After sanding the first cladding to cover the frame in dark red color..So far, everything is great with you.In the gun ports on the quarter going to do?The frames should already be pasted in.Check the port dimensions from the drawing.If the size of the frame allows it.After sanding the first cladding to cover the frame in dark red color.
.So far, everything is great with you.In the gun ports on the quarter going to do?The frames should already be pasted in.Check the port dimensions from the drawing.If the size of the frame allows it.After sanding the first cladding to cover the frame in dark red color..So far, everything is great with you.In the gun ports on the quarter going to do?The frames should already be pasted in.Check the port dimensions from the drawing.If the size of the frame allows it.After sanding the first cladding to cover the frame in dark red color.

First plank at keel.
I couldn't help myself - I sanded down one side.


I couldn't help myself - I sanded down one side.
No rabbet?
Oh crap - rookie mistake. Any suggestions? I guess I could fake one, and do some careful sanding on the aft 1/4.
Thanks Ken for the heads up.
Thanks Ken for the heads up.
Last edited:

Hi Paul, as its I assume double plank, don't worry to much at Garboad plank. I would however cut cut plank at or near 3rd bulkhead from rear( when it flattens out & remove to allow you to taper false keep to allow for planking with. ie if its 6mm thick & first layer is 2mm planks then sand back 2mm each side tapering Y leaving 2mm in middle of bulkhead near rear which brings you back to 6mm. The on second player do the same to allow for 2nd layer thickness. It all then lines up with rudder thickness.
see
 www.modelerscentral.com

Image from above ref and may be subject to copyright.
see
How To Plank The Hull Of A Bluff Bow Model Ship | Modelers Central
Modelers Central offer a comprehensive 40 Step Build Guide. Learn How To Plank The Hull of a Bluff Bowed Wooden Model Ship. Don't miss a single step.
Image from above ref and may be subject to copyright.
What he saidHi Paul, as its I assume double plank, don't worry to much at Garboad plank. I would however cut cut plank at or near 3rd bulkhead from rear( when it flattens out & remove to allow you to taper false keep to allow for planking with. ie if its 6mm thick & first layer is 2mm planks then sand back 2mm each side tapering Y leaving 2mm in middle of bulkhead near rear which brings you back to 6mm. The on second player do the same to allow for 2nd layer thickness. It all then lines up with rudder thickness.
see
View attachment 147612How To Plank The Hull Of A Bluff Bow Model Ship | Modelers Central
Modelers Central offer a comprehensive 40 Step Build Guide. Learn How To Plank The Hull of a Bluff Bowed Wooden Model Ship. Don't miss a single step.
Image from above ref and may be subject to copyright.
Depending on what type of glue used.... pva will come off with warm water....cyanoacrylic... acetone...
Thanks guys - I will follow your suggestions. Time to rip out the aft 1/4 of the garboad plank and taper the replacement then fill the resulting gap. Ok - after studying the diagrams I see what you mean. I guess while I'm a model builder - I'm not a ship builder.
Last edited:
You're learning.... although a bit the hard way ") I've done the same thing at first......
I've done the same thing at first......
I've done the same thing at first......- Joined
- Nov 25, 2018
- Messages
- 598
- Points
- 403
If glued to the PVA, it will easily move away after warming up with a construction hair dryer.In the keel frame, make an incision along the skin line.Then cut,make a notch depth of 1.5 mm.In this recess and will lie the rails of the first skin.It will be flush with the keel frame.
Last edited:
Hopefully this is better...