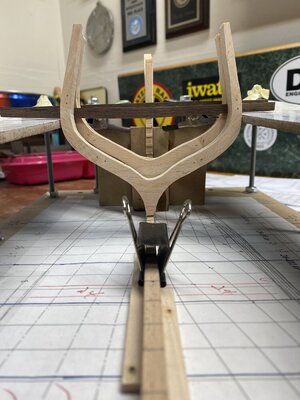
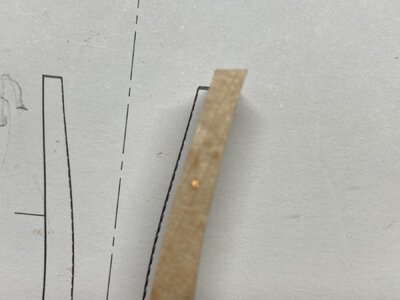
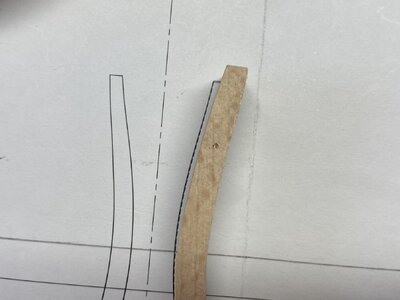
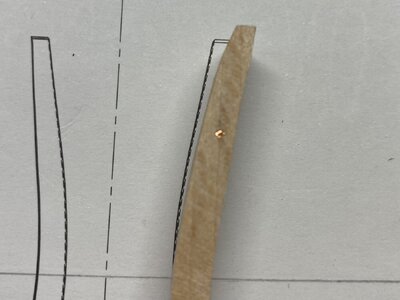
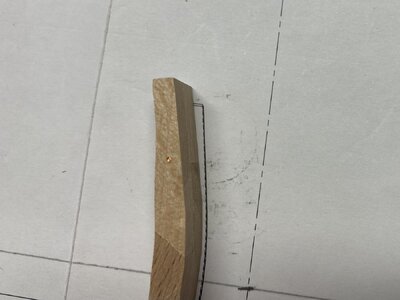
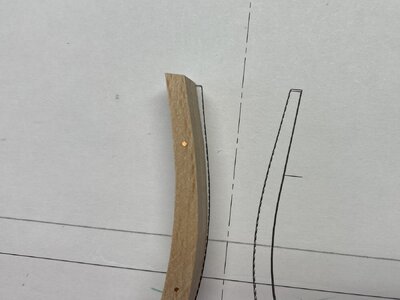
Thanks , Oh yes they’re shortened by now. Frame 30’s bottom is a little short compared to the plan. I’m going to cut it and add a longer bottom. That may work. I wasn’t clear on the bottom lengths when I cut them previously.
You are using an out of date browser. It may not display this or other websites correctly.
You should upgrade or use an alternative browser.
You should upgrade or use an alternative browser.
Le Rochefort 1:36 build by Tony P
- Thread starter Tony P
- Start date
- Watchers 21
-
- Tags
- ancre group build le rochefort
Hi Tony, how are things going with Le Rochefort? We would be delighted to see you back soon.
Thanks Tobias. I stop in the check progress on occasion. I haven’t touched it since March. I work in construction and although semi retired the winter is the only time when I have much time to build. Also been working on my planes which I love.Hi Tony, how are things going with Le Rochefort? We would be delighted to see you back soon.
I plan to get back on Le Rochefort around the new year. I’m going to give it a concerted effort. If I burn out fast or lose interest quickly I may just call it a failed effort and move on.
I have a plane project to finish and I surf fish the beach here and from Oct to the end of Dec is prime time so I’m out there hunting the Striped Bass. I’m also a amateur radio operator. Too many hobbies and not enough time for them all ! Regards to everyone.
Great to see the progress you guys are making on your models ! Still no progress for me. I'm building planes still and I really do need a 5" mini table saw to cut planks for Le Ro if I want to proceed. Semi retired and money doesn't grow on trees. Maybe I'll be able to get one this year. We shall see. Keep up the great work everyone.
I made mine from Alum … from a 1970’s model shipwright periodical. Recommend this. Then progress to what suits you and budget. Making it I forgot work and time. Wife went to bed and note on table with photo of her! “Remember Me?”, dinner in oven.
Good morning Tony, nice to hear from you. We would all be happy if you could work on Le Rochefort again soon. Good luck finding the saw you want.
Good morning Tony, nice to hear from you. We would all be happy if you could work on Le Rochefort again soon. Good luck finding the saw you want. Thank you !
Ok. I’m analyzing my frames to try and decide if I’ll continue or start over. I’m going to place the frames and spacers to see how it looks. I need to taper the frames in the inside which I haven’t done yet especially the bow and stern where the sweep is drastic. For the builder that know much more than I how can I accomplish this ?? Do I need to put the paper plan templates on the frames as a guide ? ?
My major concern is if I continue working from the plan my sizes just may not be exact. Then again would this be critical as I move forward since the hull will then be together and it would affect me further down the line??
Thanks
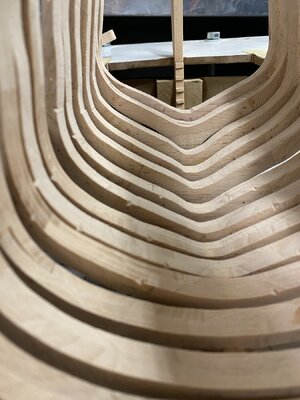
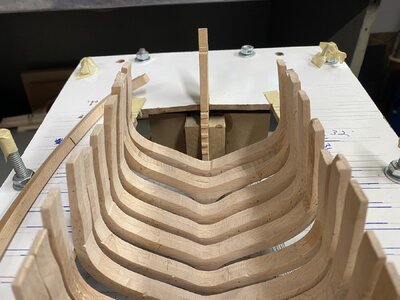
My major concern is if I continue working from the plan my sizes just may not be exact. Then again would this be critical as I move forward since the hull will then be together and it would affect me further down the line??
Thanks


Hello Tony, nice to see that you are back at it again. Here is a link to my log where I go into the lines again. Maybe it will help you a little.
Post in thread 'LE ROCHEFORT - Harbour yacht from 1787 1:36 by Tobias (Monograph by ANCRE)'
https://shipsofscale.com/sosforums/...y-tobias-monograph-by-ancre.10941/post-290839
Post in thread 'LE ROCHEFORT - Harbour yacht from 1787 1:36 by Tobias (Monograph by ANCRE)'
https://shipsofscale.com/sosforums/...y-tobias-monograph-by-ancre.10941/post-290839
Ok yes thanks I was looking for that earlier.
1st when taking off you need to make sure of the run.
2nd you need the ghosting line on each rib
In other words one frame shows the next.
3rd too much wood left to remove + all those nicks in the ribs.
4th detail ? What I can see no detail to the rib construction.
It can be done.
A lot of sanding / faring the timbers.
Depends if seen or cover up?
Bottom can just have the run.
If sections - I strongly suggest removal and sanding to fare. Very painful.
Of course if you have golden hands …. ?
Sorry forgot - I use templates as guides - then eye + batten runs. Aft run : very tricky - thicker pieces stiffens most. A little too fast in the build as you need stiffeners. I strongly suggest rest build separate (frame work).. back to scale …. Scaling not work, so use judgement. Look at human body and use actual scale, what a mess.
Tony, I feel your pain. This is my experience in starting over…
Once I had lumber milled to sizes I started on the keel assembly. It took about 3 weeks time and about 80 hours work for me to complete the new keel assembly and keelson as I really went slow and built several practice pieces to be sure of my mill and cutting setups. Next I laid out all the new frame templates and glued them to my planks which took me three days and about 12 hours work. I just finished rough cutting out all the pieces which took about 6 hours work on the bandsaw which included replacing the tires and retuning the saw. Now I’m ready to start sanding and assembly of the frames. My plan is to get all the pieces sanded to the layout line, assemble the floors and mill the floor “saddles” that fit in the keel and keelson. Once I’m satisfied that the floor pieces all fit I’ll complete the frames.
That’s as far as I’ve planned for now.
Don’t know if my experience in starting over helps or not. Best wishes for fair sailing! Remember, we do this because we enjoy it!
Yes agreed. We’ll see how it looks in the next week.1st when taking off you need to make sure of the run.
2nd you need the ghosting line on each rib
In other words one frame shows the next.
3rd too much wood left to remove + all those nicks in the ribs.
4th detail ? What I can see no detail to the rib construction.
It can be done.
A lot of sanding / faring the timbers.
Depends if seen or cover up?
Bottom can just have the run.
If sections - I strongly suggest removal and sanding to fare. Very painful.
Of course if you have golden hands …. ?
Yes Oliver we do love it ! I think milling and fitting the floors is key to get that keel and keelson joinery accurate then put the frames completely together . I agree the keel assembly is quite some project in itself. I need to get a surface planer so I can control my thicknesses easier. Also the Proxxon FET or the Micromark clone. Without the saw I’ll be struggling like I did on Blandford section. So much time wasted working with the smaller Proxxon. It’s useless except for very light light work. ThanksTony, I feel your pain. This is my experience in starting over…
Once I had lumber milled to sizes I started on the keel assembly. It took about 3 weeks time and about 80 hours work for me to complete the new keel assembly and keelson as I really went slow and built several practice pieces to be sure of my mill and cutting setups. Next I laid out all the new frame templates and glued them to my planks which took me three days and about 12 hours work. I just finished rough cutting out all the pieces which took about 6 hours work on the bandsaw which included replacing the tires and retuning the saw. Now I’m ready to start sanding and assembly of the frames. My plan is to get all the pieces sanded to the layout line, assemble the floors and mill the floor “saddles” that fit in the keel and keelson. Once I’m satisfied that the floor pieces all fit I’ll complete the frames.
That’s as far as I’ve planned for now.
Don’t know if my experience in starting over helps or not. Best wishes for fair sailing! Remember, we do this because we enjoy it!
My pendulum may have swung to the extreme due to my previous attempt with the attitude of “close enough”. This time I’m striving for zero deviation from the drawings.Ok, looking at my frames against the plans. They are certainly not perfect on the money. How much of a fudge factor do I have here ? Not much I’d think.
If your photos are showing 6 different frames, that seems to be quite a bit of deviation. However, they all seem to be a bit narrower than the plan so unless someone were to take a ruler to your finished model, who would know…. Sorry kind of a non-answer isn’t it?
You know from experience exactly my predicament. Yea agreed close enough just isn’t close enough !
I think try to taper the insides of the frames and I’ll install the frames onto the keel and take it from there. Then again it might be a waste of time. Not happy. Then I can see more clearly where I stand. I lost my stern timber’s which I’m pretty unset about too ! In the jig they don’t look bad. We’ll see. Thanks
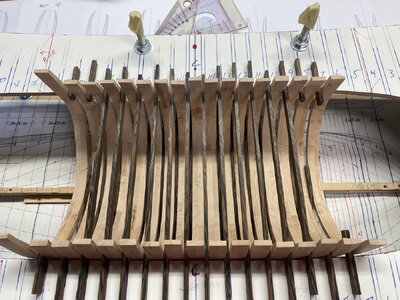
I think try to taper the insides of the frames and I’ll install the frames onto the keel and take it from there. Then again it might be a waste of time. Not happy. Then I can see more clearly where I stand. I lost my stern timber’s which I’m pretty unset about too ! In the jig they don’t look bad. We’ll see. Thanks


