BLUENOSE - YuanQuing by Donn Farr

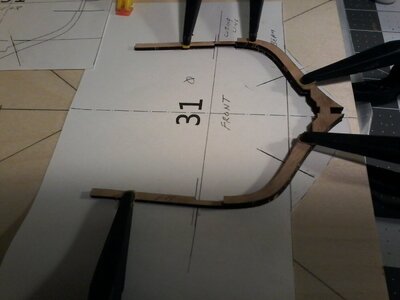
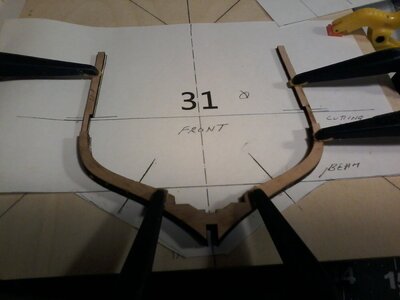
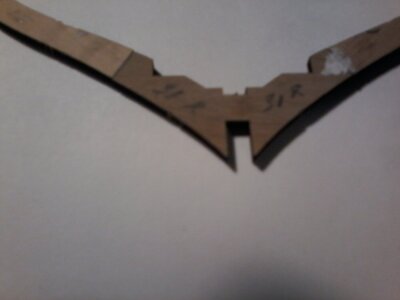
Don the second set of pictures looks VERY GOOD!!!! Now glue and clamp the the front part as well and place the clamps so that they are DIRECLY OVER THE JOINT. Once clamped, you must not able to see the joint. Glue and clamp quickly and post a picture immediately afterwards! HAPPY NEW YEAR MY FRIEND (I just had to catch some sleep).
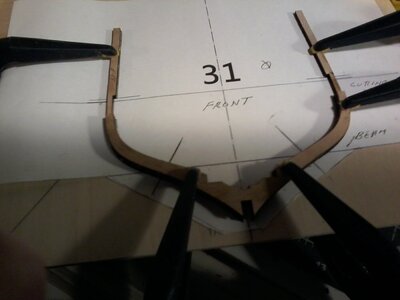
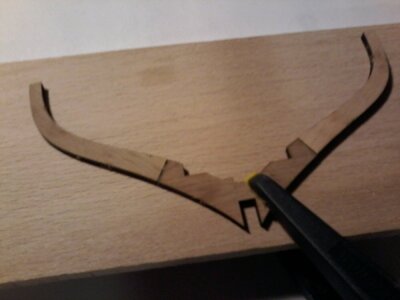
 
YES THE REAR FRAME IS REMOVED, SHOULD I WAIT UNTIL TOMORROW FOR GLUE TO SET, I AM MAKEING A COUPLE MORE BOARDS LIKE I DID FOR FRAME NO 31 SO I CAN LET FRAMES DRY AND START ANOTHER ONE, HOPEFULLY I WILL CUT IT OUT TOMORROW LIKEING THIS ONE RIGHT NOW HOPE TO DO JUSTICE TO IT. GOD BLESS STAY SAFE YOU AND YOURS DON
 
TOTAL TIME CLAMPED OVER NIGHT, STILL HAVE IT CLAMED TO THE SCRAP BOARD I SHOWED LAST NIGH ONE OTHER QUICK QUESTION COUD I PUT A DROP OF CA ON THE REAR JOINTS FOR ADDITIONAL STRENTGH AND AS YOU KNOW I HATE REPEAT HATE USING CA UNLESS IT IS NECESSARY. GOD BLESS YOU AND YOURS DON
 
No don't put any CA on. OK Don. please remove the rear frame from the paper. Please take two pictures once removed - one from the front and one from the back on a clean white sheet of paper. Try to focus on the rear joints especially. Thank you my friend.
 
OK HOPE BRAIN IS IN GEAR HERE ARE PICTURE THE ONE CLAMPED TO THE SCRAP BOARD IS JUST TO MAKE SURE IT DOESNT GET BROKE UNTIL I GLUE BOTH SIDES AND THEN WILL PLACE IT IN ITS PROPER BAG, THANKS AGAI FOR ALL YOUR HELP AND KINDNESS. GOD BLESS STAY SAFE YOU AND YOURS DON
 

Attachments

  • 20210101_013953.jpg
    20210101_013953.jpg
    70.8 KB · Views: 22
  • 20210101_014041.jpg
    20210101_014041.jpg
    68.5 KB · Views: 22
  • 20210101_014240.jpg
    20210101_014240.jpg
    98.8 KB · Views: 22
EXCELLENT MY FRIEND !!!! Exclamation-Mark Exclamation-Mark Exclamation-Mark BeerCoffee-CupBirthday-Cake 
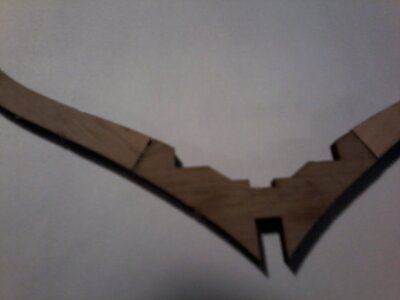
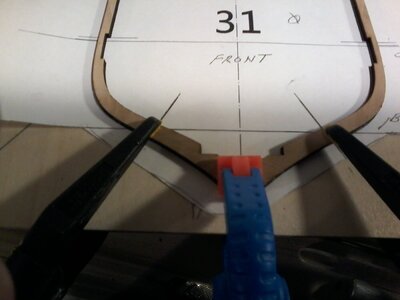
You are not allowed any of these !!! I know you may not eat cake, and I presume you don't drink (like me) so have the nicest cup of my friend! Now you can sand those joints even (both front and back) and carry on with the front in exactly the same way ! Well done Don!
 
OK ALL, FIRST FRAME GLUED TOGETHER ON THE FRAME BOARD WILL LET IT DRY FOR AT LEAST 4 HOURS, PROBALLY MORE STARTING MY SECOND ONE AS I HAVE MADE A COUPLE OF FRAME BOARDS TO DO MORE WHILE ONE DRYS, I HAVE SOME QUESTIONS I AM USING WELL BOND EXCELLENT GLUE HAVING A PROBLEM IT SETS UP QUICK DOES NOT GIVE ME TIME FOR ADJUSTMENTS ANY OPIONS NEXT QUESTION IS ANYONE MARKING THE FRAMES FOR THE INDICATED CUTTING LINE AND BEAM LINES, YOU SEE 2 PICTURES OF THE FRONT FRAME ONE SHOWS THE FRAME OFF SLIGHTLY THE OTHER SHOWS IT SHIFTED CORRECTLY. GOD BLESS STAY SAFE ALL DON
 

Attachments

  • 20210101_193451.jpg
    20210101_193451.jpg
    116.1 KB · Views: 17
  • 20210101_193613.jpg
    20210101_193613.jpg
    107 KB · Views: 17
  • 20210101_193757.jpg
    20210101_193757.jpg
    99.3 KB · Views: 17
It doesn't seem as if a spreader bar is needed Don - not on the frames I've done so far at least.
 
HI DEAR FRIEND, MY BRAIN IS HAVING A PROBLEM RIGHT NOW TON THE FRAME DWG WHERE IT SAYS CUTTING LINE IS THAT THE TOP OF FRAME WHERE A CAP RAIL IS TO GO THIS IS BOTHERING ME GOT TO FIGURE THIS OUT. GOD BLESS STAY SAFE YOU AND YOURS DON
 
Don I have not yet read and translated that far. Please don't worry about that now. Just concentrate on making frames. I might be posting something tonight or then on Wednesday/Thursday when I have the days off. Believe me, the frames will keep you busy for a month - if not longer.
 
FULLY UNDERSTOOD AND I AGREE PLEASE NOTYFY LAWRENCE HE MAY BE UNDER A MISCONCEPTION OR I MISS UNDERSTOOD HIM HE REFENCED ME TO YOUR POST 175 WHERE THE CUTTING LINE IS SHOWN, ONE THING WITH ME I AM NOT GOING TO GET AHEAD OF MYSELF IT SEEMS TO BE A TRAIT WITH MODEL SHIP BUILDERS EVERY TIME I HAVE DONE THAT IT SPELLS TROUBLE . GOD BLESS STAY SAFE ALL DON
 
Wise words my friend - wise words indeed. When you have completed Frame 31 (and there is still one thing left to do which I will tell everyone about later), I would do frame #30 next and then the first two frames # 1 and #2.
 
Back
Top