Batavia - Revell 1/150

Joined
May 3, 2020
Messages
155
Points
253

Location
Bulgaria
Hello, everyone!

The ship is an order from a friend of mine - years ago he made the hull and asked me to finish it.
It has proved quite difficult for me to work on this scale, because the sailboats have many details, and it is difficult to show them accurately.
However - I do what I can, and I think that it will be a decent ship:

1.jpg2.jpg3.jpg4.jpg5.jpg8.jpg19.jpg23.jpg24.jpg28.jpg31.jpg32.jpg35.jpg44.jpg46.jpg49.jpg50.jpg52.jpg53.jpg54.jpg57.jpg59.jpg61.jpg62.jpg64.jpg
 
The showcase is dry.
For those who haven't done the showcase, I'll let myself share the steps.
There is nothing complicated.
I use glass - usually float glass with no anti-glare like anti-reflex etc.
I don't like plexiglass because it's easy to scratch, turn yellow over time and is more expensive.
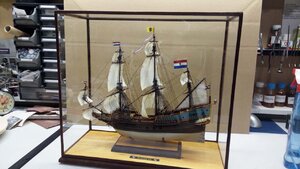
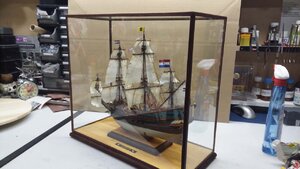
This showcase measures 46x18x38 cm and costs around 6$v. The glass is 3mm thick. Thicker glass is of course used for larger showcases.
You must say to the glass worker by cutting it NOT to smooth the edges, because then it is difficult to stick - it remains a joint.
After the show case is dry, you can gently sand them down to prevent them from cutting.
The rule is - the front and rear windows are front. They stick to the edge of the two sides.
The showcase ceiling covers the front and back + both sides.
Here are the steps;
1. Put the top glass on the table - on a newspaper at least 3 layers.
2. Glue the first side glass - backing it up with something that does not fall while gluing one of the large pieces - front or back.
3. Glue one of the two large pieces - either front or back at right angles with the side glued.
So you already have 3 glued - the top, side and front glass. You can remove the support - silicone holds them, but still be careful
3. Glue the second side glass.
4. Glue the other large piece glass to the front or back.
5. Clamp with carpentry clamps carefully, if you do not have clamps, You can use tape
I stick with plain transparent silicone. Allows corrections about 20 minutes after application.
Full tightening - 24 hours.
The silicone can cleaned with a scalpel.

130.jpg131.jpg
 
Very nice work indeed at such a small scale.The case is very nice but if you plan on taking the model to shows,make sure they will allow the case.In the UK you must use a minimum of 4mm toughened glass for Health and Safety reasons.That is one reason many choose plastic glazing

Kind Regards

Nigel
 
Very nice work indeed at such a small scale.The case is very nice but if you plan on taking the model to shows,make sure they will allow the case.In the UK you must use a minimum of 4mm toughened glass for Health and Safety reasons.That is one reason many choose plastic glazing

Kind Regards

Nigel
Yes, yes, If I bring the model to the show, I remove the case :)
 
The showcase is ready, it remains to be cleaned well.
The frame is made of 1mm thick wenge veneer.
Then sand with several types of sandpaper and apply 1 layer of brown linseed oil.
When the oil dries, I will pass it again with Danish Oil finally. After this must be more cleaning
:)
The showcase is ready, it remains to be cleaned well.
The frame is made of 1mm thick wenge veneer.
Then sand with several types of sandpaper and apply 1 layer of brown linseed oil.
When the oil dries, I will pass it again with Danish Oil finally. After this must be more cleaning
:)
132.jpg133.jpg134.jpg135.jpg136.jpg
 

Attachments

  • 137.jpg
    137.jpg
    148.4 KB · Views: 6
  • 138.jpg
    138.jpg
    128.9 KB · Views: 6
All around - this is really impressively well done! I am particularly interested in your sails; what material do you use - Modelspan? What is your method for attaching bolt-ropes? Are the bolt “ropes” rope-laid wire, so that you can shape the sails into a billowing form? The light airbrush distressing looks very good!
 
All around - this is really impressively well done! I am particularly interested in your sails; what material do you use - Modelspan? What is your method for attaching bolt-ropes? Are the bolt “ropes” rope-laid wire, so that you can shape the sails into a billowing form? The light airbrush distressing looks very good!
Maybe this post helps with sails

 
All around - this is really impressively well done! I am particularly interested in your sails; what material do you use - Modelspan? What is your method for attaching bolt-ropes? Are the bolt “ropes” rope-laid wire, so that you can shape the sails into a billowing form? The light airbrush distressing looks very good!

I made these sails form rice paper.
Its other name is paus.
Here are the steps:
1. I cut them a little bigger so that I can make the fold at the end, then I paint them with the airbrush 1 layer mostly dirty white.
So I have the foundation.
2. With light brown or beige, spray a second time to give a wearing effect.
3. Then I draw the vertical lines with a thin 2H pencil
4. I glue the bypass rope - I don't know the word in English, in Bulgarian it is "lictros". I use "Loctyde Gel glue.
5. When the sails are already in place, I made some rain marks with brown oil paint, which I dilute with double refined turpentine.
After a while I will upload final photos and the effect will be clearly visible :)

This is the technology for this scale - 1/150
For scale 1/100 I use almost the same technology, but the sails made of plastic bags that you can find in any supermarket.
 
Moarein, thank you for taking the time to explain your sail process, and Zoly, I also appreciate that link.

I’m intrigued by your Soleil Royal avatar, Moarein. Would you mind posting a few photos of that model, here?
 
Moarein, thank you for taking the time to explain your sail process, and Zoly, I also appreciate that link.

I’m intrigued by your Soleil Royal avatar, Moarein. Would you mind posting a few photos of that model, here?

I posted Le Soleil Royal here:


:)
 
Back
Top