-

Win a Free Custom Engraved Brass Coin!!!
As a way to introduce our brass coins to the community, we will raffle off a free coin during the month of August. Follow link ABOVE for instructions for entering.
-

PRE-ORDER SHIPS IN SCALE TODAY!
The beloved Ships in Scale Magazine is back and charting a new course for 2026!
Discover new skills, new techniques, and new inspirations in every issue.
NOTE THAT OUR FIRST ISSUE WILL BE JAN/FEB 2026
You are using an out of date browser. It may not display this or other websites correctly.
You should upgrade or use an alternative browser.
You should upgrade or use an alternative browser.
Kurt Konrath
Kurt Konrath
Side windows in plans are a bit confusing, did you glue in with a bit sticking out and sand to match side contour?
How thick is window frame when done, and does plastic glue to inside edge of frame?
How thick is window frame when done, and does plastic glue to inside edge of frame?
Hi Kurt
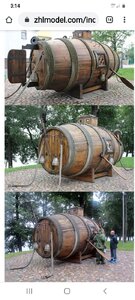
Based on plan and pictures from ZHL MODEL you have to flush the frame with the barrel. See below
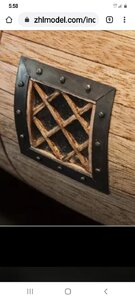
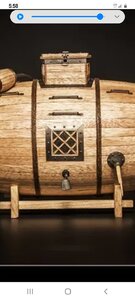
If you zoom the pictures of the Russian Repo at the museum you will see the frame is flushed with the interior side of the barrel. See below


I tried to do as the Museum picture. The result is not good when you see it in a magnified picture. Not when you see it at naked eye and nirmal distance
In my next one I will change the strategy.
What I did was to assemble the window using the provided frame. Then I did the aperture 1 mm shorter left and right. With a file I was adjusting the opening until the frame was able to enter, pushing slightly to avoid pushing it inside. If that happens i think you will not be able to take it out.
I pushed until my brain said enough !!!
My learning.... next time I will use a frame made with a wider wood. So I can push the "window" inside and allow frame to pop out and then flush it following the barrel shape. In that way will finish as the Museum Russian model and you do not risk pushing the frame to much.
I hope I was clear. If not let me know please.
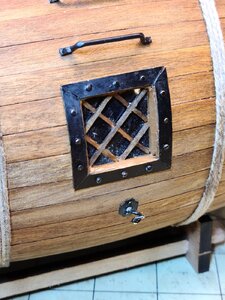
Now my ugly window :
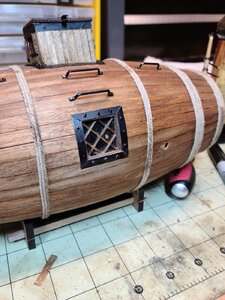
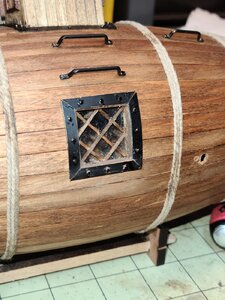
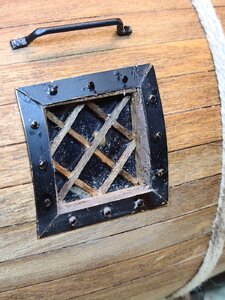
I still need to work on it a little. I will try to fill my mistakes with walnut filler. I have to think what I can do to improve her frame :-(
Best
Daniel
Based on plan and pictures from ZHL MODEL you have to flush the frame with the barrel. See below


If you zoom the pictures of the Russian Repo at the museum you will see the frame is flushed with the interior side of the barrel. See below


I tried to do as the Museum picture. The result is not good when you see it in a magnified picture. Not when you see it at naked eye and nirmal distance
In my next one I will change the strategy.
What I did was to assemble the window using the provided frame. Then I did the aperture 1 mm shorter left and right. With a file I was adjusting the opening until the frame was able to enter, pushing slightly to avoid pushing it inside. If that happens i think you will not be able to take it out.
I pushed until my brain said enough !!!
My learning.... next time I will use a frame made with a wider wood. So I can push the "window" inside and allow frame to pop out and then flush it following the barrel shape. In that way will finish as the Museum Russian model and you do not risk pushing the frame to much.
I hope I was clear. If not let me know please.
Now my ugly window :


I still need to work on it a little. I will try to fill my mistakes with walnut filler. I have to think what I can do to improve her frame :-(
Best
Daniel
Side windows in plans are a bit confusing, did you glue in with a bit sticking out and sand to match side contour?
How thick is window frame when done, and does plastic glue to inside edge of frame?
Forgot to answer the plastic "glass" question. Yes, based on pictures is glued inside. It is also a magnet for every particle that is around.... and there are too many
I do not know what I can do to clean it a bit ,when I am done ,without risking ungluing it.
It was clean like a glass when I installed it. But now..... well you see the pictures.
Kurt Konrath
Kurt Konrath
I am wanting to try this kit but must finish one of my others project first!
Admirals orders, and we know what happen when crew makes the admiral unhappy!
Admirals orders, and we know what happen when crew makes the admiral unhappy!
Yes... I know what that means Kurt 
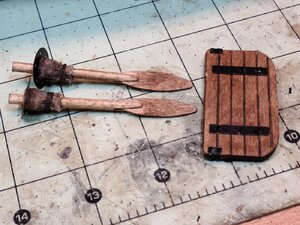
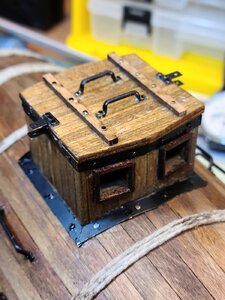
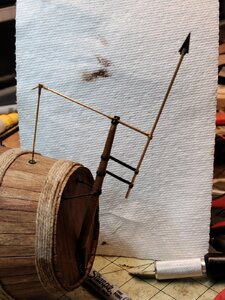
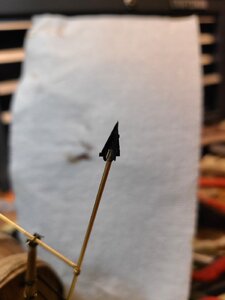
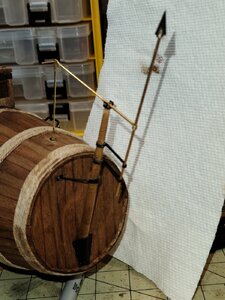
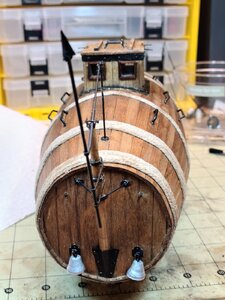
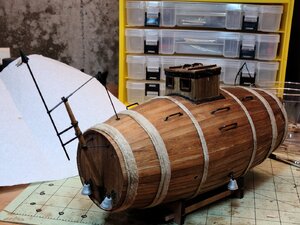
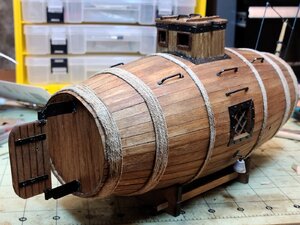
Today I finished the bow with the Harpoon. Some others details, like the weights and now working on the stern. Also did some work on the window and her final aspect improved. I will leave it as it is now. I know my skills and limits. So I am afraid of touching it more and doing a disaster.
Some pictures:

Cheers
Daniel
Today I finished the bow with the Harpoon. Some others details, like the weights and now working on the stern. Also did some work on the window and her final aspect improved. I will leave it as it is now. I know my skills and limits. So I am afraid of touching it more and doing a disaster.
Some pictures:


Cheers
Daniel
- Joined
- Apr 20, 2020
- Messages
- 6,205
- Points
- 738

This is a special and beautiful modelHi
After 3 days non stopping working on the Red Dragon i decided to stop it a few days and start a new project. No... i will not leave the Red Dragon as it is. It will be finished !!!
This kit was a present of my oldest son a few months ago. He got it from ZHL MODELS.
On this link you will find an excellent review of the kit with many links to what is known about this submarine.
Efim Nikonov 1721
This will be a kit review of the first wooden submarine for the Russian Navy from 1721shipsofscale.com
You will see that at the stage I am now, it will be nice to add some interior features. But I can only find a picture at this site:

First Russian Submarine
Entertainment photo blog with Informations, Facts, Fun, Home Ideas, Creative Designs, Art, Painting, Cozy Ideas, Cool Stuff, etcpixgrove.blogspot.com
View attachment 162111View attachment 162112
If anyone have the skills to find more interior images It will be greatly appreciate !!!
If I do some interior, I do not like the idea of adding LEDs. Just I do not like to see a wire going to a battery power and a switch.
Another option will be to do it as it is. And do another one cut by half. Showing all the inside. For that I will need more pictures. I can risk another kit as the price is something like $70 shipped to USA from China.
Ok, let's show what I did today.
It all start here
View attachment 162113View attachment 162114
They snap very tight !!! I broke a couple that I glued at the end. It finish being a strong structure. My mistake was to start adding them in oposite sides. Just add one after the other, going all around.
View attachment 162117View attachment 162118
Did a good sanding to have all well shaped so "planks" will fit all the way. Like when we do the ship hull.
I cut the extra "wood extensions", sanded and glued the "artificial planking". It was already done and I highlighted the planks with pencil.View attachment 162119
I had to use all those clamps because after placing the pice of wood over the wood-glue it started to bent. It was alive. It is so thin that needed to be kept in place.
That is all for now.
Cheers
Daniel

Looking very good ! a really interesting kit
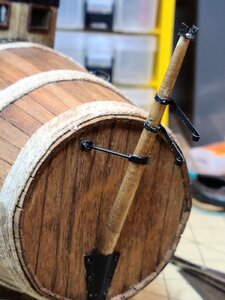
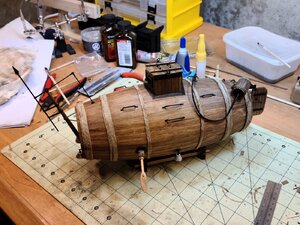
Yesterday night I finish the sub. The barrel for air intake is attached as the museum replicate in Russia and not just glued to the sub as the model.
Here are a few pictures. I still need to finish the stand with the sub name. As soon as that is done I will post final pictures to close this building log and to post at the forum gallery. I will try to do better pictures for the closure.
Any comments for a final touch that can improve the model are always welcome.
Kit is GREAT !!!!. A lot of fun. Is something different. It is full of details. You can't ask more for $70 shipped to USA.... I will close saying it is a very BEAUTIFUL and INCREDIBLE detailed kit that reflects the real size sub that is at the Russian museum.
I take my hat with this kit.... highly recommended.
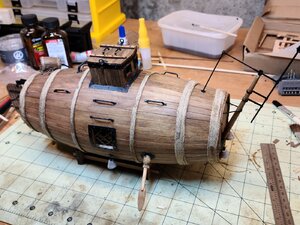
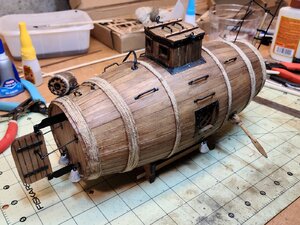
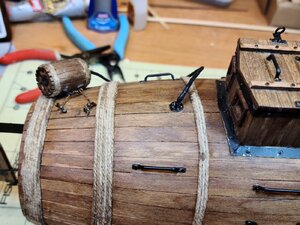
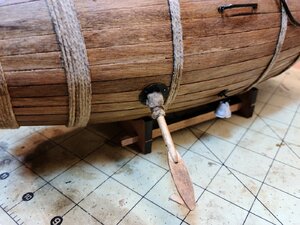


Cheers
Daniel
Here are a few pictures. I still need to finish the stand with the sub name. As soon as that is done I will post final pictures to close this building log and to post at the forum gallery. I will try to do better pictures for the closure.
Any comments for a final touch that can improve the model are always welcome.
Kit is GREAT !!!!. A lot of fun. Is something different. It is full of details. You can't ask more for $70 shipped to USA.... I will close saying it is a very BEAUTIFUL and INCREDIBLE detailed kit that reflects the real size sub that is at the Russian museum.
I take my hat with this kit.... highly recommended.


Cheers
Daniel
Last edited:
Very interesting model and very nicely done. It's nice to see something other than a sailing ship - not that there's anything wrong with that.
Very interesting model and very nicely done. It's nice to see something other than a sailing ship - not that there's anything wrong with that.
Thank you Jim for the nice words. Still I think that in the hands of the experts with better skills this model can be improved or will look better. Nevertheless, I am very satisfied with my result.
I will post pictures with a background that allows to see the details better.
Thanks !!
Daniel
Last edited:
This is really a very good made model - Happy to hear that you were satisfied with the kit
Many Thanks for this interesting building log
Many Thanks for this interesting building log
This is really a very good made model - Happy to hear that you were satisfied with the kit
Many Thanks for this interesting building log
Thank you Uwek !!!
Well, this is finally the end for this model and log. Finish the base and placed it as the Russian repo.
First picture is a screen shot from ZHL MODEL. Same pictures and more info can be find using the links provided at the first post.
I am using this screen shoot for you all to compare with the finish model.
My pictures are taken using one of my dogs pad. Letting you know, so you do not scratch your head thinking what is my background
If you zoom the pictures you will see all the details.
So here we go :
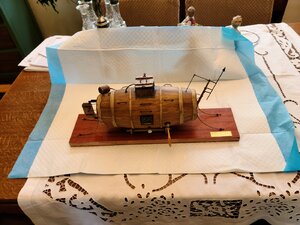

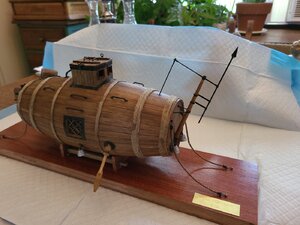
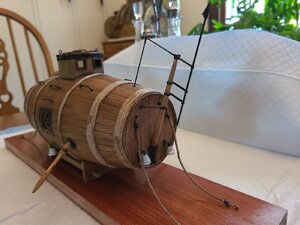
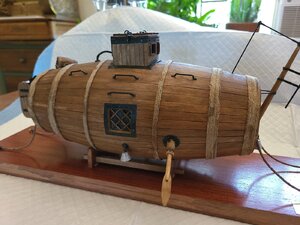
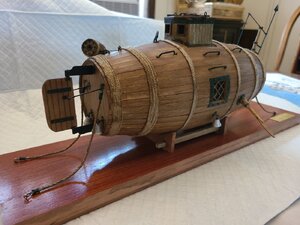
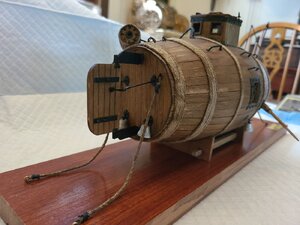
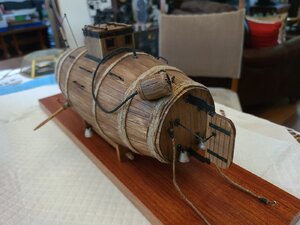
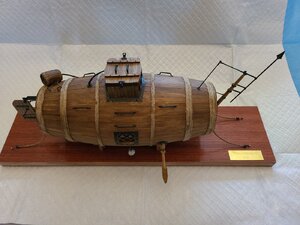
This is it.
Cheers !!!
Daniel
First picture is a screen shot from ZHL MODEL. Same pictures and more info can be find using the links provided at the first post.
I am using this screen shoot for you all to compare with the finish model.
My pictures are taken using one of my dogs pad. Letting you know, so you do not scratch your head thinking what is my background
If you zoom the pictures you will see all the details.
So here we go :


This is it.
Cheers !!!
Daniel
- Joined
- Jan 9, 2020
- Messages
- 10,543
- Points
- 938

Hi Daniel
I must compliment you on a super looking model! So often our builds are same old ... same old ... but this is really different. I think you have imparted an amazingly realistic look to your sub. Well done!
Heinrich
I must compliment you on a super looking model!
 So often our builds are same old ... same old ... but this is really different. I think you have imparted an amazingly realistic look to your sub. Well done!
Heinrich
Hello Danie! Congrats! You are a fast builder. The model looks great and spotted some unique details! 

- Joined
- Sep 18, 2022
- Messages
- 3
- Points
- 3
Placed an order for another kit from ZHL MODEL.
This will will be the open one. I have in mind a way of planking it, that I hope will stay in place when I cut the skeleton.
I will explain my idea in detail when I start the new thread.
2 Questions :
1) The sub has 350 mm long. What scale that could be, more or less ? (I would like to buy some human figures, if possible)
2) Any suggestions for wood staining to provide a weathering look to the planks ?
Thanks
Daniel
Thanks for posting pics of your build. I just got my kit and trying to build the kit. This is my first naval kit and yes, I already broke some parts of the MDF frame. It's low grade fiberboard but I guess it does the job. I look forward to making progress to my kit, using your photos as inspiration and reference. Thanks!Any idea for the interior it will be welcome.
Thank you !!
Daniel


