-

Win a Free Custom Engraved Brass Coin!!!
As a way to introduce our brass coins to the community, we will raffle off a free coin during the month of August. Follow link ABOVE for instructions for entering.
-

PRE-ORDER SHIPS IN SCALE TODAY!
The beloved Ships in Scale Magazine is back and charting a new course for 2026!
Discover new skills, new techniques, and new inspirations in every issue.
NOTE THAT OUR FIRST ISSUE WILL BE JAN/FEB 2026
You are using an out of date browser. It may not display this or other websites correctly.
You should upgrade or use an alternative browser.
You should upgrade or use an alternative browser.
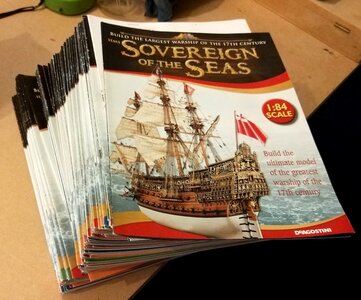
DeAgostini Sovereign of the Sea's 1/84 scale, by neptune [ Closed]
- Status
- Not open for further replies.
I haven't been feeling too good lately so I thought that for something non exertive I would take a look at the hull and how it had been built,
this is just going to be an out of the box build, no frills, with maybe just a couple of modifications along the way,
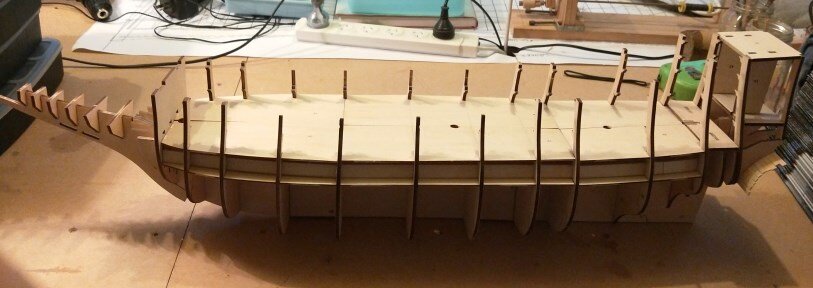
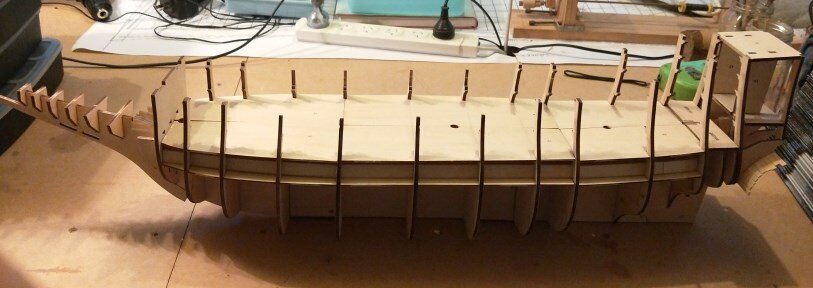
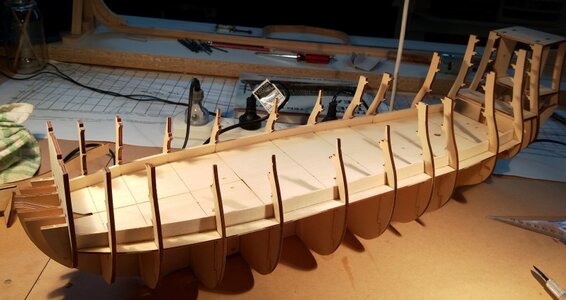
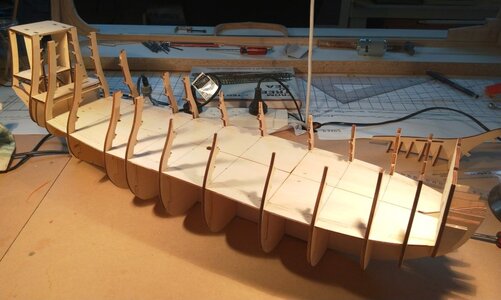
This is the hull as the previous owner had built it,
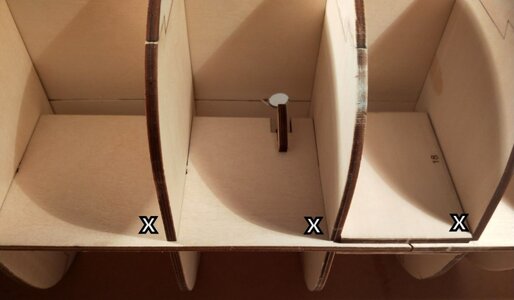
on closer inspection several of the bulkheads were not seated properly on the central keel, you can see where the XXX are,
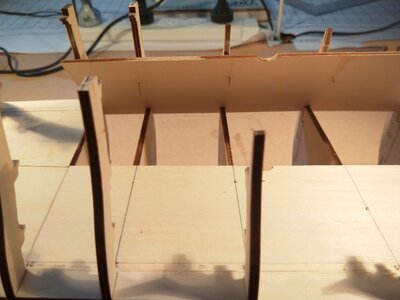
also the deck sheeting panels were loose, and you can see in the above pic that there are only a few nails holding them,
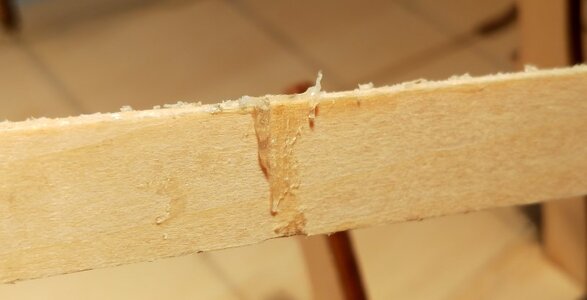
also the glue he had used was like a rubber cement, see in the above pic,
so i decided it had all to come apart and I would start from the begining, this is where the rubber cement worked
in my favour, and the decks just lifted off and the cement was easily cut with a sharp craft knife, thats the top deck
taken off with no breakages,
all the gun port supports removed,
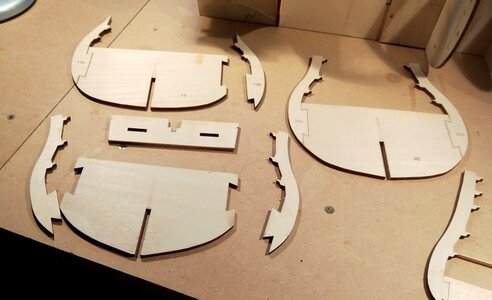
once I had removed the lower deck there was another shock awaiting me, a lot of the side framing parts had not
even been glued in place they were just sitting in place and the bulkheads themselves were not glued, they had
just been slid down over the central keel,
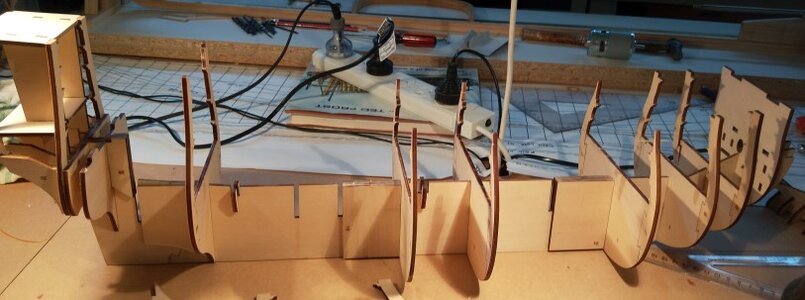
all the bulkheads just lifted up off the central keel,
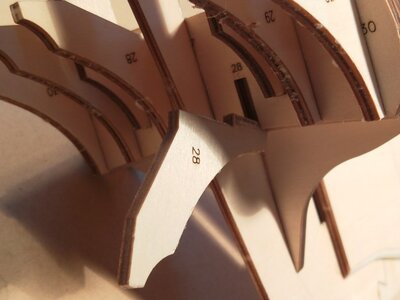
it was the same at the stern, all the parts just pulled out,
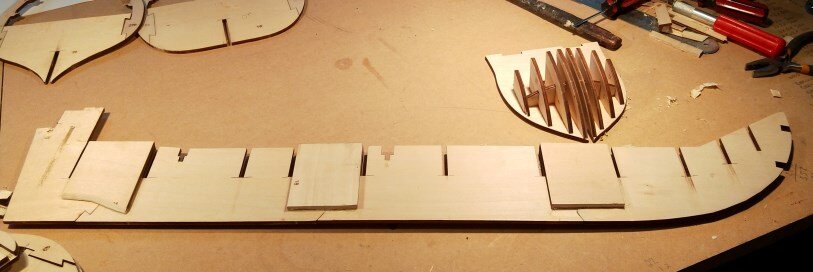
in the end everything came apart cleanly, the only parts that were solidly glued were central keel reinforcing plates
and the bow section, so he must have used PVA glue on them,
.
this is just going to be an out of the box build, no frills, with maybe just a couple of modifications along the way,

This is the hull as the previous owner had built it,

on closer inspection several of the bulkheads were not seated properly on the central keel, you can see where the XXX are,

also the deck sheeting panels were loose, and you can see in the above pic that there are only a few nails holding them,

also the glue he had used was like a rubber cement, see in the above pic,

so i decided it had all to come apart and I would start from the begining, this is where the rubber cement worked
in my favour, and the decks just lifted off and the cement was easily cut with a sharp craft knife, thats the top deck
taken off with no breakages,

all the gun port supports removed,

once I had removed the lower deck there was another shock awaiting me, a lot of the side framing parts had not
even been glued in place they were just sitting in place and the bulkheads themselves were not glued, they had
just been slid down over the central keel,

all the bulkheads just lifted up off the central keel,

it was the same at the stern, all the parts just pulled out,

in the end everything came apart cleanly, the only parts that were solidly glued were central keel reinforcing plates
and the bow section, so he must have used PVA glue on them,
.
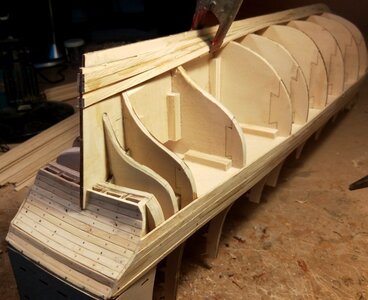
So after cleaning all the rubber cement glue off the parts I started reassembling the hull frame work,
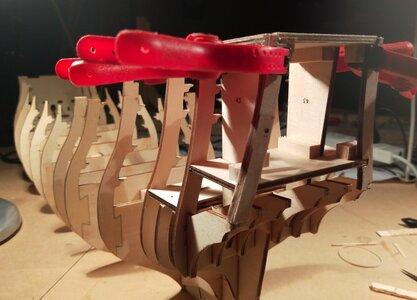
Got all the bulkheads attached and working on the transom framing,
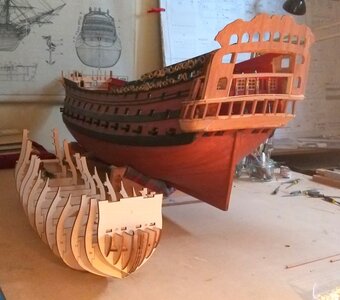
here she is sitting along side my Royal William, big difference the Royal William is 1/48 scale and the SOTS is 1/84,
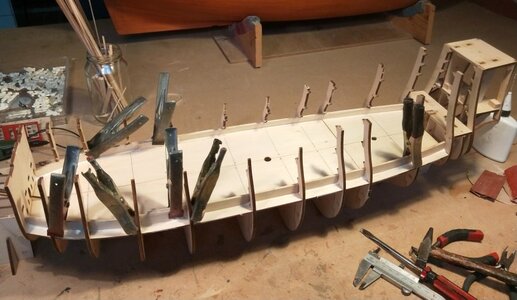
reattaching the cannon supports,
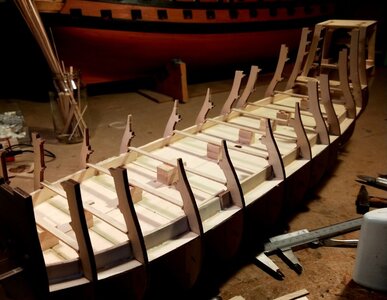
setting everything up for the next deck, I added small blocks under the deck timbers for extra security,
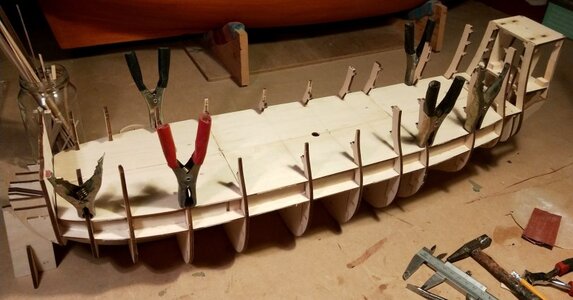
and here she is back to where she was when I bought her, but this time the glue used was Selleys quick set PVA,
.

Got all the bulkheads attached and working on the transom framing,

here she is sitting along side my Royal William, big difference the Royal William is 1/48 scale and the SOTS is 1/84,

reattaching the cannon supports,

setting everything up for the next deck, I added small blocks under the deck timbers for extra security,

and here she is back to where she was when I bought her, but this time the glue used was Selleys quick set PVA,
.
Great to see you back in the shipyard, John.  I like the way you build your models, so will watch as your build progresses!
Ooooooh... another DeAgostini HMS SotS builder! Where's my popcorn? This is going to be great! I'm just a few steps behind you in assembly HMS SotS.
G'day Darius, the way I am building you will soon be in front, , I will be jumping from model to model,Ooooooh... another DeAgostini HMS SotS builder! Where's my popcorn? This is going to be great! I'm just a few steps behind you in assembly HMS SotS.
Best regards John,
We'll see about that, mate! I'm stuck in a mental rut pondering what the next move is, because the stern structure is being modified extensively, and plans to install lighting have to be made while the framing is still open and exposed. Nigel, a fellow Aussie, has helped me a lot in making decisions regard where to make changes.G'day Darius, the way I am building you will soon be in front, , I will be jumping from model to model,
Best regards John,
Hey John,
That's a great deal for this model kit! Plus all the extras! I'll pull up a chair to watch your build if that's all right.
Paul
That's a great deal for this model kit! Plus all the extras! I'll pull up a chair to watch your build if that's all right.
Paul
Thanks guys for the likes and you all are more than welcome to come aboard and follow,
best regards John.
best regards John.
Hallo John,Thanks guys for the likes and you all are more than welcome to come aboard and follow,
best regards John.
I am kindly asking you if it is allowed to come also on board ?...... I will follow your new build with big interest
Hallo John,
I am kindly asking you if it is allowed to come also on board ?...... I will follow your new build with big interest
You are very welcome Uwe, and I promise that if I put a bed on her I will make sure it has Plain sheets,
best regards John.
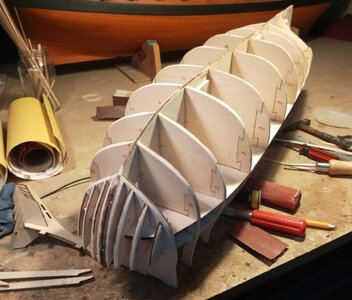
So thats the hull sanded and ready for planking, I don't like planking the hull and then adding the keel, the Stem
and the stern post, I prefer to add all of these then commence the planking, you can see the keel pieces and the stem
to the left of the pic,
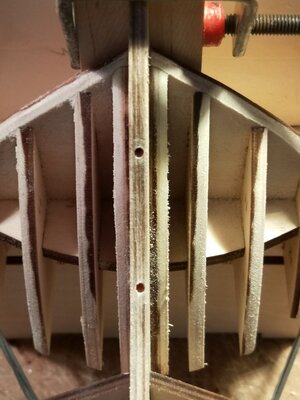
I drilled the stem piece to take the wood dowells I had prepared, I clamped it between
two blocks of wood to make sure it was in the correct place,
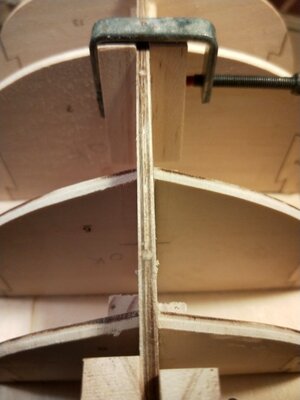
after gluing and dowelling the stem,
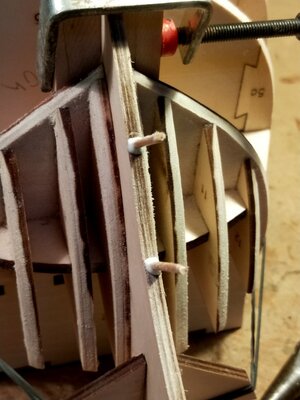
another pic of how I held the stem whilst drilling and dowelling,
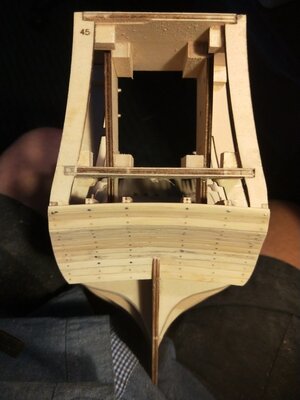
Next up was to plank the lower transoms, I planked these with the Bamboo supplied,
and every thing went well,
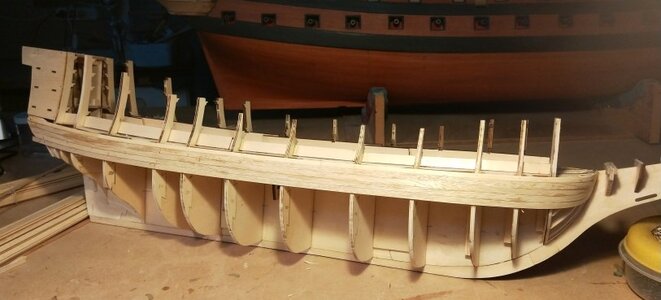
Then I attached five rows of planks to each side, the very top plank is the bamboo supplied and the four lower
ones are bass wood, i decided to use the Bass wood as some of the bamboo planks were splitting,
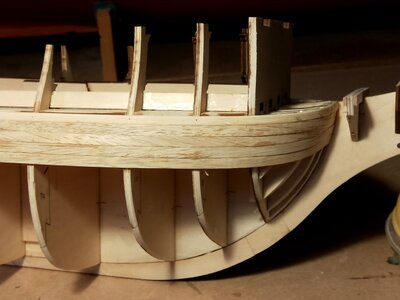
close up of the bow,
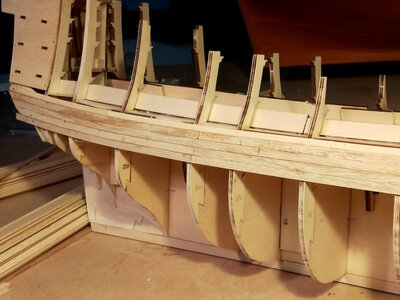
and a close up of the stern,
.
Last edited:
Looking good John.
Thank you Jim and Brian, I wasn't going to start her for awhile but got itchy fingers,Looking good John.
best regards John.
Its been hot here for the last week or so, I was hoping to get out to the shed and cut some wood for making the frames for my Steam Drifter, but I have had to stay inside in my hobby room, so i continued on with the SOS, which means Sovereign of The Sea's, or as in my case by the time I am finished with her she will be know as the SOS which may mean Some Other Ship,
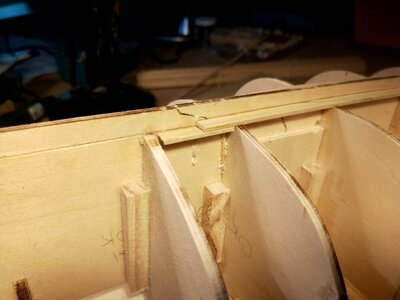
I started doing the bottom planks by the keel, the instructions say to cut the planks in the middle of a frame,
but what i do is the above,
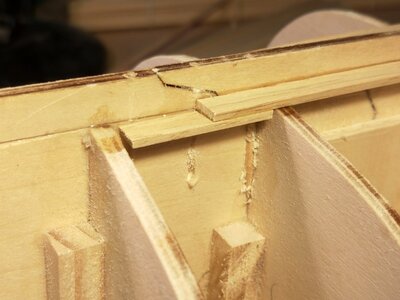
and a close up, the plank has to be twisted to conform to the frames,
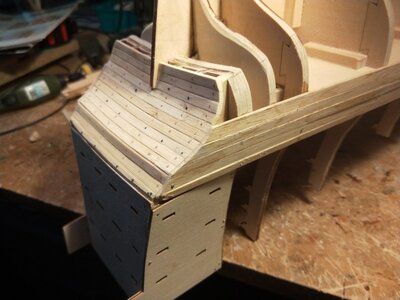
while waiting for the glue to dry I trimmed and sanded the transom planking,
a close up of the work on the after end,
.

I started doing the bottom planks by the keel, the instructions say to cut the planks in the middle of a frame,
but what i do is the above,

and a close up, the plank has to be twisted to conform to the frames,

while waiting for the glue to dry I trimmed and sanded the transom planking,

a close up of the work on the after end,
.
Great bargain you got there.
Those multi-issue kits are not cheap + all those tools, bits and pieces are a nice bonus.
Looks like the original owner dry-fitted and used hot melt glue(?) which meant a lot less work for you to correct the errors of others.
Added to 'Watched' builds.
Those multi-issue kits are not cheap + all those tools, bits and pieces are a nice bonus.
Looks like the original owner dry-fitted and used hot melt glue(?) which meant a lot less work for you to correct the errors of others.
Added to 'Watched' builds.
Thank you John for the nice comments and adding me to your watch list,Great bargain you got there.
Those multi-issue kits are not cheap + all those tools, bits and pieces are a nice bonus.
Looks like the original owner dry-fitted and used hot melt glue(?) which meant a lot less work for you to correct the errors of others.
Added to 'Watched' builds.
Best regards John,
Hello John, you are making easy work of what I struggled with the most on my DeAg Vasa. Hull planking was nearly the end of me (and the end of my build). The second planking (which should have been easier) was an epic tragedy of do/re-do. I'm looking forward to see how it progresses in your skilled hands. I also laughed at your weather report - it's -2 degrees in northern Illinois USA this morning.
Hello John, you are making easy work of what I struggled with the most on my DeAg Vasa. Hull planking was nearly the end of me (and the end of my build). The second planking (which should have been easier) was an epic tragedy of do/re-do. I'm looking forward to see how it progresses in your skilled hands. I also laughed at your weather report - it's -2 degrees in northern Illinois USA this morning.
Brrrrrr thats cold, what did they give you for the first planking, I got Bamboo, ( but no Panda's ) I used it for one plank each side and then changed to what looks like Bass wood,
best regards John.
I never did figure out what species of wood they provided. It wasn't bamboo (didn't have the tubular structure) but it was fairly easy to work with (basswood?). Some pieces would split and the darker pieces simply would not bend at all - they just snapped. The problem wasn't the wood supplied - the problem was me trying to figure out how to manage the bluff bow. On the second planking I changed to pear.Brrrrrr thats cold, what did they give you for the first planking, I got Bamboo, ( but no Panda's ) I used it for one plank each side and then changed to what looks like Bass wood,
best regards John.
- Status
- Not open for further replies.


