• LUCZORAMA SHIPWRECK SCAVENGER HUNT GIVEAWAY. 4 Weeks of Fun • 1 Legendary Prize ((OcCre’s Fram Ship)) • Global Crew Welcome!
    **VIEW THREAD HERE**

Soldering advice - gas or electric?

  • Thread starter Thread starter JohnK
  • Start date Start date
  • Watchers Watchers 7
Joined
Jan 31, 2020
Messages
46
Points
78

Location
Manchester, UK
I have started to build the Fokker Dr1 Tri-plane (well they did call them "air SHIPS" in the early days) and a large part of the construction is using Brass tube, rod or photo etched parts as well as Cast parts in Britannia (a form of pewter) and Zinc. I have an old 25w standard single heat/element, single shoe electric soldering iron which I have used on small electrical wiring jobs but nothing very intricate. I understand that I may need variable temperatures on the different metals, would I be advised to buy a variable heat soldering iron and if so, butane gas or electric? And what about the solder, would a lead free universal solder be OK or to buy flux and high and low melt solders??

Many thanks and not too much Booing for my deviation into air ships.??!!

JK
 
I haven't done that much detailed soldering but I have noticed a few things over the years. I torch makes it hard to concentrate the heat. Anything kinda down the flame gets heated and you may not want that. They definitely have their place for bigger stuff. Be careful about your choice of wattage. If you are soldering something like, say, 1/8" square brass it may soak up most of the heat a 25w iron will give but if you use a 100w you can get in there, reach temp, and be out before the heat travels down the tube. Quicker and you end up with a better joint. Hope that helps.
 
Thanks for that tip - I have tried making one of the brass rod/tube parts with my 25W iron and yes it does take a time for the solder to melt and it heats a larger area than I would like, the solder then flows along, as you point out. Although I have used a blow torch on central heating pipes, I am a little hesitant to have even a small flame on my work bench which is in my study and could easily be knocked over, so I think I will look at a more powerful electric iron.

JK
I will not claim to be an expert or even a long time experienced one for this question. I do have some things to also think about and pass along.
What you need to solder with I think greatly depends upon what you soldering, metal, size, proximity to another soldered connection, and heat sinks to prevent unwanted heat traveling along to those places. For equipment I am soldering only small fittings of both wire and brass tubes no larger than a couple of mm and thin wall at that. Having the metals clean is essential as well as keeping them held in contact witn "extra hands" types of multi-arm devices. I even use elastic cords with alegator clips to hold some ends in the same what that strop blocks. For flux I have preferred a past flux which I apply with a clean sharp pointed tooth pick to where I want the solder to flow.
I use only an electric 40 Watt very sharp pointed iron which I cleaned and tinned to start with and frequently re-clean by gently filing, then re-tin. I use a rosin core solder, 60/40 .031" dia, which I hammered flat and cut into small pieces about 1 - 1.5 mm long which I place on top of the paste fluxed area with tweezers and bring the iron up underneath. The tinned iron melts the prepped joint very fast. For longer folded sheets I don't have experience. I saw a video about resistance soldering which was very impressive but very expensive. If I did a lot of that type of continuous edge sheet metal soldering, as with railroad cars, I could consider it as there is no visible soldered joint afterwards.
I hope that these things help you consider what your needs are and how to better approach them. Experimenting is always a good tack to follow before acquiring too many items. Rich (PT-2)
 
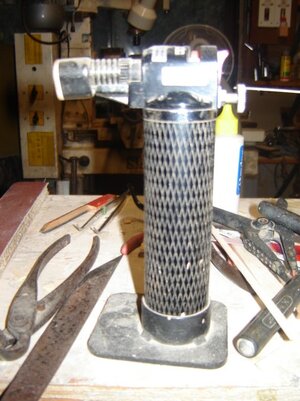
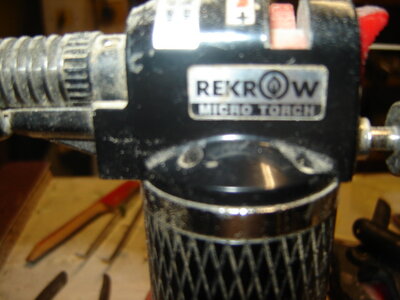
Gas/butane for me. The micro torches are instant on instant off..no waiting for the element to heat up, and you can use MANY different alloys to solder or braze. Pinpoint heat as well.
 
I build model railway loco kits, etched brass in 0 gauge.
The brass can be quite thick and the minimum sized iron I use is 50 watt.
Heat capacity is everything, so smaller irons are no good, in and out quick,
before you melt everything else around it.
I use Antex irons, the bits are coated and tend to last longer, never file them.
I have a 50 watt digital iron that runs from 50 to 450 degrees C, so will cover
brass and white metal (690D)
I also have a resistance soldering unit which I have had at least 15 years and use all the time.
I have gas irons for out 'in the field', but I find you have next to no control over them for fine detail.
 
Meant to add about solder, don't use lead free, I haven't found a lead free one yet that flows well.
Use 70 degree solder for white metal and 145/180 degree solder for brass or nickel silver.
I use liquid flux as the resin/paste fluxes are a pain to clean later and paint doesn't like it.
 
I have started to build the Fokker Dr1 Tri-plane (well they did call them "air SHIPS" in the early days) and a large part of the construction is using Brass tube, rod or photo etched parts as well as Cast parts in Britannia (a form of pewter) and Zinc. I have an old 25w standard single heat/element, single shoe electric soldering iron which I have used on small electrical wiring jobs but nothing very intricate. I understand that I may need variable temperatures on the different metals, would I be advised to buy a variable heat soldering iron and if so, butane gas or electric? And what about the solder, would a lead free universal solder be OK or to buy flux and high and low melt solders??

Many thanks and not too much Booing for my deviation into air ships.??!!

JK
Hallo JK alias @JohnK
we wish you all the BEST and a HAPPY BIRTHDAY
Birthday-Cake
 
I have a 35W solder iron that I use with an ordinary electric light dimmer to adjust to lower temperatures when needed. I also use my woodburning iron on the dimmer. It is really handy to test the temperature on a piece of scrap fromyour project before starting on your actual project. I built my dimmer from parts I had laying around in my shop. Most hardware stores/building supply stores have all the materials needed. The dimmer can be the older style that does not work with LED lights. The dimmers for LED lights work just as well for soldering irons, but they cost a lot more than the older style. If you have a variable voltage transformer, that will work very well with soldering irons also.
Attached is a schematic of the dimmer that I built.
Happy Modelling,
Steven
 

Attachments

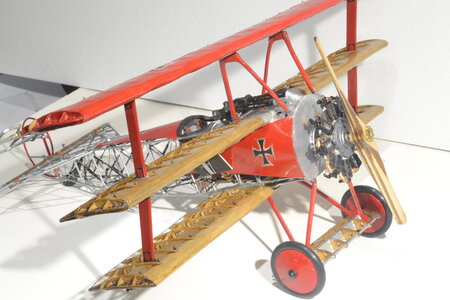
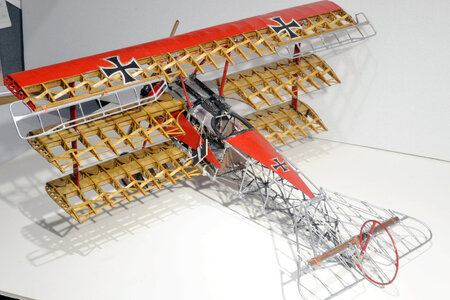
Thanks for the greeting - following up from my questions about the soldering irons, I have been beavering away on the Fokker D1 (Model Airways) which is almost complete. I have been a little frustrated with the kit in so much that the cast metal parts (which form the main structural body of the plane) are very soft and distort very easily and impossible to solder, they just melt away even using low melt solder. Before starting another boat/ship, I am about to try their other model the Sopwith Camel, which was the British rival to the Fokker D1. The SC doesn't seem to have as many cast metal structural parts.

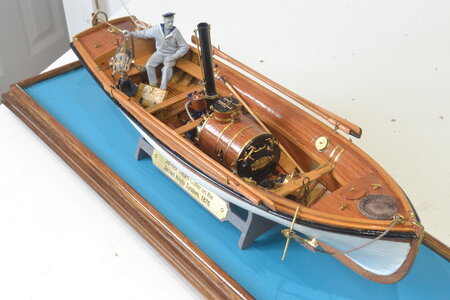
Before I started on the airplane, I built the James White Steam Boat, a very enjoyable build but found some of the plastic parts too small to handle and very fragile.
regards

DSC_0014_05.JPGDSC_0015_05.JPGDSC_0010_06.JPG

JohnK
 
Thanks for the greeting - following up from my questions about the soldering irons, I have been beavering away on the Fokker D1 (Model Airways) which is almost complete. I have been a little frustrated with the kit in so much that the cast metal parts (which form the main structural body of the plane) are very soft and distort very easily and impossible to solder, they just melt away even using low melt solder. Before starting another boat/ship, I am about to try their other model the Sopwith Camel, which was the British rival to the Fokker D1. The SC doesn't seem to have as many cast metal structural parts.

Before I started on the airplane, I built the James White Steam Boat, a very enjoyable build but found some of the plastic parts too small to handle and very fragile.
regards

View attachment 286538View attachment 286539View attachment 286547

JohnK
You show us two very different vessels of different media: Air and Water. Both great to see so well done.
Rich
 
I have started to build the Fokker Dr1 Tri-plane (well they did call them "air SHIPS" in the early days) and a large part of the construction is using Brass tube, rod or photo etched parts as well as Cast parts in Britannia (a form of pewter) and Zinc. I have an old 25w standard single heat/element, single shoe electric soldering iron which I have used on small electrical wiring jobs but nothing very intricate. I understand that I may need variable temperatures on the different metals, would I be advised to buy a variable heat soldering iron and if so, butane gas or electric? And what about the solder, would a lead free universal solder be OK or to buy flux and high and low melt solders??

Many thanks and not too much Booing for my deviation into air ships.??!!

JK
Hallo @JohnK
we wish you all the BEST and a HAPPY BIRTHDAY
Birthday-Cake
 
I have never used soldering tools, but ball the Ring -which you have to open -to put through the sail and Stay. and then back again I solved this tañking with the hardware shop. He gave a Soldering Glue - which works as the Polistiren glue for plastic models. With this soldering glue you will -on the two ed of the ring -add a little drop (IT WILL START MELTING THRE METALVERY FAST-LESS THAND ONE SECOND) on each tip, and mediately add the two parts together, as it starts getting solids again. IO have over time made hundreds of the these ring. It works here. see below. el capi

07-STAYSAILS.jpg
 
Back
Top