• "Thank you for your Donations and Support"
    As we close this Annual Donations Drive, I want to thank you all for your Generosity in Donating to Ships of Scale. It is Greatly Apreciated !!!
    Ships of Scale continues to explore exciting things to offer to the Ship Building Community.

HMS Victory Mantua 1:78 (first build) by Grant Tyler

That looks simply brilliant Grant. Well done, young man!
Good morning Heinrich. Thanks- your system worked for me and I am happy how they look. They don’t take too long either which is a plus for sureThumbsup. You mentioned (I think in Ron’s log) that you are closing your shipyard for a while- are you moving again?
 
Good morning Heinrich. Thanks- your system worked for me and I am happy how they look. They don’t take too long either which is a plus for sureThumbsup. You mentioned (I think in Ron’s log) that you are closing your shipyard for a while- are you moving again?
I haven't moved yet! :) The apartment they were going to give me was only a temporary one and then I would have had to move again in another month's time. So I told them - not a chance. I am staying put until they have finalized my "real" apartment.
 
A hearty hello to everyone. Intermittently I have been trying my hand at rigging the dead eyes to the shrouds. I had a go using this methodology:

D8C4824C-47B1-41D3-B31E-BE7248F9A537.jpeg
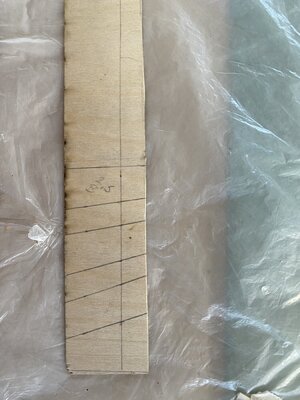
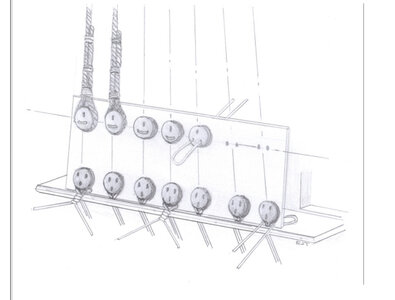
To align the dead eyes I used hardwood and measured the position of the dead eyes. I used the rigging plan provided to establish the position of the foremost one.
9F01D344-D7BF-4D38-B5FB-E38DD8F20E63.jpeg
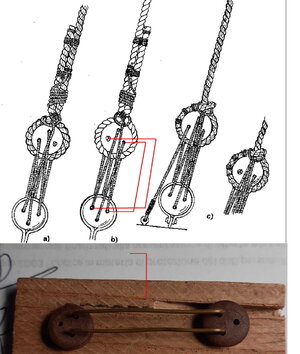
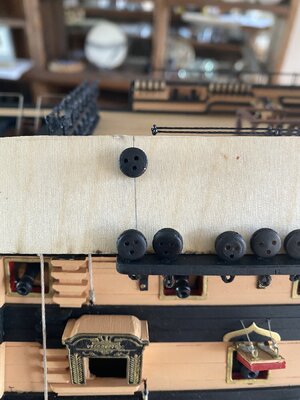
I secured the hardwood to the channel just behind the lower dead eyes already fitted. Using 3 nails through the first, 4th and last dead eyes, rather than wire in above diagram as it is easier to remove the board, it was fitted to the channel.

Making sure the shrouds looping around mast where all correctly positioned I pulled each one down to the lower deadeye on the Chanel and marked the board to reflect the vertical line of each shroud.BB4CFE20-4E14-4419-9129-5CDC2B325FC0.jpeg

The horizontal line was then draw in parallel to the channel at the height determined from the plan.

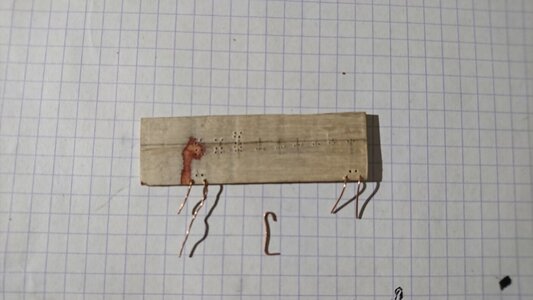
As each deadeye has the 3 holes all over the place (No uniformity)I had to place each deadeye individually and drill the holes for Each one with the upper center hole following the vertical line.
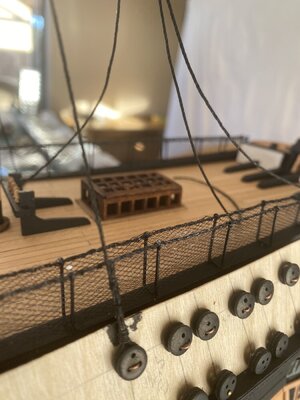
I then attached each dead eye with copper wire and placed it back on channel and inserted the nails.
ED60F39C-C088-4DB5-A304-E1EB4435C888.jpeg
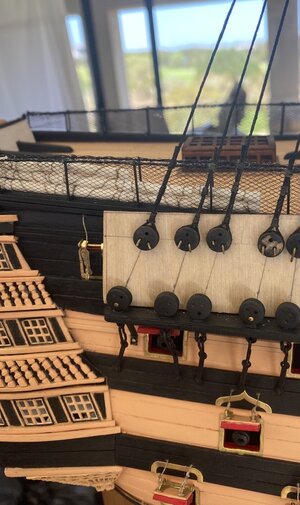
I double checked the sequence and position of the shrouds around the mast and took the shroud line around the deadeye on the board fore to stern and made 3 lashing as per diagram above. I left a small gap on the lower lashing for the lanyard lines to go through to be tied off when I get to these one day. (I’m not sure if these are to big or not, However once done the lanyard line should cover the gaps. I attempted to keep each shroud tension the same (not so easy) and this was Grant guess work.
72AC52EA-A084-4833-8013-3F7E86E0F0AC.jpeg

Once all done I removed the copper wires and nails. I repeated the same for port and starboard.

I have thought to buy new rope as this rope frays and doesn’t give defined detail, however I am too far into the process. If I change now there will not be conformity across my ship. I am happy however it could be better.

I now have to wait for my new blocks and this is a good thing as I need to pull myself back a bit and finish so many aspects I am still working on.

Cheers
Grant
 
I said it earlier - sensible and methodical. It has to work - good work Grant!
 
Grant it looks like you have a very good system for dead eye alignment. However, judging from the skew lines on the board, you may need to adjust the chain strop on the bottom row of dead eyes to get a line matching closer to the ones on the temp backer board. At the same time you could pull some of the slack out of them as well.
 
Grant it looks like you have a very good system for dead eye alignment. However, judging from the skew lines on the board, you may need to adjust the chain strop on the bottom row of dead eyes to get a line matching closer to the ones on the temp backer board. At the same time you could pull some of the slack out of them as well.
Hello Daniel. Yep you are correct.....Eish. All my dead eyes can still rotate so I am hoping that when I do line them up when doing the lanyards all will come right. I completely forgot to do this when doing the shroud attachment. Tomorrow morning I will check in mean time I hold my breath...

Cheers
 
Ciao, Daniel. Sì, hai ragione..... Eish. Tutti i miei occhi morti possono ancora ruotare, quindi spero che quando li allineerò quando faccio i cordini tutto andrà bene. Mi sono completamente dimenticato di farlo quando facevo l'attaccamento della sindone. Domani mattina farò il check-in nel frattempo trattengo il respiro...

Saluti
Buon pomeriggio, potrebbe essere utile anche questo sistema

bigotte.jpg
 
Last edited by a moderator:
Buon pomeriggio, potrebbe essere utile anche questo sistema
Hello Frank- I did consider that system, however I felt that it left chance for variance from the line direction of the shrouds. I think a more experienced builder would have the confidence to do this or even judge it visually. I just need to be a little conservative in my options as I’m learning. Cheers
 
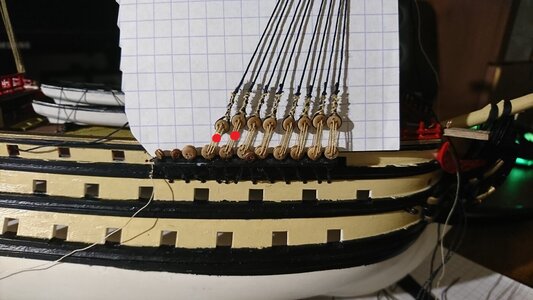
I used same method just in smaller scale, but fore some reasons last three deadeyes were under fixing points and i had to readjust them - much above orginal line. Maybe somebody knows why it happend. Red dots mark place before readjusting
View attachment 285403
View attachment 285404
Hello. Yes that is strange. Mathematically this should not happen if the measurements run correctly. Your channel appears in line so I don't have the answer for that. I have not seated the mast yet as I need to wait for some new blocks, however on a simple test run, these seem reasonable. When I tension the lanyards it looks like it will come out good. Holding thumbs....still a way off tho.
 
Good morning. Quarter Davits.

The fitment of the hinges for the quarter davits need to be installed prior to the completion of the dead eyes.....in my view. I think it will be difficult to do so once the shrouds are fitted.

Some details I would like to add to the kit instructions. In fact the whole rigging, block attachment, tackle etc need to be changed from the plans. The kit is devoid of such detail.

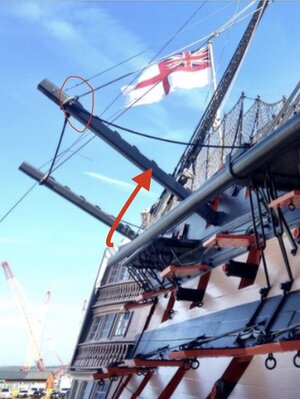
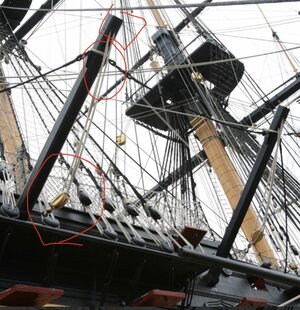
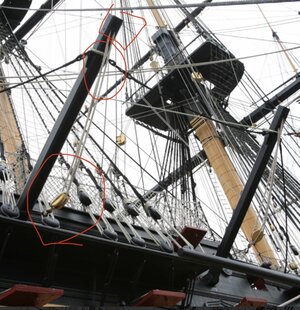
The real ship in Portsmouth:

5F2E1D66-FE62-4C48-9093-A9A8785AAED1.jpeg

363E948C-E15C-4D85-B2E0-536F48A1588A.jpeg

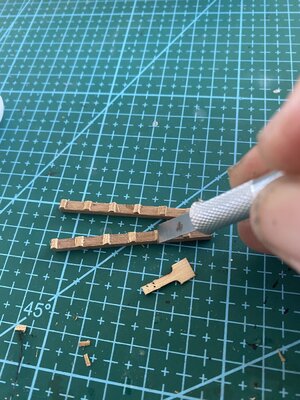
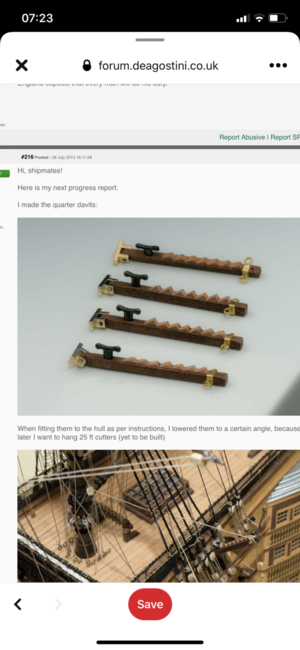
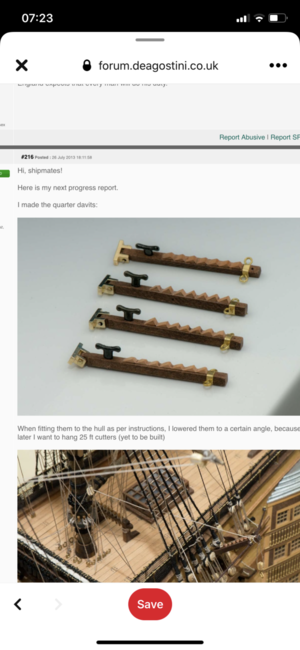
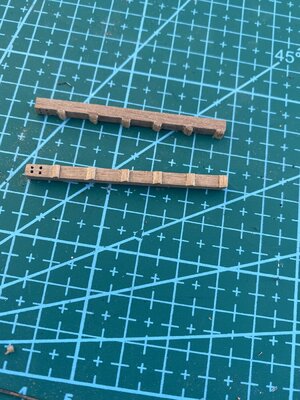
I have marked the changes- inserted the shaped ridges along each Davit, drill the four holes for the tackle lines in each, add the blocks and change the rigging and attachment there of for each Davit.

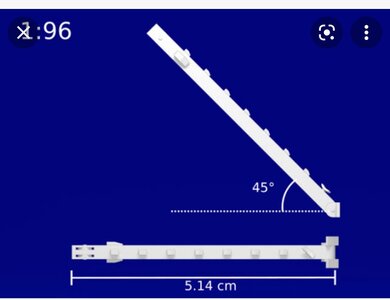
A really good example of what to achieve is from Model shape way 3D.
94116BF5-7D1D-4C80-8F2C-FDF387AA9EAE.jpeg
I started this process:

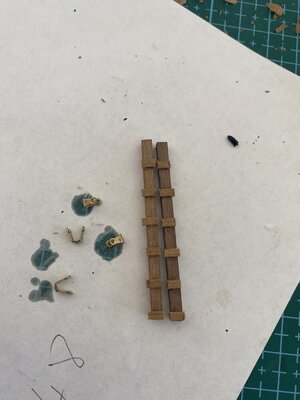
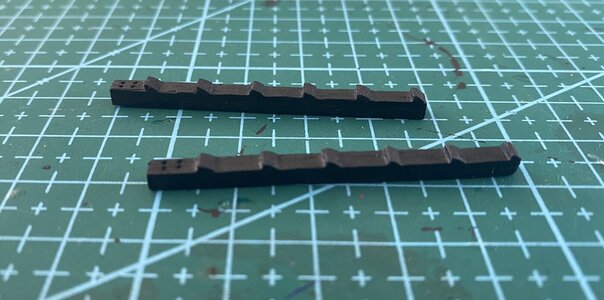
Measured the Davits per instructions for length and scale using 3x3 walnut. I scratched my left over wood and found some 2x1 walnut strips which I glued based the Davit . With an exacto flat blade a blade I cut the leading edge off to get the shape of each. The hinges I soaked in acid for 10min and will apply antioxidant flat black paint(it works for me as I don’t have brass black here in SA).
EC3DBB80-400F-44F1-8547-EA5599A6699C.jpeg
32F981B4-2B8E-4C09-980C-F5B8D728CA65.jpeg
I made a little stencil with 4 holes which I will use to try and get these drilled in correct place and consistent on each Davit-very little space to work with. I will use a 0.6mm drill bit....

......to be continued.

I need to pop into office for a while. Cheers Grant.

9620EF1E-5E81-44E0-863D-C750840DC1A6.png

C4BB462A-5C1F-401D-A29F-7ECECFB6140B.jpeg
 
Thanks guys- back at home and I will continue.
32C20F6B-F118-48CD-B787-D8E87B2B98F0.png
Apologies for this being on the previous attachment (small) but I have been looking at what Deagostini Victory makes a fair number of times during my build. It is also a sad representation of the Quarter Davits and I chose not to peruse this. I also made some more builders choices in that to simulate a small square on each 2x1 little strip was beyond me so I left them horizontal across the width of the Davit.

Sanded and ready for paint- my little stencil worked well- not 100%. Fit Grants Victory ;)
76FB52F0-F871-48DE-B428-D61E3FEE0E63.jpeg
I paint one directional long brush strokes and each coat a thin coat. 4 coats here. I normally lightly sand with 800grit each coat to smooth and push the paint into the wood, however these Davits are too small for that.
5A5C1F8D-F0F5-4FF0-8333-08C0E5351C50.jpeg
Base of the Davits done.
 
A historical indication is that these quarter Davits where not on the Trafalgar Victory. These came much later around 1806 (It is estimated). Actual proof of these Davits is only documented in 1864. However there are drawings by Christian
Schetky in 1824 which show these. So take your pick.

The stern Davits (which I am also planning to make) where only installed in 1920.

My poor Victory has a bit of that and a little of this as a historical accuracy ROTF.

I am planning to hang two of the launches from these and it is why I want to get the rigging correct.

Cheers
 
Un'indicazione storica è che questi quartieri Davits non erano sul Trafalgar Victory. Questi arrivarono molto più tardi intorno al 1806 (si stima). La prova effettiva di queste gru è documentata solo nel 1864. Tuttavia ci sono disegni di Christian
Schetky nel 1824 che mostrano questi. Quindi fai la tua scelta.

Le gru di poppa (che ho anche intenzione di realizzare) furono installate solo nel 1920.

La mia povera Vittoria ha un po' di questo e un po' di questo come accuratezza storica ROTF.

Ho intenzione di appendere due dei lanci a questi ed è per questo che voglio ottenere il sartiame corretto.

Saluti
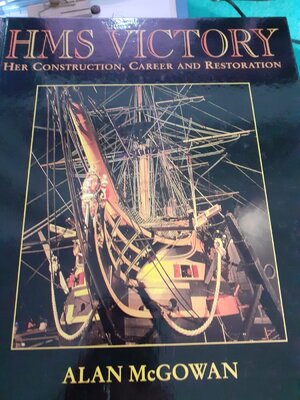
Buona sera , secondo me per aiutarti tantissimo sul Tuo modello dovresti procurarti questo libro

WhatsApp Image 2022-01-24 at 18.51.47.jpeg
 
Back
Top