USRC Harriet Lane Model Shipways 1:96 scale circa 1863

How did I
Love your Flying Cloud, Pete! This may be a silly question, but , will you copper the hull?

miss all this progress in between?
Yes. But I have as yet to decide what I want it to look like. The all shiny and new look bothers me as do all the rivets or divots at scale and the amount of attention the copper bottom garners in lieu of the rest of the ship.
 
Well shipmates, the smoking lamp is lit throughout the ship. And I think I hear my admiral parking her car. So, enjoy! More tomorrow. Promise!
 
There is such a world of difference between the 1950s iteration of the kit I built and what you are building. :eek: (Mine is a much smaller scale, solid hull, etc.)
And, by the way, I have yet to use, let alone own, an airbrush.;)
So far I give ya First Place MetalGold StarGold StarGold StarGold Star
 
That’s some really fine work Chuck. Clean, precise, symmetric. I enjoyed this recap of territory already captured and look forward to more!
Paul! You're too kind! Thank you! When I post about the coppering of the hull, you'll see that there are plenty of goofs, including the fact that the scale of the plates is 48" x 18"!
 
As promised.

If you're following this build, you know that I planned to plank the deck with 1/32" strips over the kit supplied deck. As I thought about this, it occurred to me to just plank with 1/16" strips because the end result would be the same, more or less, when it came to the thickness of the deck. So, that's what I did. Sitting here today, however, I wonder whether it would have been wiser to plank with 1/32" thick strips over the kit supplied deck to be certain of the locations of the king posts through which run chain supports for the weight of the paddle wheel assemblies. Too late for regrets! What's done, is done.
 
Last edited:
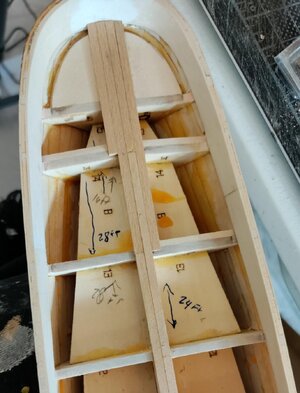
The first image shows the start of the planking. The numbers are the scale feet between the aft bulkheads o/c. Under the "I wish I had . . . ." column, I wish I had put in frames so that all of the centers were 24 scale feet on center. Most of the bulkheads forward of this section were 24 feet on center. The strips I glued to the bulkheads are the result of my imperfectly squared bulkheads. I had this problem aft (mainly). I'll do better next time!
Planking 1.jpg
 
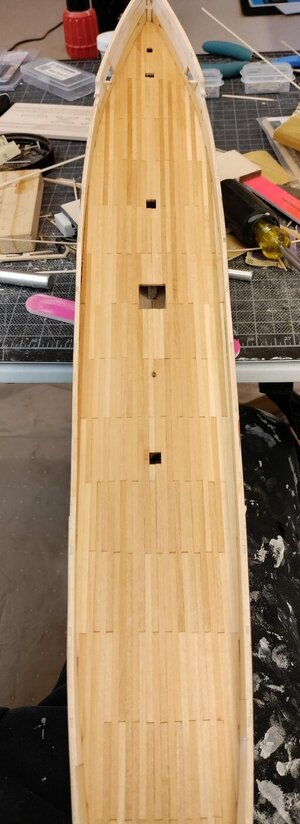
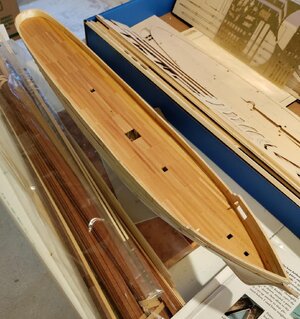
Here is the finished work. See the square openings? The big one in the middle is where the smoke stack will go. The one in front is for the bowsprit step. The other two are where the fore and main masts go - They probably shouldn't be square:oops:. I got going with the planking and just went with the shape of the openings without thinking about the shape of the things that go in the openings. Now I have square holes for round pegs! Except for the bowsprit step. I'm not worried about the smoke stack hole because the deck house will cover that mistake. I am hopeful that the mast holes will be covered by a mast foot. We'll see! I finished the wood with my usual tung oil.Planking 2.jpgPlanking 3.jpg
 
Oops! I mis-spoke. The second of the five holes (from forward aft) is for the Samson post part of the windlass. Also ok that it is square.;)
 
Putty and paint.

I have mentioned a couple of times that the kit, although a wooden ship model, seems to have been designed with plastic modeling techniques in mind. Almost every build log I've seen shows modelers trying to, and mainly achieving, a perfectly smooth hull with the liberal use of putty. The problem, I think, is that the precut planking at 1/32" thickness is too flexible to maintain proper shape between the bulkheads. The remedy is to fill the spaces between the bulkheads with balsa so that the thin planking material cannot flex and the end result is smooth without needing putty. The alternative is to plan the build using 1/16" thick planks. This alternative would mean diminishing each bulkhead by 1/32" so that the end result gives one a hull in the dimensions it was designed to have. Better still - do both. With the latter alternative one would have the benefit of being able to show the wood from keel to the top of the upper bulwarks. The colors might be shown based on the species of wood. In any event, the hull could be completed to design and perfectly smoothed by sanding - no putty.

My problem with putty/filler is that it never, in my limited experience, has the same surface as the wood it lays on. Once painted it is pretty clear, again in my limited experience, that the hull is a combination of putty and filler and wood. I am happy to own that the issue is me. I just don't know how to do it properly. Fair enough. But, I'm not trying to give the impression that my model is plastic. It's a wooden ship model. I want the viewer to understand that they are looking at a model made of hundreds if not thousands of pieces of hand-shaped wood.

Paint. Instructions 21 - 24 inclusive, describe the method and manner of painting the hull. The author of the instructions used a spray primer from the can. He also used canned spray paint for the black topsides. Other builders seem to have taken things a step farther and, because they could, airbrushed the ship. Here's what happened with my build:

By the time I got to the point of painting I had allowed the instructions and other build logs to get in my head so firmly that I stopped work in order to research and source an airbrush and a compressor. The prices for an airbrush kit are not crazy although one can decide to spend a fair amount on top quality. I was then reminded, I don't know how or why, that I can just go for it with the paint I have and do it by hand with a brush. Many of you have written - "It's your model build it how you want to build it." So, that's what I did!

When I bought the kit, I also bought the Model Shipways paint package for the Harriet Lane. I used MS primer and MS Hull/Spar Black for the upper bulwarks. Inboard the instructions call for white. I thought that white would be almost cartoonish in contrast with the black. I used MS Warm White instead and am happy with the contrast.

BTW - I have had less than satisfactory results with the MS primer. It does not bond well to the wood. I have found that it usually peels away in frighteningly large strips when I remove the waterline tape. All advice on better primers, better hull preparation, better technique is most welcome! Here's a shot of the primer peel.
Primer peel detail.jpgPrimer peel detail 2.jpg
 
Last edited:
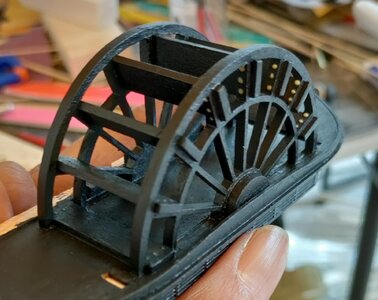
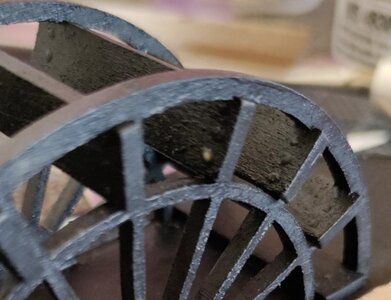
I learned a technique to simulate bolt heads from someone on the forum during my build of the Lovely Renee nee Fair American. The technique is to put a tiny dot of glue from the end of a toothpick or needle on the surface where the bolt would go. The dot, when dry, looked to be the color of the surface it was on and nicely simulated a bolt head. Now, I only ever did this on black surfaces and I used regular Titebond II wood glue.

Here's my effort to simulate bolts holding the paddles to the spokes of the paddle wheel. You can see the glue before and after drying.

Paddle detail 1.jpgPaddle detail 2.jpg
 
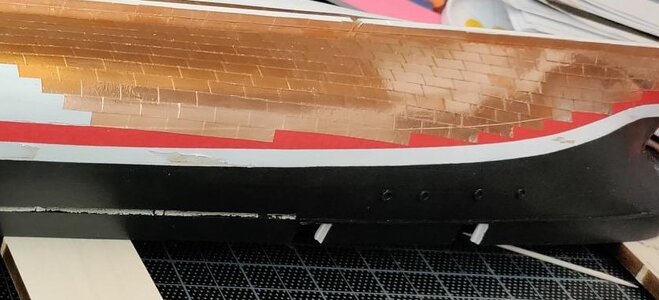
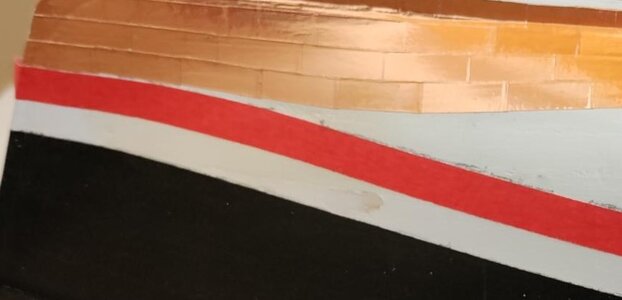
Paint or copper plate? The instructions tell the builder "The actual ship was probably copper plated, but this would look out of scale at 1:96." The author then recommends painting the hull with MS 4814 (copper paint). Happily, before I started the build, I did a lot of research to find what other modelers did with heir Harriet Lane builds. For the most part, I found that people followed the instruction's recommendation to paint the lower hull. Most choose a coppery red rather than metallic copper. Most used airbrushing to do the job. Of course, the airbrushing was done over a practically glass smooth hull.

Then, may blessings never cease, I found a build log where the modeler chose to go ahead and copper plate the hull. The result looked marvelous to me. So following his lead, I sourced copper tape from Blue Jacket Shipcrafters (Thank you BJS :)) in the narrowest width they had - 3/16". When it came time to do the work, I broke out the instruction book from my ModelShipways USS Syren kit (it's on the shelf waiting it's turn) to help understand the process. I also found a neat YouTube video on how to tape for gore lines. I then started the process of making the numerous 1/2" long copper plates. Yes, I know that the scale dimensions of 18" x 48" are incorrect on the width. As I recall my reading from a long discussion of copper plating on this forum the standard dimension was 12" or 16" by 48". So, yes, I took a shortcut and decided not to reduce the width of each plate by 1/16" actual, or 6" scale.

I did, however, decide not to try to simulate nail patterns. I thought that it would look too busy.
 
Last edited:
Your results look pretty nice! For scale I trust my Eyeball. A variation of "Occam's razor: "what looks right probably is"...
 
Back
Top