• LUCZORAMA SHIPWRECK SCAVENGER HUNT GIVEAWAY. 4 Weeks of Fun • 1 Legendary Prize ((OcCre’s Fram Ship)) • Global Crew Welcome!
    **VIEW THREAD HERE**

Willem Ruys 1:500 waterline model from scratch

  • Thread starter Thread starter MBJ
  • Start date Start date
  • Watchers Watchers 4

MBJ

Joined
Jun 5, 2024
Messages
33
Points
48

Dear all,
I recently started a 1:500 waterline model of Rotterdamsche Lloyd´s Willem Ruys, launched in 1947 for the Rotterdam - Jakarta service. I do not own a sophisticated workshop or fancy tools, but hope to get a proper result using basic techniques.
What I did so far:

1. found some deck plans
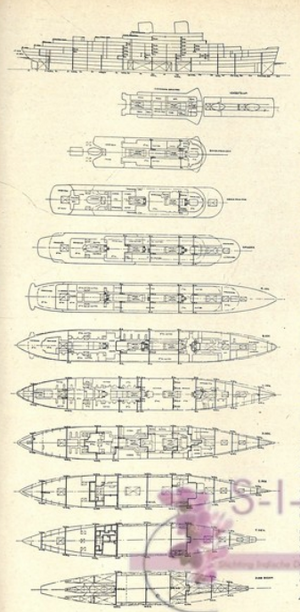
1717657719170.png
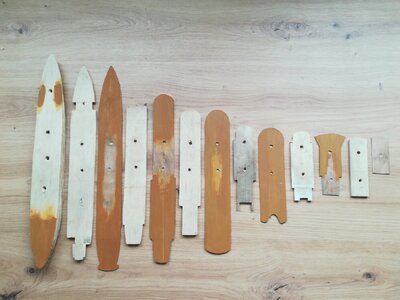
2. Scaled those I need for the waterline model, transfered them to plywood (1 and 4 mm, respectively), and cut the decks out with my jigsaw
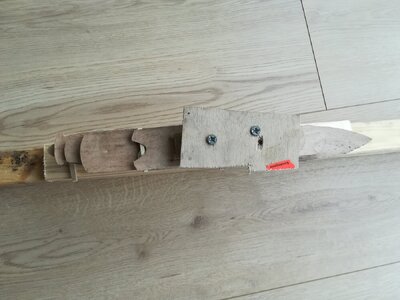
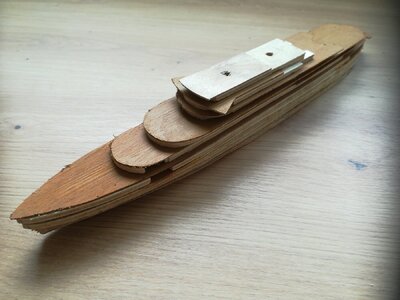
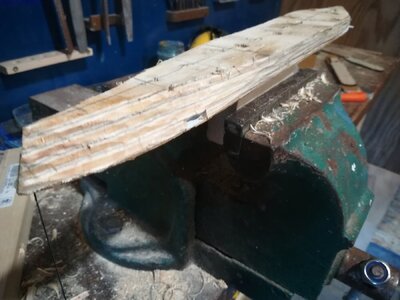
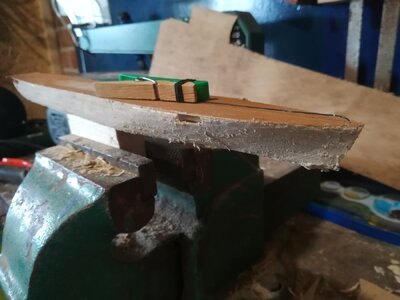
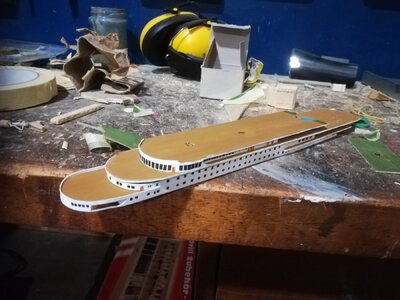
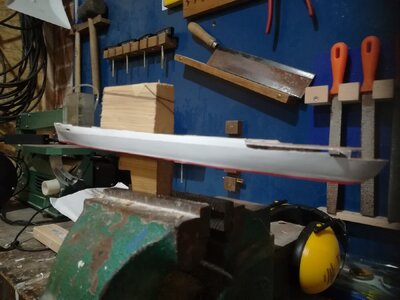
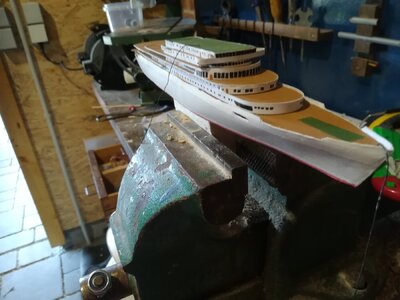
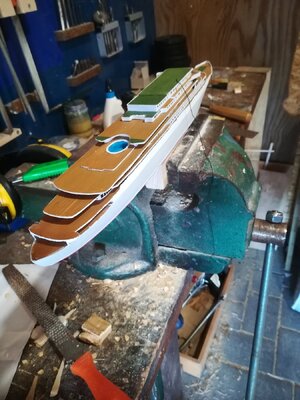
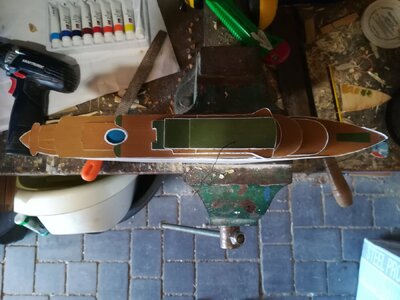
3. Arranged the decks and fixed them to a straight piece of wood. My idea is the following: I want to reproduce the sheer, and therefore need to bend the wood slightly. To achieve this, I added spacers beneath the lowest deck (to achieve the bend), arranged all decks, soaked them in water for a few hours, and then let them dry. My hope is that they´ll stay in shape after drying. (I´d be curious to know: Do you know other techniques to achieve this "controlled bending" of plywood?)The washers you see on the fotos allow the wood to dry faster. Here´s where the model stands today:
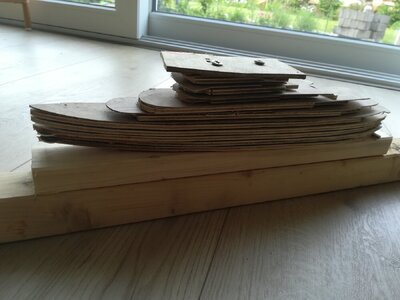
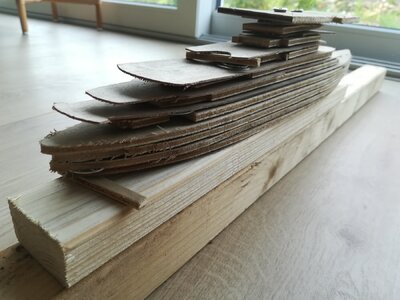
1717658207275.jpeg
1717658240349.jpeg
1717658263056.jpeg
You can see that when I drove the screws in (the holes will later be covered by the stacks) the whole arrangement twisted quite badly. I´ll need to see how to improve the technique for future models. For now, i just hope it will work out.
I´d be happy if you enjoy this tiny project! More posts to follow soon.
 
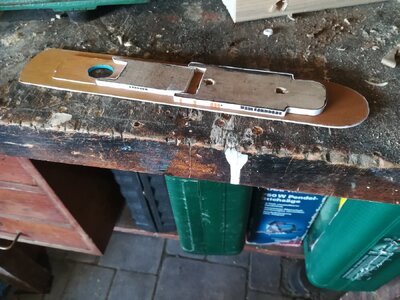
Here´s some update on the Willem Ruys. I started painting the decks and arranged them for one of the fotos.17179219661186609800756237163246.jpg 17179217783381532325032722176087.jpg
The sheer did not turn out perfectly, but ok - I´ll need to fix it to an even base to get an even "keel" in the end.
 
Last edited:
Interesting start (and project)
I am looking forward to the next working steps
 
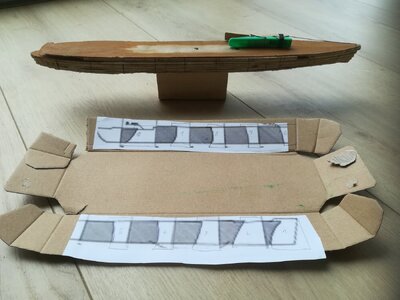
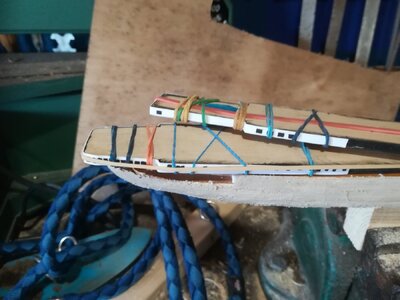
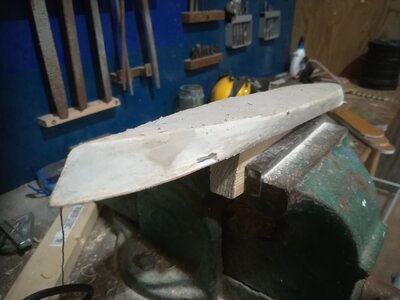
I found some time to carve the hull and arrange some of the decks. I decided to attach cardboard to the deck houses etc., on which I drew the windows before attaching them. It was not easy to figure out the windows arrangements on each deck, and in some spots I cheated a bit.
The pool is almost ready for a swim, as you can see below :)

IMG_20240616_155808.jpg

IMG_20240616_112243.jpg
 
Thanks for this model. I can remember admiring this ship at the dock in balboa panama. I hope you post the finished pictures
 
Thanks Bob! Definitely a beauty, especially with the decks descending so elegantly towards the stern before her refit. I sure will post more pictures when she's finished!
 
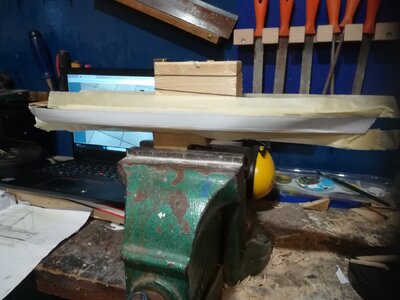
Just an addition on the problem of getting the sheer right when building with several horizontal layers: As I wrote earlier, the plan to wet and let dry the decks worked OK, but not great. I have tried around a bit and ended using a thick layer of filler, which I sanded on an even surface. That worked nicely. However, to have perfect control on the sheer I'll try something different next time. Still interested to hear if anyone has any ideas on that issue. Cheers!
 
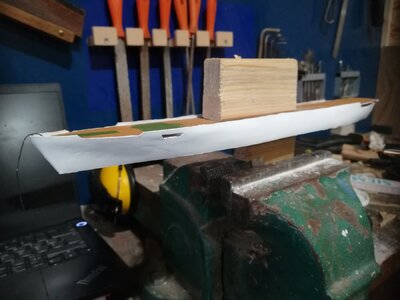
I finished sanding the hull and applied a layer of paper /cardboard to it. The reason for doing this is to resemble the bulwark at the bow (bulwarks used as reel). Unfortunately, cutting the cardboard afterwards proved to be a real pain, because it frays.
Afterwards I painted the hull - turned out nicely, I think. Tomorrow I will attach the decks - really looking forward to that!

IMG_20240626_211636.jpg

IMG_20240626_220709.jpg

IMG_20240626_230526.jpg
 
I attached the decks and will post some pictures tomorrow - currently drying.
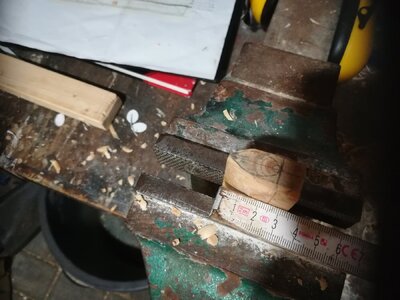
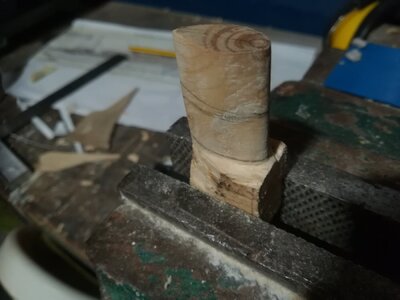
In addition I worked on some details (feels like pretty much everything is a detail in 1:500): hatches, masts and funnels. Especially the funnels were challenging, as I was not sure which material to use. Sawing several layers of Plywood - too small to saw. Cardboard/paper - not sufficiently stable. Soft wood - broke when I worked on it (funnels too small). In the end, I decided to carve them from hard wood. Let's hope they don't break when I saw them!

IMG_20240626_230037.jpg

IMG_20240627_204806.jpg
 
I added some more details: smokestacks, masts, hatches, vents etc. And some "rigging" - if I may call it that in this forum of professional builders of sailing ships with kilometers of rope on their models.
The small scale makes details really tricky, and the question is whether details actually improve the model or they look too unprecise and have the opposite effect. E.g. The vent at the main mast is only 5 mm in height - hard to get that perfectly "clean". How do you decide which details to include, and which to dismiss?

IMG_20240629_123742.jpg

IMG_20240629_123748.jpg

IMG_20240629_123812.jpg
 
The small scale makes details really tricky, and the question is whether details actually improve the model or they look too unprecise and have the opposite effect. E.g. The vent at the main mast is only 5 mm in height - hard to get that perfectly "clean". How do you decide which details to include, and which to dismiss?
Yes. An important question for modelers as scales get smaller. We fight against the limitations of physics. You're correct to consider how details look. I believe that the eye (and the attached brain) is the proper judge in these matters. In practice, when you look at a model, your brain is comparing the model to a full-size vessel. The smaller the scale, the farther away the model looks. At distance, you cannot see many details.

The final model is quite handsome but I think that using layers of plywood resulted in additional work. Regular wood (basswood, pine, pear, etc.) would be easier and neater to carve and would require less filler. Fair winds!
 
Thanks for your response, Andy. I agree with your opinion on details - and added a few more :)
The advantage of working with several layers in this scale, and with this type of ships, is that I can directly use available deck plans - one deck per layer. I will try out "regular" wood if I can find some in the right thickness.

IMG_20240701_230817.jpg

IMG_20240701_230812.jpg
 
The advantage of working with several layers in this scale, and with this type of ships, is that I can directly use available deck plans - one deck per layer.
My post was not as clear as I would have liked. I didn't mean to abandon the bread-and-butter approach but to substitute real wood* for the layers of plywood. Plywood is a very useful material but is very poor for carving. On this model of the Willem Ruys it may have been handy to use real wood for the hull and part of the superstructure and to use plywood for those decks with cantilevered areas. Have fun!

* I haven't thought of a better term. "Lumber" sounds a bit too big.
Right, thanks for clarifying! Bread and butter is definitely the right term here, and lumber indeed sounds inapproproiate at 1:500.
 
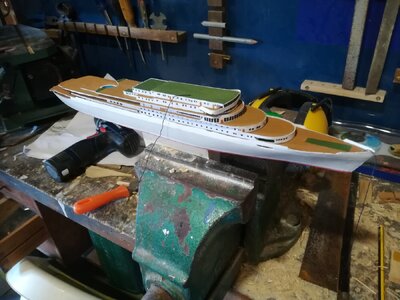
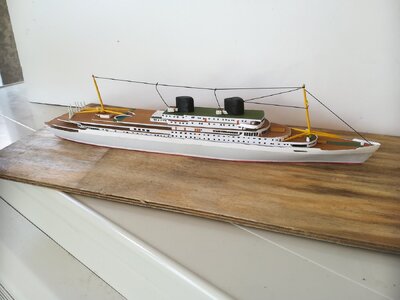
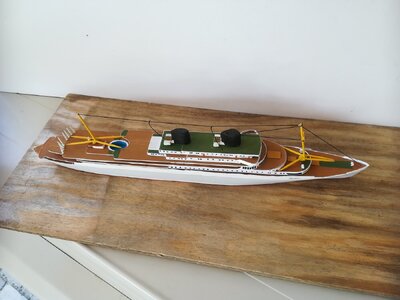
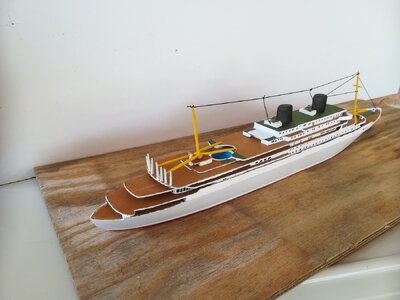
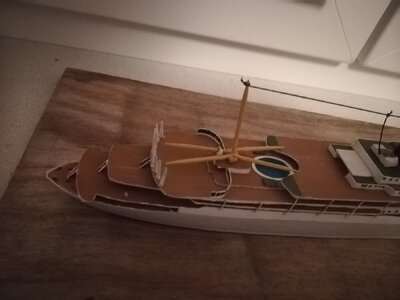
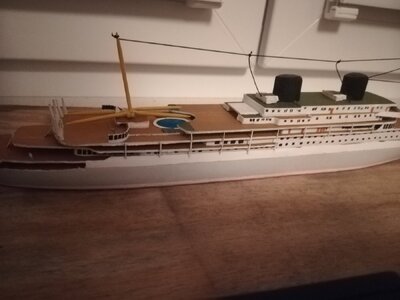
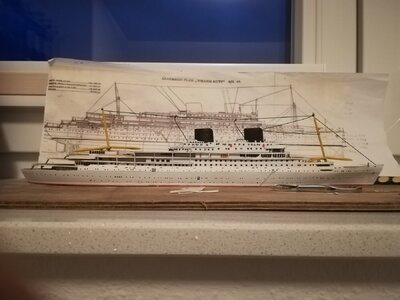
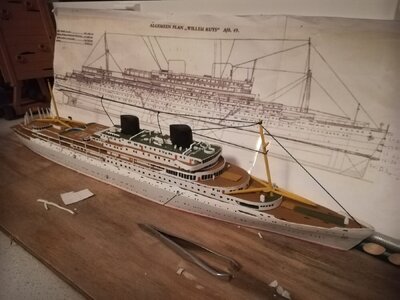
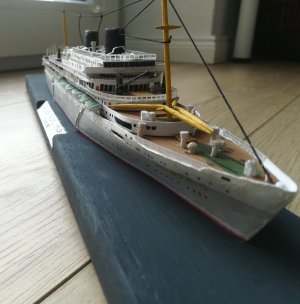
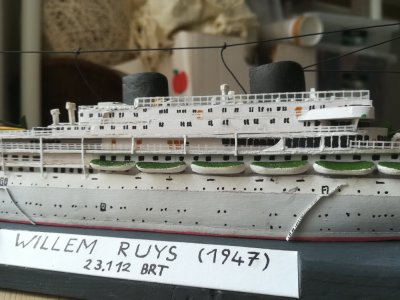
It took me forever to find the time and add the last details to my "Willem Ruys", but now it is finally completed. Here´s what I did after the last post:

1. Lifeboats: Individually sawn and carved, quite challenging at 18 mm length; I attached them to an invisible plastic "bulwark" to immitate them hanging from the davits.
2. Guardrails: I used the same plastic "bulwarks" and drew the rails with white varnish. Straight lines were fine, but I struggled wherever curves were required.
3. Stand

Thanks to all who showed interest in this little build, I hope you enjoyed it. I now started another 1:500 model: Stena Germanica (1987), to be posted in this forum soon.
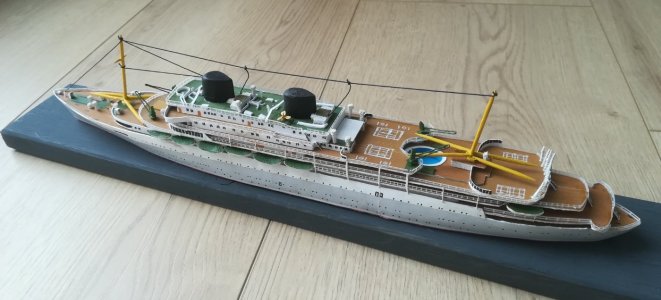
IMG_20250214_132741_.jpg

IMG_20250214_132808_.jpg

IMG_20250214_132858_.jpg

IMG_20250214_132928.jpg
 
Back
Top