• LUCZORAMA SHIPWRECK SCAVENGER HUNT GIVEAWAY. 4 Weeks of Fun • 1 Legendary Prize ((OcCre’s Fram Ship)) • Global Crew Welcome!
    **VIEW THREAD HERE**

Billings Boats Cutty Sark

Joined
Nov 4, 2024
Messages
27
Points
48

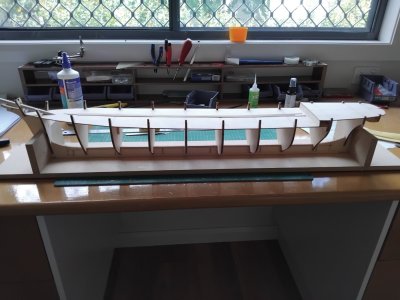
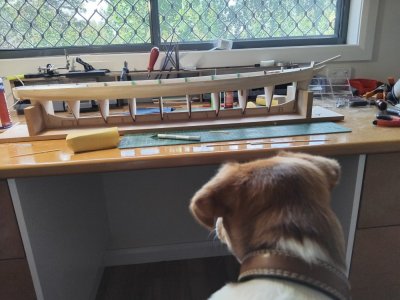
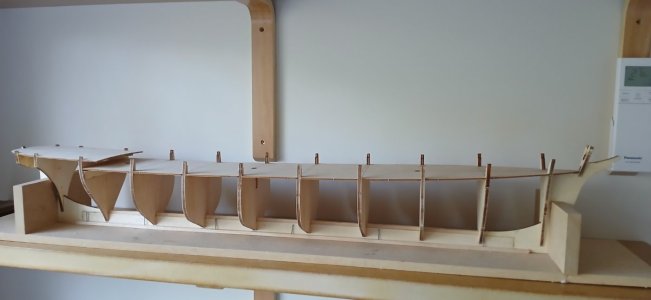
I am a recent arrival to this sight. I came looking for a forum on building the BB Cutty Sark. Found it in the excellent build of Domcee. Now it is time to get my own Cutty Sark project underway. This is all part of a cunning plan to ease into retirement. Little steps and so far so good. Mine is a new kit but nothing much has changed since Domcee opened his older kit. Maybe the laser cutting is improved. Same plastic blocks and deadeyes. That is going to grind my gears so the budget may have to run to wooden replacements. Like wise the plastic ships boats. At this stage the basic hull frame is assembled and that went together very easily. Now the decking and my first hiccup. Decking strips were supposed to be 3 x 0.7 according to the parts list. Unfortunately it is more like 3x 0.35 to 0.45. I don't like my chances of keeping the lines straight on such a long deck so I have order 4x1 from Modellers Central. I have found the excellent video series by John Allaprantis for this build so I'm feeling reasonably confidant. What could possibly go wrong.:oops::oops:
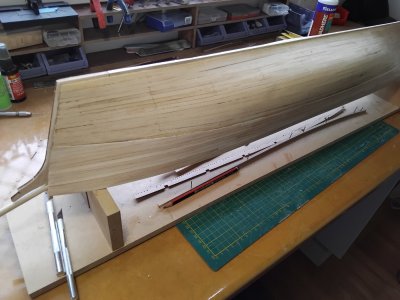
I shall try and maintain a build log on here. We will see how it all goes.1000000207.jpg1000000352.jpg
 
Have fun with this project (btw: I moved the topic to the log area)
 
Some additional thoughts, depending on how deep you want to go.
Get a copy of Longridge's Vol. 2 on rigging. Invaluable. Photos are hard to see but I copied some on my HP and they seem easier view.
I got Campell's rigging plan from the Greenwich museum. I had it enlarged on an engineering copier at my former work. Blurred some of the text, but as a reformed sailor it is easy to figure it out. Would consider selling mine if you are interested. It was very useful in giving proper dimensions of rigging components and is considerably more detailed than kit plans. Keep in mind they use circumference versus diameter in thickness.
My biggest mistake was not taking more time with the stern block of wood, so the decal does not fit like it should.
Please feel free to contact me with any questions.
Jim
 
Welcome aboard. If you need photos of detail give me a shout. A while back I made my large library of pics available and will do it again as needed.
 
I am a recent arrival to this sight. I came looking for a forum on building the BB Cutty Sark. Found it in the excellent build of Domcee. Now it is time to get my own Cutty Sark project underway. This is all part of a cunning plan to ease into retirement. Little steps and so far so good. Mine is a new kit but nothing much has changed since Domcee opened his older kit. Maybe the laser cutting is improved. Same plastic blocks and deadeyes. That is going to grind my gears so the budget may have to run to wooden replacements. Like wise the plastic ships boats. At this stage the basic hull frame is assembled and that went together very easily. Now the decking and my first hiccup. Decking strips were supposed to be 3 x 0.7 according to the parts list. Unfortunately it is more like 3x 0.35 to 0.45. I don't like my chances of keeping the lines straight on such a long deck so I have order 4x1 from Modellers Central. I have found the excellent video series by John Allaprantis for this build so I'm feeling reasonably confidant. What could possibly go wrong.:oops::oops:
I shall try and maintain a build log on here. We will see how it all goes.View attachment 484911View attachment 484912
Hi,

Just looked in and saw that there is another monster on the go!

Having been down to Greenwich and taken lots of pictures I am including the relevant photographs and reference images with a little bit of history as I go through each part of the build so that it will be helpful (and add a bit of interest) for any modellers building the Cutty Sark. The Billing kit is not the best but
I also looked through Jon's YouTube build and he has made a very nice job of his model following the kit instructions so it is a case of going as far as you want in the detailing but you will still end up with a really beautiful model in any case. I have gone down the route of trying to make my model more accurate and have probably gone OTT - which has been very trying at times, as you have probably gathered from my build log! I would certainly recommend buying the etched upgrades from HiSModel, they are super fine and so much better than the plastic bits in the Billing kit. I have a also just bought a set of the resin boats from Kevin at KTL at 1:75 scale and I will be building those up in the next couple of weeks. I am upgrading most of the parts as I go which does add-up, but I am happy to do so because this is a SSSSSLLLLLOOOOWWWW build so I am spreading the cost over a long time. I will be buying decent ropes when I get to the rigging and that will be quite expensive for this model (probably need 300 metres of ropes of different sizes).

Best advice I can give: Brassing the hull on my model was an absolute pain and I would not recommend going down that route unless you are prepared to do so! Jon coppered his hull with commercial plates which is perfectly fine but, the quick way is just to paint it! From my tests I would say that Tamiya's X-19 gold leaf paint was the best match to the bright brass work than any other paints that I tried and that would have been my choice - if I had not gone totally OCD on the brass work on my model!

Good luck with the build, drop me a note if you want any advice.

Dom
Thank you very much for mentioning us.
If you would consider buying some accessories for your Cutty Sark (Billing Boats) from us, use this link where we have everything for this model in one category, except photo-etchings we also sewing sails (which are not included in kit) and also much higher quality wooden blocks you can find everything here:
Good luck with the build.
 
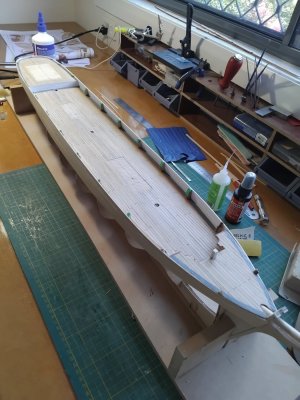
What have I let myself in for. Summer has arrived though with a vengeance so there is a good excuse to dive into my cave along with my offsider and turn on the aircon. I ended up getting some silver ash strips for decking from Modellers Central. Should have been easy as they are relatively close. Turned out very expensive. For some reason their site prices everything in US and the only indication is a little US flag on their home page. So half as much again came out of my account. Not happy. The strips were good and clean but would have been better still if they had been the 0.6 as advertised. Measured up as 0.37 to 0.4 . Had planned on doing caulking with thread like John A but didn't feel confident it would work with such thin stock. Ended up inking with texta after sealing the strips with sanding sealer to stop the ink bleeding. Laid the strips with white glue giving another coat of sanding sealer before sanding and giving a coat of scandinavian teak oil. rubbed it with a paper towel while still wet and I'm quite happy with the results. A nice natural colour. Started to put on nailing detail but decided at this scale it was going to look cluttered.
I must get a copy of the drawings from the UK. The research is proving half the fun. I have done a lot of virtual tours on youtube of the real ship plus there are so many images online. They do show up a lot of the short comings of the Billings kit. Like others I am modifying the foredeck and bulwarks. I am being sucked in.:D
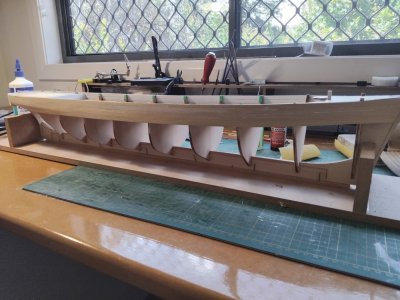
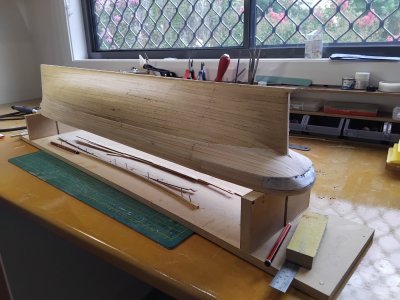
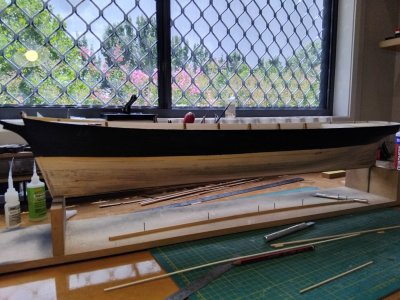
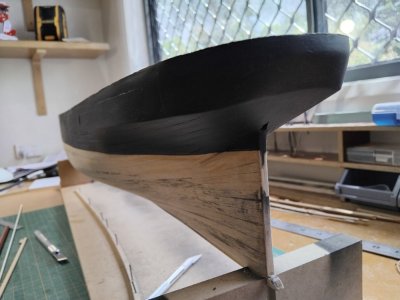
Started on some of the hull planking. The planking stock provided seems quite good with a good even bend along the length. Decided not to infill between the bulkheads even though there is quite a plank span between the bulkheads. Glueing up with white glue including on the seams. Having no fill behind allows me to line the seam up flush with a paper clip or if that is not possible I line them up with finger pressure a put a dab of CA on the seam . A quick squirt of activator and it holds while the white glue dries. Hate sanding so the neater I can get as I go along will save me down the track. My wife is looking at this monster and asking where I am going to display it.
So enough for today. It's beer oclock in this part of the world.

1000002416.jpg1000002417.jpg1000002425.jpg
 
Nice work! I struggled with the planking. The spacing of the bulkheads is much too large for such a long hull, I think Billing needs to double up the number of bulkheads which would stop the planks bowing and help get the shape of the bow and stern right. The stern really was a "pain-in-the-stern" to plank!

Thumbs-Up
 
Hi,

Just looked in and saw that there is another monster on the go!

Having been down to Greenwich and taken lots of pictures I am including the relevant photographs and reference images with a little bit of history as I go through each part of the build so that it will be helpful (and add a bit of interest) for any modellers building the Cutty Sark. The Billing kit is not the best but
I also looked through Jon's YouTube build and he has made a very nice job of his model following the kit instructions so it is a case of going as far as you want in the detailing but you will still end up with a really beautiful model in any case. I have gone down the route of trying to make my model more accurate and have probably gone OTT - which has been very trying at times, as you have probably gathered from my build log! I would certainly recommend buying the etched upgrades from HiSModel, they are super fine and so much better than the plastic bits in the Billing kit. I have a also just bought a set of the resin boats from Kevin at KTL at 1:75 scale and I will be building those up in the next couple of weeks. I am upgrading most of the parts as I go which does add-up, but I am happy to do so because this is a SSSSSLLLLLOOOOWWWW build so I am spreading the cost over a long time. I will be buying decent ropes when I get to the rigging and that will be quite expensive for this model (probably need 300 metres of ropes of different sizes).

Best advice I can give: Brassing the hull on my model was an absolute pain and I would not recommend going down that route unless you are prepared to do so! Jon coppered his hull with commercial plates which is perfectly fine but, the quick way is just to paint it! From my tests I would say that Tamiya's X-19 gold leaf paint was the best match to the bright brass work than any other paints that I tried and that would have been my choice - if I had not gone totally OCD on the brass work on my model!

Good luck with the build, drop me a note if you want any advice.

Dom
Thankyou for that Dom. Iam trying my best not to go OTT so will probably settle on a middle ground. I am at that age where you don't plant a little tree if you have plans to one day hang a hamock in it. I plan to copper plate the hull with Caldercraft plates as they don't have as many rivets on them as the Billings ones.. I am also looking at aging them, probably with vinegar and salt. The budget will blow out a bit getting upgrades but there are a range of choices out there. I justify such things by arguing it would be much dearer if I played golf. Just must not over use that one.
I am enjoying following your build so lead the way.

Ian
 
Thank you very much for mentioning us.
If you would consider buying some accessories for your Cutty Sark (Billing Boats) from us, use this link where we have everything for this model in one category, except photo-etchings we also sewing sails (which are not included in kit) and also much higher quality wooden blocks you can find everything here:
Good luck with the build.
Hi,
I think in time we will be talking.
Ian
 
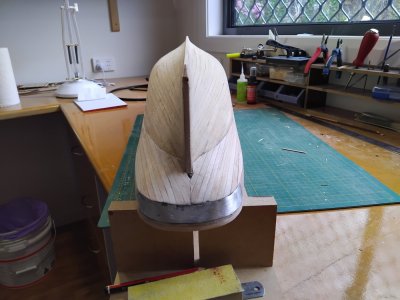
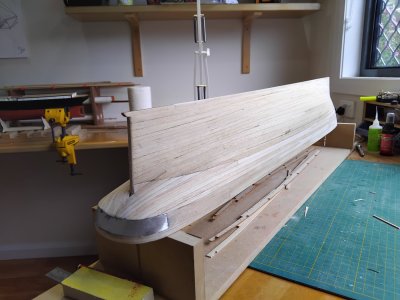
Into a new year and despite the challenges this kit throws up, progress is being made. The hull planking went well. I glued the plank edges together and took time to get them flush . Paper clips were good for this. The timber provided, while straight and even, was scored quite badly by saw marks. By the time you sand them out the original 2mm thickness is probably down to 1 mm. Overall the hull felt quite fragile, especially along the bulwarks. I decided to double plank down to the waterline. I had some nice clean sycamore 3x01000002961.jpg1000002962.jpg1000002963.jpg1000002964.jpg1000003088.jpg1000003089.jpg.45 strip from another kit and that did a nice job. It also allowed me to clad the stern with a more flexible material. A lot is happening in that stern area. I cheated on the most difficult area by cutting up a soft drink can and putting on a strip of aluminium. After all the real ship has a metal stern. Likewise I used the alumium for the freeing ports. Billings only have 4 aside instead of the correct 6. Next is the copper plating. I know, but I can be a glutton for punishment.
I have plans now from Greenwich and a copy of Longridge in the mail. The Campbell drawings were a bit dissapointing. Copies of copies and very hard to read the text. They look to be about 3/4 the size of the original drawings. Does anyone know if the full size ones are available.
Spotify podcasts and audio books will help with the plating.
 
Into a new year and despite the challenges this kit throws up, progress is being made. The hull planking went well. I glued the plank edges together and took time to get them flush . Paper clips were good for this. The timber provided, while straight and even, was scored quite badly by saw marks. By the time you sand them out the original 2mm thickness is probably down to 1 mm. Overall the hull felt quite fragile, especially along the bulwarks. I decided to double plank down to the waterline. I had some nice clean sycamore 3x0View attachment 494461View attachment 494462View attachment 494463View attachment 494464View attachment 494465View attachment 494466.45 strip from another kit and that did a nice job. It also allowed me to clad the stern with a more flexible material. A lot is happening in that stern area. I cheated on the most difficult area by cutting up a soft drink can and putting on a strip of aluminium. After all the real ship has a metal stern. Likewise I used the alumium for the freeing ports. Billings only have 4 aside instead of the correct 6. Next is the copper plating. I know, but I can be a glutton for punishment.
I have plans now from Greenwich and a copy of Longridge in the mail. The Campbell drawings were a bit dissapointing. Copies of copies and very hard to read the text. They look to be about 3/4 the size of the original drawings. Does anyone know if the full size ones are available.
Spotify podcasts and audio books will help with the plating.
Splendid!

Like the use of the can - proper recycling. I agree the wood was terrible in my kit as well but rather than sand down I made a slurry from wood filler by adding some isopropyl alcohol and water and rubbed it into the wood which is a very effective grain filler. I then gave that a gentle rub down with medium grit and filled any major bad areas with 2-part plastic wood filler and rubbed that back to shape. To finish the prep work I used a high build automotive primer (U-POL PCPG/AL) which is really good at filling in any minor blemishes and takes any paint really well.

I did buy a set of Campbell's drawings from RMG which are cleanly printed but they are not properly scaled. You can purchase correctly scaled drawings from RMG directly but they are quite expensive as they custom print them to order.

Dom
 
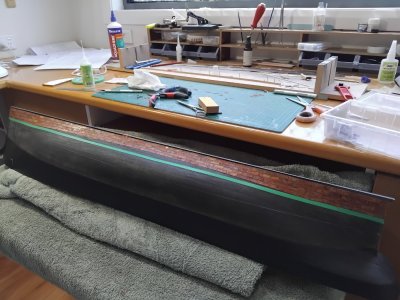
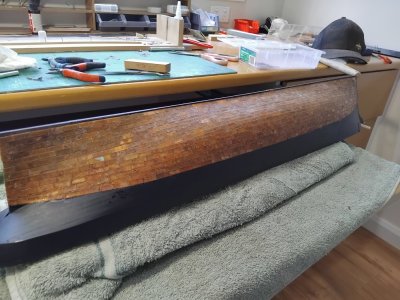
Progress is back on. After deciding on my plans for copper plates my Australia supplier was on holidays until late January so I went direct to the UK, getting Caldercraft 1:72 plates from Ship Wright Shop. Only took about 10 days. In the mean time I put some time in on my other project, Occre's Endurance. I have never done copper plating before and despite what some say about the job, I found it quite relaxing. Even therapeutic. It is certainly a different pace to my pre retirement life. I'm working up from the keel and dividing the area into 3 bands. Plates have been aged with vinegar and salt. Also I have been having a close scrutiny of the Campbell plans. Sorting out what needs to be added or modified from the basic Billings kit. I am starting to feel a sense of yes, I can make this work.
I have added one item to my bucket list. At the Maritime Museum at Darling Harbour in Sydney they have the Barque James Craig. She is 3 masts steel hull. Slightly smaller than the Cutty Sark but very similar fitout. They sell day trips on her of about 6 hours. Down the harbour and out the heads. It would be just the ducks nuts. Its got to happen.IMG_20250210_093556.jpg1000003844 (1).jpg1000003845 (1).jpg
 
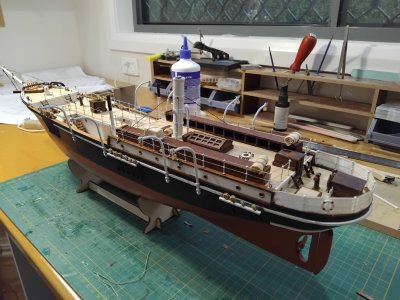
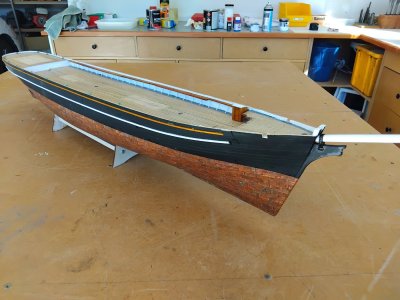
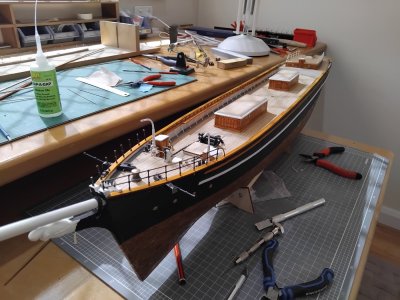
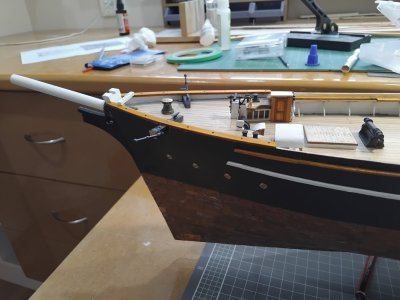
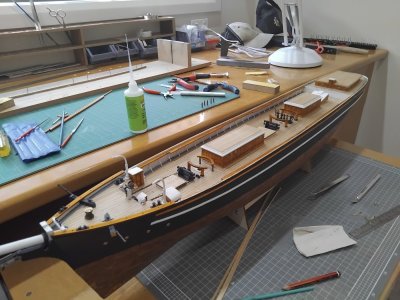
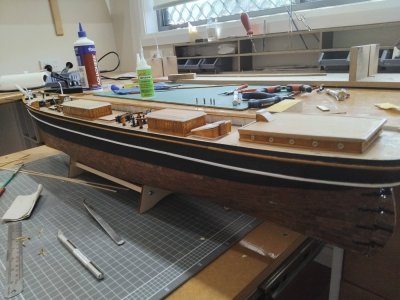
It is said fortune favours the brave but apart from a few times when this thing has tested me it's coming together and the summer has been fairly productive. Billing's with their scarcity of instructions invites you to innovate and that putting it mildly.1000004492.jpg
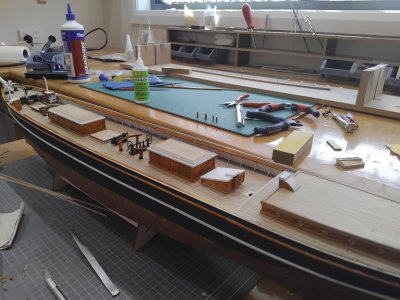
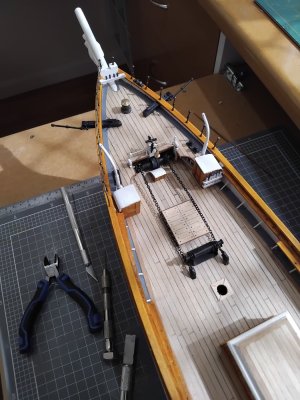
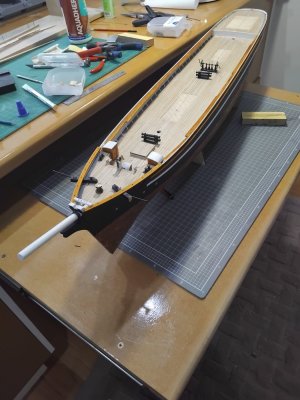
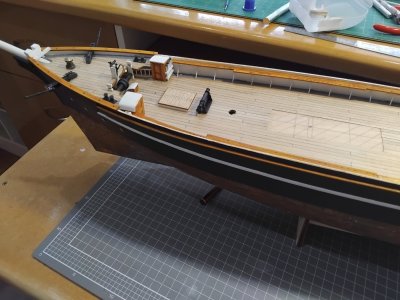
Both stem and stern have turned out to be correctly shaped to my eye at least. Bulwarks have been modified to more closely resemble the real deal. Onto deck fittings. I got a set of etchings and rigging blocks from Hismodels. Even from Australia it was hassle free and great service. I did however swallow hard when I saw how small a 2.5mm deadeye is. I have no idea how how threading those is going to go. Especially seeing as they won't be that accessible when attached to the railings. My wife has a large magnifying glas on a flexible stand with light. I may have to requisition it under emergency powers.

Work is coming to a halt in a couple of weeks. My attempt at retiring has failed miserably and I'm heading north to Canada for about 4 months work and then I shall try a further attempt at retirement. Thats the plan anyhow.1000004829.jpg1000005039 (1).jpg1000005040.jpg

1000004699.jpg

1000004700.jpg

1000004701.jpg

1000004828.jpg

1000004830.jpg
 
That’s looking very good, Ian. Just in case fidelity matters to you, there aren’t any davits at the fore end, they are more or less beside the aft cabin, placed so as to shift the lifeboats and Jolly. That said, the Cutty Sark went through many changes over the years so who knows, maybe it did have fore davits at some point.

Retirement is a strange beast. I thought I retired last August but came to realise I’d be bored out of my skull if I wasn’t still working one way or another. So I now do various, very different part time jobs. The major difference is that I love my work now, despite the horrendous pay cut :). As you may find, it’s not at all difficult to find yourself working far harder than you did previously!
I am in two minds on those davits Kevin. They are on the billings kit and are on the Campbell plans where they are described as anchor davits. But if I knock them off again they may stay off.
This is my office when I'm working. Believe me, it's a drug that's hard to give up.20190708_093810.jpg
 
Back
Top