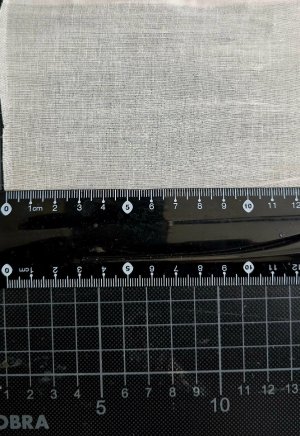
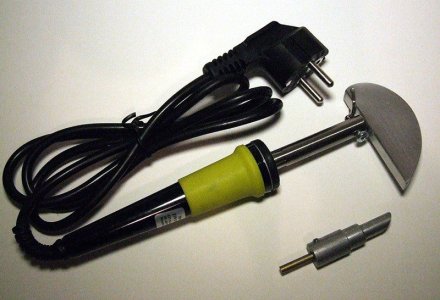
Now they are showingHello my friend,
can you see the pictures now? That would make me very happy. You are also welcome to comment on them.
Best regards
Günter
-

Win a Free Custom Engraved Brass Coin!!!
As a way to introduce our brass coins to the community, we will raffle off a free coin during the month of August. Follow link ABOVE for instructions for entering.
-

PRE-ORDER SHIPS IN SCALE TODAY!
The beloved Ships in Scale Magazine is back and charting a new course for 2026!
Discover new skills, new techniques, and new inspirations in every issue.
NOTE THAT OUR FIRST ISSUE WILL BE JAN/FEB 2026
You are using an out of date browser. It may not display this or other websites correctly.
You should upgrade or use an alternative browser.
You should upgrade or use an alternative browser.
Black Swan
- Thread starter GIG1810
- Start date
- Watchers 26
-
- Tags
- black swan occre
- Joined
- Dec 5, 2022
- Messages
- 1,119
- Points
- 443

Hey Alan,
Thank you very much for your answers. They really help me. I can of course make good use of your tips for the Athena. Your construction progress looks great and I'm always very curious to see how you show your next steps. Please continue by all means.
Best regards
Günter
Thank you very much for your answers. They really help me. I can of course make good use of your tips for the Athena. Your construction progress looks great and I'm always very curious to see how you show your next steps. Please continue by all means.
Best regards
Günter

- Joined
- Dec 5, 2022
- Messages
- 1,119
- Points
- 443

Hello friends,
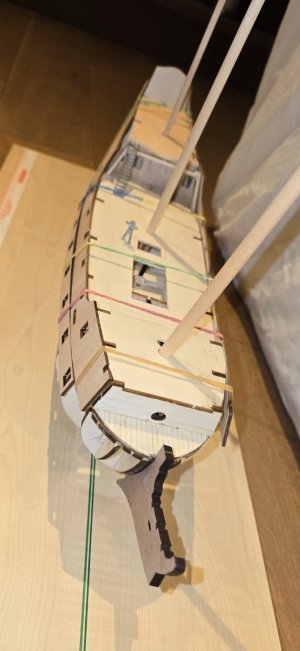
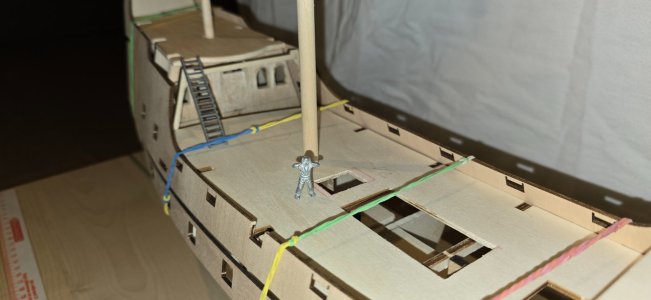
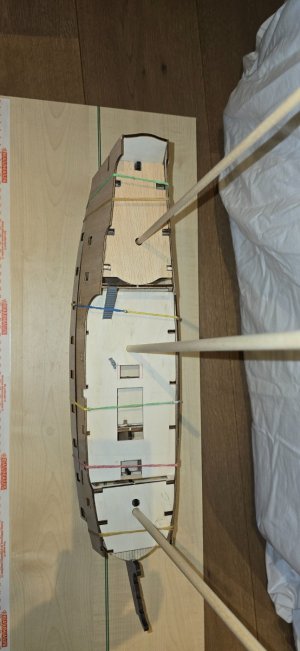
so, here I am again. I have of course been able to continue working on my model a bit, and I have to say there is a danger of addiction, because every step forward always gives me a great feeling of happiness. I had already forgotten how much fun it is to build a model. I haven't had much experience with wood so far, as I'm more of a plastic and iron person. There's still so much to do and I had decided to only extend the lower deck a little, as you can only see the gun barrels and not the inner workings of the deck. That's not a bad plan. However, I was wrong about the amount of work involved. This is madness. It's not just assembling and waiting for the glued wood to dry so that you can move on to the next step, but you sit at the model for a long time, pondering and trying out whether the planned implementation can really work. Especially on this small scale, every mistake is visible.
But enough rambling. What have I done on the ship so far?
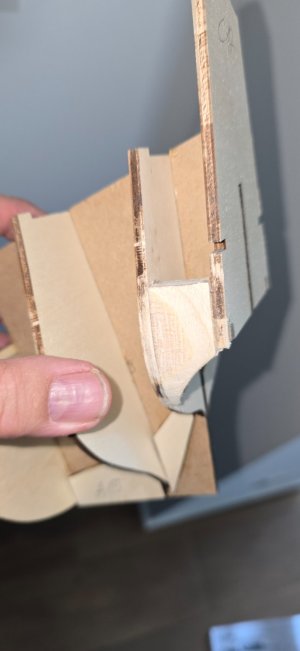
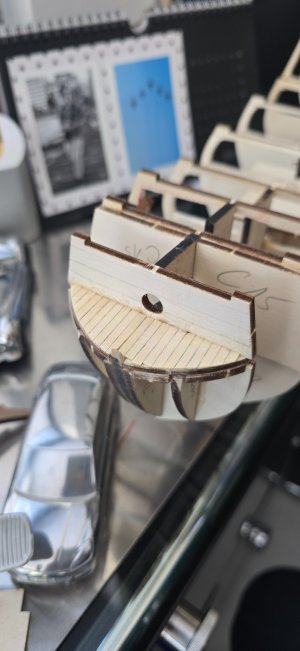
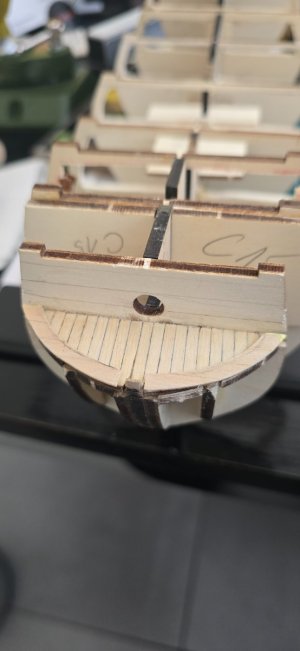
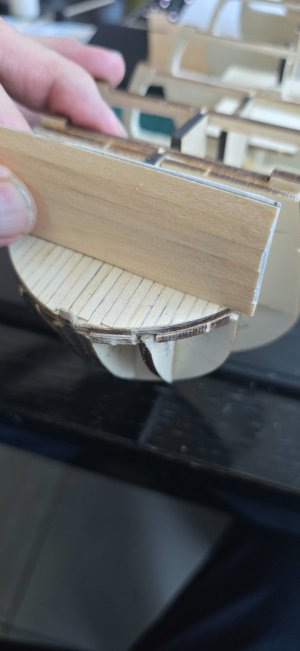
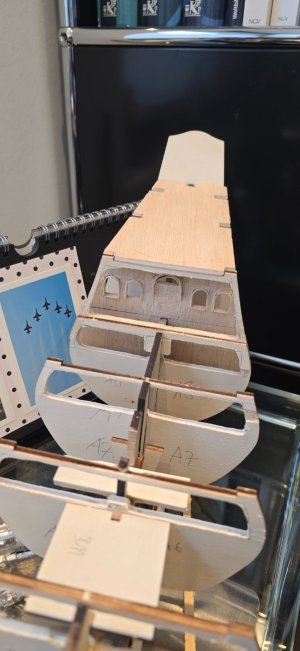
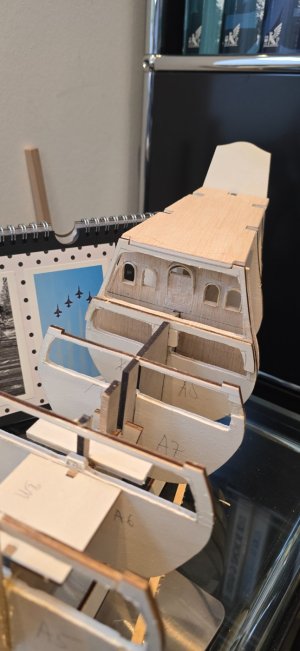
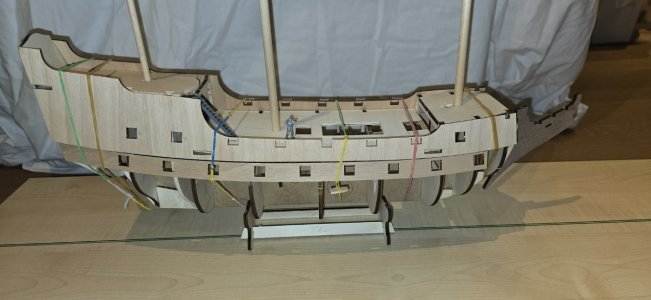
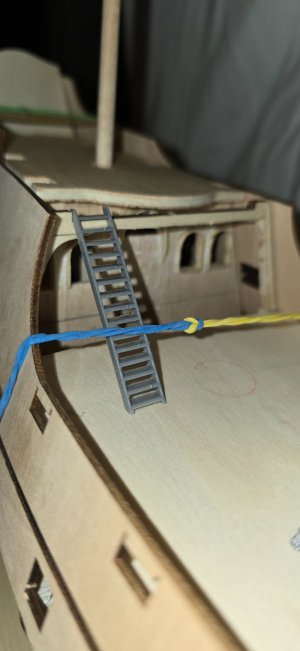
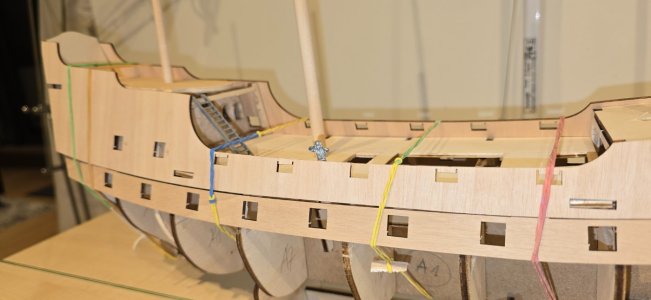
I had to cut out a new poop deck because the old one was so warped that I could no longer use it. I also had to draw and cut out a new additional bulkhead. This serves to represent the entrance and the windows (what a fiddly job ...). Then I had to sand down the stern so that I could create a good transition for the planking later.
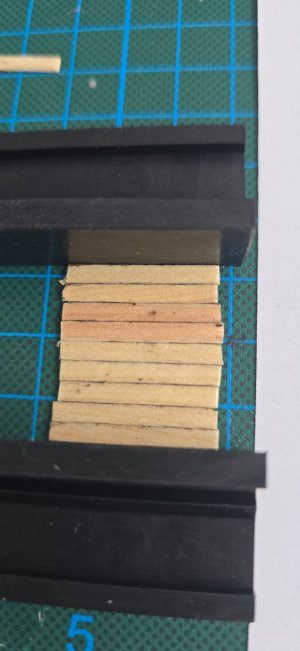
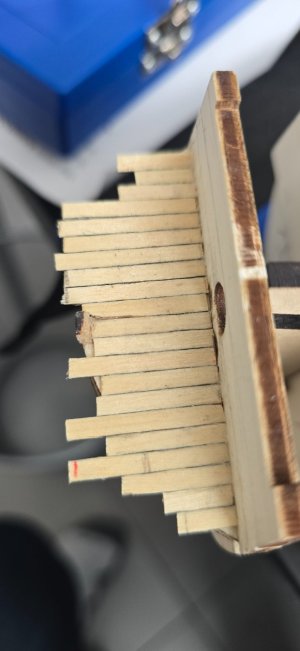
What a job. I also did my first caulking on the bow. I lined it with thin wood veneer (0.5 mm × 3 mm).
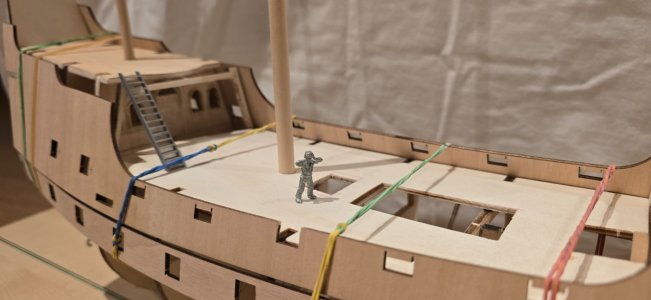
What worries me a lot, however, is that the lower gun ports of the lower deck are much too small and I have to rework them. They should have a size of 10 mm × 10 mm.
However, they are only 0.8 mm × 0.8 mm in size. The stamp frames are also missing. I would also have to cut and insert these again. The scaffolding bars don't fit either. They are much too short. Here, too, I would really have to make improvements. That means I have to build it from scratch.
I also have to make improvements to the main deck midships and bring the gun ports to the correct size of 10 mm × 10 mm.
The conversion can no longer be done according to the OcCre model instructions. Maybe later. It's becoming more and more of a scratch build!
But we are not giving up. Unfortunately, this will really prolong the conversion.
But enough whining. Here are a few more pictures
Best Regards
Günther


Last edited:
- Joined
- Dec 5, 2022
- Messages
- 1,119
- Points
- 443

Hi guys,
Since I'm still waiting for some wooden strips and therefore can't continue with the Athena, I've started to build the dinghy. Here are a few pictures. But what I noticed is the fact that it is completely out of scale and it just doesn't look that nice. What do you think?
Best regards
Günter
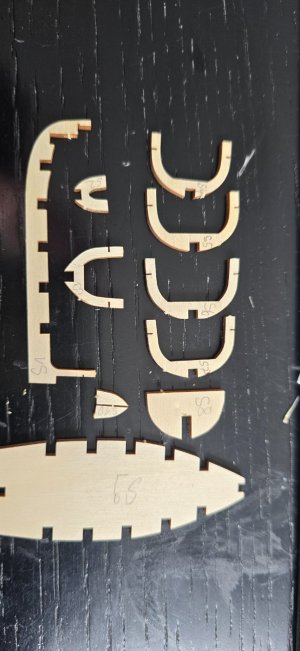
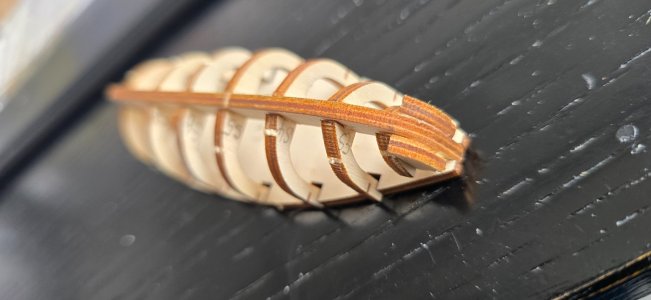
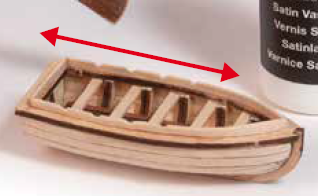
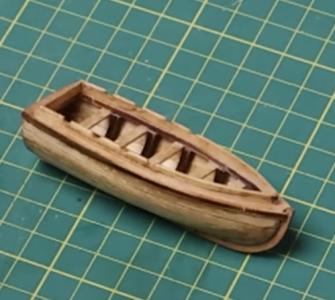
Since I'm still waiting for some wooden strips and therefore can't continue with the Athena, I've started to build the dinghy. Here are a few pictures. But what I noticed is the fact that it is completely out of scale and it just doesn't look that nice. What do you think?
Best regards
Günter


Last edited:
- Joined
- Dec 5, 2022
- Messages
- 1,119
- Points
- 443

Good morning boys,
I have already expressed my dissatisfaction with the kit. That's why I'm going to make it a bit better, I hope. For now, I've been busy waiting for my church wood to be delivered so that I can move and improve the lower piece ports. I ordered 2 mm thick and 30 cm long churchwood for this purpose. Then I had to painstakingly cut the strips and cut them to fit the upper wood of the Black Swan. This is what I did. Then sanded and adjusted. It just looks great. Now I just have to draw in the frames and the gun ports. So that they follow the deck, of course. That means they have to be cut straight. Then I still have to make the sill frames.
Oh yes, I think the dinghy is terrible. I've found a solution here too. Let me surprise you.
Here are a few pictures of my current progress.
Best regards
Günther

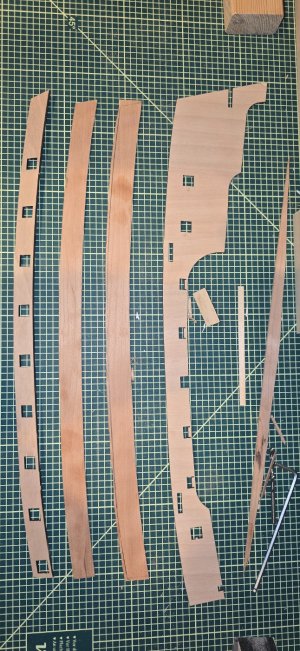

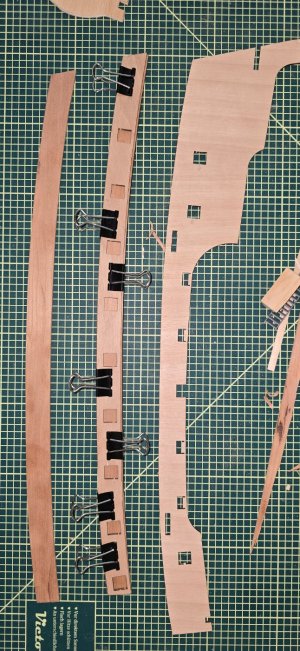

I have already expressed my dissatisfaction with the kit. That's why I'm going to make it a bit better, I hope. For now, I've been busy waiting for my church wood to be delivered so that I can move and improve the lower piece ports. I ordered 2 mm thick and 30 cm long churchwood for this purpose. Then I had to painstakingly cut the strips and cut them to fit the upper wood of the Black Swan. This is what I did. Then sanded and adjusted. It just looks great. Now I just have to draw in the frames and the gun ports. So that they follow the deck, of course. That means they have to be cut straight. Then I still have to make the sill frames.
Oh yes, I think the dinghy is terrible. I've found a solution here too. Let me surprise you.
Here are a few pictures of my current progress.

Best regards

Günther


Last edited:
- Joined
- Dec 5, 2022
- Messages
- 1,119
- Points
- 443

Hi guys,
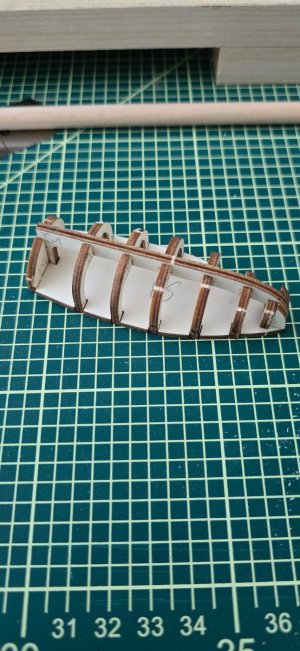
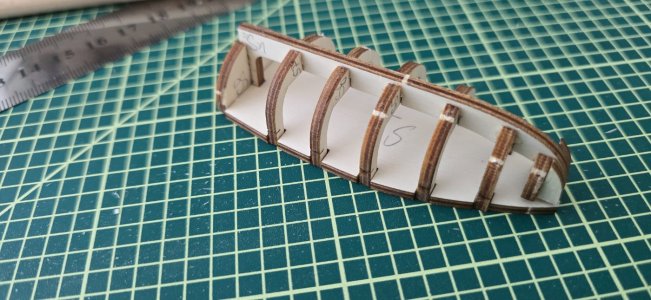
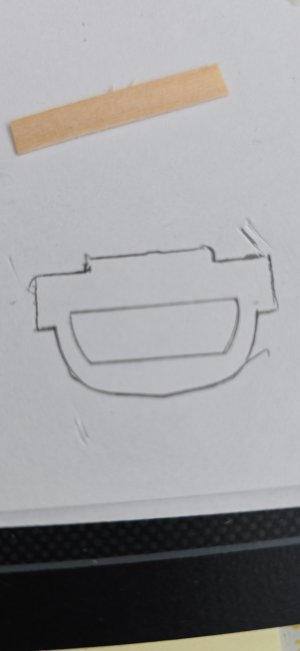
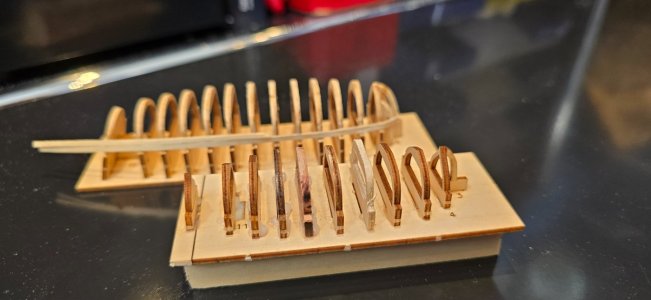
As you know, I am more than dissatisfied with the dinghy. It really doesn't fit into a beautiful ship like the Athena will be. That's why I took the trouble to see if I had anything in my box of leftovers that I could use for the dinghy. Because anything is prettier than this bulky dinghy.
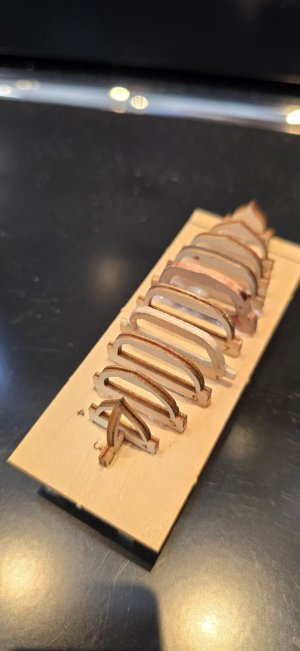
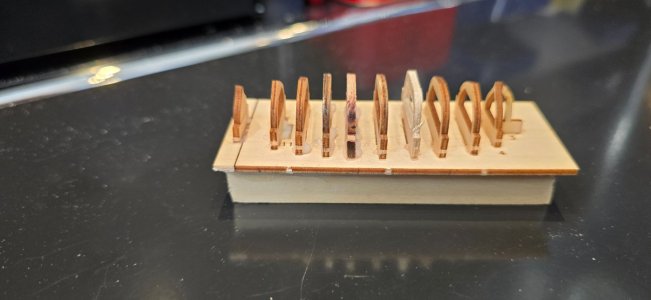
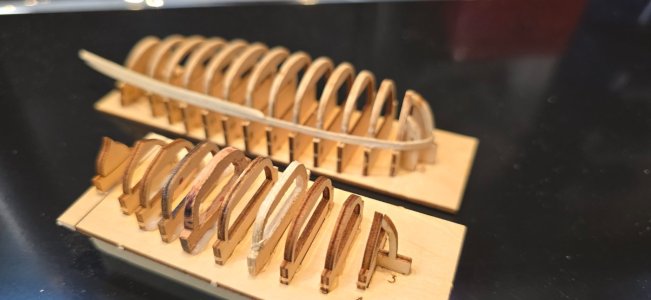
I had a plan of an 18-foot cutter scaled to 1:75 and then glued everything to 2mm church paper and tried to cut it out. It actually worked quite well. However, I had to build 6 new frames because they always broke when I cut them out. I don't have much experience with wood yet.
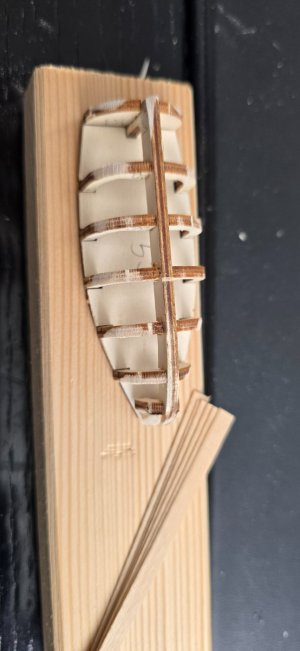
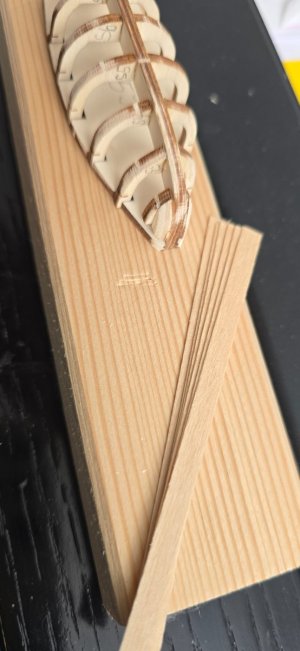
Then I built a ramp and put all the frames in a row one behind the other. I glued them in place and now they have to dry so that I can attach the 2 mm wide maple strips tomorrow. I hope I can manage that. Unfortunately, I'm not as fast as I had hoped. My strips for the Athena won't arrive until next week. Until then I'll take care of my dinghy.
I'm practically going to build two models, one model in one model. The Athena and her dinghy.
The dinghy will get a lot of accessories. A mast, oars, bowsprit, anchor, sails and ropes. Of course a bottle of rum and a sailor's box.
Here are a few pictures....
Best regards
Günther


- Joined
- Dec 5, 2022
- Messages
- 1,119
- Points
- 443

Hi guys,
I thought I would start the 18 foot cutter with the dinghy. But I'm still missing a few things. I would like to start with the rudder rims and the stern tiller. These are my first attempts.
The oars have a length of 4.3 cm and a width of 0.65 mm.
The stern tiller has a length of 2.5 cm and a width of 0.70 mm.
The finishing touches are still missing and will be done. Take a look at the pictures.
I still had one of the plastic straps in my leftover box and used it as a model. I am very pleased with the way the rudder straps turned out.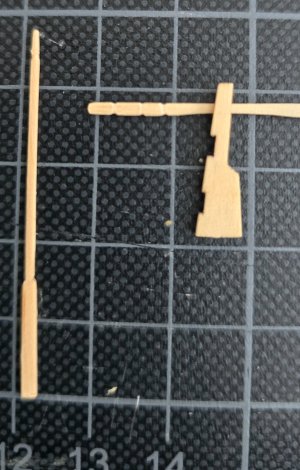
Best regards Günther
I thought I would start the 18 foot cutter with the dinghy. But I'm still missing a few things. I would like to start with the rudder rims and the stern tiller. These are my first attempts.
The oars have a length of 4.3 cm and a width of 0.65 mm.
The stern tiller has a length of 2.5 cm and a width of 0.70 mm.
The finishing touches are still missing and will be done. Take a look at the pictures.
I still had one of the plastic straps in my leftover box and used it as a model. I am very pleased with the way the rudder straps turned out.


Best regards Günther

- Joined
- Dec 5, 2022
- Messages
- 1,119
- Points
- 443

Ahoy, gentlemen,
I've been able to build a bit more on the Athena. As I'm still not sure how to build the lower deck, I've turned my attention to the dinghy (lifeboat). That's a real piece of work ;-) Everything is so small. But I don't want to complain and am doing my best.
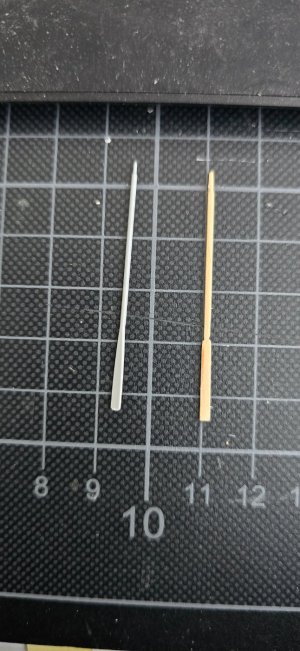
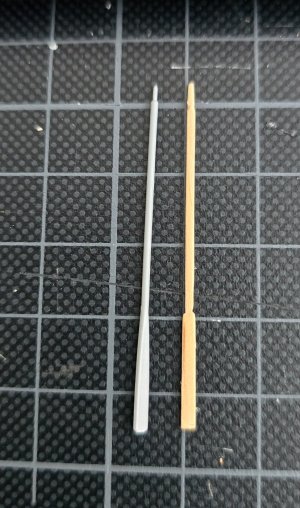
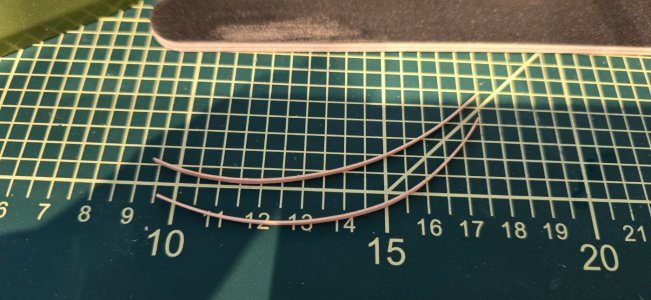
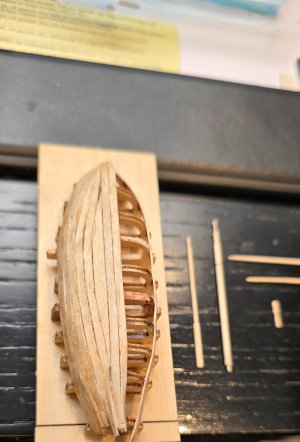
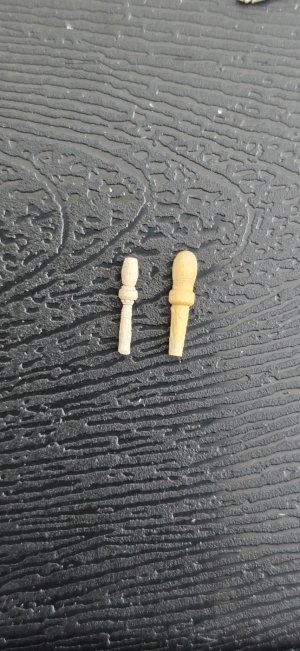
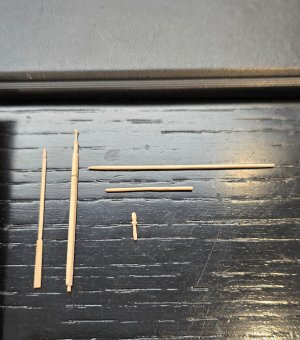
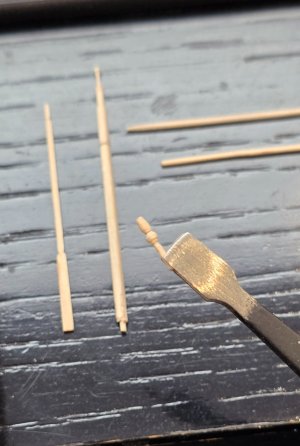
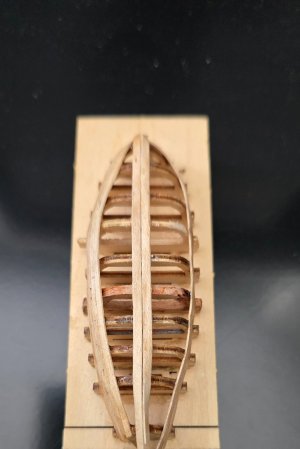
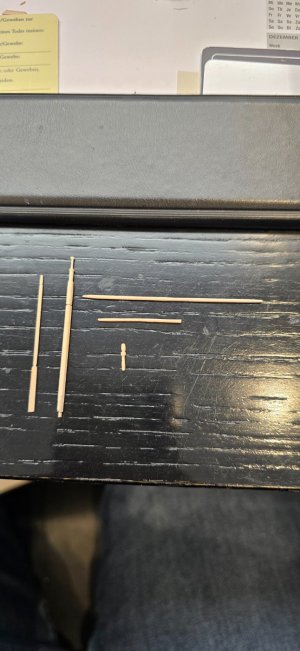
I've started with the hull planking and one half is finished. I still have to plank the other half. Then I've finished the main mast, bowsprit and sail mast. I sanded everything down and rounded it off. I'm going to sew a fabric sail on the sail mast. I also tried to make a nail in a slip. It was really not easy and I think I broke 10 or 20 toothpicks. But look at the pictures. I hope you like them. Unfortunately I'm very busy at work at the moment and so the construction of the Athena will be delayed a bit. But I'll persevere and finish it. I promise,
Best regards
Günther

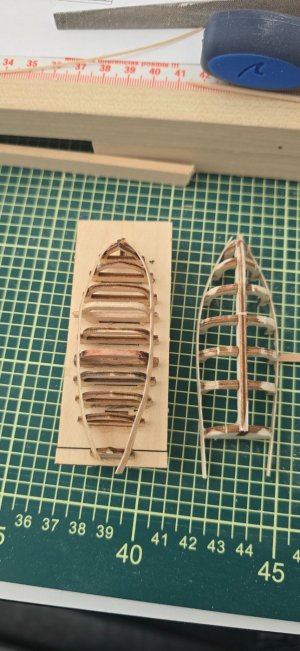
Here I have bent the planks!
You can see the differences in the document nails.
On the left-hand side is my finished nail!
On the right side is the purchased nail.

I've been able to build a bit more on the Athena. As I'm still not sure how to build the lower deck, I've turned my attention to the dinghy (lifeboat). That's a real piece of work ;-) Everything is so small. But I don't want to complain and am doing my best.
I've started with the hull planking and one half is finished. I still have to plank the other half. Then I've finished the main mast, bowsprit and sail mast. I sanded everything down and rounded it off. I'm going to sew a fabric sail on the sail mast. I also tried to make a nail in a slip. It was really not easy and I think I broke 10 or 20 toothpicks. But look at the pictures. I hope you like them. Unfortunately I'm very busy at work at the moment and so the construction of the Athena will be delayed a bit. But I'll persevere and finish it. I promise,
Best regards
Günther


Here I have bent the planks!


You can see the differences in the document nails.
On the left-hand side is my finished nail!
On the right side is the purchased nail.


Good evening Gunther. These little boats are quite the challenge and you are owning it. Cheers GrantAhoy, gentlemen,
I've been able to build a bit more on the Athena. As I'm still not sure how to build the lower deck, I've turned my attention to the dinghy (lifeboat). That's a real piece of work ;-) Everything is so small. But I don't want to complain and am doing my best.
I've started with the hull planking and one half is finished. I still have to plank the other half. Then I've finished the main mast, bowsprit and sail mast. I sanded everything down and rounded it off. I'm going to sew a fabric sail on the sail mast. I also tried to make a nail in a slip. It was really not easy and I think I broke 10 or 20 toothpicks. But look at the pictures. I hope you like them. Unfortunately I'm very busy at work at the moment and so the construction of the Athena will be delayed a bit. But I'll persevere and finish it. I promise,
Best regards
Günther
View attachment 519585
View attachment 519587
Here I have bent the planks!
View attachment 519586
View attachment 519593
You can see the differences in the document nails.
On the left-hand side is my finished nail!
On the right side is the purchased nail.
View attachment 519590
View attachment 519592
View attachment 519594
View attachment 519588
View attachment 519589
View attachment 519591
- Joined
- Dec 5, 2022
- Messages
- 1,119
- Points
- 443

Ahoy sailors,
I was able to work a bit on my little dinghy again and after endless adjusting of the planks and sanding, sanding, I managed to finish planking the lifeboat. I had to fit each plank individually. I had to construct the keel and the bow myself. The keel has a height of 0.8 mm
The planks are made of 2 mm maple and have a length of 8 cm and a thickness of 0.5 mm. It was not easy to attach them and keep them in place. I then sealed some small gaps in the hull with wood filler and sanded them again. Last but not least, the hull was painted with a matt clear varnish.
Here are a few more pictures....
Best regards
Günther
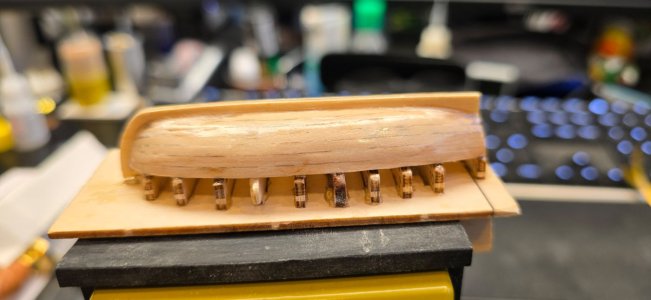
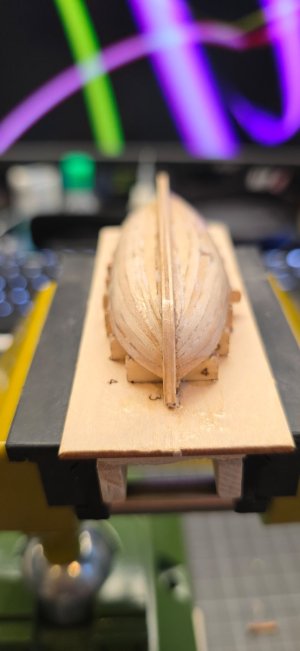
Here the hull is still very shiny because I painted it with clear varnish in the first coat.

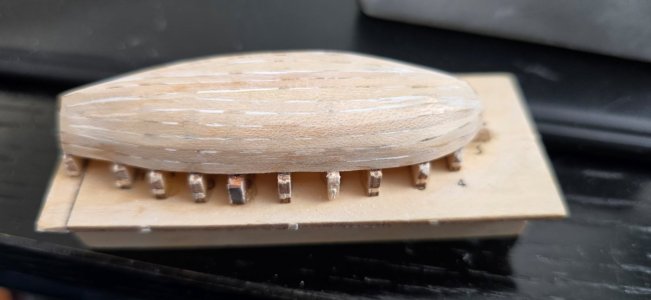
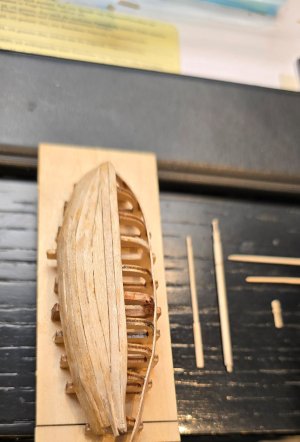

I was able to work a bit on my little dinghy again and after endless adjusting of the planks and sanding, sanding, I managed to finish planking the lifeboat. I had to fit each plank individually. I had to construct the keel and the bow myself. The keel has a height of 0.8 mm
The planks are made of 2 mm maple and have a length of 8 cm and a thickness of 0.5 mm. It was not easy to attach them and keep them in place. I then sealed some small gaps in the hull with wood filler and sanded them again. Last but not least, the hull was painted with a matt clear varnish.
Here are a few more pictures....
Best regards
Günther


Here the hull is still very shiny because I painted it with clear varnish in the first coat.


Last edited:
- Joined
- Dec 5, 2022
- Messages
- 1,119
- Points
- 443

- Joined
- Dec 5, 2022
- Messages
- 1,119
- Points
- 443

Hi guys,
unfortunately I can't do anything at the moment! The job comes first. Nevertheless, I have been able to work a bit on the small lifeboat.
It's so tiny and I can only work with glasses, which is really difficult. Nevertheless, I'm trying my best!
Best regards
Günter
P.S.
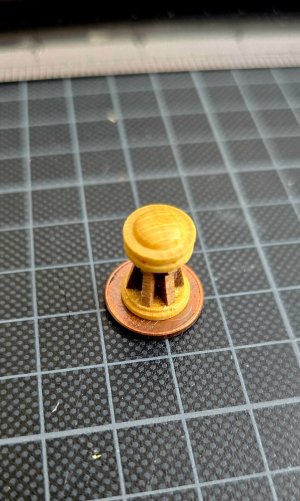
I have also finished the anchor capstan for the Athena.
It is already quite small, 1.5 cm high and 0.8 mm in diameter. It still has to be painted and fitted with a metal strap and re-hook.
Cheers Günther
Here are the photos and see for yourself.
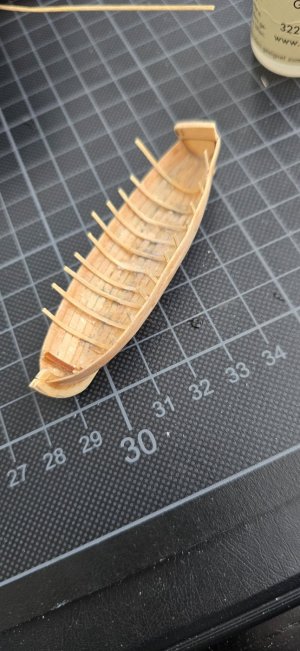
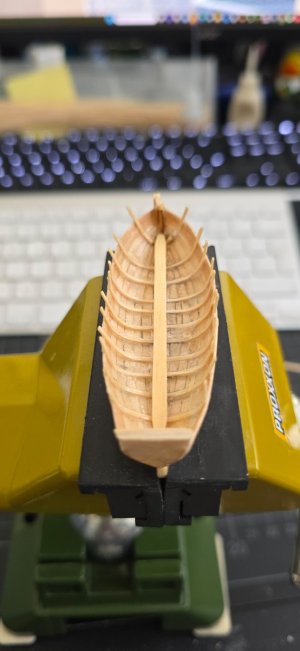
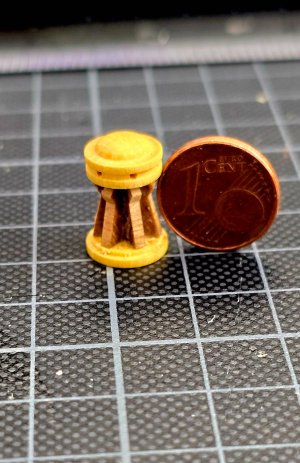
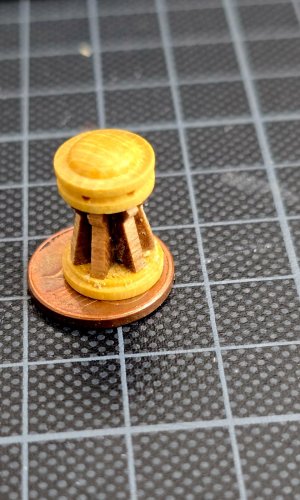
unfortunately I can't do anything at the moment! The job comes first. Nevertheless, I have been able to work a bit on the small lifeboat.
It's so tiny and I can only work with glasses, which is really difficult. Nevertheless, I'm trying my best!
Best regards
Günter
P.S.
I have also finished the anchor capstan for the Athena.
It is already quite small, 1.5 cm high and 0.8 mm in diameter. It still has to be painted and fitted with a metal strap and re-hook.
Cheers Günther

Here are the photos and see for yourself.


Good afternoon, the “life boat” looks really good. The rib approach is difficult but makes for a more realistic and presentable boat. Cheers Grant
PS that is a tiny capstan.
PS that is a tiny capstan.
- Joined
- Dec 5, 2022
- Messages
- 1,119
- Points
- 443

Dear Sirs,
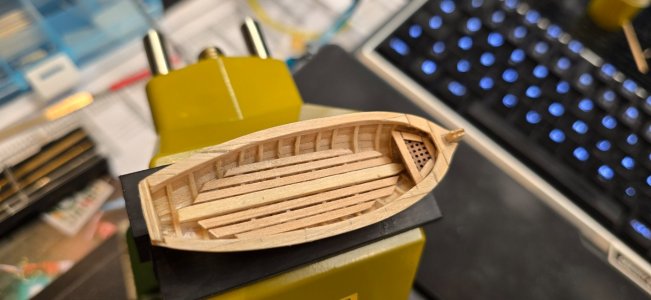
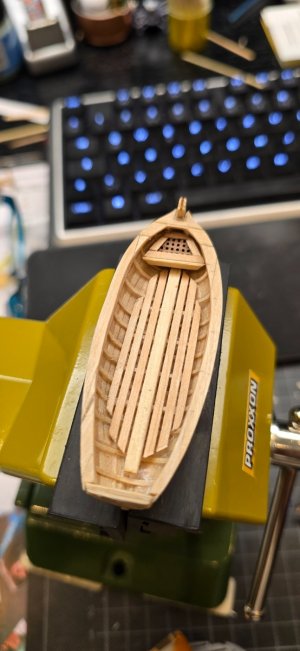
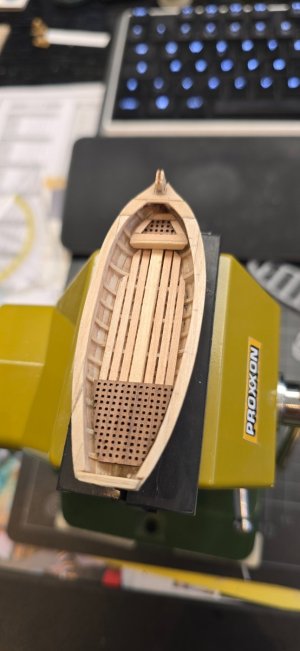
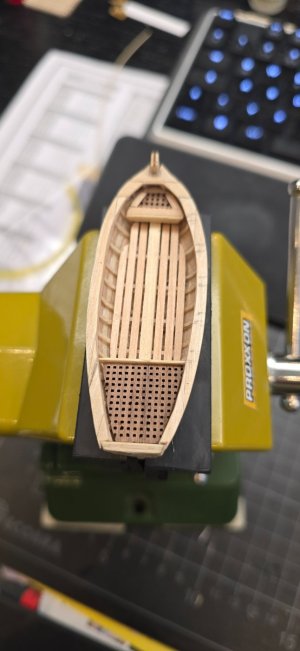
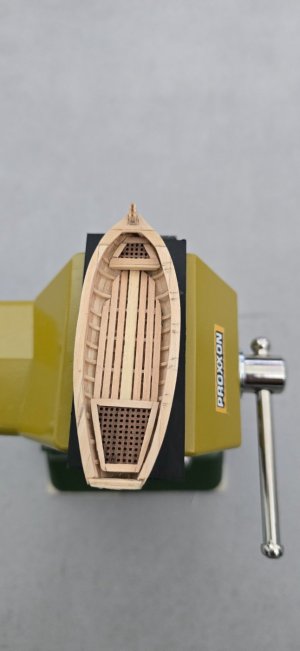
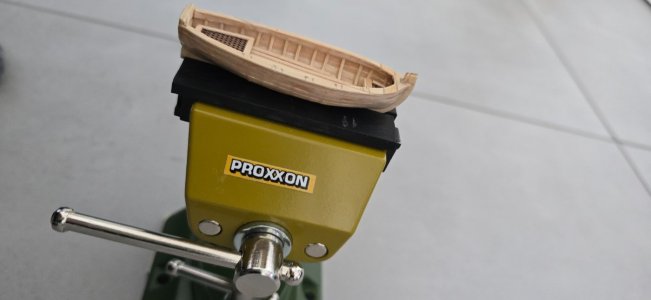
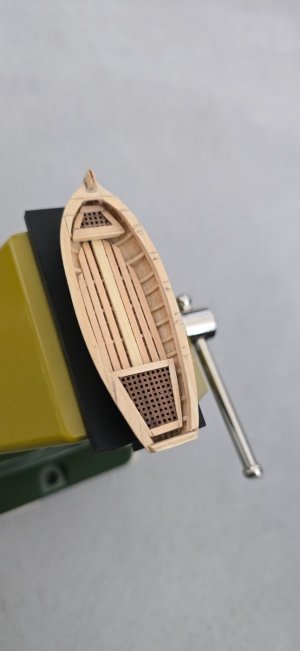
I have another small update from my Lifeboat.
It's really fun to design it, but it's very difficult to build a really nice model in this scale. I'm trying very hard and hope you like it as much as I do.
What have I done to it so far?
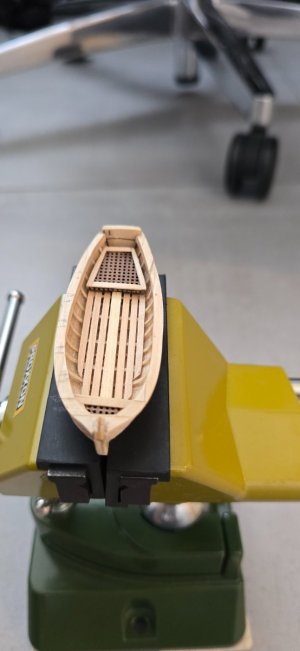
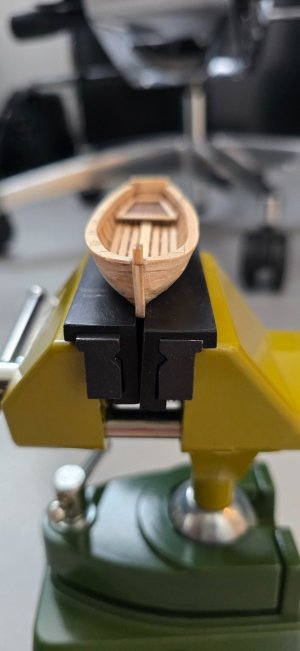
I have sanded and fitted the frames. The formers have a thickness of 0.5 mm and a width of 1 mm. It's quite a challenge to install something like this without it tearing. Then I sanded down the planks above and fitted new ones. I had to put them together from several parts. Here, too, the width was
2 mm and 0.5 mm thick. Then I laid out the floor. For this I had to use
glue 2 x 3mm wide linden strips together, shape them and insert them. I had to glue this onto 1 mm x 0.5 mm wide lime strips as a base for the other 6 lime strips. These measure 2 mm x 5 cm. I also had to sand these down.
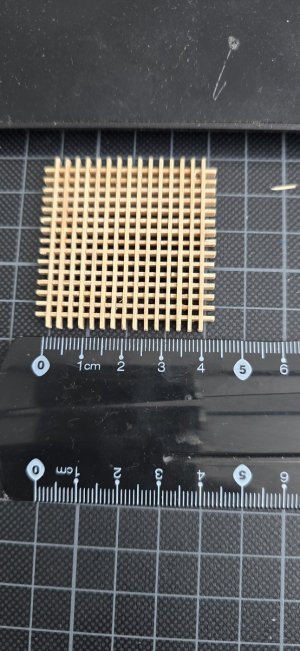
Then I made the gratings from walnut wood with 0.75 mm holes and then framed them with 1.5 mm lime strips and sanded them.
Then the grating at the rear was also made from walnut. Also with 0.75 mm holes and 1.5 mm lime strips in the framing.
Next steps:
Installation of the seat boards, insertion of the stern tiller.
Outstanding work;
Sanding, varnishing, painting.Then I will take care of the accessories.I'll make the sail myself, rudder, water keg, covering nails, metal gables, mast bowsprit, thimbles, ropes
I'll make the sail myself, the water keg, the covering nails, metal gables, mast, bowsprit, tiller, thimbles, ropes and fastening rings.
So there's still a lot to do and I'll be very happy when I can tell you the results.
I can also tell you how much has been broken.
35 toothpicks
10 limewood strips 2 mm x 0.5
20 limewood strips 1 mm x 0.5
2 gratings a 0.75 mm x 4 cm x 4 cm
lots of superglue, wood glue
and a lot of sweat..... )
)
Best redards
Günther
I have another small update from my Lifeboat.
It's really fun to design it, but it's very difficult to build a really nice model in this scale. I'm trying very hard and hope you like it as much as I do.
What have I done to it so far?
I have sanded and fitted the frames. The formers have a thickness of 0.5 mm and a width of 1 mm. It's quite a challenge to install something like this without it tearing. Then I sanded down the planks above and fitted new ones. I had to put them together from several parts. Here, too, the width was
2 mm and 0.5 mm thick. Then I laid out the floor. For this I had to use
glue 2 x 3mm wide linden strips together, shape them and insert them. I had to glue this onto 1 mm x 0.5 mm wide lime strips as a base for the other 6 lime strips. These measure 2 mm x 5 cm. I also had to sand these down.
Then I made the gratings from walnut wood with 0.75 mm holes and then framed them with 1.5 mm lime strips and sanded them.
Then the grating at the rear was also made from walnut. Also with 0.75 mm holes and 1.5 mm lime strips in the framing.
Next steps:
Installation of the seat boards, insertion of the stern tiller.
Outstanding work;
Sanding, varnishing, painting.Then I will take care of the accessories.I'll make the sail myself, rudder, water keg, covering nails, metal gables, mast bowsprit, thimbles, ropes
I'll make the sail myself, the water keg, the covering nails, metal gables, mast, bowsprit, tiller, thimbles, ropes and fastening rings.
So there's still a lot to do and I'll be very happy when I can tell you the results.
I can also tell you how much has been broken.
35 toothpicks
10 limewood strips 2 mm x 0.5
20 limewood strips 1 mm x 0.5
2 gratings a 0.75 mm x 4 cm x 4 cm
lots of superglue, wood glue
and a lot of sweat.....
Best redards
Günther


What a beautiful outcome at this scale! I can't wait to see it finished.
Good afternoon. I agree with Paul. Stunning work at this scale- kudos. Cheers GrantDear Sirs,
I have another small update from my Lifeboat.
It's really fun to design it, but it's very difficult to build a really nice model in this scale. I'm trying very hard and hope you like it as much as I do.
What have I done to it so far?
I have sanded and fitted the frames. The formers have a thickness of 0.5 mm and a width of 1 mm. It's quite a challenge to install something like this without it tearing. Then I sanded down the planks above and fitted new ones. I had to put them together from several parts. Here, too, the width was
2 mm and 0.5 mm thick. Then I laid out the floor. For this I had to use
glue 2 x 3mm wide linden strips together, shape them and insert them. I had to glue this onto 1 mm x 0.5 mm wide lime strips as a base for the other 6 lime strips. These measure 2 mm x 5 cm. I also had to sand these down.
Then I made the gratings from walnut wood with 0.75 mm holes and then framed them with 1.5 mm lime strips and sanded them.
Then the grating at the rear was also made from walnut. Also with 0.75 mm holes and 1.5 mm lime strips in the framing.
Next steps:
Installation of the seat boards, insertion of the stern tiller.
Outstanding work;
Sanding, varnishing, painting.Then I will take care of the accessories.I'll make the sail myself, rudder, water keg, covering nails, metal gables, mast bowsprit, thimbles, ropes
I'll make the sail myself, the water keg, the covering nails, metal gables, mast, bowsprit, tiller, thimbles, ropes and fastening rings.
So there's still a lot to do and I'll be very happy when I can tell you the results.
I can also tell you how much has been broken.
35 toothpicks
10 limewood strips 2 mm x 0.5
20 limewood strips 1 mm x 0.5
2 gratings a 0.75 mm x 4 cm x 4 cm
lots of superglue, wood glue
and a lot of sweat.....)
Best redards
Günther
View attachment 521409
View attachment 521410
View attachment 521411
View attachment 521412
View attachment 521413
View attachment 521414
View attachment 521415
View attachment 521416
View attachment 521417


