• LUCZORAMA SHIPWRECK SCAVENGER HUNT GIVEAWAY. 4 Weeks of Fun • 1 Legendary Prize ((OcCre’s Fram Ship)) • Global Crew Welcome!
    **VIEW THREAD HERE**

HMS Enterprise 1774 POF 1:48.

I just wanted to see howfar you got on your Enterprice, ( because i don't have the time to properly catch up )
and all i read is a damaged finger, and a replaced knee, did i mis any more damaged parts???
Anyway, me and my admiral hope you have a good and speedy recovery, from all damaged components.

Greetings from the Netherlands,
Peter and Admiral Marijke
Good morning Peter. Thank you very much for your encouragement. My recovery is very much on track and so far so good:D.
Cheers Grant
 
Good evening Everybody. I haven’t played much with my ship lately, however yesterday and today I lay on the floor and did some fairing of the hull. There are plenty hrs to go:D…..
View attachment 531162View attachment 531165View attachment 531163
My recovery from my op is going really well and my only frustration is I cannot drive just yet…..Plenty of pain still during the physio work but that’s expected and my physio lady really enjoys inflicting as much as she can ROTFROTF.
Cheers Grant
Ahoy Gant. Look at that! She's coming along soooo well. Cheers.
 
Ricochet Rabbit fully loaded :D:p

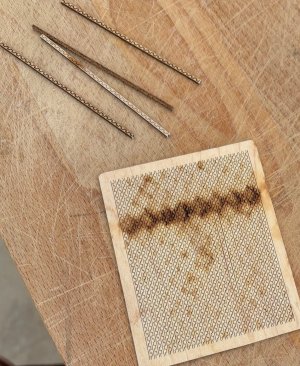
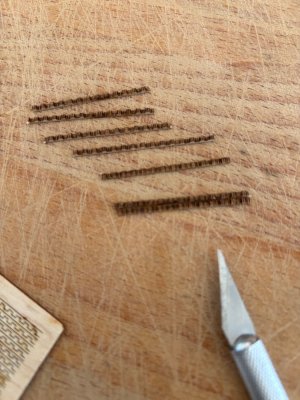
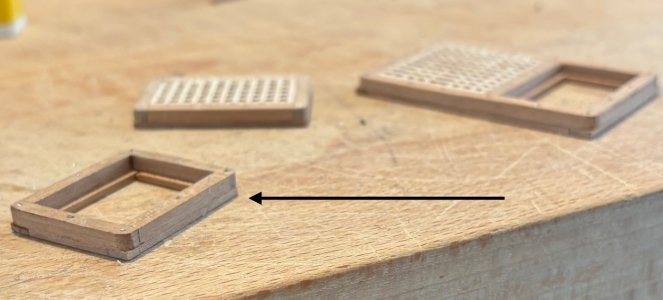
Decided to make some gratings. The kit gratings are difficult to get reasonable as they are very fragile and thin. All the other builds I see the other guys buying or using alternatives…..but I’m a stubborn South African so gave it a goROTF. (Real reason it is a costly mission to get the parts to Melkbosstrand).
IMG_6129.jpegIMG_6131.jpeg
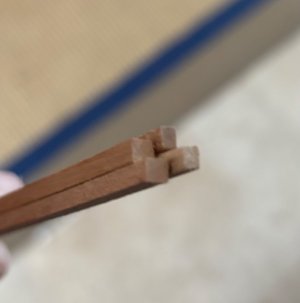
Something I picked up a little late is the 3x3mm wood provided varies in size considerably.
IMG_6134.jpeg
My attempts: IMG_6178.jpeg
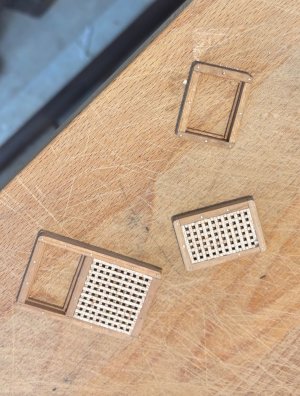
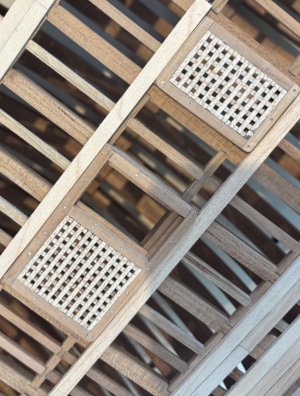
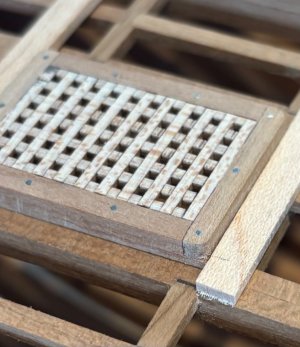
You will see I am leaving some completely open showing the frame/coming and rabbets. I made all sides with a rabbet as I have to lift all fittings by 1.5mm as I am attaching these to the beams directly and going to build the deck afterwards. This is opposite to the kit design.
IMG_6180.jpegIMG_6196.jpeg
IMG_6197.jpeg
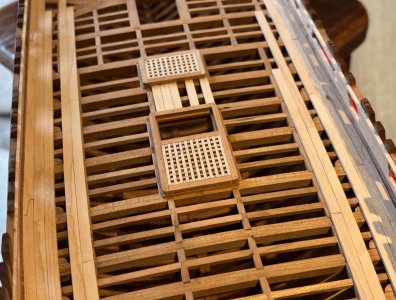
I have cut a few deck pieces to see how it will look with some pieces missing……nothing glued just trying to see if this design is going to work or am I heading into a world of failure………. We are going to find out sooner or later.
IMG_6205.jpeg
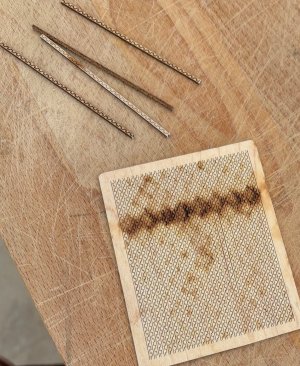
I am struggling to get my finishes to the level I want. I used steel wool to polish, but this changes the colour. I have bought some dremel bits for cleaning and polish so will try these when they get here.
Cheers Grant
 
Ricochet Rabbit fully loaded :D:p

Decided to make some gratings. The kit gratings are difficult to get reasonable as they are very fragile and thin. All the other builds I see the other guys buying or using alternatives…..but I’m a stubborn South African so gave it a goROTF. (Real reason it is a costly mission to get the parts to Melkbosstrand).
View attachment 532044View attachment 532045
Something I picked up a little late is the 3x3mm wood provided varies in size considerably.
View attachment 532046
My attempts: View attachment 532047
You will see I am leaving some completely open showing the frame/coming and rabbets. I made all sides with a rabbet as I have to lift all fittings by 1.5mm as I am attaching these to the beams directly and going to build the deck afterwards. This is opposite to the kit design.
View attachment 532048View attachment 532049
View attachment 532050
I have cut a few deck pieces to see how it will look with some pieces missing……nothing glued just trying to see if this design is going to work or am I heading into a world of failure………. We are going to find out sooner or later.
View attachment 532051
I am struggling to get my finishes to the level I want. I used steel wool to polish, but this changes the colour. I have bought some dremel bits for cleaning and polish so will try these when they get here.
Cheers Grant
These hatches look truly perfect to me, even on the macro pics.
 
Ricochet Rabbit fully loaded :D:p

Decided to make some gratings. The kit gratings are difficult to get reasonable as they are very fragile and thin. All the other builds I see the other guys buying or using alternatives…..but I’m a stubborn South African so gave it a goROTF. (Real reason it is a costly mission to get the parts to Melkbosstrand).
View attachment 532044View attachment 532045
Something I picked up a little late is the 3x3mm wood provided varies in size considerably.
View attachment 532046
My attempts: View attachment 532047
You will see I am leaving some completely open showing the frame/coming and rabbets. I made all sides with a rabbet as I have to lift all fittings by 1.5mm as I am attaching these to the beams directly and going to build the deck afterwards. This is opposite to the kit design.
View attachment 532048View attachment 532049
View attachment 532050
I have cut a few deck pieces to see how it will look with some pieces missing……nothing glued just trying to see if this design is going to work or am I heading into a world of failure………. We are going to find out sooner or later.
View attachment 532051
I am struggling to get my finishes to the level I want. I used steel wool to polish, but this changes the colour. I have bought some dremel bits for cleaning and polish so will try these when they get here.
Cheers Grant
looks really nice; especially with the nails. congratulations!
 
Ricochet Rabbit fully loaded :D:p

Decided to make some gratings. The kit gratings are difficult to get reasonable as they are very fragile and thin. All the other builds I see the other guys buying or using alternatives…..but I’m a stubborn South African so gave it a goROTF. (Real reason it is a costly mission to get the parts to Melkbosstrand).
View attachment 532044View attachment 532045
Something I picked up a little late is the 3x3mm wood provided varies in size considerably.
View attachment 532046
My attempts: View attachment 532047
You will see I am leaving some completely open showing the frame/coming and rabbets. I made all sides with a rabbet as I have to lift all fittings by 1.5mm as I am attaching these to the beams directly and going to build the deck afterwards. This is opposite to the kit design.
View attachment 532048View attachment 532049
View attachment 532050
I have cut a few deck pieces to see how it will look with some pieces missing……nothing glued just trying to see if this design is going to work or am I heading into a world of failure………. We are going to find out sooner or later.
View attachment 532051
I am struggling to get my finishes to the level I want. I used steel wool to polish, but this changes the colour. I have bought some dremel bits for cleaning and polish so will try these when they get here.
Cheers Grant
Great looking hatch grating assemblies Grant. I'll bet they were fun to put together.
 
Grant! Glad to see you're back at it! Lovely scale model eye-candy! Also, like pornography, I know excellence when I see it. That is some super tight craftsmanship on your gratings, sir!

Finally, since I see who is saying that your work is superlative, which it is, true story! - I know not to believe them when they post the same language in my log ROTF

Speedy progress on your rehab and your build! Keep producing the magnificent eye-candy!

Blessings. Peace. Gratitude.
Chuck
 
I agree with our friends - the hatches look fabulous. What surfaces are you struggling to finish to your satisfaction? Are you talking about the hatches and coamings - or the planking - or?
Hi Paul. Thank you kindly. I am fighting with her a little bit. Everything I do comes out “nice” however that is just itROTF. It is no specific thing more I’m not getting the look and feel I want. I am also having to redo plenty as I’m working it out as I go due to me tossing the kit design which was too “plain” for what I wanted. The last area is I’m battling to finish off the cherry nicely- my look is a bit rough. I have read Sergey Alert a few times as he is getting the cherry looking good. I am finding this project a challenge (which is a good thing) and my limited modelling skills are being tested. Between the cuss words plenty of fun is being had thoROTF. Cheers Grant
 
Back
Top