• LUCZORAMA SHIPWRECK SCAVENGER HUNT GIVEAWAY. 4 Weeks of Fun • 1 Legendary Prize ((OcCre’s Fram Ship)) • Global Crew Welcome!
    **VIEW THREAD HERE**

Albatros build log. First ship kit.

Joined
Jun 26, 2025
Messages
13
Points
28

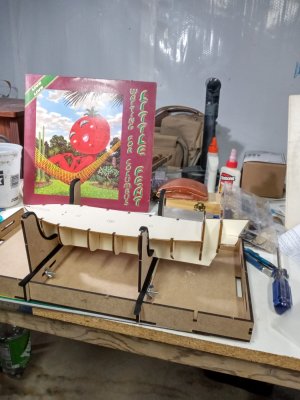
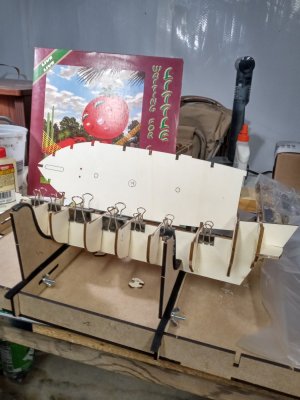
I finally got started and the dry fit was easy enough.Albatros 3.jpg I used the deck to make sure the frames would align when I glued them in.Albatros 4.jpg
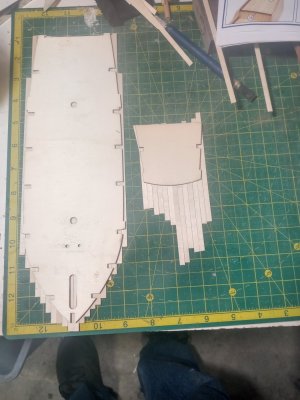
Planking the deck was a bit tedious and I used white glue. Contact glue was recommended, but I used what I had and it seems fine after sanding.Albatros 8.jpg
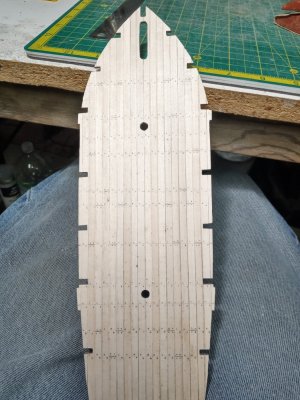
The trimming and opening all mast holes went well. I was really bothered by the instructions concerning the nails, or treenails, in the instructions. It didn't look right so I found a post on the SOS forum by Uwek about this exact ship. His advice that the nails should follow the frames supporting hatches and masts seemed solid so I followed it with my landlubber logic. I lightly penciled in the frame lines then created butt joints that were staggered. The nail holes were added and it ain't perfect but I think it looks more realistic. The light frame lines will be erased and sanded leaving the nail holes and butt joint lines. The deck has been glued on. Albatros 11.jpg
So far it's been fun and challenging. The deck was tougher than I imagined trying to match frame lines with masts and hatch openings. The diagram of the deck to scale in the rulebook helped immensely.
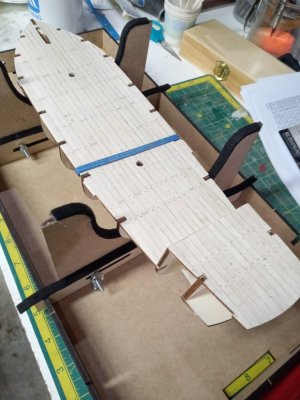
Albatros 10.jpg
 
Looks good for a first attempt. Uwek is full of knowledge and won't steer you wrong.

Decking looks good, one thing to think of at this stage is sealing the decks while you have full access side to side.

Several methods, but Olha (Shipsphotographer) uses thin CA to cover deck, then uses a stiff scrapper to remove excess and gives deck nice flat smooth surface.
Thank you! I will look into that process.
 
I finally got started and the dry fit was easy enough.View attachment 531922 I used the deck to make sure the frames would align when I glued them in.View attachment 531926
Planking the deck was a bit tedious and I used white glue. Contact glue was recommended, but I used what I had and it seems fine after sanding.View attachment 531927
The trimming and opening all mast holes went well. I was really bothered by the instructions concerning the nails, or treenails, in the instructions. It didn't look right so I found a post on the SOS forum by Uwek about this exact ship. His advice that the nails should follow the frames supporting hatches and masts seemed solid so I followed it with my landlubber logic. I lightly penciled in the frame lines then created butt joints that were staggered. The nail holes were added and it ain't perfect but I think it looks more realistic. The light frame lines will be erased and sanded leaving the nail holes and butt joint lines. The deck has been glued on. View attachment 531929
So far it's been fun and challenging. The deck was tougher than I imagined trying to match frame lines with masts and hatch openings. The diagram of the deck to scale in the rulebook helped immensely.
View attachment 531930
That looks wonderful ! Great job !
nice album choice too. :)
 
Looks good for a first attempt. Uwek is full of knowledge and won't steer you wrong.

Decking looks good, one thing to think of at this stage is sealing the decks while you have full access side to side.

Several methods, but Olha (Shipsphotographer) uses thin CA to cover deck, then uses a stiff scrapper to remove excess and gives deck nice flat smooth surface.
I couldn't find Olha in the membership but accidently came across Olha Batchvarov on YouTube and saw her applying glue to a deck. I've subscribed to her channel.
 
That be her, and she has lots of good stuff on her channel, to get to best stuff you have to become a supporting member and pay monthly stipend.
 
I finally got started and the dry fit was easy enough.View attachment 531922 I used the deck to make sure the frames would align when I glued them in.View attachment 531926
Planking the deck was a bit tedious and I used white glue. Contact glue was recommended, but I used what I had and it seems fine after sanding.View attachment 531927
The trimming and opening all mast holes went well. I was really bothered by the instructions concerning the nails, or treenails, in the instructions. It didn't look right so I found a post on the SOS forum by Uwek about this exact ship. His advice that the nails should follow the frames supporting hatches and masts seemed solid so I followed it with my landlubber logic. I lightly penciled in the frame lines then created butt joints that were staggered. The nail holes were added and it ain't perfect but I think it looks more realistic. The light frame lines will be erased and sanded leaving the nail holes and butt joint lines. The deck has been glued on. View attachment 531929
So far it's been fun and challenging. The deck was tougher than I imagined trying to match frame lines with masts and hatch openings. The diagram of the deck to scale in the rulebook helped immensely.
View attachment 531930
Lowell George...One of my guitar heros...I'm guessing you're the same vintage as myself. Were you listening to it while taking the pics? I'm picking not too many out there will know what Im talking about.
Cheers
Rick
 
Lowell George...One of my guitar heros...I'm guessing you're the same vintage as myself. Were you listening to it while taking the pics? I'm picking not too many out there will know what Im talking about.
Cheers
Rick
Hello! Yes, I was listening to it. I had Led Zep 1 on after that. I'm 75 and still have a ton of albums I bought starting in the late 60's. I might be an older vintage than you!
 
It looks nice... I recommend you pay attention to sanding the fake posts. This is very important for the body to look smooth.
 
Nice to see another Albatros build on here. Looks great except you made the same mistake many other builders of this ship have made. We all make mistakes. I blame Occre instructions for this one. You trimmed out all the notches on the sides of the deck. I highly recommend you view all of the other Albatros build logs on this site along with other Occre ship build logs. I'm another 73 year older that enjoys the classic rock of the 70's. I listen to a lot of Santana while I build. Will add your build log to the list of logs that I follow.
 
Nice to see another Albatros build on here. Looks great except you made the same mistake many other builders of this ship have made. We all make mistakes. I blame Occre instructions for this one. You trimmed out all the notches on the sides of the deck. I highly recommend you view all of the other Albatros build logs on this site along with other Occre ship build logs. I'm another 73 year older that enjoys the classic rock of the 70's. I listen to a lot of Santana while I build. Will add your build log to the list of logs that I follow.
Howdy! I've been slowly working on the bulwarks but they're not attached yet. I think I'll try splicing in plank material and seeing if I can blend it enough to hide the tops of the posts. Hopefully the bulwarks will conceal it. It's heartening to find out an album cover created fun conversation! I might have to place other albums into the photos just for the heck of it.
 
Here's another suggestion. Build at least one canon and then while holding the bulwark in place on the deck, place the canon and see if it fits without touching the top of the gunport. I know my canons did not fit and I would have liked to trim the top of the gun port before I planked it inside and out. I know some others have also had this issue. See my build log below.
 
Back
Top