• Win a Free Custom Engraved Brass Coin!!!
    As a way to introduce our brass coins to the community, we will raffle off a free coin during the month of August. Follow link ABOVE for instructions for entering.

HMS Victory - Mantua 1:78 Build log

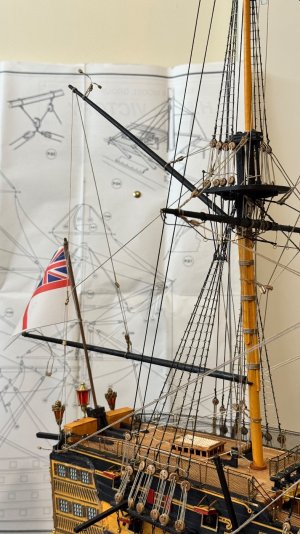
From what I can figure out from what is written on the chart, the red pennant for Victory was flown from the main topmast head and the yellow pennant was "hoisted where best seen". At least that is what the chart shows. "Best seen" to me is as high as possible so with the red pennant on the main, maybe the yellow on the fore topmast head.

Allan
Thanks Allan.
 
⚓ HMS Victory – Rigging Progress Update ⚓

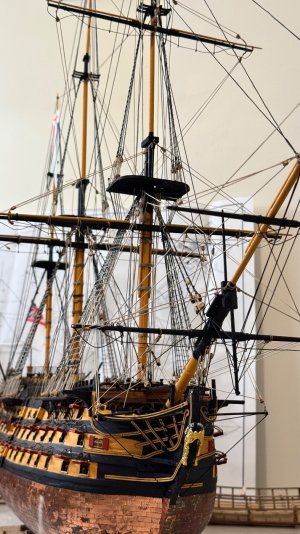
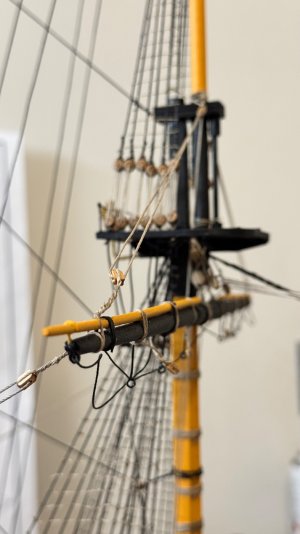
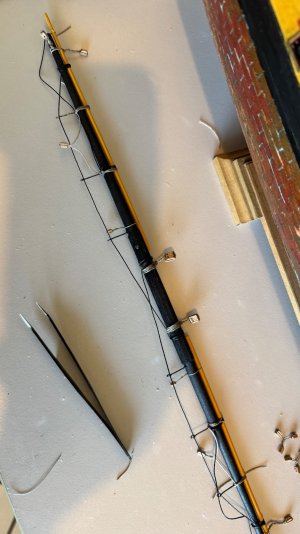
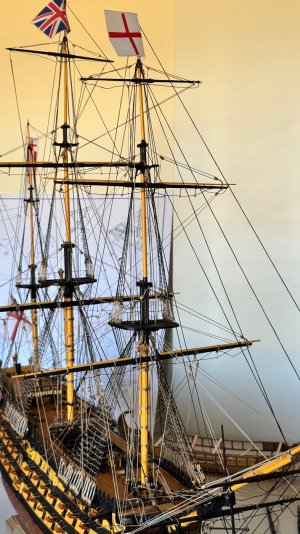
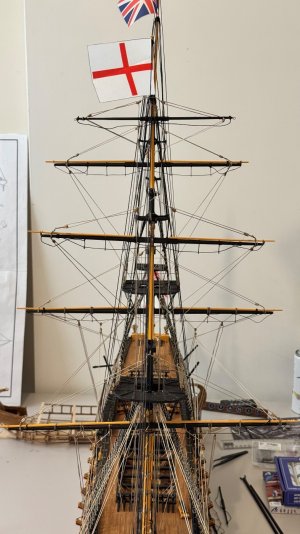
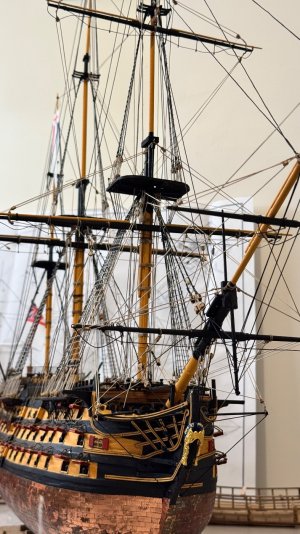
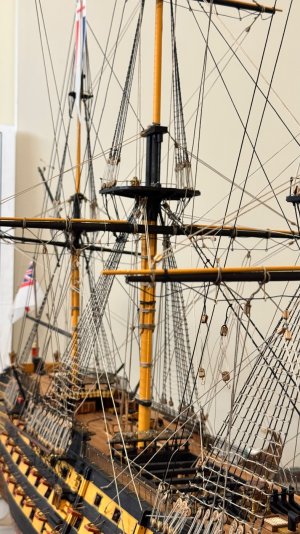
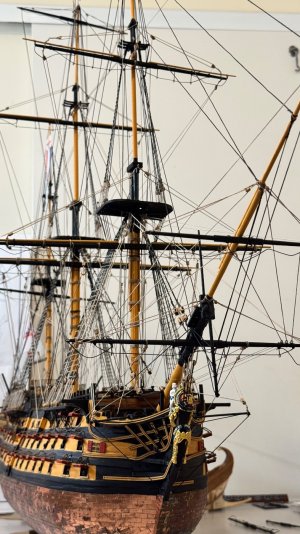
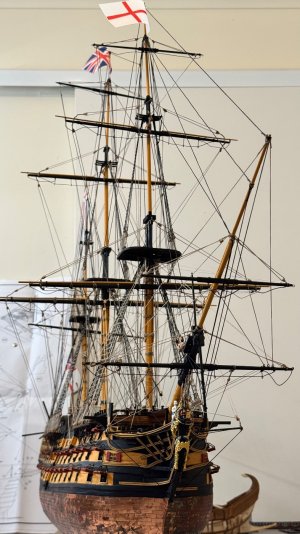
Today was a really productive day on my Mantua 1:78 scale HMS Victory build. I completed the bowsprit and the forward mast, and then began tying in the running rigging on the mainmast. Now that I’ve got a solid rhythm going and a clearer understanding of how all the lines come together, the process moved along much faster than before.

If you’ve ever studied the rigging plans that come with these wooden kits, you’ll know they can sometimes be a bit vague or even inaccurate. The Mantua plans for the running rigging were slightly out in a few places, so I decided to cross-reference with a far more historically accurate source — The Anatomy of Nelson’s Ships. That book has been a real lifesaver for confirming the correct line routing, block positions, and belaying points.

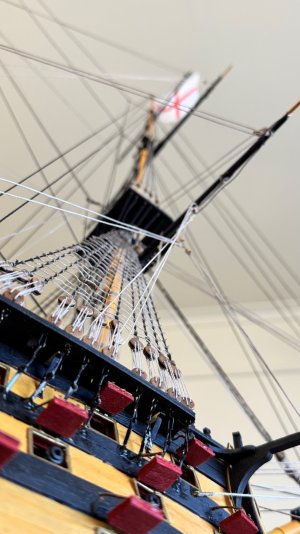
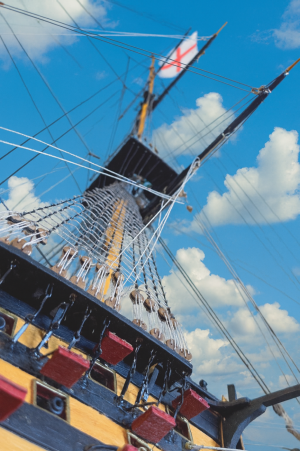
Seeing the masts taking on their final form — with the complex web of standing and running rigging — really brings this ship to life. The more I add, the more it feels like a miniature working vessel rather than just a display model.

There’s still plenty more to go, but progress is steady and rewarding. Every new line tied adds another layer of realism and history to this incredible ship.

Stay tuned — next up, I’ll be continuing the mainmast running rigging and slowly moving aft as the rigging network expands across the decks.


⚓ “A ship is safe in harbor, but that’s not what ships are built for.”

IMG_9051.jpeg

IMG_9049.jpeg

IMG_9047.jpeg

IMG_9046.jpeg

IMG_9044.jpeg

IMG_9022.jpeg

081C3473-26C8-44FA-9118-1C72D5279E4B.png

B658FA5C-364D-40B2-86BE-B0363B250FFE.png

3F3FCC67-1829-4E1B-B288-217740A14150.png
 
Love the photographs!!
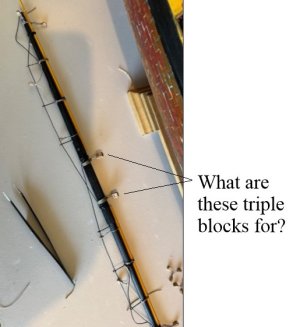
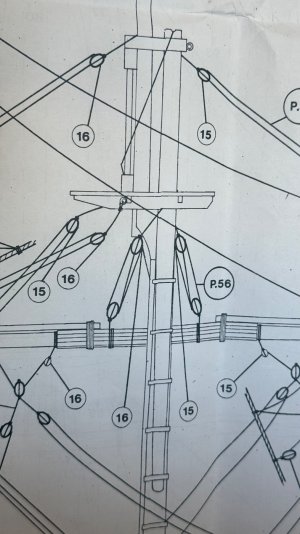
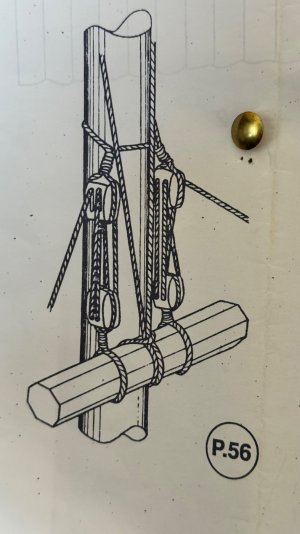
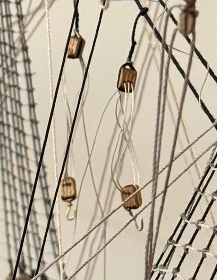
One question, hope you don't mind. I am guessing this is a lower yard, but what are the triple blocks for?
Thanks
Allan
1759622628967.jpeg
 
Thank you Phillip
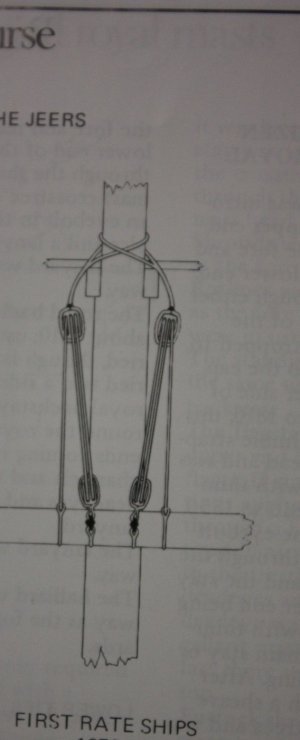
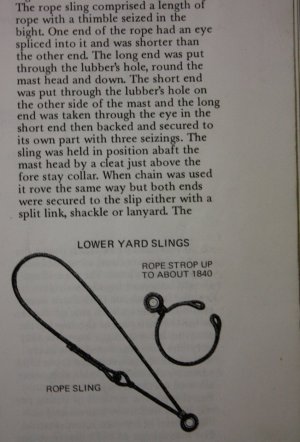
I thought that might be the case, but seeing triple blocks secured to the yard threw me. I see from the drawings you posted they show two pair of double blocks which, according to James Lees' The Masting and Rigging of English Ships of War would be wrong for a first rate up to 1811. The below is from Lees' book, including jeers and the how the sling was rigged.

Allan

1759657554047.jpeg

1759657783445.jpeg
 
The Dance of the Rigging – HMS Victory Progress Update

Today felt like I was standing right there on the decks of HMS Victory herself — the ropes creaking, masts swaying, and the faint echo of orders being shouted across the ship.

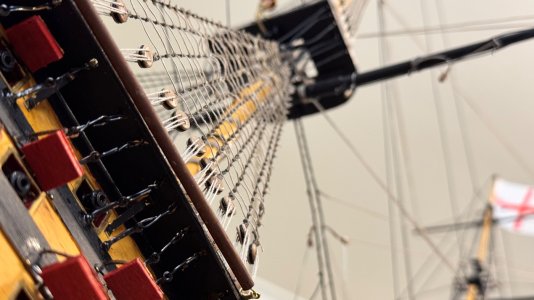
I’m now almost at the end of the running rigging, and what a journey it’s been. Every single line, pulley, and block has its own story to tell. When you first look at the plans, it’s like staring at a spider’s web drawn by a madman — but once you start tying each section, it begins to make sense. Suddenly, the chaos turns into rhythm. You can almost feel how alive the ship must have been when she was under full sail.

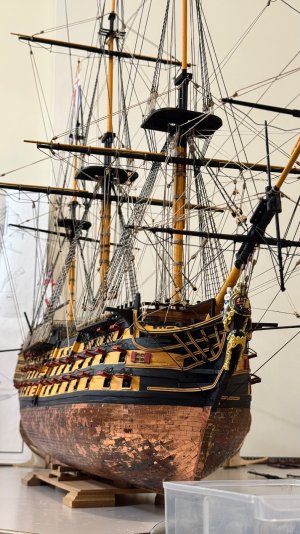
What amazes me most is the sheer amount of work that went into these ships — miles of rope, hundreds of pulleys, and more copper tiles than you can count. The craftsmanship of the original builders was on another level. They didn’t just build a ship — they built a living, breathing machine that could cross oceans and fight battles, all powered by the wind and the hands of men.

As I tie the final lines, I can almost picture the crew working alongside me — one hauling on the braces, another climbing the shrouds, someone shouting from the quarterdeck. It’s like bringing history back to life, one tiny knot at a time.

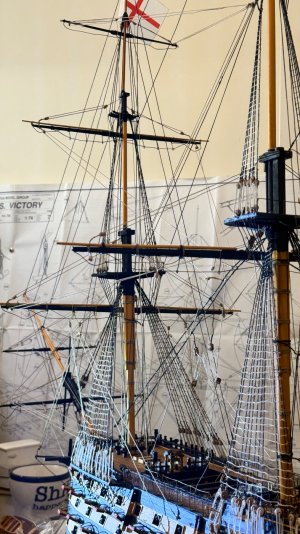
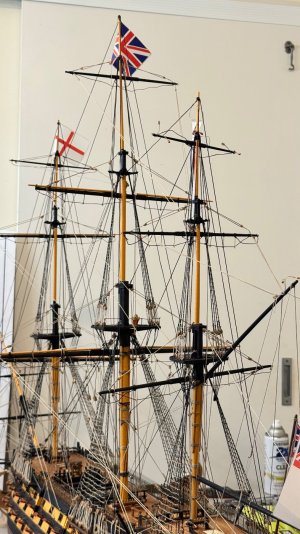
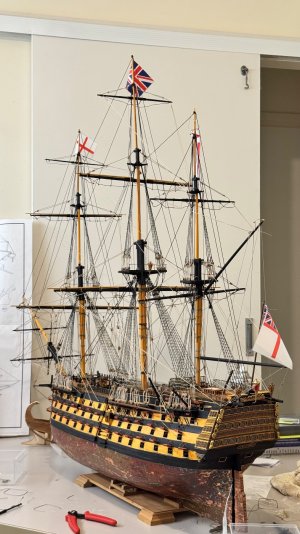
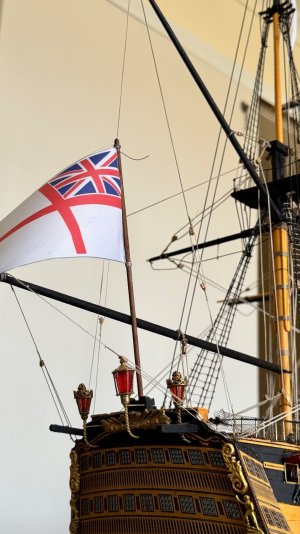
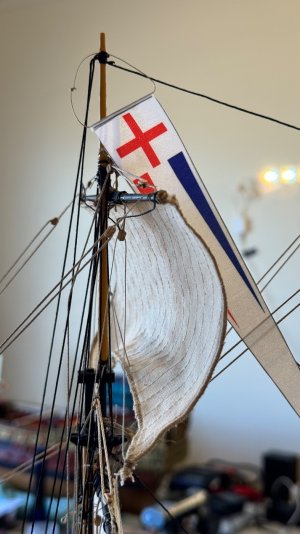
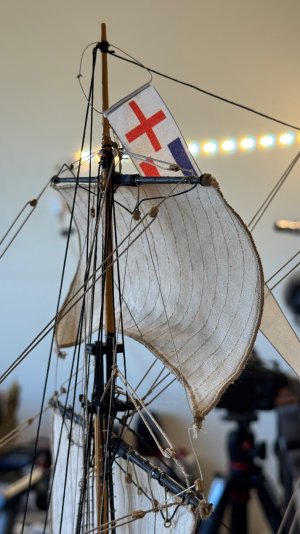
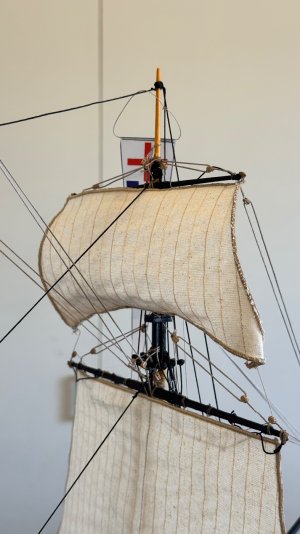
Victory’s masts now stand proudly dressed, her flags flying high — the Union Jack and the Cross of St. George catching an imaginary sea breeze here in my workshop. There’s still a little more rigging to go before I move on to the sails, but she’s already looking magnificent.

This ship never fails to amaze me. Every detail feels like a tribute to the men who built and sailed her.


⚓ Ship: HMS Victory – Mantua 1:78


⚓ Stage: Running rigging nearly complete


⚓ Next step: The sails and final touches before display


She’s standing tall, proud, and full of spirit — as if she’s ready to sail out of history once more.

IMG_9073.jpeg

IMG_9056.jpeg

IMG_9051.jpeg
 
⚓ Back to the HMS Victory Build

After a short pause, I’m back at the workbench with HMS Victory. I hit a small snag a couple of days ago — I ran short on rigging blocks. It’s amazing how many of these little pieces this ship consumes! Each line, pulley, and block has its own purpose, and when you’re this deep into the rigging, you really can’t skip or fake any of them.

I’ve placed an order for a good supply — enough not only to finish the last of the running rigging but also to mount all the sails when the time comes. They should arrive next week. In the meantime, I’ve borrowed a few blocks from my Sovereign of the Seas build to keep the momentum going. Once my new batch arrives, I’ll replenish what I’ve “borrowed.”

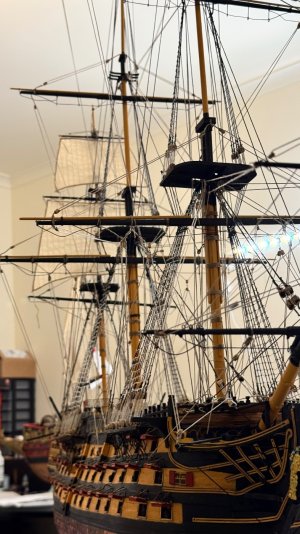
The focus this week has been on the mizzenmast, the last of the three towering masts. It’s a challenging one — smaller, more intricate, and tucked right at the stern, where space is tight and the rigging lines converge in every direction. It’s like tying knots in a spider’s web while trying not to disturb all the threads around you.

Despite the challenge, I’m making steady progress. Just two more cross masts to tie in, and the rigging will be complete. Every block, every line brings this ship one step closer to life — a reminder of the craftsmanship and precision that kept these great warships under sail centuries ago.

Once the new blocks arrive, the next major stage begins — mounting the sails. That’s when HMS Victory will truly start to look ready for sea.

It’s been a long and detailed journey, but seeing her take shape with all the standing and running rigging in place makes every hour worthwhile.

⚓ “England expects that every man will do his duty.” — Admiral Lord Nelson

IMG_9092.jpeg

IMG_9093.jpeg

IMG_9094.jpeg

IMG_9095.jpeg

IMG_9096.jpeg
 
Phillip, your Vicky is coming along beautifully! You certainly have something to be proud of.

Might I suggest, that if nothing is going to be attached to the hooks on your lifting blocks, that you hang a small weight on them to straighten the lines more naturally and then paint the lines with a very thin wash of watered down PVA. At full scale, the weight of those blocks would keep the running lines straight. I would rig a small test (or 4) off-model to get the feel for how much to thin the glue and how much to apply. Some very thin shellac might work also.

1760006460407.png
 
⚓ A Milestone Reached – The Rigging is Complete! ⚓

Today marks one of the biggest milestones in my HMS Victory build — I’ve officially tied the last knot of the rigging!

After countless hours, thousands of tiny threads, and more patience than I thought I had, the rigging as supplied with the Mantua kit is now complete. I can’t quite believe it… tomorrow I’ll wake up and there’ll be no more lines or knots waiting for me to tie.


It’s honestly a strange feeling — for weeks my daily routine has been “tie, tighten, trim, and repeat.” But looking at her now, standing tall with her masts fully rigged, every line and deadeye in place, it’s all been worth it.

I couldn’t resist taking a little sneak peek of what’s to come, so I loosely placed a few sails on the masts — and wow… just wow. Seeing those canvas sails against the forest of rigging brought the ship to life in a way that photos can barely capture. It’s like watching history breathe again. ⛵

There’s still more to do before she’s truly finished: the anchors, chains on the rudder, the side davit lines, and then of course, properly mounting the sails. But I’m not rushing into that — after this marathon of rigging, a short break is well earned!

Every knot tied feels like a tiny tribute to the real men who worked aboard the Victory over 200 years ago. I’m so proud of how she’s shaping up — this stage really transforms her from a beautiful model into a living piece of maritime history. ⚓


Stay tuned — the next chapter will be all about setting those sails!

IMG_9127.jpeg

IMG_9124.jpeg

IMG_9123.jpeg

IMG_9122.jpeg

IMG_9125.jpeg

IMG_9126.jpeg

IMG_9121.jpeg

IMG_9120.jpeg

IMG_9119.jpeg

IMG_9118.jpeg

IMG_9117.jpeg

IMG_9116.jpeg

IMG_9115.jpeg

IMG_9114.jpeg

IMG_9112.jpeg

IMG_9108.jpeg

IMG_9104.jpeg
 
⚓ A Milestone Reached – The Rigging is Complete! ⚓

Today marks one of the biggest milestones in my HMS Victory build — I’ve officially tied the last knot of the rigging!

After countless hours, thousands of tiny threads, and more patience than I thought I had, the rigging as supplied with the Mantua kit is now complete. I can’t quite believe it… tomorrow I’ll wake up and there’ll be no more lines or knots waiting for me to tie.


It’s honestly a strange feeling — for weeks my daily routine has been “tie, tighten, trim, and repeat.” But looking at her now, standing tall with her masts fully rigged, every line and deadeye in place, it’s all been worth it.

I couldn’t resist taking a little sneak peek of what’s to come, so I loosely placed a few sails on the masts — and wow… just wow. Seeing those canvas sails against the forest of rigging brought the ship to life in a way that photos can barely capture. It’s like watching history breathe again. ⛵

There’s still more to do before she’s truly finished: the anchors, chains on the rudder, the side davit lines, and then of course, properly mounting the sails. But I’m not rushing into that — after this marathon of rigging, a short break is well earned!

Every knot tied feels like a tiny tribute to the real men who worked aboard the Victory over 200 years ago. I’m so proud of how she’s shaping up — this stage really transforms her from a beautiful model into a living piece of maritime history. ⚓


Stay tuned — the next chapter will be all about setting those sails!

View attachment 549045

View attachment 549046

View attachment 549047

View attachment 549048

View attachment 549049

View attachment 549050

View attachment 549051

View attachment 549052

View attachment 549053

View attachment 549054

View attachment 549055

View attachment 549057

View attachment 549058

View attachment 549059

View attachment 549060

View attachment 549064

View attachment 549066
Good afternoon Phillip. It is always good to see some more historically correct rigging than the plans show. I remember how limited the Mantua plans where. Very impressive build of this magnificent ship.
Cheers Grant
 
Phillip,

Your victory is looking awesome. And as Grant said nice to also see much more complicated and accurate rigging throughout. AND with sail no lessFirst Place Metal
This ship will always way above my skill set - Oh! your copper plates are just about perfect as well.

I always enjoy following other builders who have a Victory build log.
 
Good afternoon Phillip. It is always good to see some more historically correct rigging than the plans show. I remember how limited the Mantua plans where. Very impressive build of this magnificent ship.
Cheers Grant
Thank you very much, GrantTyler!

Yes, I found the Mantua plans to be quite limited when it came to the finer rigging details — especially for the running rigging. The Anatomy of Lord Nelson’s Ships book was a huge help in getting things closer to how they were actually set up on the real HMS Victory. Although that was also a bit of a challenge as the running rigging plans in the book are not all that detailed.

I’ve really enjoyed pushing the build that bit further toward historical accuracy. I’m especially pleased with how the copper plating turned out — I didn’t polish or seal it at first, just let it naturally tarnish until it reached the aged look I wanted. Once it developed that perfect patina, I sealed it with a clear satin coat to preserve the finish.

It’s been such a rewarding process bringing this magnificent ship to life, detail by detail! ⚓
 
Phillip,

Your victory is looking awesome. And as Grant said nice to also see much more complicated and accurate rigging throughout. AND with sail no lessFirst Place Metal
This ship will always way above my skill set - Oh! your copper plates are just about perfect as well.

I always enjoy following other builders who have a Victory build log.
Thanks so much, oldflyer! Really appreciate that.

Yeah, the rigging was definitely a big challenge but also the most enjoyable part once I got into the rhythm of it. The Mantua plans were pretty limited, so I used The Anatomy of Lord Nelson’s Ships book to get the running rigging and general layout a lot closer to the real ship.

Totally agree, it’s great following other Victory builds. Every one has its own unique take and there’s always something to learn from each other. ⚓
 
HMS Victory – Nearing the Finish Line ⚓

What an incredible journey this build has been so far. Every part of this ship has challenged me in a different way, but also given me so much enjoyment along the way. it’s been one of the most rewarding modelling experiences I’ve ever tackled.

The rigging is now officially completed — as supplied in the kit — and it feels amazing to finally reach that stage. I can honestly say there’s something very satisfying about tying that last knot! Seeing the ship come alive with the web of lines, blocks, and tackles really captures the spirit of the real HMS Victory.

I recall when I first opened the packaging and noticed how much rigging there was supplied. In excess of 200 meter of ropes. I thought to myself, surely not. Surely there’s not 200m of lines on this model. Well. There’s not a lot of rope left. So to my amazement, yes. There is some 200m of ropes on this model of the HMS Victory. Translate that to full scale and Wow. Wow. She must have been a sight to be seen.

There’s still a few things left to do before she’s truly finished:
  • Sails: The next big stage. I’ve ordered over 100 extra blocks just for this, and they arrived yesterday — quicker than expected!
  • Anchors and Rudder Chains: Still to be fitted, along with the final deck details.
  • Deck Finishing Touches: I’ll be adding small coils of rope, ready for the crew to “adjust the sails,” and a few other realistic touches to bring the deck to life.

I’ve promised my mates that I won’t start mounting the sails until they get to see her in person as she is right now — fully rigged and standing proud. I think it’s only fair after all the support and encouragement they’ve given me through the build.

Looking ahead, my plan is to display Victory at local hobby expos so others can enjoy seeing her up close. She’ll then take pride of place in my home in a custom-built display cabinet that my mate Mark and I are currently designing. The goal is to protect her from dust and damage while still showcasing every detail.

It’s been such an enjoyable and educational project from start to (almost) finish — a true labour of love. Each day I look at her, I’m reminded of just how magnificent this ship really was and what a joy it’s been recreating her in miniature.
 
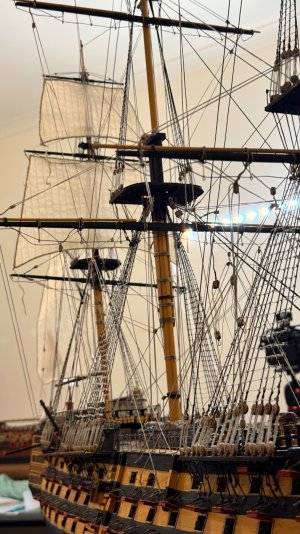
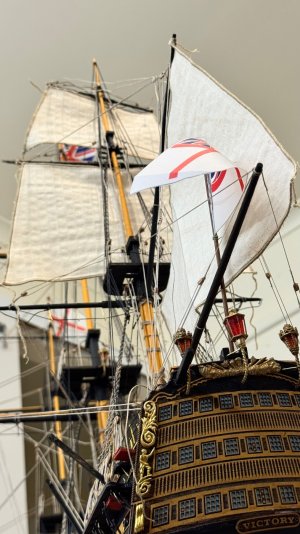
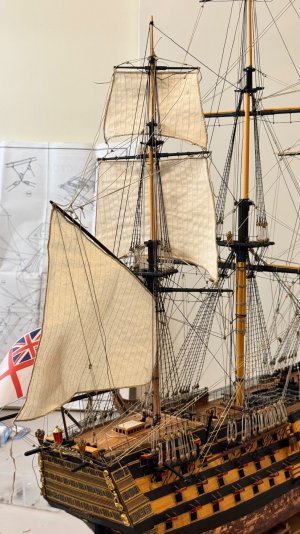
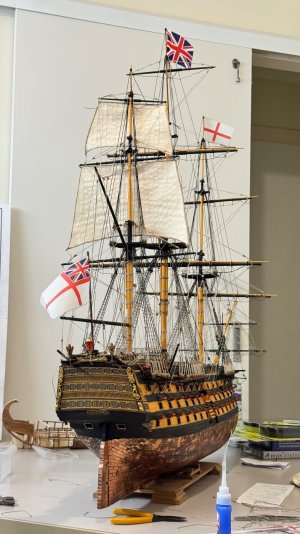
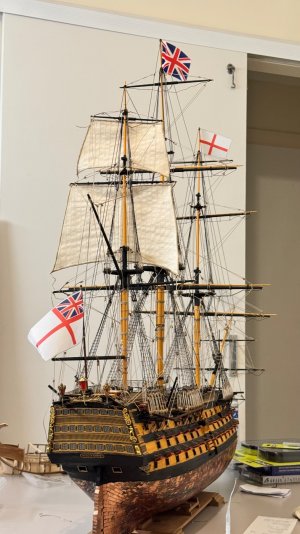
⚓ Sail Deployment Has Begun! ⚓

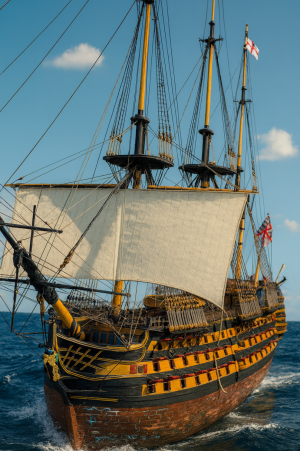
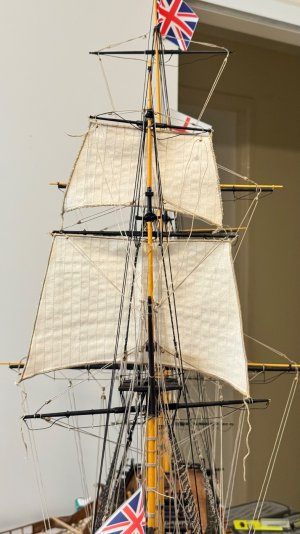
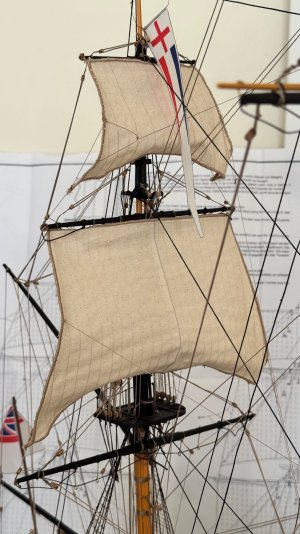
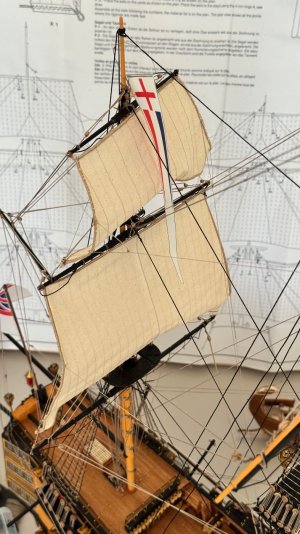
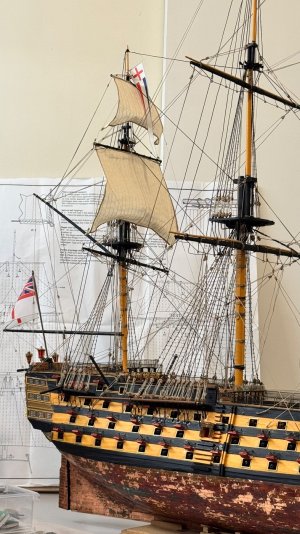
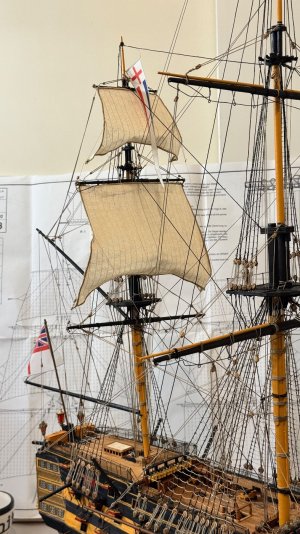
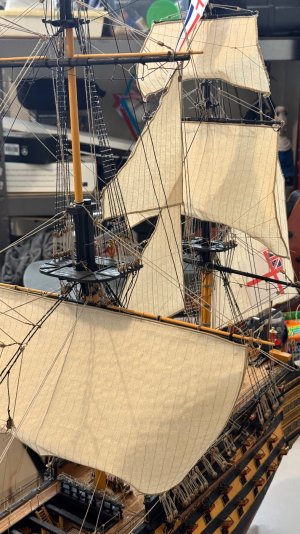
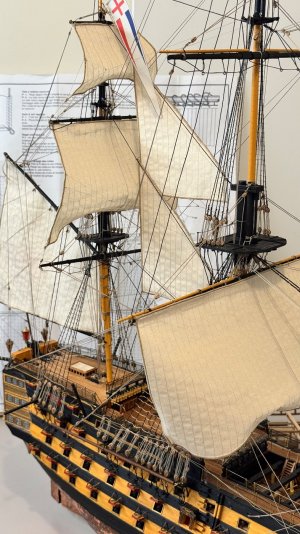
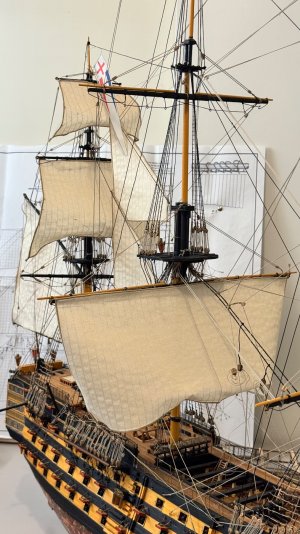
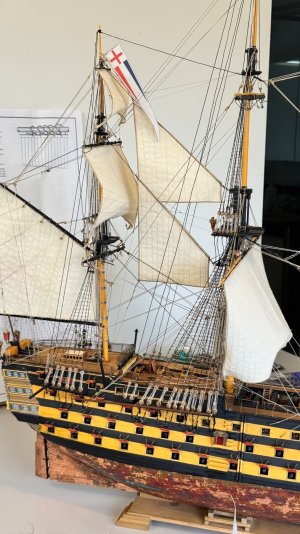
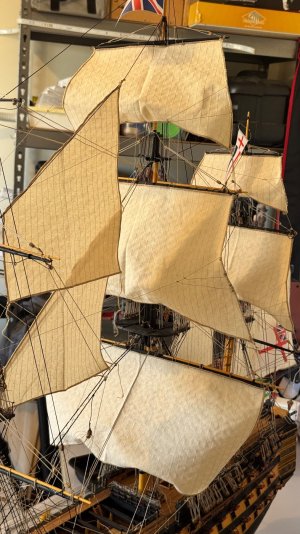
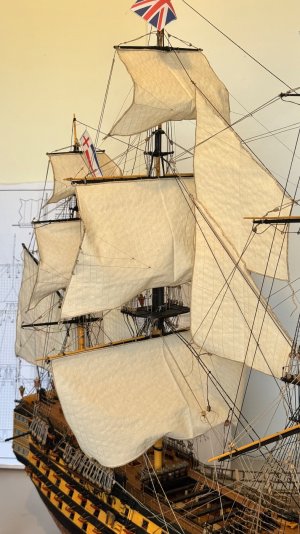
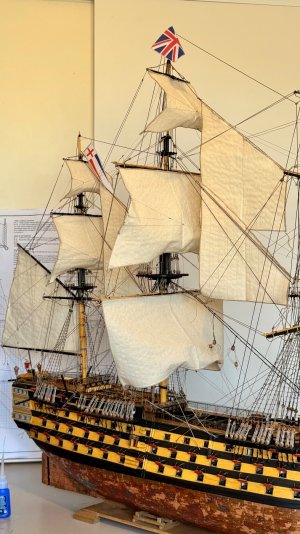
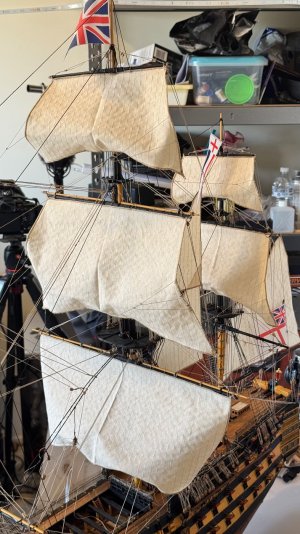
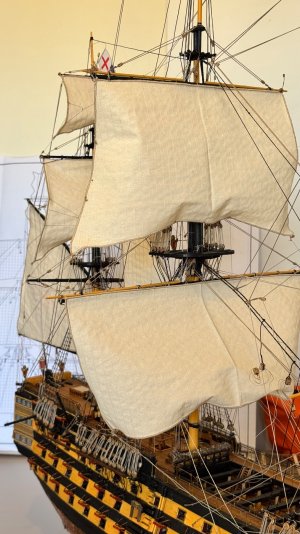
I’ve officially started mounting the sails onto my HMS Victory build and I have to say… what a transformation already! Up until now, the rigging alone gave this ship life and structure – but now, with canvas in the wind, she’s truly starting to feel alive.

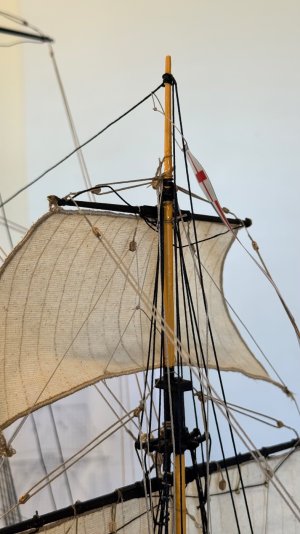
Instead of leaving the sails hanging flat, I used a combination of running rigging lines, careful tensioning and a few newly added lines to shape each sail so it looks like it’s catching a strong, steady breeze. The result has blown me away – that sense of motion and realism has just gone to a whole new level. It genuinely feels like Victory is under sail, powering forward across the open sea.

I’ll admit, I spent a fair bit of time contemplating whether I should weather the sails more with stains for that old battle-worn look. But without spare material to experiment on, I wasn’t willing to risk damaging them. In the end, I’m actually really happy with the natural tone of the canvas – it gives a clean yet authentic look that still suits a ship that’s been well maintained by her crew.


✅ Sails shaped with realistic wind effect


✅ Lines tensioned with historical accuracy in mind


✅ More sails to go – but this is already a huge visual milestone


✅ Loving every minute of this stage of the build


I can’t wait to see her fully dressed with all sails mounted. This is the stage where months of rigging, deadeyes, blocks and tiny knots all begin to pay off visually. From here on, every sail adds personality and power to the ship. Stay tuned because this is going to look absolutely magnificent when she’s fully rigged under sail! ‍☠️⚓


Let me know what you think so far – should I keep the sails clean like this, or maybe add some very light ageing later once everything is mounted?

IMG_9163.jpeg

IMG_9162.jpeg

IMG_9159.jpeg

IMG_9158.jpeg

IMG_9154.jpeg

IMG_9153.jpeg

IMG_9152.jpeg

IMG_9151.jpeg
 
HMS Victory – Sail Work Day: 10 Hours of Pure Focus ⛵

What a massive day on the build today. I put in a solid 10 hours straight working on the sails and rigging, and I’m honestly thrilled with how things are starting to come together. Seeing the HMS Victory slowly transform from a fully rigged ship into one that finally begins to look alive under sail is incredibly rewarding.

I spent a lot of time carefully shaping and tensioning each sail to capture realism and motion, as if she’s pushing through a sea breeze. I didn’t want flat, lifeless sails—my goal is to make them look like there’s wind driving her forward, just as she would have looked during the age of sail. Every line had to be thought through—sheets, braces, clewlines, buntlines—all coming together so that the sails naturally pull and sit with believable form.

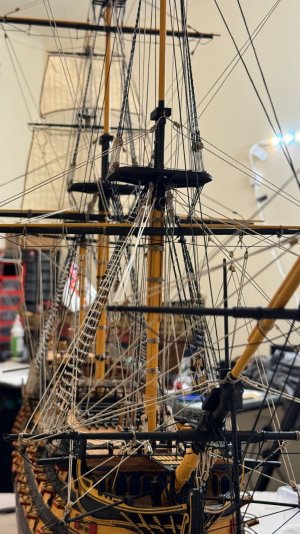
I also had to be strategic with how I tied in the additional running rigging now that the sails are mounted. Things are really getting tight and busy between the masts, and there’s very little room for fingers or tools now. It’s a challenge, but the good kind—the kind that makes you appreciate the engineering genius behind these ships.

The difference the sails make is unreal. Victory suddenly looks powerful and proud—like she’s actually at sea again. And I’m nowhere near done yet! Still lots more sail work to go, and then I’ll move on to finishing touches like anchors, rigging coils on deck, and a few final details before I can officially call this build complete.

For now, I’m wrapping it up for the night—eyes are tired, hands full of CA glue, but I’m absolutely loving this stage of the build. Every hour invested is 100% worth it.


Thanks again to everyone following along—I appreciate the support and motivation from this awesome modelling community. More updates soon ⚓

IMG_9184.jpeg

IMG_9182.jpeg

IMG_9181.jpeg

IMG_9180.jpeg

IMG_9179.jpeg

IMG_9178.jpeg

IMG_9177.jpeg

IMG_9176.jpeg
 
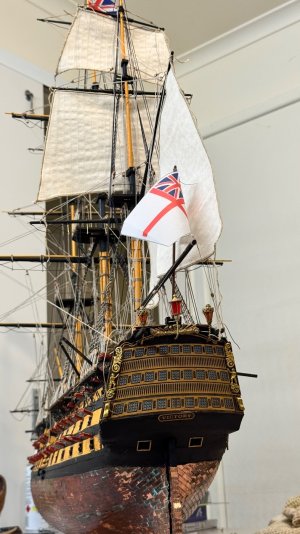
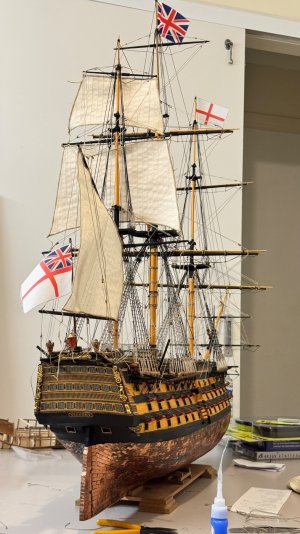
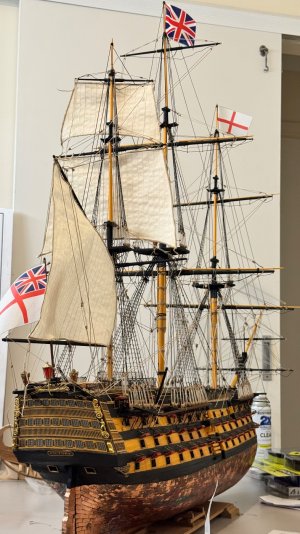
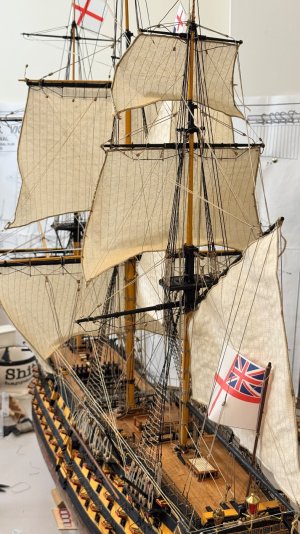
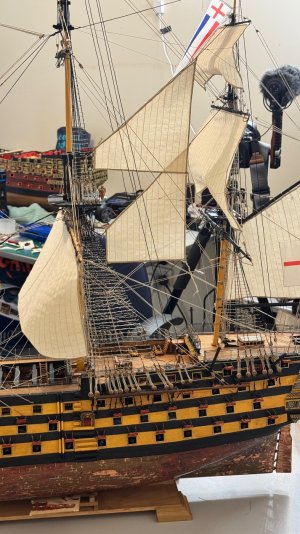
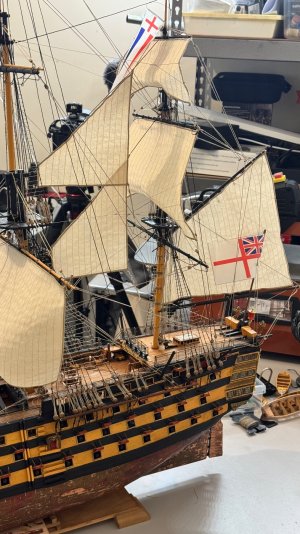
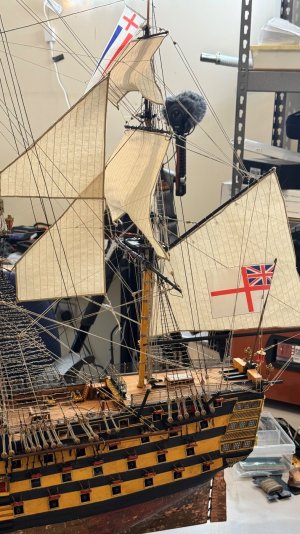
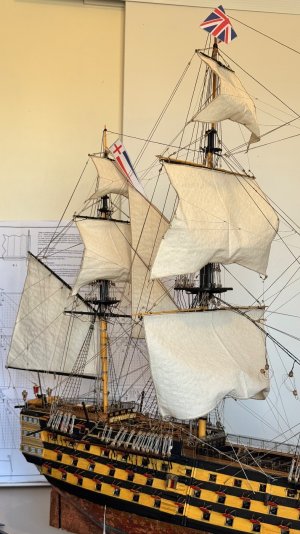
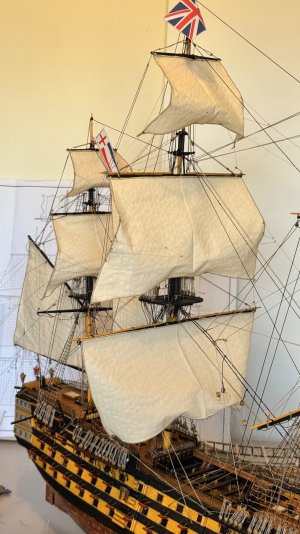
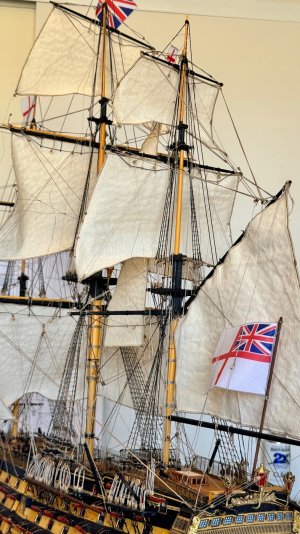
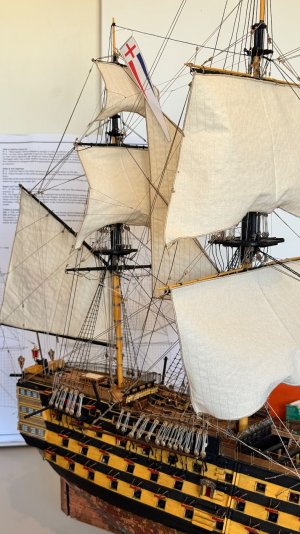
⚓️ Sail by sail, she’s coming to life! ⛵


10 sails down – 6 or 7 to go!


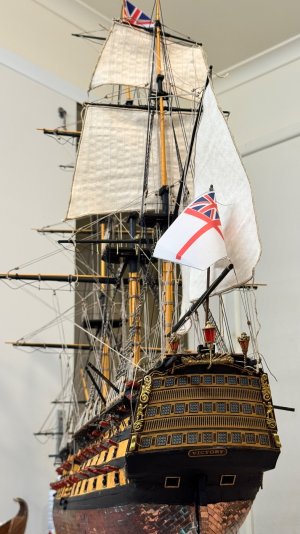
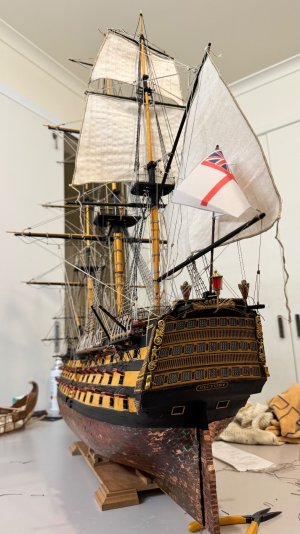
Another huge milestone today on my Mantua HMS Victory build. After months of rigging, deadeyes, stays and lines, it’s an incredible feeling to now see the sails transforming her into a living, breathing ship. For the first time, I can actually feel the motion of this model—as if the wind is pushing her across the Channel.


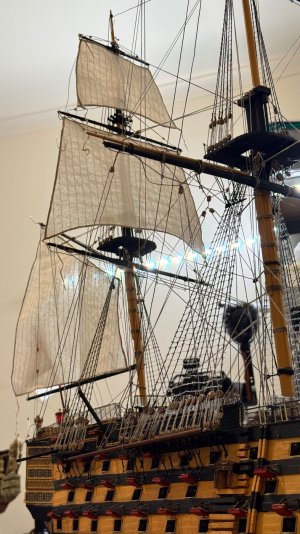
I now have 10 sails mounted, carefully shaped to look naturally filled with wind rather than hanging flat. That’s always been a big goal of mine—realism over convenience. It would have been easy to just hang them straight, but I wanted the atmosphere of a ship under way, ready for action—as she would have looked at Trafalgar in 1805.


Every sail has its own challenge:


✅ Correct tie points


✅ Seam alignment


✅ Curvature with realistic billow


✅ Tensioning all the sheets and braces without distorting previous work


✅ Making sure the lines don’t interfere with each other (easier said than done!)


I’m deliberately taking my time here. Each one of these canvas beasts has a personality of its own, and the more I add, the more intricate the web of rigging becomes. Still to go are the remaining staysails and topgallants, and then the real fine-tuning begins—adjusting belaying points, trimming excess line, tightening braces, coiling ropes on deck and bringing it all together as a proper Royal Navy warship.


I have to say—I’m absolutely loving how she looks right now. The sails introduce a powerful sense of movement and presence. Even standing still in the workshop, she looks ready to answer Nelson’s famous order:


“England expects that every man will do his duty.”


Next step tomorrow—more sails and more rigging lines! Steady as she goes. ⚓


Let me know what you think of the progress so far!

—Phil

IMG_9199.jpeg

IMG_9198.jpeg

IMG_9197.jpeg

IMG_9196.jpeg

IMG_9195.jpeg

IMG_9194.jpeg

IMG_9193.jpeg

IMG_9191.jpeg

IMG_9190.jpeg
 
⚓️ Sail by sail, she’s coming to life! ⛵


10 sails down – 6 or 7 to go!


Another huge milestone today on my Mantua HMS Victory build. After months of rigging, deadeyes, stays and lines, it’s an incredible feeling to now see the sails transforming her into a living, breathing ship. For the first time, I can actually feel the motion of this model—as if the wind is pushing her across the Channel.


I now have 10 sails mounted, carefully shaped to look naturally filled with wind rather than hanging flat. That’s always been a big goal of mine—realism over convenience. It would have been easy to just hang them straight, but I wanted the atmosphere of a ship under way, ready for action—as she would have looked at Trafalgar in 1805.


Every sail has its own challenge:


✅ Correct tie points


✅ Seam alignment


✅ Curvature with realistic billow


✅ Tensioning all the sheets and braces without distorting previous work


✅ Making sure the lines don’t interfere with each other (easier said than done!)


I’m deliberately taking my time here. Each one of these canvas beasts has a personality of its own, and the more I add, the more intricate the web of rigging becomes. Still to go are the remaining staysails and topgallants, and then the real fine-tuning begins—adjusting belaying points, trimming excess line, tightening braces, coiling ropes on deck and bringing it all together as a proper Royal Navy warship.


I have to say—I’m absolutely loving how she looks right now. The sails introduce a powerful sense of movement and presence. Even standing still in the workshop, she looks ready to answer Nelson’s famous order:


“England expects that every man will do his duty.”


Next step tomorrow—more sails and more rigging lines! Steady as she goes. ⚓


Let me know what you think of the progress so far!

—Phil

View attachment 550162

View attachment 550163

View attachment 550164

View attachment 550165

View attachment 550166

View attachment 550167

View attachment 550168

View attachment 550169

View attachment 550170
Nicely done
 
Back
Top