• Win a Free Custom Engraved Brass Coin!!!
    As a way to introduce our brass coins to the community, we will raffle off a free coin during the month of August. Follow link ABOVE for instructions for entering.

Special Tool or Special Skill/Technique?

Joined
Nov 17, 2021
Messages
1,127
Points
408

Location
Columbia, SC
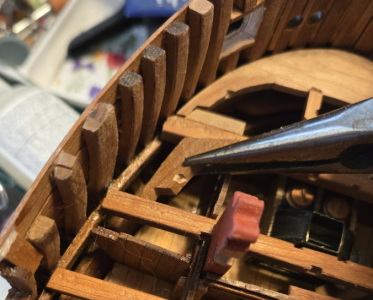
I've run across this before, but I'm about to run across it many, many times with my current Granado build. How do I hold small parts, with glue on 2-3 surfaces, while inserting it into the proper location in a hull structure or other area? Like what I'm trying to do here:
1763228150918.png
I can kind of get the piece in place, but of course it's at an angle instead of horizontal. I can't get my fat fingers in place to hold it, so need pliers or tweezers or something to do it. But, everything I have holds it an an angle. Bent end tweezers and pliers bend the wrong direction - sideways in the above picture. But to do it right, I need a tool or method to hold and position the piece in the exact position to secure it with glue. I've tried double-sided tape and sticky putty to no avail.

So, is there a tool or method I don't know about to do this? I'm certain this is a pretty common need in model ship building, so many/most of you have found some way of doing it. Please enlighten me!
 
Piano wire? Drill a small hole in a hidden area of the
part. Using a piece of stiff wire, bend it into a shape that will offer the piece with the required orientation. Press the end of the wire into the hole. When the glue dries remove the wire.

Roger
 
Piano wire? Drill a small hole in a hidden area of the
part. Using a piece of stiff wire, bend it into a shape that will offer the piece with the required orientation. Press the end of the wire into the hole. When the glue dries remove the wire.

Roger
That's a thought. Drill the hole underneath, make a U-shaped wire bend to insert from above. Worth trying, thanks.
 
A common problem! I have sometimes inserted a pin into a pre-drilled hole (push fit) in a position that I can grip with pliers or tweezers. I, too, wish I had some angled pliers with the bend in the other plane from the usual. Perhaps I may try wrecking a cheap pair of tweezes.
 
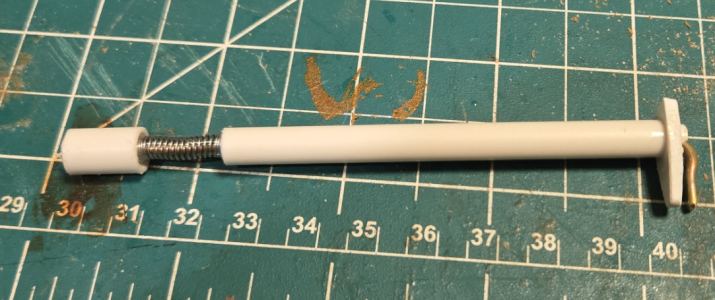
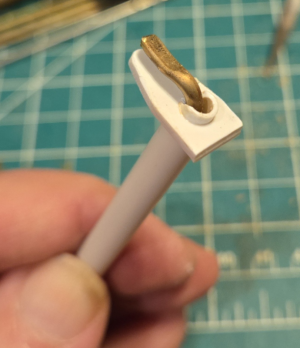
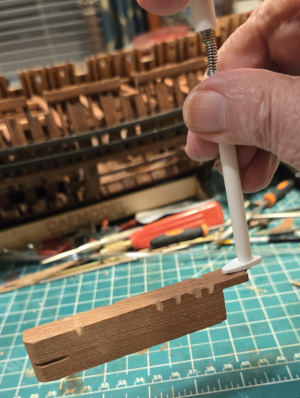
I think I solved my problem. I made a simple tool out of some brass rod and plastic tubing scraps. The finished "tool" look like this:
1763261849187.png
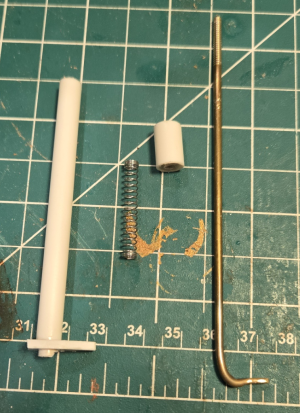
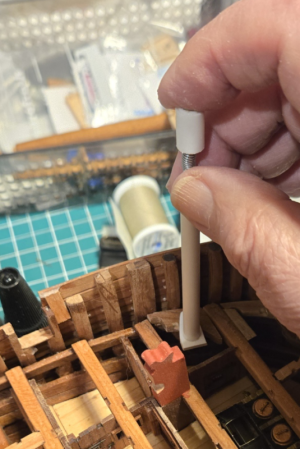
Taken back apart, it looks like this: and it's use in the above situation is shown here:
1763261900903.png 1763261961962.png
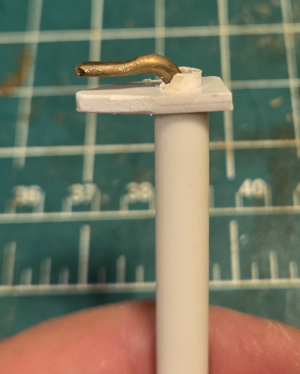
I used a scrap of brass rod about 3mm round, threaded one end to 4-36, heated, flattened and bent the other end to hold the piece.
The housing is made up of 3 different sizes of telescoping plastic tubing, cemented together, with a flat piece added to hold the item at the end.
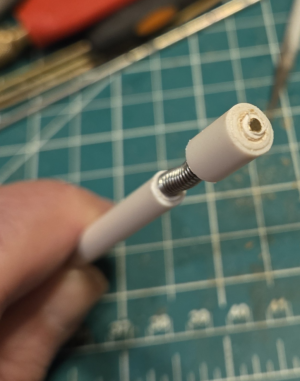
I used the spring from a ballpoint pen, and made the adjusting and assembling "button" with 3 pieces of tube, tapped to 4-36 (finally used my 60 year old set of dies and taps).

These are close-ups of the assembled unit:
1763262220311.png 1763262250914.png 1763262281431.png

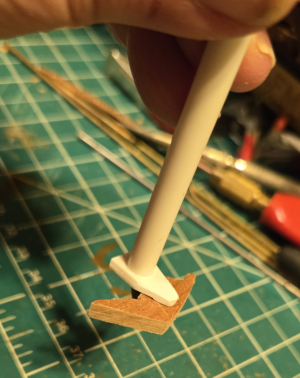
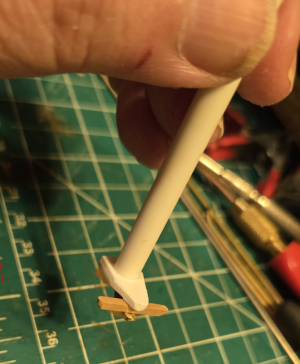
It actually works quite well, holding all manner of pieces and sizes securely, without need to press the button:
1763262317152.png 1763262337184.png 1763262374939.png
The spring holds the part in place, the top housing can apply pressure down to position the part, and pressing the button releases the part and allows removal of the tool.

It's not pretty, and I'm not sure how long it will last, but I think it will work just fine for my purposes. I considered designing a better one for my son to make a 3D print of for the housing and button, but I'd still want to use brass for the moving rod. And, thanks to my clumsiness and fat fingers, I have a new tool to use!
 
How about placing a part into a final position and only then applying the glue?
Regardless of how the part is positioned, I'd say that depends on the location, type of glue, etc. On the parts I'm now placing, glue first on the part, then placing it with the tool, and adjusting the position slightly works very well, with all glue hidden. In other areas, especially if using CA glue, adding it later makes sense to me.

The tool works great to position the part to check fit, etc. and then glue with whatever method desired.
 
Possible methods:

For direct hand positioning and holding in place:


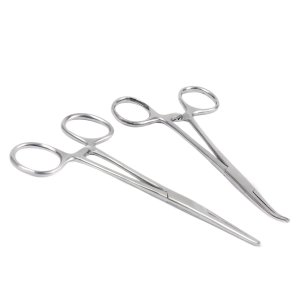
Kelly clamps - straight and curved -small and 5.5" : Kelly clamps.jpg

This pair was $7 US
A piece of Tygon tubing (used IV tubing works) as padding. Using the locking function with wood is probably a bad idea.

Prices are all over the map - a $5 instrument is probably good enough.


For stand=off position clamping:


You could try gluing the backside of the part to a stick or Bamboo skewer using Duco cement : apply to both surfaces let dry- add abit more to one face and bond - dries quickly - poor sheer strength - push may work - when the job is done - apply a drop of acetone using a pipette.
Grip the stick in:

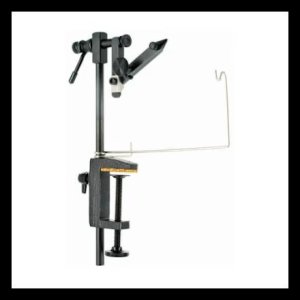
A tie flying C-clamp but ***** not too articulate: tie flying C-clamp.jpg

or

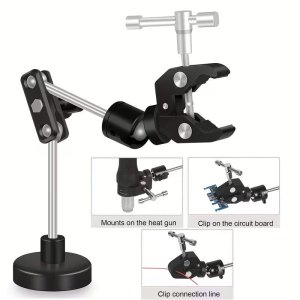
A circuit board heat gun holder or something I found on TEMU: TEMU heat gun holder.jpg

It looks like it should be useful for something.


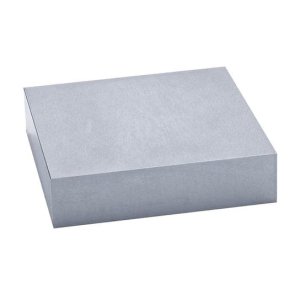
It has a magnetic base. To hold it this steel bench block 3.5"x3.5"x0.75": steel bench block 3x3x75.jpg

It is from a jewelers supply is small but heavy and can get close.
There are snake neck LED spot lights with a magnetic base so the block can be used for that too as well as it being an anvil if you need to pound the heck out of something.
 
Back
Top