


I love the doors. I'm going to steal your idea. So much nicer than the photo etch in the kit.I went ahead with the deck planking, after adding some small curved pieces atop the bulkheads to add camber. Then I started work on the doors, following others in making new ones.
View attachment 590825
View attachment 590826
View attachment 590827
View attachment 590828
View attachment 590829
View attachment 590830

-

SUBSCRIBE TO SHIPS IN SCALE TODAY!
The beloved Ships in Scale Magazine is back and charting a new course for 2026!
Discover new skills, new techniques, and new inspirations in every issue.
NOTE THAT OUR NEXT ISSUE WILL BE July/August 2026 -

Win a Free Custom Engraved Brass Coin!!!
As a way to introduce our brass coins to the community, we will raffle off a free coin during the month of August. Follow link ABOVE for instructions for entering.
You are using an out of date browser. It may not display this or other websites correctly.
You should upgrade or use an alternative browser.
You should upgrade or use an alternative browser.
HMS Beagle 1:60 scale Occre by embojo


hear hear!!I love the doors. I'm going to steal your idea. So much nicer than the photo etch in the kit.
Marquand shows them clearly in his book and they are labeled as "hammock rail" Cannot speak to their being on any other shipI really am curious. Has anyone seen a diamond pattern on any other 19th century Royal Navy ship?
Yes, it's interesting. I can only think he decided to follow PG Kings sketch. There aren't any detailed plans or drawings of the modifications to Beagle. What troubles me is the lack of any other depiction of other Royal Navy ships... other Brigs, frigates, ships of the line with similar decoration, and this makes me doubtful about his interpretation, and at least question the existence of diamond decorations. There's no doubt they do look beautiful and Marquardt is certainly a greater authority than me!! The absence of definitive evidence means we all have some latitude in how we build our models... which is quite nice reallyMarquand shows them clearly in his book and they are labeled as "hammock rail" Cannot speak to their being on any other ship

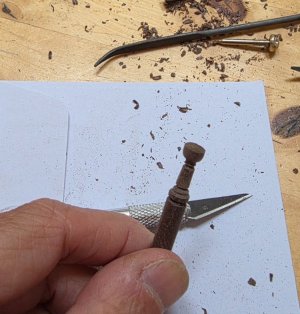
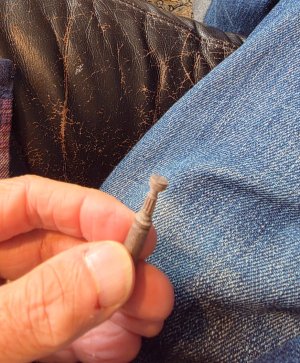
While waiting to start planking, I worked on the azimuth compass and binnacles. I already had some 6mm mahoganny dowels. For the binnacle on the right, i marked the dowel out from the kit piece, did some rough carving then put it in the cordless drill chuck. I used small files to get the shape for the base.
For the binnacle head, I used a 6mm brass upholstery tack and filed it into shape. I drilled the top and added small pieces of brass rod for the lamp 'chimneys' I filed the flat window, then used a dremel to hollow it out. I drew a compass on a small paper disc glued it inside, then a drop of transparent glue to simulate glass window (It will be turned away so won't really be visible).
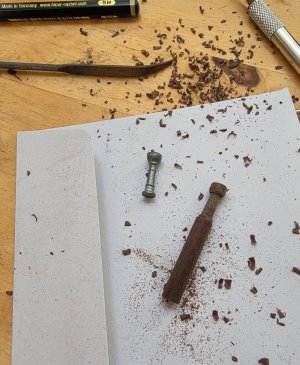
For the azimuth compass, I decided not to use the cordless drill. I carved the dowel and sanded while rotating between fingers. Its not quite as even I suppose. Then used a blade to cut the vertical grooves. I cut a thin piece of brass sheet, formed it into a circle and glued to the top of the wooden base. I used white acrylic paint and a marker pen for the compass then a drop of transparent glue for the glass cover. The upright sighting pieces were cut from another piece of thin brass sheet.
I wish I had a lathe... maybe one day!
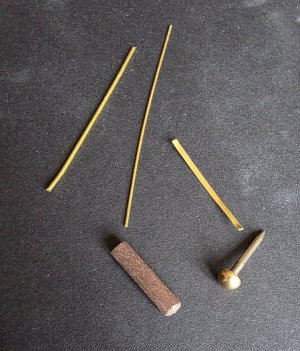
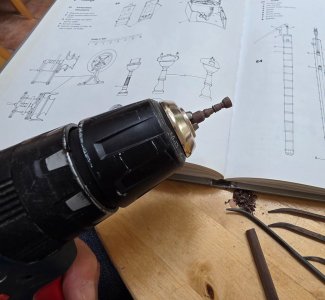
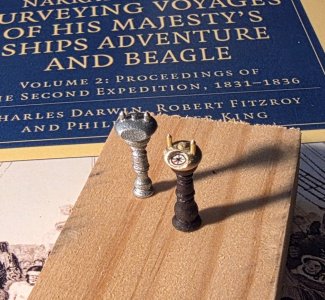
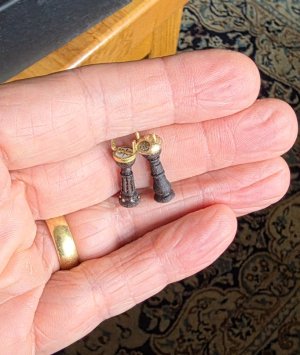
For the binnacle head, I used a 6mm brass upholstery tack and filed it into shape. I drilled the top and added small pieces of brass rod for the lamp 'chimneys' I filed the flat window, then used a dremel to hollow it out. I drew a compass on a small paper disc glued it inside, then a drop of transparent glue to simulate glass window (It will be turned away so won't really be visible).
For the azimuth compass, I decided not to use the cordless drill. I carved the dowel and sanded while rotating between fingers. Its not quite as even I suppose. Then used a blade to cut the vertical grooves. I cut a thin piece of brass sheet, formed it into a circle and glued to the top of the wooden base. I used white acrylic paint and a marker pen for the compass then a drop of transparent glue for the glass cover. The upright sighting pieces were cut from another piece of thin brass sheet.
I wish I had a lathe... maybe one day!

- Joined
- Oct 12, 2022
- Messages
- 87
- Points
- 113

Congratulations, your modification is very successful. The details of Occres kit seems based on imagination, frustrating.
Are leaving the cabin walls a natural color? I've stained my deck with MinWax "weathered oak" so was thinking that I might just do one coat of stain on the walls, not too. But then I read somewhere, I don't remember, to use thinned sapele dye. I don't see anything in Marquat about colors.Working on deck houses. I think the cabin wall planking needs more attention. The deck camber is just about visible. I've added some curved strips to the top of the quarterdeck for the quarterdeck camber. I couldnt resist adding a few interior details to represent a cabin. The left-hand facing door led into the chartroom/Darwin's cabin which had several book cases and the large chart table. In the kit, this area is bisected by the false keel, but it was fun to do.
View attachment 592087
Hi Cazzie, cabin wall (and inside bulwark?) colours? Thats a very good question. I've been thinking about this but haven't decided yet! I think it would still be possible to change cabin wall colours at this stage!.
My deck is a light walnut, same for cabin walls. I used pear strips for inside bulkhead. I'm wondering if it would look better with a bit more contrast... darker-stained cabin walls? Or alternatively, painted walls?
I've searched a lot for definitive evidence but there doesn't seem to be any, giving us some freedom for personal preference. I oscillate between darker staining for the cabin/bulwark walls... and painting them a light colour... dirty white... cream... yellowish ocre (like Nelson's ships) etc. I think paint, even if light, would add a textural contrast with the deck.
My deck is a light walnut, same for cabin walls. I used pear strips for inside bulkhead. I'm wondering if it would look better with a bit more contrast... darker-stained cabin walls? Or alternatively, painted walls?
I've searched a lot for definitive evidence but there doesn't seem to be any, giving us some freedom for personal preference. I oscillate between darker staining for the cabin/bulwark walls... and painting them a light colour... dirty white... cream... yellowish ocre (like Nelson's ships) etc. I think paint, even if light, would add a textural contrast with the deck.
Thanks for your endorsement Jackie WolfCongratulations, your modification is very successful. The details of Occres kit seems based on imagination, frustrating.
. I'm really enjoying trying to make improvements. It's my first ship build so I don't have anything to compare it with. Even built straight from the instructions though, I still think it looks pretty nice. And at least you make rapid progress. I seem to be going at a snails pace! I add a few (first layer) planks, then find some more exciting detail to work on!! Hopefully I'll get there eventually 
I noticed that you framed out for your own port holes instead of using the photoetch. Will you put a black background behind them?Working on deck houses. I think the cabin wall planking needs more attention. The deck camber is just about visible. I've added some curved strips to the top of the quarterdeck for the quarterdeck camber. I couldnt resist adding a few interior details to represent a cabin. The left-hand facing door led into the chartroom/Darwin's cabin which had several book cases and the large chart table. In the kit, this area is bisected by the false keel, but it was fun to do.
View attachment 592087
Last edited:


Good morning. I have just caught up with your log. I love all the mods you are doing to your Beagle. Very nice indeed. Cheers Grant
Hi Grant, seeing your expertise, I very much appreciate your comments. My long term plan is to make a plank on frame model.Good morning. I have just caught up with your log. I love all the mods you are doing to your Beagle. Very nice indeed. Cheers Grant
Hi Cazzie, after cutting out the window holes, I used pieces of clear acetate glued inside. I did have some glass slide coverslips but I found them difficult to cut and they kept cracking!I noticed that you framed out for your own port holes instead of using the photoetch. Will you put a black background behind them?
First layer of planking finally done. Oh, a bit of sanding to do. It was a bit more tricky than I expected. If you look carefully on the starboard side you can see a straight line of several strakes I had to cut and replace. I did quite a lot of tapering and steam bending, and there are 2 or 3 dropped planks per side. I was pleased not to need too much wood filler. I've test fitted the stem piece. I'm thinking of cutting a rabbet in the keel/stem and glueing them in place before the final planking. I'm going to try cutting and spiling the planks from sheet wood, rather than using the provided strip wood. (The TV makes quite a good backdrop for taking pics!)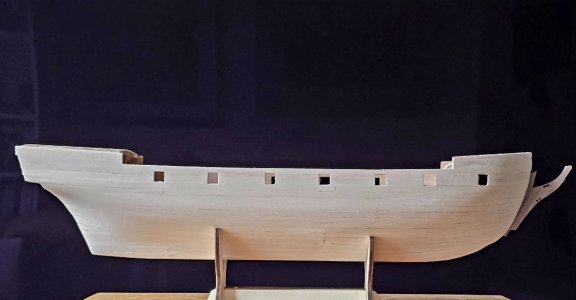
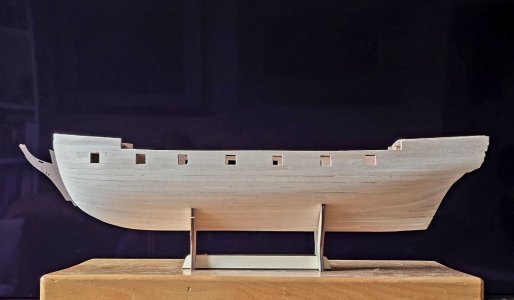
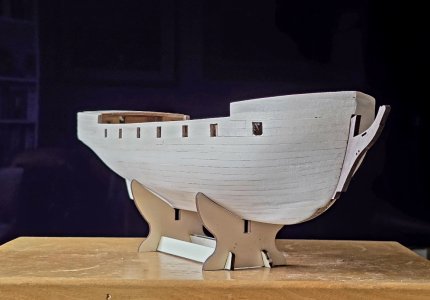
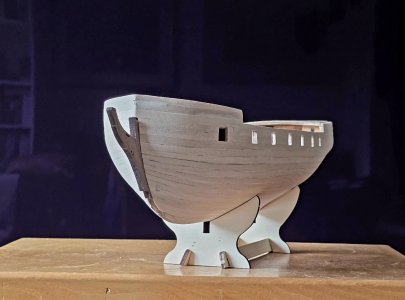
Thanks Grant. Much appreciated. It is going very slowly as this is my first build and at each stage, I need to do a lot of research, reading reference books, build logs and watching many videos. Model ship building really is a fascinating subjectGood morning. I have just caught up with your log. I love all the mods you are doing to your Beagle. Very nice indeed. Cheers Grant
Been going slowly recently. I fitted the keel, then with some difficulty cut a rabbet. I'm not sure whether it would have been better to have cut the rabbet before attaching. I then fitted the garboard strakes. I decided to attach the wales next which is where I'm at now.
Taking a break for a long planned holiday... to see the total solar eclipse in Tarragona, just south of Barcelona. We are driving down in our wee VW campervan. When we planned this there weren't any wild fires or diesal shortages due to war. So fingers crossed it will go well. Our friends near La Rochelle, others south of Bordeaux and yet others in Barcelona who we are visiting tell us there are no fires in their vicinities! I will look forward to progressing with the Beagle on our return in about three weeks time
Taking a break for a long planned holiday... to see the total solar eclipse in Tarragona, just south of Barcelona. We are driving down in our wee VW campervan. When we planned this there weren't any wild fires or diesal shortages due to war. So fingers crossed it will go well. Our friends near La Rochelle, others south of Bordeaux and yet others in Barcelona who we are visiting tell us there are no fires in their vicinities! I will look forward to progressing with the Beagle on our return in about three weeks time
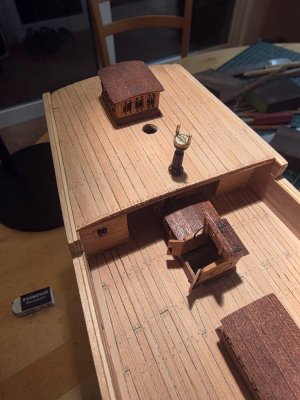
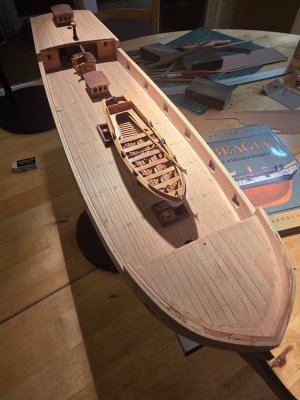
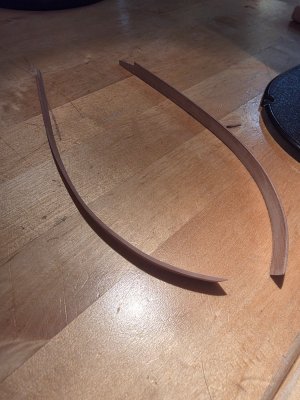
I decided to try and simulate treenails on the deck, without making them too noticeable. Deck fittings are just loosely placed as I'm still working on second planking of the hull. Having a second attempt at the wales, rather than the thin strip of wood used in the kit.


Looking very fine indeed. Cheers Grant