• Ships of Scale has incorportated an extra level of security when you log In. Please follow on-screen prompts to acknowledge that you are not a robot via a "Check Box" or a "Pictorial Check Box Puzzle". This is needed due to higher level of AI Activity Security.
  • SUBSCRIBE TO SHIPS IN SCALE TODAY!

    The beloved Ships in Scale Magazine is back and charting a new course for 2026!
    Discover new skills, new techniques, and new inspirations in every issue.

    NOTE THAT OUR NEXT ISSUE WILL BE July/August 2026
  • Win a Free Custom Engraved Brass Coin!!!
    As a way to introduce our brass coins to the community, we will raffle off a free coin during the month of August. Follow link ABOVE for instructions for entering.

New carving project in apple: The Stern Decoration of the Royal Charles

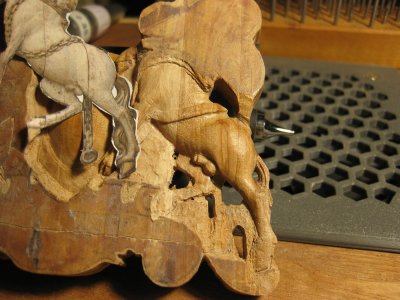
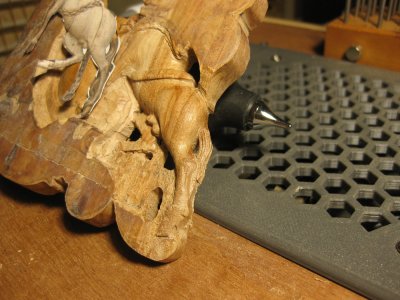
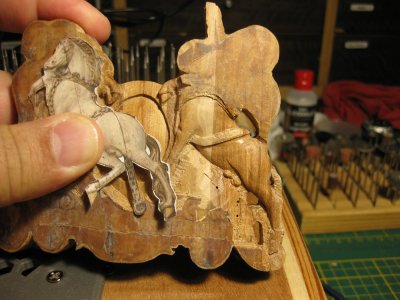
I worked on the decoration again for a few days and my god this is a careful job. Slowly and carefully not to take away too much wood. There is a lot of work to recreate the part, but deeper in the wood. Be careful not to take away the surrounding wood too much and later fall short.
But it is very nice to do. Working on the horse's legs and starting to give the body a rough shape. It looks like a minor update, but I think it's a total of 8 hours of work.

IMG_5885.JPGIMG_5886.JPG
Another difficulty I encounter is that apple wood has hard and soft zones. And sometimes you keep on with the cutter in the soft part if you are not careful. Thanks for passing by!
 
I worked on the decoration again for a few days and my god this is a careful job. Slowly and carefully not to take away too much wood. There is a lot of work to recreate the part, but deeper in the wood. Be careful not to take away the surrounding wood too much and later fall short.
But it is very nice to do. Working on the horse's legs and starting to give the body a rough shape. It looks like a minor update, but I think it's a total of 8 hours of work.

View attachment 619014View attachment 619015
Another difficulty I encounter is that apple wood has hard and soft zones. And sometimes you keep on with the cutter in the soft part if you are not careful. Thanks for passing by!
I ‘minor 8 hours of carving’ update is a update, Stephan. And it’s nice to see how your create this small details. Great!
Regards, Peter
 
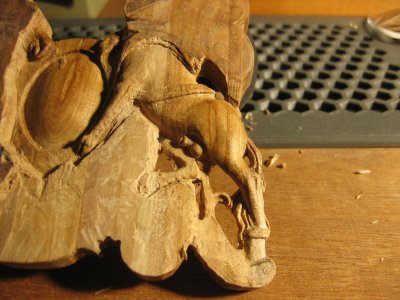
I just realized that my last update was a month ago again. But there isn’t much to show every time, either. I don’t work for long stretches at a time, and usually only for an hour at most. Sometimes it’s just too hot here to get anything done. And sometimes I work for about three hours straight. But you can now see the horse’s head taking shape in the carving. I’m not quite there yet, and the body still needs to be slimmed down quite a bit. (The horse’s, that means, and mine too, for that fact.
Thanks for your visits, likes, and comments—I always appreciate them.

But the shape is already coming together nicely. Apple wood is difficult to shape. As I mentioned earlier, I really have to watch out for soft spots in the wood or tough sections. In the soft spots, you cut through too quickly; in the tough sections, the router gets caught in the wood; only the hard parts (fortunately, most of it) go very smoothly.
The other challenge lies in not removing too much of the surrounding wood too early, so I can better work on the horse. That wood needs to remain for the decorations around it. Apple wood is a good teacher, and it’s still a pleasure to try to get this right.

IMG_5896.JPGIMG_5898.JPG

Thanks for stopping by.
 
Nice progress with the carvings, Stephan. And …… it’s all in the details ….. :)
Regards, Peter
... details, details, details!!!
Peter, Jim, thanks. Details like that take so much time. In this case you don't see it growing, but shrinking Alien
The first attemp was more a part for Godzilla. But after a while it got the right scale. I asked the admiral if she would like to shape that part, because she has a better view on it. But she didn't feel like getting involved in that. :)
 
I asked the admiral if she would like to shape that part, because she has a better view on it. But she didn't feel like getting involved in that. :)
... hilarious. You are a brave man to suggest Admiral shaping that part. Good thing she refuses. Imagine she had a scalpel in her hand...ouch. Speechless Speechless Speechless ROTFROTFROTFROTFROTFROTFROTFROTF
 
Thank you all so much again for your visits, likes, and words of encouragement.

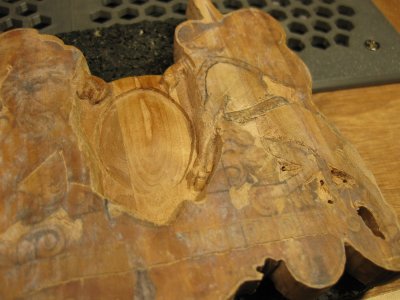
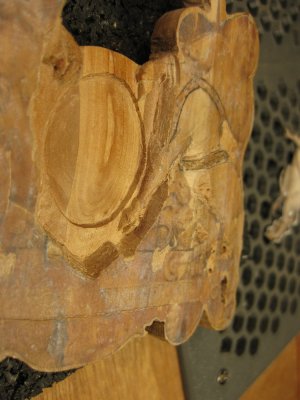
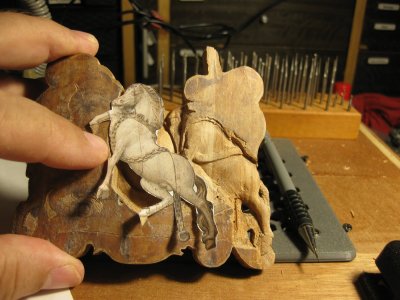
A lot has happened. The details I discussed at length earlier have been completely removed and redone, but this time carved deeper into the wood. You really get practice by recreating the details over and over again. It’s also pretty hard to judge whether you’re going deep enough in proportion. But it’s better to start too high than to leave too little wood to get it right.

The belly has been largely changed, his manhood has been redone, the tail is more detailed, and the rear leg is in the works. I’ve also removed quite a bit of excess wood. Unfortunately, there’s an irreparable mistake near the green circle. It should have had a bit more curvature. I removed just a millimeter too much. The blue rectangle shows a scratch that’s too deep; I have some sanding pads for the Dremel and hope to make it invisible with those. I’m sure I’ll manage that. The purple oval near the hind leg is the next task; the leg needs to be much narrower at the back, which will also leave more wood for the tail. You can really see how everything comes together. I once posted videos showing how I add details by carefully running the router over a small area for minutes at a time. That’s still the case, and it’s still time-consuming with these details. Thanks for stopping by.

IMG_5900.JPGIMG_5900a.jpg
 
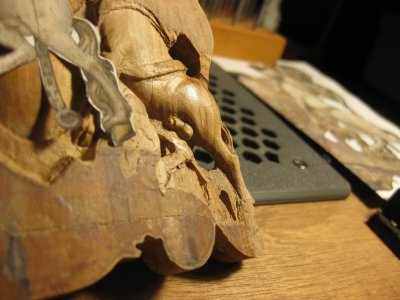
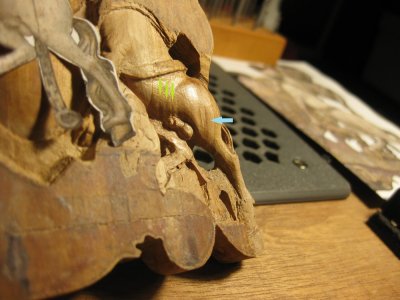
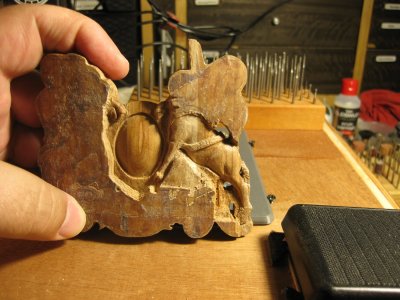
This morning I worked on the back leg and addressed the issues mentioned in the previous post. I was able to more or less resolve the problem indicated by the green circle by pulling the leg less far forward and hollowing out the abdominal area slightly more on the side—emphasizing the waist more.

The area on the hip inside the rectangle is now completely gone, but it doesn’t look that way in the photo. This is due to the grain of the wood; the grain is lighter in color in that deeper spot. Apple wood is simply unpredictable and not uniform in color. And because of that, it looks as if I slipped with the chisel there—really strange. But macro photos are always unforgiving.

The back leg is now largely separated from the background, which makes it look more lively; the “knee area” has also been slimmed down a bit.

And then there are those strange stripes in the last photo. They’re very subtle, but because I’m taking the photo with just one lamp, you can see the shadow very clearly. I’ll focus on that tomorrow to get it nice and smooth. By the way, I do that with a scalpel, which I use to carefully scrape along the grain. Then I polish it with a nylon brush on the Dremel until it shines.

Thanks for the likes and for stopping by.

IMG_5901.JPGIMG_5902.JPGIMG_5903.JPGIMG_5903a.jpg
 
I am awestruck at the work, I never thought that I could be that good at wood carving all of those metal parts in wood.
Thanks for your visit, I had the same thoughts when I did my first one and still do with this one. But with patience, step by step and a rotary tool with the right cutters you get a long way.
 
Thanks all for the visit and likes.

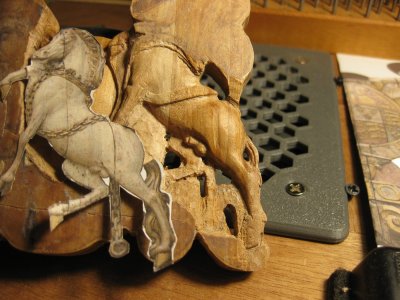
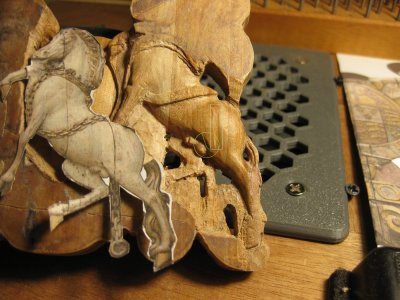
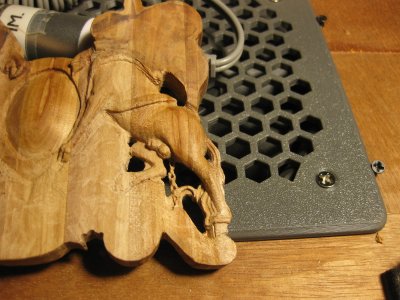
It’s actually amazing to see how the details take shape. You mill a tenth of a millimeter here and there, and sometimes it seems like it’s going in the wrong direction. But in the end, you still get the result you had in mind. Sometimes it’s a little different from the original, but good enough to move forward with. I looked up at the chain; it seemed very difficult to make. But it turned out to be a piece of cake. Even though the wood I still had available was a bit too thin. I’d been a little too generous with the removal at an earlier stage. I shaped the horse’s hoof on the underside. And I worked a bit more on the hind leg; that’s also slowly starting to take the right shape. I think I’m going to pay a little more attention now to the top of the horse and the chain across the flank.


IMG_5905.JPG
 
Back
Top