• SUBSCRIBE TO SHIPS IN SCALE TODAY!

    The beloved Ships in Scale Magazine is back and charting a new course for 2026!
    Discover new skills, new techniques, and new inspirations in every issue.

    NOTE THAT OUR NEXT ISSUE WILL BE July/August 2026
  • Win a Free Custom Engraved Brass Coin!!!
    As a way to introduce our brass coins to the community, we will raffle off a free coin during the month of August. Follow link ABOVE for instructions for entering.

FAIR AMERICAN 14 GUN Privateer by Model Shipways 1:48 SCALE

I just remembered some about the stem piece from Namabiiru's build HERE post#6. He made his own figurehead. That's above my skill level.

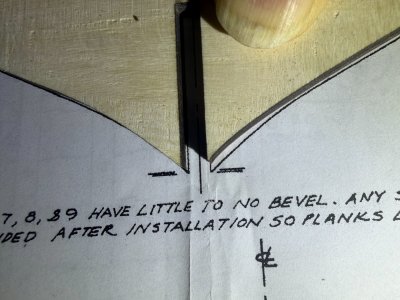
A notch must be cut into the stem piece. I took the metal figurehead out of the parts bag. It's pretty pathetic compared to the stem it sets on. Looks so tiny next to the stem piece it sit on. I will seach the internet to see if I can find a decent 1:48 scale figurehead. I noticed there isn't a hole cut into the stem piece for the lashing that holds the bowsprit in place.
View attachment 594886

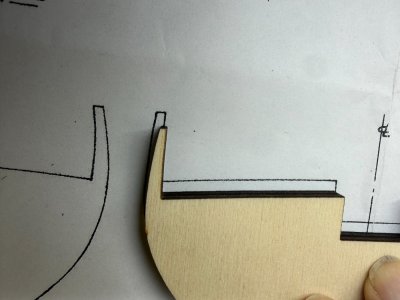
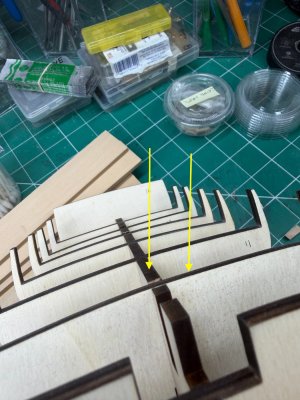
Plans show notch cut into the piece. And it shows the lashing hole which isn't there.
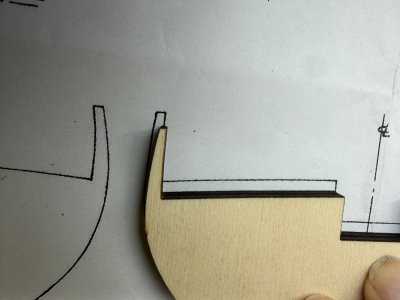
View attachment 594887

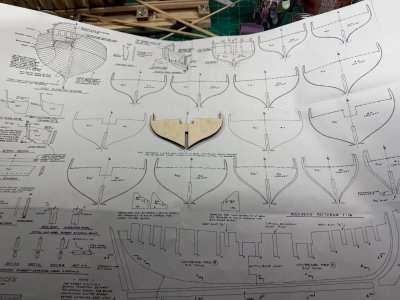
Here's an image from the plans showing the figurehead setting in the stem. The supplied figurehead looks nothing like this.
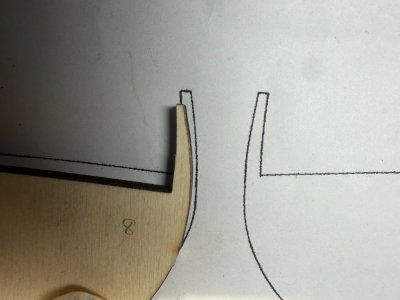
View attachment 594888

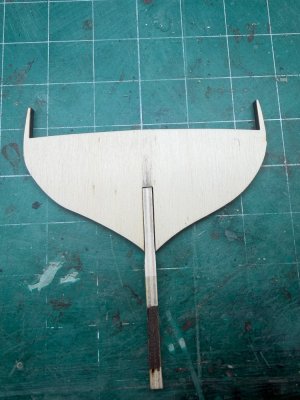
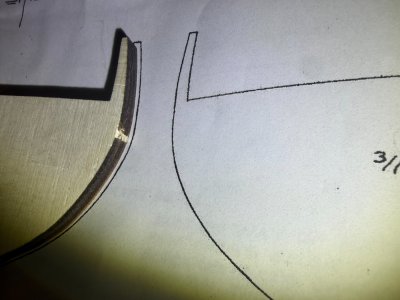
Not sure what I'll do. Here's the figurehead laying against the stem.
View attachment 594893

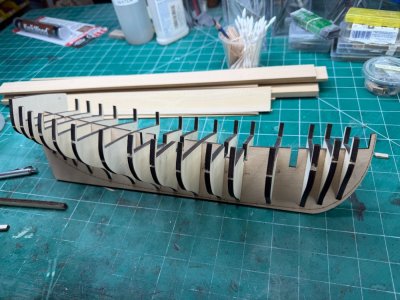
Belive I'll stop here and figure this out. I want to glue the keel pieces to the main keel before attaching the bulkheads. This way I can lay all the pieces flat on the bench when gluing to make sure they are evenly positioned. I may even cut new keel pieces from a better wood. I intend to use different woods for the hull and deck than those supplied with the kit.

Rob,
It took me forever to figure out what to do about the figurehead (maybe why it’s called that ;)). I had originally cut the notch, then decided to fill it back in, then in the end I cut a whole new stem.
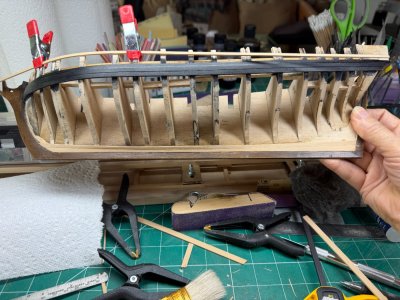
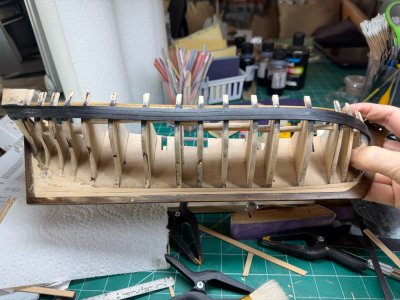
You are right about the white metal figurehead being pretty sketchy. For the record, I didn’t carve my own; I simply modified the heck out of the kit part. It could be argued I went a bit overboard, but I was having fun with it.
 
I've cut and installed the garboard and 1st broad strakes. Looks like there is only broad strake. I have several of the main planking pdf files/books. And google searched the internet. Most don't actually say how to spile these two starkes. I did find a couple references on the internet.

The general idea is to have a greater width at bow and stern and narrower width at the widest bulkhead. Though a couple sources said to taper at the bow/stern and widest midships. I'm going to ignore that one.

After confusing myself enough by reading everything I could find, I finally decided on this... garboard 33% wider at stern. My kit supplies planks (though I'm cutting my own) are 3/16". So the garboard was cut 1/4" wide. Left full width at stern. Trimmed to about 1/2 width at the largest bulkhead. And finally about 2/3 width at bow. This gives a little rise at the bow, but not much. I trimmed the broad strake at 7/16", a little less than the garboard, but more that the regular planks as suggested.

The kits manual states " The garboard strake and first broad strake (the first 2 planks next to the keel) should be given a bit more width at the
ends in order to follow the curve of the sheer and hull, and to compensate for greater drag, or depth, aft.

There's a little more angle between the two planks midships than I wanted. This was likely caused by the tip of the bulkhead not touching the rabbet correctly??? Anyway, I just didn't feel like working that area anymore.

1.jpg2.jpg
 
I've been thinking about what to do with this ship. Just not happy with about everything up to this point. i even purchased another of the same kit from model expo while it was on sale for 50% off this week, thinking I would just start over.

On the new kit, I laid the keel, the part that holds the bulkheads, over the drawings. The slots cut for the bulkheads don't even aline with the drawings. And the slots cut into the keel for the bulkheads to slip into are over 1mm narrower than the thickness of the bulkhead thickness material. I would need to run all the bulkheads through the thickness sander to get them to fit. I tried doing this with a piece of scrap bulkhead materail. The slots in the keel aren't even cut the same width. So each bulkhead would need to be sanded individually, or I could sand the actualy slot in the keel for each bulkhead.
1.jpg

I cut the bulkheads from the material. The bulkheads weren't numbered as they should have been. So I just started with the smallest as #1 and went to #16. Laying the bulkheads on the diagram sheets made it apparent why I had so much trouble fairing the kit I am currently working on.

Here is an image with a bulkhead aligned with the mark for the ship deck. Look how far off the sides of the bulkhead are.
2.jpg
Here is an image of the bulkhead aligned at the bottom where the false keel would attach. The ships deck and bulwarks aren't close.
3.jpg

And another bulkhead with the bottom aligned on the drawings.
4.jpg

As I had cut several new bulkheads from my own material on the kit i am currently building I guess it would be foolish to start over on a new kit with the same problems.

So... I'm back to the point of do I continue with this kit that I don't really care for as I've had so many problems. or just abandon it completely and move on to another kit??
 
How frustrating, Rob. And can you even trust the drawings? To make it work it seems you will have to scratch build new bulkheads - but then what's the point of the kit?

Have you ever reviewed this build? He seems to have advanced further than you have - maybe he can help?

 
This is typical of nearly everyone of the recent boxings of Model Expo kits I’ve started. It’s clear that materials and production methods have changed to reduce production costs, but the plans have not been modified to suit. I think this is part of the reason I’ve been so slow returning to my own build of this kit.

I hope you’ll stick with it, Rob, so we can lean on each other. We can call it a group build! :D
 
Yes I have reviewed Namabiiru's build. Very nice build. Most builds I can find were never completed. Or they are a completed build with just images posted. There was a couple excellent completed builds on another site, but that site was destroyed and the builds with it.

I just removed the wales and the garboard/1st broad strake off my model. Thinking of starting with the 'fairing' again and trying to get it better. I may even remove the false keel. Don't know yet.
 
Jumping in late….

You have the kit, it has problems, accept that and use it for skill building.

Sure the parts don’t match the drawings, but go with it, plank the hull the best you can, practice spiling and tapering….

Do a decent job on this one, roll the skills into the next.

Good luck with it….
 
Jumping in late….

You have the kit, it has problems, accept that and use it for skill building.

Sure the parts don’t match the drawings, but go with it, plank the hull the best you can, practice spiling and tapering….

Do a decent job on this one, roll the skills into the next.

Good luck with it….
Ha! Ok. Thanks for the input... :)
 
Keep at it Rob. Ersrich is right, use this to develop your skills although you seem to be pretty skilled already.

Most things I build I end up chucking the instructions and building new parts that are better than what was furnished in the kit. It's more fun and satisfying that way.

I'm finishing the standing rigging on my Fair American. A friend passed and I didn't have the heart to throw it away so I'm developing my rigging skills on a nice looking little ship. But talk about confusing... a story for another day.

Keep going! Persistence is the primary trait of a model ship builder! Best wishes,

Bruce
 
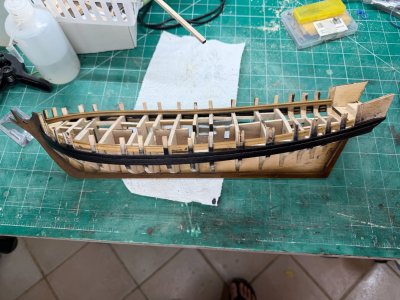
I'm finished with this model. Every time I try to fix something, I damage something else. Don't know how many times I've broken off the bulwark stantions. I can't even find the broken off pieces anymore. Guess I just don't have any 'love' for this kit anymore. I just don't want think through working on it now.

I thank those who were trying to get me to finish this model. But, I'm going to start over with another kit. Maybe I'll get my desire back to build a ship. Right now it's kind of low.
 
I'm finished with this model. Every time I try to fix something, I damage something else. Don't know how many times I've broken off the bulwark stantions. I can't even find the broken off pieces anymore. Guess I just don't have any 'love' for this kit anymore. I just don't want think through working on it now.

I thank those who were trying to get me to finish this model. But, I'm going to start over with another kit. Maybe I'll get my desire back to build a ship. Right now it's kind of low.
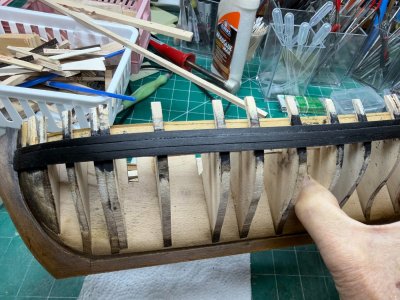
Sorry to hear you’re throwing in the towel. I broke quite a few stanchions as well, but was able to re-attach them with some reinforcement. I plan to add a bunch of extras anyway because what’s left of the original stanchions after fairing doesn’t leave a consistent base for the interior planking of the bulwarks and are in any event in the wrong place for framing the gun ports.
 
I tried starting another 'different' ship build. I couldn't do it. I don't feel good about giving up on this model. So, I have decided to not give away the new kit I just bought and start over using the new kit.

First thing I did was to use my thickness sander to get the bulkheads to fit into the keel. The keel slots were much narrower than the bulkheads, so none of the bulkheads would fit. Using my thinkness sander I slowly sanded down the piece of square stock until it would fit into one of the slots. This thickness worked for bulheads 6, 9, 10 and 14. None of the remaining bulkheads would fit into their keel slots. Reducing the thickness sander by .002 at a time I sanded the square stock until it would fit into another keel slot. This worked for bulkheads 2, 3, 4, 5, 11, 15, and 16. None of the remaining bulkheads would fit into their keel slots. I kept this up until I was able to fit all the bulkheads snugly into their slots.
1.jpg
2.jpg
 
Now... step two is to ask you knowledgable builders what you think is right.

Should I trust the plans of the bulkheads to be correct? And the laser. cut bulkheads to be incorrect?
3.jpg

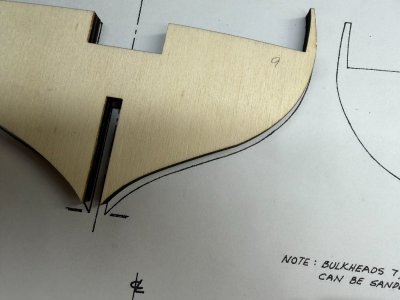
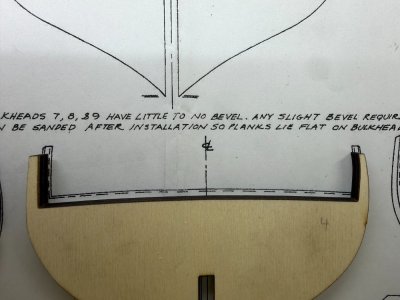
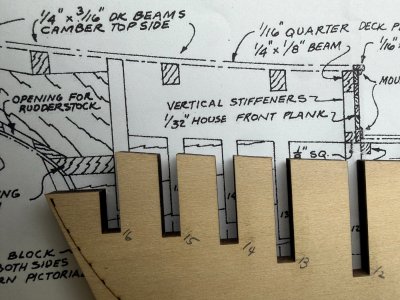
When placing each bulkhead over their drawing, the plywood bulkheads are all over the place with incorrect dimensions.
5.jpg4.jpg7.jpg

One thing I know I will do is to lengthen the bulkhead tips so they extend to the bearding line evenly on each side.

What do you think about the sides of the bulkheads? Should I glue on strips to get them to match the drawings? And to make them match when I flip the bulkhead over. Some are off quite a bit when I flip them.

I'm thinking about getting the bulwark stantions to match the drawings too. This just seems the right thing to do. What do you think.

I'm having a little problem remembering what I have done before so it's kind of like my first build on everything I do.

Any suggestions about what is the best way forward in correccting the bulkheads is appreciated.

6.jpg
 
Back
Top