• Ships of Scale has incorportated an extra level of security when you log In. Please follow on-screen prompts to acknowledge that you are not a robot via a "Check Box" or a "Pictorial Check Box Puzzle". This is needed due to higher level of AI Activity Security.
  • SUBSCRIBE TO SHIPS IN SCALE TODAY!

    The beloved Ships in Scale Magazine is back and charting a new course for 2026!
    Discover new skills, new techniques, and new inspirations in every issue.

    NOTE THAT OUR NEXT ISSUE WILL BE July/August 2026
  • Win a Free Custom Engraved Brass Coin!!!
    As a way to introduce our brass coins to the community, we will raffle off a free coin during the month of August. Follow link ABOVE for instructions for entering.

Black Pearl rigging 1/72

Joined
Sep 4, 2022
Messages
21
Points
48

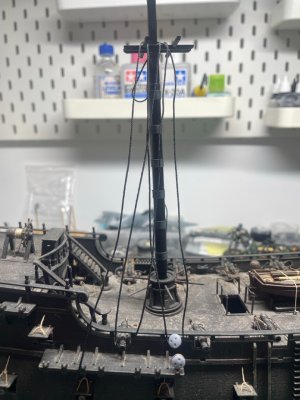
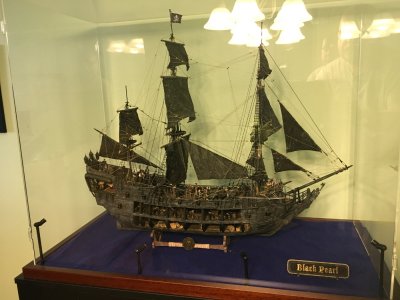
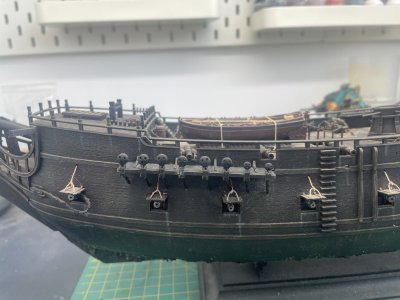
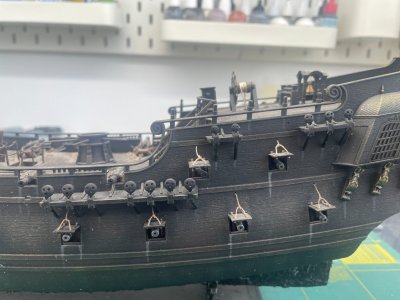
A couple of years ago, I built the hull of the Black Pearl. When it came time to do the rigging, I felt overwhelmed and decided to postpone it. Now I'd like to continue.

I've watched a few build logs and gone through some books, but I'm sure I'll have a lot of questions along the way, and I'd appreciate your support. Since this is my first ship model, I'm not aiming for 100% historical accuracy and am willing to cut a few corners.

Here's what I have at the moment.

IMG_5950 Large.jpegIMG_5951 Large.jpegIMG_5953 Large.jpegIMG_5958 Large.jpegIMG_5965 Large.jpegIMG_5961 Large.jpegIMG_5959 Large.jpegIMG_5955 Large.jpegIMG_5966 Large.jpegIMG_5954 Large.jpegIMG_5956 Large.jpegIMG_5960 Large.jpegIMG_5957 Large.jpegIMG_5952 Large.jpegIMG_1504 Large.jpeg
 
I'm not aiming for 100% historical accuracy and am willing to cut a few corners.

It depends on what you want to achieve, 90%, 50% or ? when it comes to cutting corners. As this is a fantasy ship, there are really no rules. Still, she was supposedly the British merchant Wicked Wench when captured by Sparrow in the early 18th century so there are books that might be helpful. For sizes of masts, yards, and rigging, one of the best sources that covers this era is Lees' The Masting and Rigging of English Ships of War you can try to rig her as much like a real ship of that era as you want. For example as this was supposed to be an early 18th century English ship there should not be any belaying pins which look to be present in one of your photos. The model itself looks lovely, so a nice rigging job would enhance the work you have already put forth. Again this was a Disney dream ship so normal rules need not apply. :)
Allan

Thanks for the reply. I haven't seen this exact book, but I do have Mondfeld's Historic Ship Models and Petersson's Rigging Period Ship Models.
Your mention of belaying pins is a good example of a corner I'm willing to cut. Overall, what I mean is that if I get stuck on something, I'll probably simplify it and move on rather than getting bogged down trying to make it perfectly accurate.

The first thing I need to do is fix the lower deadeyes. There are already some fittings in place, and I can't do it properly, so I'll have to come up with a workaround. I'll share it a bit later.
 
If you are not going to model sails, you can keep it simple with just the standing rigging, then halyards, lifts and braces.
Petersson's and Mondfeld's books should be all you need. For belaying points, follow the shortest less entangled run.
 
The simplest way to rig a ship is to just follow the steps in the manual. Revell's instructions are pretty clear. Petersson's Rigging of Period Ship Models might help you to understand the movement of ropes, but it will be more complicated to recreate on a model. If you want to delve deeper into rigging, Boudriot's '74 Gun Ship' (Volume 3) is a great book which describes the many functions of sails, ropes and pulleys, and provides dimensions that you can follow. Radek also has PDF copies and wooden pulleys with ropes, which you can use to replace the plastic ones. Good luck on your journey!

 
The simplest way to rig a ship is to just follow the steps in the manual. Revell's instructions are pretty clear. Petersson's Rigging of Period Ship Models might help you to understand the movement of ropes, but it will be more complicated to recreate on a model. If you want to delve deeper into rigging, Boudriot's '74 Gun Ship' (Volume 3) is a great book which describes the many functions of sails, ropes and pulleys, and provides dimensions that you can follow. Radek also has PDF copies and wooden pulleys with ropes, which you can use to replace the plastic ones. Good luck on your journey!
Thanks. I will definitely start with the instructions, except for the shrouds, which are plastic in the kit.
 
If you are not going to model sails, you can keep it simple with just the standing rigging, then halyards, lifts and braces.
Petersson's and Mondfeld's books should be all you need. For belaying points, follow the shortest less entangled run.
Thanks. I would love to have sails, but even without them it's a lot of work. One step at a time :)
 
Thanks for the reply. I haven't seen this exact book, but I do have Mondfeld's Historic Ship Models and Petersson's Rigging Period Ship Models.
Your mention of belaying pins is a good example of a corner I'm willing to cut. Overall, what I mean is that if I get stuck on something, I'll probably simplify it and move on rather than getting bogged down trying to make it perfectly accurate.

The first thing I need to do is fix the lower deadeyes. There are already some fittings in place, and I can't do it properly, so I'll have to come up with a workaround. I'll share it a bit later.
Petersson will be fine since there are already belay racks.
 
A couple of years ago, I built the hull of the Black Pearl. When it came time to do the rigging, I felt overwhelmed and decided to postpone it. Now I'd like to continue.

I've watched a few build logs and gone through some books, but I'm sure I'll have a lot of questions along the way, and I'd appreciate your support. Since this is my first ship model, I'm not aiming for 100% historical accuracy and am willing to cut a few corners.

Here's what I have at the moment.

View attachment 620474View attachment 620475View attachment 620476View attachment 620477View attachment 620478View attachment 620479View attachment 620480View attachment 620481View attachment 620483View attachment 620484View attachment 620485View attachment 620486View attachment 620487View attachment 620488View attachment 620482
That looks fantastec.
 
Just in general, I think it helpful to do as much of the preparatory work with the masts and the yards off the ship. Do the standing rigging from the inside out then the running rigging.

Have fun, looks like a great ship!

Rob
 
I've been reading about ship rigging all day, and I just can't keep all of this in my head. But have to start with something. I decided to print deadeyes, since they will be painted black. But they look a bit too large. What do you think about their size and the shrouds' thickness?
IMG_1518 Large.jpeg
 
R
The diameter of the deadeye should be 1.5 times the size ( circumference ) of the shroud or stay it is attached to..
Thanks, and the deadeye should be half or a bit more than the diameter of the mast. The mast is 8mm, deadeye in the photo 6mm, a bit too large.
 
The diameter of the deadeye should be 1.5 times the size ( circumference ) of the shroud or stay it is attached to..
The hard part is finding the correct circumference of the shrouds and stays. The masts and yards dimensions in 1700 were a ratio of the length of the keel, the depth, and breadth. Then, the stays and shrouds are a ratio of the masts diameters and then the deadeyes a ratio of the shroud or stay circumference. 1.5 is pretty much the same ratio James Lees gives (1.6) in The Masting and Rigging English Ships of War for round deadeyes but first you have to find out the correct circumference of the ropes. As this is a fantasy ship and you mentioned you are not overly concerned with accuracy it's probably easiest to just find the circumference on the lines in the kit and go from there.
Allan
I would rather go from the masts' diameters, as they are already in place and the only "constant" that I have. I also checked the mast dimensions related to the deck length, according to Mondfeld. The lower mast is a bit shorter, but its diameter is pretty accurate. And the shrouds in the kit are plastic, so not a good reference :)
 
shrouds in the kit are plastic
UGH!!!!

If you use the lower masts diameters as a reference it is not too crazy. The circumference of the stays are half the diameter of the appropriate lower mast and the shrouds are 0,6 the size of the appropriate stays. Then you can use the 1.5 or 1.6 for the diameter of the deadeyes.

Allan
 
Last edited:
Finally, some progress on this. 3D-printed deadeyes and very happy with how they turned out.

IMG_1598.jpgIMG_1599.jpg
 
Back
Top