• Ships of Scale has incorportated an extra level of security when you log In. Please follow on-screen prompts to acknowledge that you are not a robot via a "Check Box" or a "Pictorial Check Box Puzzle". This is needed due to higher level of AI Activity Security.
  • SUBSCRIBE TO SHIPS IN SCALE TODAY!

    The beloved Ships in Scale Magazine is back and charting a new course for 2026!
    Discover new skills, new techniques, and new inspirations in every issue.

    NOTE THAT OUR NEXT ISSUE WILL BE July/August 2026
  • Win a Free Custom Engraved Brass Coin!!!
    As a way to introduce our brass coins to the community, we will raffle off a free coin during the month of August. Follow link ABOVE for instructions for entering.

USS Constitution - Model Shipways (kitbashed) 1:76.8 by GGibson

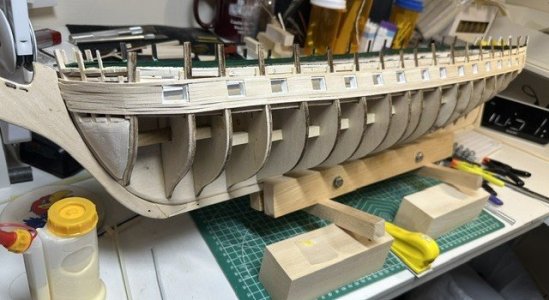
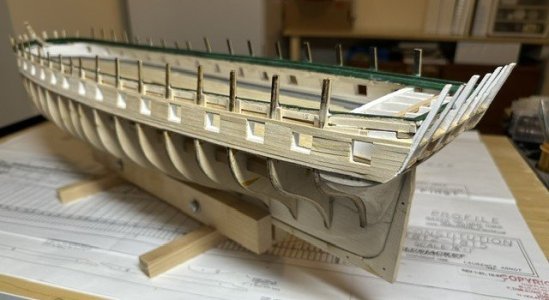
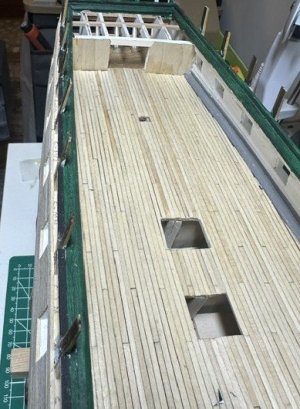
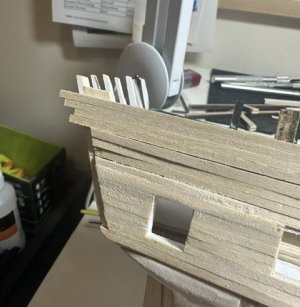
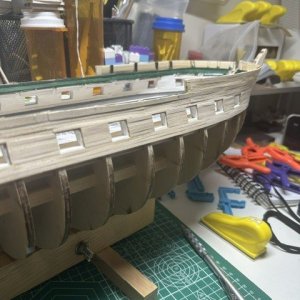
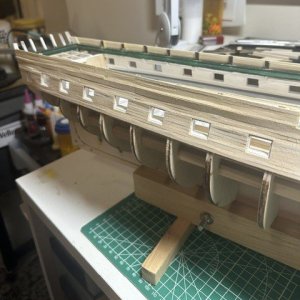
Another very quick update. Nothing earth-shattering, but I did spin the ship around and continued the planking around the gun deck gunports, continuing to use those 3/32” x 3/64” strips.

260702a-GD_GP_Planking.jpeg

260702b-GD_GP_Planking.jpeg​

I will continue the outer hull planking up to the main rail. I think, as others have done, this will give the hull walls some strength for when I will need to flip it upside down for the lower hull planking and coppering.

I will wait to do the sanding work that these outer planks need until I complete most of the planking work, although I have done some initial sanding as I have placed certain pieces.

That’s it for now! For those in the USA, enjoy your holiday weekend! Be safe and enjoy with family and friends! Happy 250th, America!
 
Steady as she goes Gregg :)
Happy 4th of July. Fitting ship to be working on at this momentous occasion in our history.

Thanks, Frank! I'm about as steady as a tortoise, though! <shrug> SLOOOOWWWW... To your point, though, it is pretty cool that several of us are in various build stages of this historic ship. It is fun AND inspiring to witness everyone's work. Thumbsup
 
Another bit of time between updates again but, hey… it’s summertime and some great quality time out of the shipyard hanging with some of the grandkids, so it’s all good, right? And really not a lot to add, as I have been going back and forth a lot on what things to do in what order and exactly how to best accomplish those things. But that’s what posting these build logs is all about… the documentation and the advice!

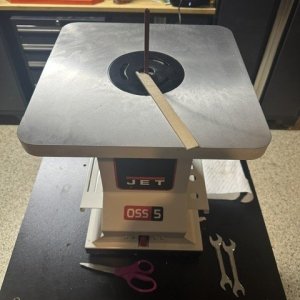
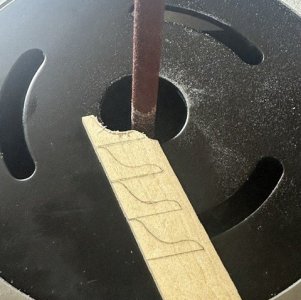
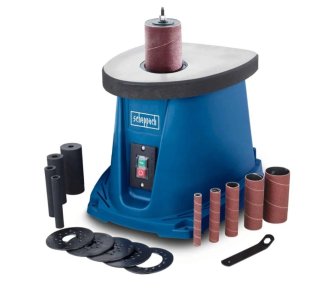
With that said, I have been working some on creating those knees that will be placed on the gun deck bulwarks to support the spar deck braces. I really didn’t like using the Dremel with the drill press workstation. I was going through lots of sanding drums and it was difficult to switch drums so often. I saw an ad from a local woodworking shop for a sale on a larger benchtop oscillating spindle sander and I couldn’t resist.

260720a-SandingKnees.jpeg

260720b-SandingKnees.jpeg​

I knocked out a bunch of the hanging knees one afternoon and started working on a supply of the diagonal knees. But I have decided to postpone the placement of those knees onto the gun deck bulwarks for now.

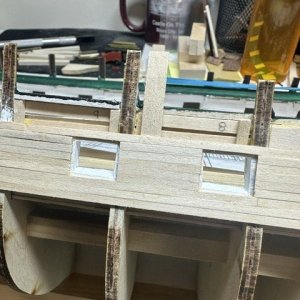
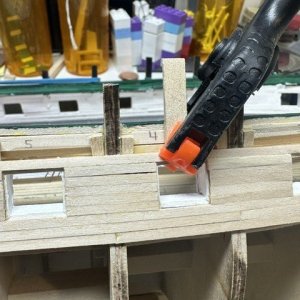
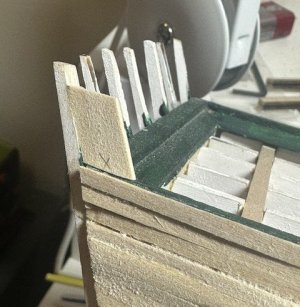
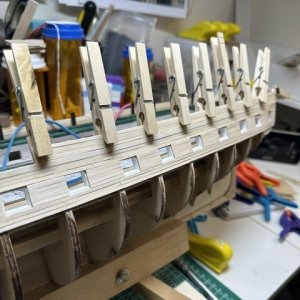
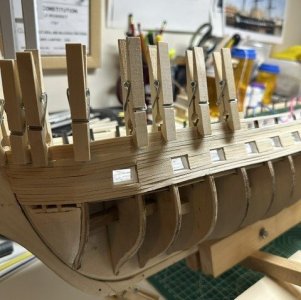
So, I am back on the exterior of the ship working on the outer upper hull planking above the gun deck gunports. As I work the planking up from the gun deck to the spar deck gunport area, I needed to address the gap between bulwark supports at the gunport sills that will occur once the inner and outer planking is complete, if not addressed at some point. So, some strips need to be placed between the affected bulwark supports. But, I had covered up some of that area when I was working on the gun deck bulwark planking and needed some additional wood support to secure the planking. So, an exacto knife took care of that issue.

260720c-SD_GP_Work.jpeg

260720d-SD_GP_Work.jpeg​

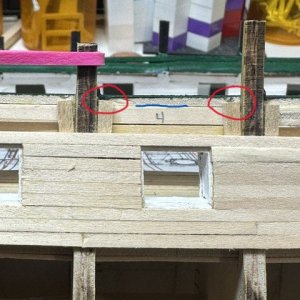
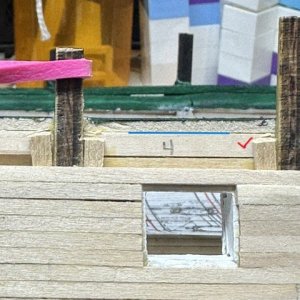
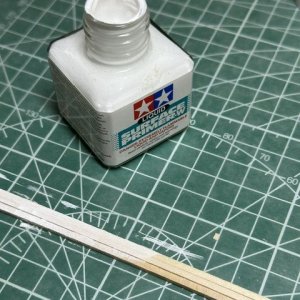
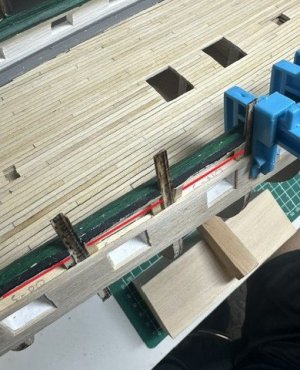
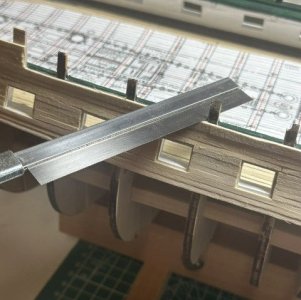
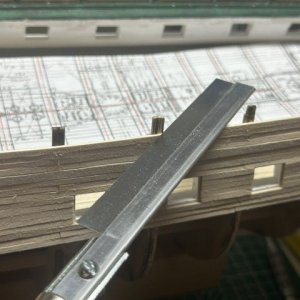
Then, I took three strips of 3/32” x 3/32” square stock (I actually only ended up needing two) and sanded, primed and painted one side of each strip black. The spar deck gunports were black during this “1812-ish” period. Each distance between respective bulwark supports was then measured and a strip was cut and glued to the backside of the spar deck planksheer. Yes, they are hard to see! The added red circles and lines hopefully help some.

260720e-SD_GP_Work.jpeg

260720f-SD_GP_Work.jpeg

260720h-SD_GP_Work.jpeg​

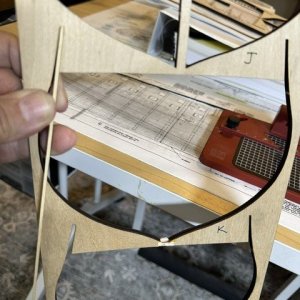
In the center of the ship on both sides, I needed to determine where the open waist for this 1812-ish version of the Constitution will be and needed to make new bulkhead extensions for where those will reside, since they won't be exactly at the kit's bulkhead locations. Using the sheet waste that I had saved from when I had initially punched out the Bulkhead K piece from the kit (the bulkhead closest to the area where these new extensions will be needed), I was able to cut and sand the shape necessary for these new extensions. Those were then glued into their positions based on the plans. 8.76mm from Bulkhead K to the aft side of the gangway board. 19.39mm from Bulkhead E to the aft side of the forward gangway board.

260720g-SD_GP_Work.jpeg

260720i-SD_GP_Work.jpeg

260720j-SD_GP_Work.jpeg​

With those spar deck gun sill spacers placed, I will now work on completing the outer hull planking up to what will be the main rail.

260720k-SD_GP_Work.jpeg​

As always, appreciate the likes, comments, criticisms and suggestions.
 
Looking good!

For future reference, you may want to see about getting some additional inserts for that oscillating sander. That's a pretty large gap between the sanding cylinder and your stock for the knees. There will be times when you don't want that much open space underneath your workpiece.

Congrats on the acquisition of a new piece of what I'm sure will be very useful equipment in your Shipyard.
 
Looking good!

For future reference, you may want to see about getting some additional inserts for that oscillating sander. That's a pretty large gap between the sanding cylinder and your stock for the knees. There will be times when you don't want that much open space underneath your workpiece.

Congrats on the acquisition of a new piece of what I'm sure will be very useful equipment in your Shipyard.
Thanks, Peter! That was the smallest of the 3 inserts that it came with, but yours is an excellent point. I'm sure there will be equally sized if not smaller tasks ahead. I'll look into a smaller insert, as well.

And, fwiw, since this this new addition is so big, it's in the garage, not the shipyard... <shrug> ROTF
 
Wow! It’s been another long break in between build log updates. It’s been since this past spring since I’ve posted with any kind of regularity. But that’s what happens to many of us during the warm summers, we get out of the shipyard, play and work outdoors, spend additional time with families and our grandkids who have the summer off from school, etc, etc.

That’s not to say, though, that I haven’t tried to advance some on this Constitution build these past few weeks. My recent efforts have been to plank the outer hull from the tops of the recently completed gun deck gunports up to the spar deck planksheer, which will be the bottoms of the spar deck gunports. However, for several reasons, this became more challenging than I anticipated, as I was measuring, placing and gluing plank strips… and then later on in the planking process, getting the isopropyl alcohol out and ungluing planks that were not eventually lining up properly in all spots against the spar deck planksheer. And I did this a few times! Grrr… I even took a bit of a break to lessen the frustration, setting the ship aside for a few days. More on that in a bit.

But, after a couple days, I put the ship back on the table with the intent to finish this phase. In order to get that final top plank to line up exactly with the spar deck plank sheer, I took a slightly wider strip than the 3/32” x 3/64” strips I have previously been using to plank the outer hull in this area and measured where I needed to cut the wider strip so it laid perfectly against the planksheer. Then, using an exacto blade, I trimmed the planking strip to those marks and… going to call this good. Yes, that planking is slightly wider than the others, but being directly below the spar deck gunports and after the strips are painted black and channels, deadeyes and rigging all get in the way, the differences (hopefully) won’t be distracting.
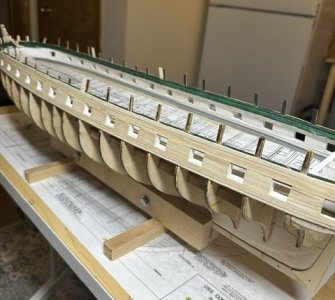
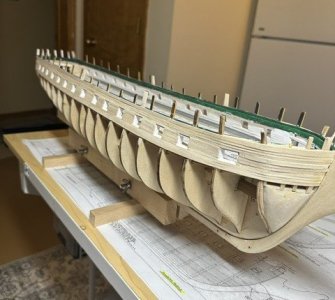
260823a-Bulwarks.jpeg 260823b-Bulwarks.jpeg​

So, time now to begin working on the upper bulwarks planking at the spar deck level. I have seen some prior build logs plank the inner bulwarks first, others have planked the outer bulwarks. I notice that Robert Hunt’s practicum planks the inner bulwarks before marking the gunport locations.

It appears, though, that the inner bulwarks will need some type of rivet or bolt appearances, along with various cleats and pin rails on them and those can be done later. So, I will place the outer bulwarks planking now. The practicum calls for 4 rows of the same 3/32” x 3/64” strips to establish the tops of the spar deck gunports and the top rail. I will, of course, take note of the open waist on this 1812-ish version, so the bulwarks will not be planked in that area.

So it is time to continue building. If anyone has comments, concerns or suggestions, I appreciate the follows, likes and comments, as always! A few weeks ago, several weeks before the frustrations I mentioned above that had me set the Constitution aside for a few days, I received a Model Expo email (one of the daily ones that many of us subscribe to) that was advertising Ernest Hemingway’s Pilar Fishing Yacht.

Well, crap! I was thinking the Constitution would probably end up being the last model I would be working on. But, noooo… Model Expo had to advertise the Pilar! For the past 15 years or so, my son and his family have lived in the Keys, so we have made numerous trips. In that time, of course, I have learned all there is to know about Hemingway and his beloved yacht. And there is a rum company in Key West called Hemingway Distilling Company that proudly makes a rum called Papa’s Pilar. And, yes, it is mighty tasty! So, of course, I now have Model Shipway’s Pilar on my shelf waiting its turn. I have even begun some research and other preparation work to get ready for that build. Whether I will wait until the Constitution is finished (whew, whenever that may be?!?) or whether I work it in and build both simultaneously? That decision will eventually be made.

Until then, I still have my Constitution to build! Again, I appreciate the follows and comments.

 
Hi Gregg
Glad to see you back at it. Wouldn't worry too much about the oversized plank, as you said, once the channels and everything else is on the ship, it won't even be noticeable. Keep it up
 
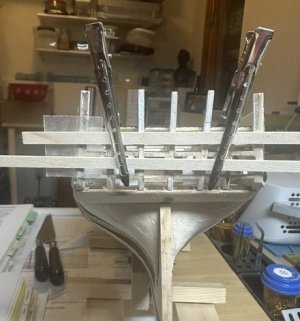
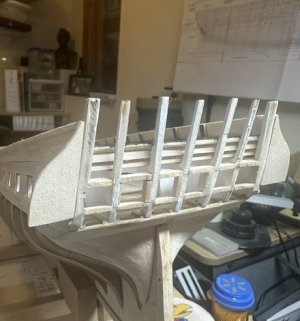
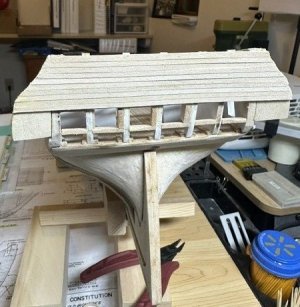
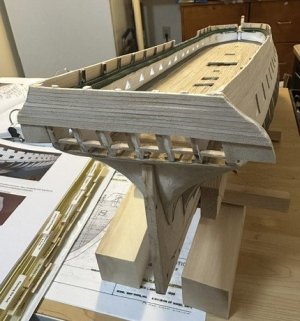
So, as I mentioned yesterday, my next step is to plank the outer bulwarks from the spar deck planksheer up to the top rail, and I am jumping right in today to begin that work. In planking the hull at the gundeck area, I laid planks to the front side of the transom frame, thinking that the transom extension pieces will rest directly on the outside transom frames and not on the planks if they were to extend to the back of the transom frames. Does this make sense?

260824a-SternBulwarks.jpeg 260824b-SternBulwarks.jpeg​

To continue that process, these four plank strips that I will be placing now would not have anything to attach to at the transom. So, using a scrap 3/64” basswood piece, I installed a filler piece against the transom frame.

Both the outer bulwark planking and the eventual inside bulwarks will cover up this filler piece. I have laid four 3/32” wide planks against the filler piece to demonstrate. This filler piece will be trimmed down similar to what will be done with the bulwark frames that extend above the top rail position.

Hope this makes sense to people. Question is, have I planked this transom area correctly, with the transom extension pieces to be secured shortly? The quarter galleries will cover most of this area, too.

Appreciate any feedback/comments.
 
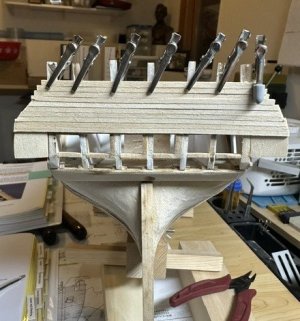
This will be a short update on completed activities. I have completed planking the upper outer bulwarks. After placing the four plank strips above the spar deck plankshear, I removed the excess bulwark frames that extended above what will be the top rail. This was done easily by using one of my Zona saws.

260830a-UpperGP.jpeg 260830b-UpperGP.jpeg

260830c-UpperGP.jpeg 260830d-UpperGP.jpeg​

With them removed, the ship looks better already! The camera does show where lots of sanding needs to be done, however! So, I will sand the bulwarks that are present now, working from 150 grit down to 400 grit. Hopefully, that will clean them up a lot.

260830e-UpperGP.jpeg 260830f-UpperGP.jpeg​

I’m a bit conflicted now about whether I should do some planking of the stern transom area or if the ship is ready to be flipped upside down in order to work on the lower hull planking. I’ve seen others take different approaches. Speaking of the transom, I also need to address placement of the transom extensions that will act as the “backside” of the quarter galleries. Right now, it just seems like they would be too susceptible to breaking until I actually begin work on the quarter galleries themselves.

Lots to do and to think about! As always, appreciate the follows and comments.

 
I’m a bit conflicted now about whether I should do some planking of the stern transom area or if the ship is ready to be flipped upside down in order to work on the lower hull planking. I’ve seen others take different approaches. Speaking of the transom, I also need to address placement of the transom extensions that will act as the “backside” of the quarter galleries. Right now, it just seems like they would be too susceptible to breaking until I actually begin work on the quarter galleries themselves.
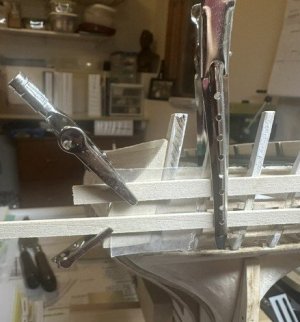
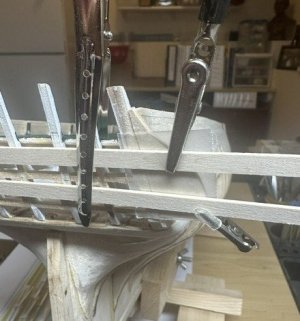
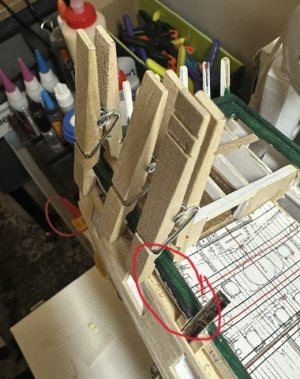
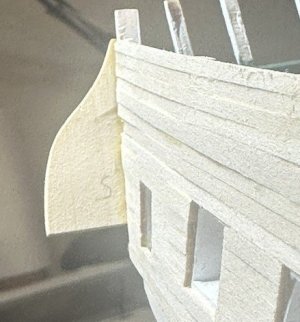
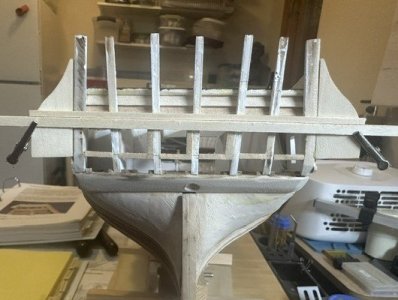
So, I decided to work on the quarter gallery transom extensions and at least begin the transom planking. The first order of business, then, is to secure those transom extension “wings” that will be the backside of the quarter galleries. Using a couple of scrap planks, I secured them against the back of the transom frames I had previously installed using some long “hair clip” style clips. They seemed to work pretty well in holding the scrap boards against the frames. Doing this will allow me to accurately position the transom extensions. I placed some wax paper pieces between the end frames and the scrap planks so that the glue would not stick to the scrap planks while the extension placements cured.

260908a-UpperTransom.jpeg​

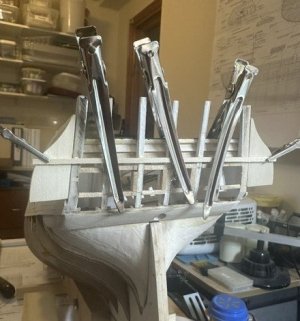
I then glued both transom extensions in place and held them in position using a couple alligator clips.

260908b-UpperTransom.jpeg 260908c-UpperTransom.jpeg​

That worked out nicely! It definitely gave them a more solid feeling, especially after I get some planking on them, as well!

260908d-UpperTransom.jpeg 260908e-UpperTransom.jpeg​

I’m a little unsure yet on how to plank the lower transom area. More on that later. So, I began on the planking area that will be above the six Commodore’s cabin windows. The window frames that I will make will have a 1/16” outer frame, while the inner grilles will be made from 1/32” strips.

All of the transom planks are the same 3/32” x 3/64” strips that I used on the upper hull planking earlier. So then, the second full plank above the windows should be 5/32” above the edge of the glass and the frame head. So, I laid a long strip of 5/32” planking at that “top of windows” edge point and secured it using alligator clips. That second-row plank strip was then placed on top of that spacing strip and glued, and with the spacing strip then removed, that 2nd row plank was secured.

260908g-UpperTransom.jpeg 260908f-UpperTransom.jpeg​

I was then able to place that first plank just above the windows accurately, so that it has the proper gap for the window frames, and then continue on up the transom, extending the transom planks out just past the installed transom extensions.

260908h-UpperTransom.jpeg​

After I placed the transom planking up to the level of the hull planking, I cleaned up the sides of the transom extensions some, shaping them by sanding the planks back to the extension positions. I’ll do a little more fine-tuning sanding once all of the hull and transom planking is completed.

260908i-UpperTransom.jpeg 260908j-UpperTransom.jpeg​

I will now need to continue the transom planking between and on both sides of the windows, and then down across the counter piece. It appears, though, that maybe before that, I need to shape a block that will rest against the “knuckle” portion of the transom. That block creates what will be the bottom portion of the quarter galleries. Does that process sound correct to those who have gone through this?

I am getting closer to the point of turning the ship over to continue the lower hull planking and begin the coppering. Well, at least I think I’m getting closer… <shrug>

As I always say, I appreciate the comments, likes, suggestions and criticisms. Taking a little fall-time excursion next week, so will be away and off the internet for a few days. Will catch back up and report how I handled this lower transom planking concern upon my return. Thanks, folks!
 
I’m a bit conflicted now about whether I should do some planking of the stern transom area or if the ship is ready to be flipped upside down in order to work on the lower hull planking. I’ve seen others take different approaches.
Great job Greg! Just do what I did, and you'll be good! (joke) :D
 
Hey Gregg,
Not sure how I missed your last couple of posts, but you are coming along nicely. Great job on the transom. Looks nice. Can't wait to see how you handle the decorations and the windows.
 
Hey Gregg,
Not sure how I missed your last couple of posts, but you are coming along nicely. Great job on the transom. Looks nice. Can't wait to see how you handle the decorations and the windows.
Thanks, Frank! Well, I have a pretty good idea of what this Constitution transom will look like, based on the Hull model. We'll see how close I can get to that version.
 
Back
Top