• Ships of Scale has incorportated an extra level of security when you log In. Please follow on-screen prompts to acknowledge that you are not a robot via a "Check Box" or a "Pictorial Check Box Puzzle". This is needed due to higher level of AI Activity Security.
  • SUBSCRIBE TO SHIPS IN SCALE TODAY!

    The beloved Ships in Scale Magazine is back and charting a new course for 2026!
    Discover new skills, new techniques, and new inspirations in every issue.

    NOTE THAT OUR NEXT ISSUE WILL BE July/August 2026
  • Win a Free Custom Engraved Brass Coin!!!
    As a way to introduce our brass coins to the community, we will raffle off a free coin during the month of August. Follow link ABOVE for instructions for entering.

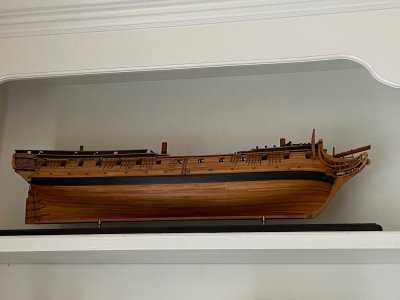
HMS Enterprise 1774 POF 1:48.

Good morning. Cap rails continued……

I have played with many ideas to get my finish a little contemporary. Firstly I scraped the outer edge of the rail to achieve the historically accurate look, however these came out horrid and I did not like the look and feel of the ship- especially the black gun port frames.
View attachment 641497View attachment 641498
So like many contemporary models before me I decided to line the outer edge of the cap rail and stain the gunport frames the same colour as the bulwark.

View attachment 641499View attachment 641502View attachment 641501
I don’t have any kit cherry wood left so I am cutting wood from my plank I bought. The grain is not as tight as the kit cherry and I am having issues bending this- just kept splitting. So alternate methods attempted.
View attachment 641507
I tried two methods to make these sharp bends.
1. I cut little sections around the bend at angles. This can be seen on the upper curve of the lining.
2. I cut the shape from a 1.5mm sheet. The lower bend and the “twirly” decoration.
View attachment 641508
View attachment 641510
Hmmmmmm……..close ups… ROTF.
I really like the overall look and feel I am getting tho:D.
Cheers Grant.
Awesome work!!
 
Awesome work!!
Thank you Paul.
Looks great Grant -I am enjoying following your progress ! I took the same approach on my first scratch build - Confederacy.

View attachment 641551
Thanks very much. Yep- your Confederacy is the look and feel I am hoping for. Just maybe she will come out something close to yours…..hopefully ROTF
Fine work, Grant. Ignore the macros - I bet it looks perfect to the naked eye.
Thank you Paul. When I look at it I am very chuffed. After cropping the pics to macro it was like ……”is this the same ship”ROTF. I had to show you guys anyway.
Just playing catch up, which seems to be more and more a bad habit of mine. Really wonderful work Grant.
Thank you Roger. I am doing more of that now days as well. It seems more guys are posting and difficult to keep up at times.

Cheers Grant
 
Good morning. Cap rails continued……

I have played with many ideas to get my finish a little contemporary. Firstly I scraped the outer edge of the rail to achieve the historically accurate look, however these came out horrid and I did not like the look and feel of the ship- especially the black gun port frames.
View attachment 641497View attachment 641498
So like many contemporary models before me I decided to line the outer edge of the cap rail and stain the gunport frames the same colour as the bulwark.

View attachment 641499View attachment 641502View attachment 641501
I don’t have any kit cherry wood left so I am cutting wood from my plank I bought. The grain is not as tight as the kit cherry and I am having issues bending this- just kept splitting. So alternate methods attempted.
View attachment 641507
I tried two methods to make these sharp bends.
1. I cut little sections around the bend at angles. This can be seen on the upper curve of the lining.
2. I cut the shape from a 1.5mm sheet. The lower bend and the “twirly” decoration.
View attachment 641508
View attachment 641510
Hmmmmmm……..close ups… ROTF.
I really like the overall look and feel I am getting tho:D.
Cheers Grant.
After rigging, close-ups are my next pet hate! Everything looks great until you take the photo, put it on a big monitor and sigh - "how did I miss that?' o_O
Of course it's because the model is supposed to be looked at with the naked eye, from a safe 'don't touch' distance, not through a telephoto lens! :cool:
 
After rigging, close-ups are my next pet hate! Everything looks great until you take the photo, put it on a big monitor and sigh - "how did I miss that?' o_O
Of course it's because the model is supposed to be looked at with the naked eye, from a safe 'don't touch' distance, not through a telephoto lens! :cool:
True story Ian. Still I was a bit surprise how my carving (if you can call it that- more like a hole and some scrapping ROTF ) was a shocker close up. I can live with it though. Cheers Grant
 
Back
Top