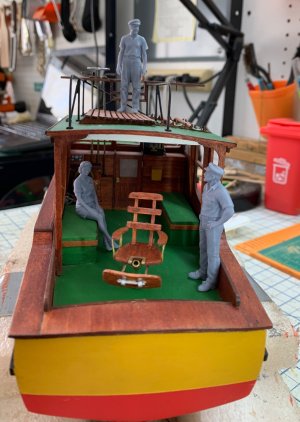
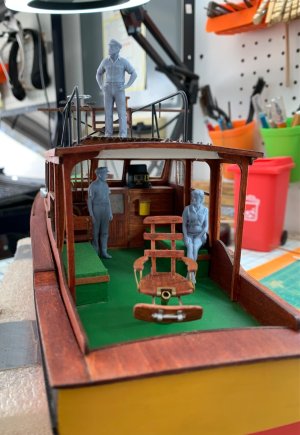
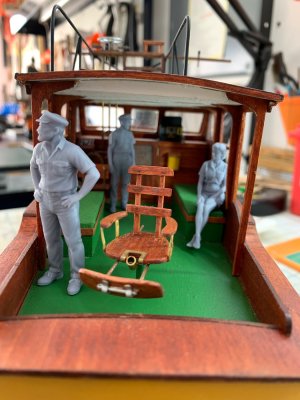
Mary should sit on one of the benches under the roof, perhaps facing out the aft of the boat.

 |
The beloved Ships in Scale Magazine is back and charting a new course for 2026! Discover new skills, new techniques, and new inspirations in every issue. NOTE THAT OUR NEXT ISSUE WILL BE July/August 2026 |
|
 |
As a way to introduce our brass coins to the community, we will raffle off a free coin during the month of August. Follow link ABOVE for instructions for entering. |
|


Looking at the differences between your two chairs I'm of half a mind to kitbash the two ideas together, take the hardware from the resin and attach it to a wooden seat because I just don't know if I like relying on my skill as a painter to translate the wood grain to the replica.I finally finished the chair,
first I built the resin printed chair I thought it looked ok but I wanted to try my own so I built another from scratch to see if I could improve the look. I don’t think mine is better just a little different. I decide later which one I’ll use.
View attachment 638213
That’s exactly why I built my own as well. I tried twice to paint and didn’t like it compared to real wood. I’ll be watchingLooking at the differences between your two chairs I'm of half a mind to kitbash the two ideas together, take the hardware from the resin and attach it to a wooden seat because I just don't know if I like relying on my skill as a painter to translate the wood grain to the replica.


I just bought this kit. It will be number 3 in the que. Super glad that there are great build logs!I like what everyone is doing. I too have the Pilar. I have it, but I think I buried it in my inventory of ships to build…I am a bit behind.
BB.Grex, I’m building the Pilar too, got the hull planked and the cabin almost done. I screwed up by attaching the cabin roof supports before installing the cabin furniture but I haven’t attached the cabin roof yet until after the cabin interior is done (thankfully the roof support over the dashboard came loose so I can access the interior pretty well).
Question: how did you mark out the location of the hole for the rod going up to the flybridge? I’m thinking of dry-fitting the roof and either measuring the location or maybe putting some paint on the end of a wood scrap and tapping it up onto the roof, then removing the roof and drilling the hole.
.
It’s always best to make a template out of heavy paper stock or out of light cardboard…easier to screw up the template than go back and fix it and still have to get hole positioned correctly….don't ask me how I know…it was ugly!!!!BB.
1. I made that same mistake also with the cross beams, and had to work around them. Don’t forget if you’re going to put a bell in there get there now.
2. For the tube from lower to upper level, my pictures show where mine ended up, as far as the roof holes locations, I used a piece of white card stock and cut it to match the roof, taped it in place, then started to find the correct spot for the holes. Once I had the tubes through the paper to to lower console and straight I marked the paper roof as accurate as I could. I then transferred the paper to the real roof crossed my fingers and drilled. Tiny holes first in case I had to adjust.
I’m making rolls of nautical charts out of brass tubing, gonna lay them on the helm station “desk” and a shelf I made for the right side cabin wall ( because it looks too empty and ya don’t waste space on a boat). You’re an awesome builder so keep on keepin’ on!Those sound like great ideas, I would love to see them.WOW GREX!! Totally freaking awesome! Outstanding work! Dang, you’re making me jealous lol. Love the gaffs on the cabin roof I made similar ones for my shrimper but I gotta say your’s are better. I’m working on the cabin interior, I made a helm chair (with arm rests lol) and ya know what? Those cup holders up top are gonna get a glass and a bottle of booze. I’m sure that’s what they’re for
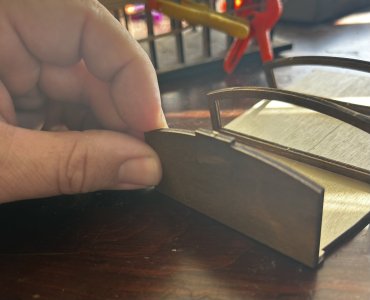
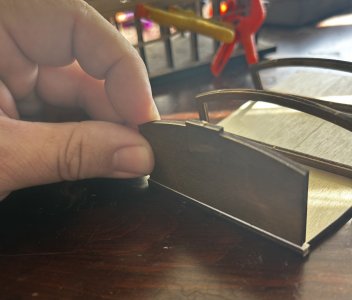
I glued mine in on top of the floor, it will be inside the sides of the cabin like your last pictureQuestion for you on the bulkhead. When it came time to glue in the forward most bulkhead did you glue it on top or the side of the lower section?
The instructions aren’t exactly clear here
View attachment 644994
View attachment 644993
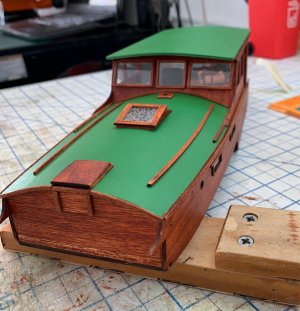
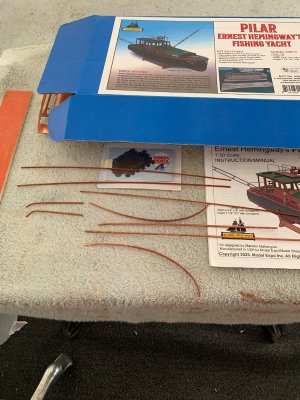

Gregg. I believe it’s basswood leftovers from previous buildsContinued nice work, Grex! What wood are you using for these extra trim strips you will be placing? Should look nice when you get them on.
. It easy to work with and stains well. I have a few molding sharpers from Artesania Latina that work ok, most of these trim pieces are quarter round ( as close as I can get them to quarter round with these shapers ) I don’t have fancy equipment. And at 75 years old I don’t plan on buying any. 
I feel your pain. But you have done an outstanding job on this!Gregg. I believe it’s basswood leftovers from previous builds