• Win a Free Custom Engraved Brass Coin!!!
    As a way to introduce our brass coins to the community, we will raffle off a free coin during the month of August. Follow link ABOVE for instructions for entering.

HMAV BOUNTY - A “face lift “

Good morning everyone. I decided to do some work on my Bounty.

I printed the Lady Bertha figure head and started to do some painting. This is work in progress but I have not posted for a while so thought I had better.
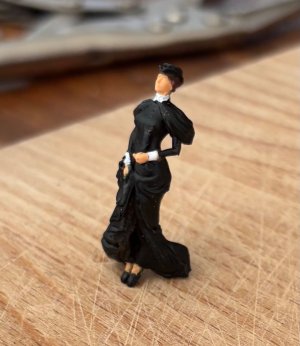
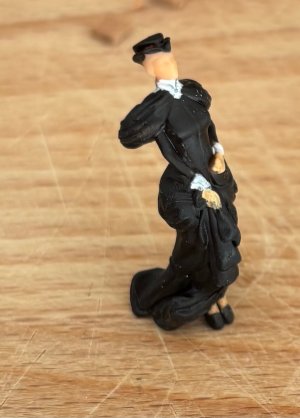
IMG_6782.jpegIMG_6774.jpeg
I have to do some modifications to the Knee of the head-
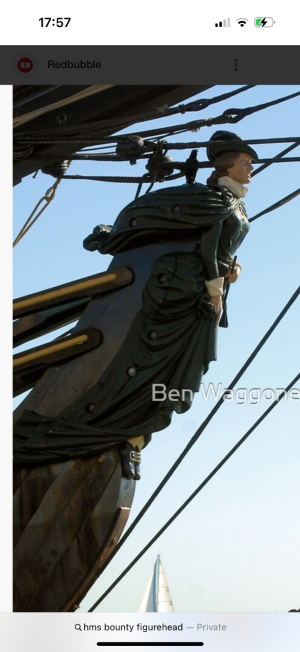
Here is a pic of how the Lady is mounted to the knee :
IMG_6798.png
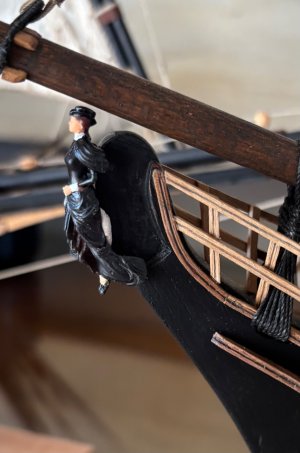
Here is how mine fits - obviously the vintage billings kit had a different and out of scale figurehead so some shaping and perhaps filling is needed - (She is stuck on with prestick). Note the positioning of her feet.
IMG_6785.jpeg
Cheers Grant
 
Good morning everyone. I decided to do some work on my Bounty.

I printed the Lady Bertha figure head and started to do some painting. This is work in progress but I have not posted for a while so thought I had better.

View attachment 550001View attachment 550002
I have to do some modifications to the Knee of the head-
Here is a pic of how the Lady is mounted to the knee :
View attachment 550003
Here is how mine fits - obviously the vintage billings kit had a different and out of scale figurehead so some shaping and perhaps filling is needed - (She is stuck on with prestick). Note the positioning of her feet.
View attachment 550004
Cheers Grant
Dear Grant
she is a beautiful Lady, well done my friend
 
You are much better at painting figureheads than I am, my friend. As suggested by @Steef66 , you can build up the billowing cloth with epoxy putty. I used Tamiya epoxy for my Fair American, which in her final configuration, fortunately required less cloth than Lady Bertha ROTF
 
Dear Grant
she is a beautiful Lady, well done my friend
use green stuff to let her cloth fit.
I do believe 'Bertha' was dressed in green, not black.

Smashing thread, thank you.
You are much better at painting figureheads than I am, my friend. As suggested by @Steef66 , you can build up the billowing cloth with epoxy putty. I used Tamiya epoxy for my Fair American, which in her final configuration, fortunately required less cloth than Lady Bertha ROTF
She has a lot of potential Grant. I can't distinguish between the black and green so that green must be a very dark green.
Drybrushing with dark green colour over the black base will create a nice effect, I think.
Good evening Gentlemen. Thank you for the comments. I am chuffed with how the printing came out. OH BOY- I thought her dress etc was black. Even now on almost all pics it looks black but I can now see a hint of green. Not a biggie to change-thanks for pointing this out. Cheers Grant
 
Good evening Gentlemen. Thank you for the comments. I am chuffed with how the printing came out. OH BOY- I thought her dress etc was black. Even now on almost all pics it looks black but I can now see a hint of green. Not a biggie to change-thanks for pointing this out. Cheers Grant
You only need to dry-brush green onto the highlights. Leave it black within the folds, etc., and I’ll wager the effect will be astonishing.
 
Good morning everyone. I decided to do some work on my Bounty.

I printed the Lady Bertha figure head and started to do some painting. This is work in progress but I have not posted for a while so thought I had better.

View attachment 550001View attachment 550002
I have to do some modifications to the Knee of the head-
Here is a pic of how the Lady is mounted to the knee :
View attachment 550003
Here is how mine fits - obviously the vintage billings kit had a different and out of scale figurehead so some shaping and perhaps filling is needed - (She is stuck on with prestick). Note the positioning of her feet.
View attachment 550004
Cheers Grant
What?!!? A figurehead that is not nude? What is the world coming to?
 
Good evening Gentlemen. Thank you for the comments. I am chuffed with how the printing came out. OH BOY- I thought her dress etc was black. Even now on almost all pics it looks black but I can now see a hint of green. Not a biggie to change-thanks for pointing this out. Cheers Grant
When you search on ‘Grachten Groen’ you got a very nice very dark green. A bad calibrated screen will show it like black.
In RGB: R-48, G-52, B-49. Or RAL-6064.
But the lady looks very nice on the bow.
Regards, Peter
 
You only need to dry-brush green onto the highlights. Leave it black within the folds, etc., and I’ll wager the effect will be astonishing.
Thanks for advice. I've never tried dry brushing before so some you tube searching will be required.
I wasn't talking about the colour of the dress, just to adjusting the shape with green stuff.
AHHH I get it now. I will have a look but this will push my "as close to zero cost" up a bit. ROTF. My first thought of "green stuff" was the stuff you get in Amsterdam coffee shopsROTF.
What?!!? A figurehead that is not nude? What is the world coming to?
I know right- a total disappointmentROTF
Nicely done Sir.
Thank you kindly
When you search on ‘Grachten Groen’ you got a very nice very dark green. A bad calibrated screen will show it like black.
In RGB: R-48, G-52, B-49. Or RAL-6064.
But the lady looks very nice on the bow.
Regards, Peter
Thank you Peter. I will have a look at this green. Once the knee of the head is shaped I think she will fit really nicely.

Cheers Grant
 
Good morning everyone. I have spent time fixing my Vintage motocross bike. Got it going again and took it for my first ride since my knee op. Everything went surprisingly well. I have change my avatar as my previous one was rather old.

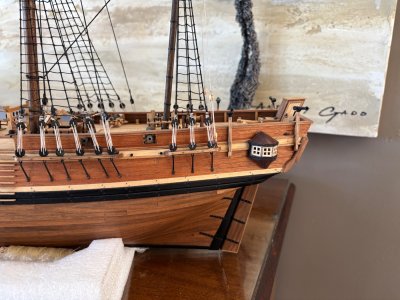
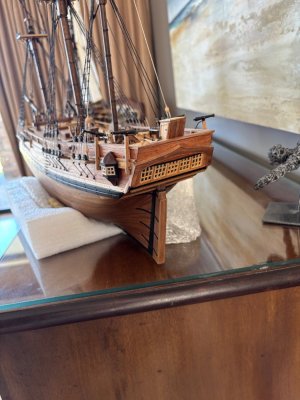
Anyway I attempted the quarter cabin/badge. Was a disaster so will have to redo. To keep my “zero cost” challenge I 3D printed it and included windows to match the stern. Stuck on with prestick.

Nope failure ROTF. Anyway here are some pics-
IMG_6815.jpegIMG_6816.jpeg
I’m running out of scraps of wood and ideas……. Never give up.
Cheers Grant
 
Back
Top