• Ships of Scale has incorportated an extra level of security when you log In. Please follow on-screen prompts to acknowledge that you are not a robot via a "Check Box" or a "Pictorial Check Box Puzzle". This is needed due to higher level of AI Activity Security.
  • SUBSCRIBE TO SHIPS IN SCALE TODAY!

    The beloved Ships in Scale Magazine is back and charting a new course for 2026!
    Discover new skills, new techniques, and new inspirations in every issue.

    NOTE THAT OUR NEXT ISSUE WILL BE July/August 2026
  • Win a Free Custom Engraved Brass Coin!!!
    As a way to introduce our brass coins to the community, we will raffle off a free coin during the month of August. Follow link ABOVE for instructions for entering.

HMS Beagle 1/60 OcCre kit semi-historic paint scheme by Timmy

Joined
Oct 7, 2026
Messages
12
Points
28

Location
Tallinn, Estonia
Hello and welcome to anyone interested to my first build log of the HMS Beagle in 1/60 scale model kit by OcCre.

I have been interested in making this little beautiful and so significant brig converted to barque for quite some time.

We can probably say that it is common knowledge that the Royal Navy phased out the Nelson's chequer (black and ochre) soon after the Napoleonic Wars ended since which the standard paint scheme intead beacame the black and white in which most Beagles are painted. It certainly makes sense timeline-wise.

My current plan, however, is to make it in black and ochre livery instead of conventional black and white. Hence the title for this build log. I just like this paint scheme more for some reason.
There is an American Scientist article describing her in this colour scheme:

https://www.americanscientist.org/article/h-m-s-beagle-1820-1870#

Since nothing has yet been built it is, of course, subject to possible change when the state of the build will approach the hull painting.
One may simply not know what lies ahead.

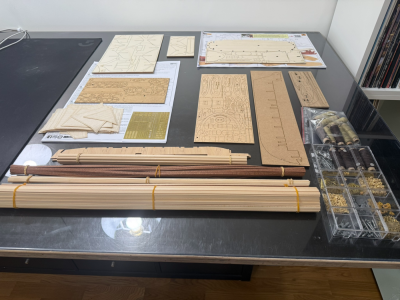
Below are some photos of me admiring the greatness that awaits.
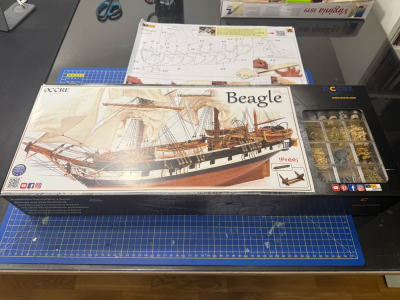
1791429893376.png
1791429927142.png
 
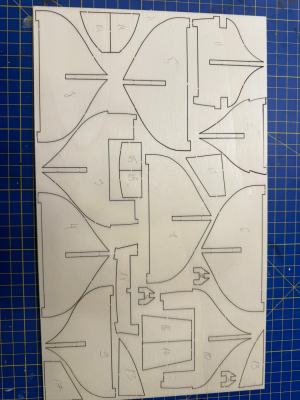
As first step I marked the bulkheads as per instruction manual in order to avoid possible mix-ups during installation.
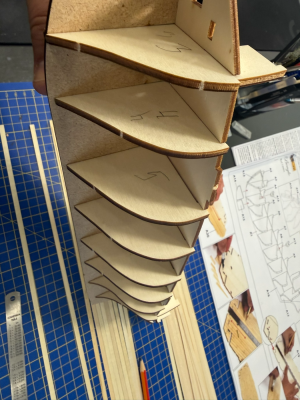
Next the bulkheads were removed from the plywood sheet and test fitted.
1791504670644.png1791504704383.png
The manual then says to start adhering the bulkheads to the keel.
Given the shape of the deck, however, mainly its recesses into which the bulkheads slide, it seems much more reasonable to glue in the keel, the bulkheads and the deck all in one go to ensure the right angles between the keel, bulkheads and deck. If the angle between the keel and its bulkheads is not exactly 90 degrees there may be a possibility of warping of the lower keel later on if bulkheads are later forced to right angle with the deck. This will also ensure best clearance between the bulkheads and the deck.

With all this said it is clear that the next thing to do is the planking of the main deck the poop deck and the forecastle deck.
 
Upon inspection of the deck planks it became clear that the single plank width is completely out of scale. Provided are standard planks of 5mm width.
In 1/60 scale that would make planks that are 12 inches wide! While I am sure planks of such impressive width could have been used somewhere I just do not see such wide planks on my ship looking any good.
1791511093453.png
What woud be a reasonable deck plank width? A quick search with Google AI gives an answer of 5'' to 9'' thus if to be narrowed down from outliers it would make sense to place planks 6'' to 8'' wide. Scaled down it would make 2.5 to 3.5mm. Sticking to the higher end of that would make it easier to place wooden nail imitations (by regular lead pencil) on it without making it look too cluttered.

The length given in the manual is 60mm. Upscaled it is 3.6m or 12ft. Since the deck is a load bearing srtuctural member of a hull I would expect to see longer timber here. A standard deck plank, upon googling, seems to be 20ft or 6m. Scaled down that is 100mm.

Thus I am looking for a plank 3 to 3.5mm wide and the plank length will be 100mm. The layout will be a simple three butt pattern.
 
A wonderful thing about living in Tallinn is that a model shop with model timber is 20min drive away open 10am to9pm every day.
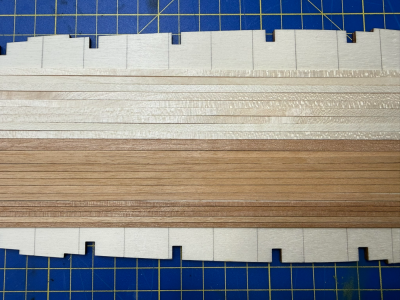
I went and bought some light mahogany strips to try out earlier today. The good thing is that they were available in 2mm, 3mm and 5mm width, thus no narrowing needed.

However upon laying them out on the plywood deck it became clear that this tone is just barely too dark for my plans for this model.
It is far enough in the future to be subject to change but the initial plan is to have the inner bulwarks painted scarlet instead of natural wood shown in the manual.
Red bulwarks look better with lighter tone of deck, more contrast between them.
1791513484515.png

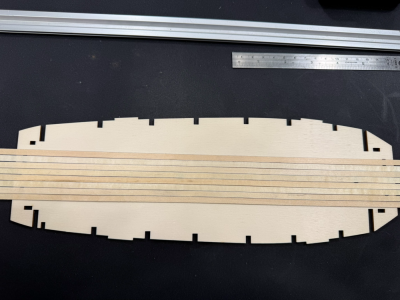
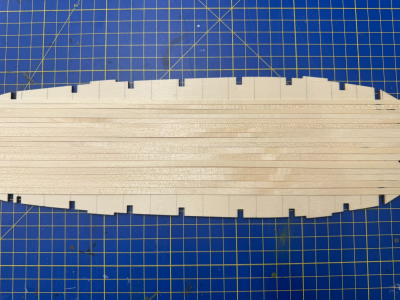
This means that the original planks provided will have to be narrowed down to 3.5mm, upscaled about 200mm or 8 inches.
Below is a comparison of original 5mm planks and new narrowed 3.5mm planks.1791514030431.png
 
I'm envious that you have such ready access to good modelling timber. Not having the equipment to prepare my own, I have to order online. Have fun with the build :).
 
I'm envious that you have such ready access to good modelling timber. Not having the equipment to prepare my own, I have to order online. Have fun with the build :).
Thanks. Will do.
Yes I happened to get lucky with this one. Funnily enogh when I went shopping there yesterday I bought just about the same assortment I would have bought online. A few strips of almost every dimension available in light shade and in mahogany. So the only real advantage is the lead time. But that can be mitigated by some preplanning. Still feels nice to be able to just walk in and get some stuff along with the groceries.
 
Hi Timmy, greetings from Athens. I have built this model and it gave me great pleasure, I trust this will be the case for you as well!

For the selection of the right timber/color, my humble advice is to not bother much with it. There's a great variety of water-based dyes and varnishes for wood, which could give you a lot of options. I usually mix them in various proportions, to achieve the color I like.
 
With decks completed and of acceptable quality it is now time to report on that interesting experience.
As mentioned before, the deck plank width was out of scale. The off the shelf option purchased at the store was too dark for this particular build.
The stains can only make timber darker, not lighter so the original provided planks had to be used.
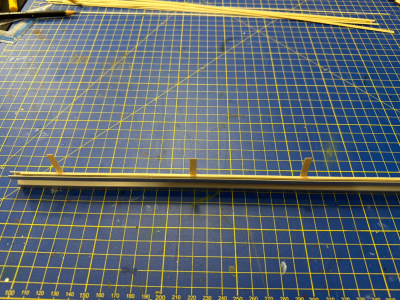
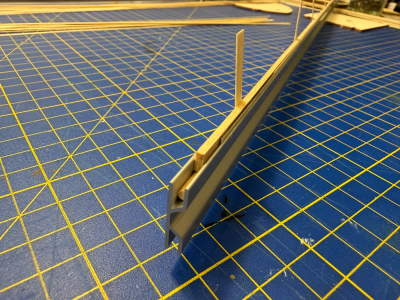
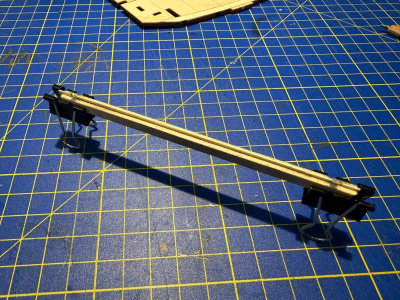
After thinking about my options I had decided to construct an "Improvised Plank Trimming Contraption"®.

1792029324997.png1792029358799.png

There are many ways to trim down the width of a plank. The two ways that quickly came to mind were using a scalpel blade in a fixture and planing of a bundle.
Planing is not possible because I do not have a plane and I also do not have a carpenter's bench which would be needed to secure the bundle well enough to allow planing. I live and work on these models at my home which is a small apartment so even if I wanted to buy some serious woodworking workshoppery I would not be able to do so. It is probably for the best.

The scalpel in a fixture is also not very good because the plank would have to be cut strictly with the grain. The quality of the planks provided does not allow for that. The grain plays a lot. This means there would be many tear outs during attempts to cut these planks this way. I am quite happy with this model's plank quality, however, beacuse if the quality were better the kit would have cost an exorbitant amount of money. It just sets a number of interesting play engineering problems to resolve with limited resources available.

The shown above method allows to trim down the width of the planks while avoiding tear-outs because the scalpel is used with light pressure and multiple passes.
This anables the use of the scalpel in all directions: with, against and across the grain.

The strips sticking out of the Contraption® are actually the wedges securing the plank rigidly to the groove, peventing sliding out and ruining the width of the plank. A similar contraption could be improvised also with a metal ruler if a suitable jig with a groove were unavailable.

The result was excellent. I forgot to take photos of the results, unfortunately. But I am sure that anybody can imagine a plank that was trimmed down from 5mm to 3.5mm.
 
There is an American Scientist article describing her in this colour scheme
The introduction of a black-and-white color scheme dates back to 1815, when post-war standardization began. A year later, following a series of trials, the black-and-white scheme officially replaced the black-and-yellow one, per an Admiralty directive. By 1820, the last ships returning from long-distance voyages had been repainted.
 
With the trimming complete it was time to start preparing for the planking.

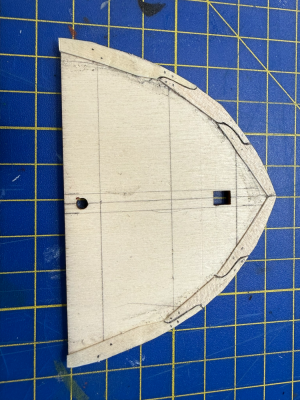
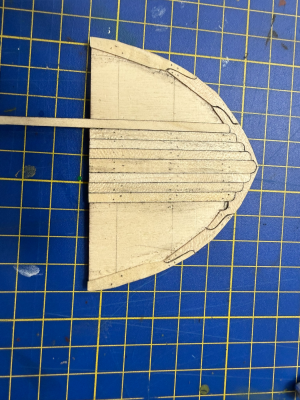
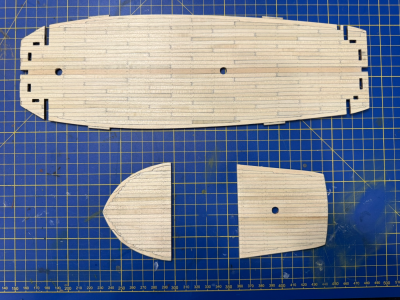
At this moment I realised that I would like to try out the option to do the margin strakes. It looked like a rather daunting task but I thought that I would start by trying it on the forecastle deck and if it fails I will just flip it and do the simpler (as per manual) option on the other side since the part is symmetrical and allows for it.
1792032648111.png1792032681604.png1792032778279.png

The result exceeded the expectations. The two things to improve next time are the lengths of the margin boards and more consistent margins (deck plank to bulwark distance). The adverse bend (around the width not the thickness) is not easy to pull off, especially with such a short radius. Thus the two breaks in the margin board, which would probably not take place on a real ship on a margin strake this short.

As for the cutting of the planks and margins, it turned out to be actually surprisingly easy. Time consuming, yes, but much easier than it seems. After careful and thoughtful planning, of course. Here is how I did it:

At first I permanently adhered the margin planks with the contact glue. After that I fabricated the plank to be installed in its final form, dry fitted it on top of the margin strake and traced the outline of the plank unto the strake with a scalpel. Then I cut out the gap and removed the leftover material with tweezers. Then I traced the edges of the plank and the strake with a regular graphite pencil and adhered the plank into its slot with contact glue. This method produces extremely accurate joints of complex shapes with much lower requirement towards the skill of the modeler than it seems. I highly recommend it to my fellow modellers, especially where an unsuccessful attempt can be just flipped and forgotten about should it fail.
 
Last edited:
The introduction of a black-and-white color scheme dates back to 1815, when post-war standardization began. A year later, following a series of trials, the black-and-white scheme officially replaced the black-and-yellow one, per an Admiralty directive. By 1820, the last ships returning from long-distance voyages had been repainted.
Hello Igor. Thank you for your advice. I know. I am aware of the phase out of the Nelson Chequer. I named my build semi-historic in the title of this blog exactly for that reason. I am building this model for my private collection. I know it may not be to everyone's taste, but I would like to be a little bit of a rebel and I want it in black and ochre. Also should I change my mind, it would actually be rather easy to change that even after the completion of the hull. It is a single exterior stripe plus a little bit on the stern galleries, very little repainting should the need arise. I thought of all these things before I began the build.

Regarding the Beagle, we know almost nothing about her. The blueprints are lost. The rebuild documentation is lost. On many conteporary paintings many of the Royal Navy ships are still, for some reason, pictured in black and ochre. Way after 1820.
What I am trying to say is that we know that she was a 10 gun brig that was converted to barque before the first expedition and that is it. We know almost nothing about her beyond that with a degree of reliability that could be called a fact. I like it in black and ochre more.

And with that said: Viva la revolucion! All hail anarchy. Freedom to the artists! I am just a Warhammer nerd making a ship every now and then. Please do not take me too seriously.
 
Last edited:
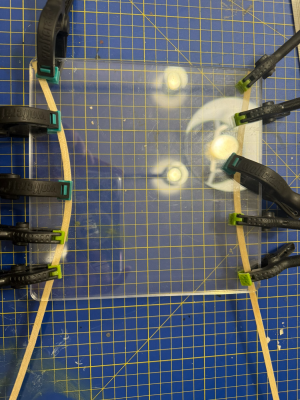
After the forecastle deck was a success, it was time to start margining and planking the rest of the model. After several failed attempts to bend the deck planks across the width, I had finally developed a method to do it consistently, if a bit slow.

1792041722618.png

The plank is left in hot water for 5 min or so, 0.5mm thickness takes very little time to be properly wetted.
Once soft, it is placed between two sheets of plexiglass under an angle downwards. (diagonally)
It is then clamped on the corner and slightly bent up and then clamped in the next position, and then bent again and clamped with the next clamp.
This seems to me so far one of the easiest ways to make such bends that I have seen on the internet and tha is why I am sharing it.
The downside of this method is that only two planks can be bent at a time and they have to stay there for several hours for this to work.

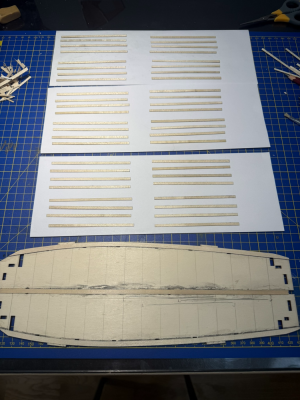
The planks need to be blackened on the thickness edges to make them distinguisheable. This step shuold not be skipped. After I tried to pencil them in bulk, as shown in the manual and in OcCre's YT videos it became apparent that the quality of the result of such method is substandard. The pencil does not reach all the planks equally and way too many reworks have to be done afterwards. This meant that the only way to pencil the planks properly was to do it with individual planks. To do that I created another jig to hold the planks while I pencil them.
It was a very time consuming process but I felt like it has to be done this way to make model look good. I was not sure it would simulate caulking properly, creating wide enough seams, but it actually worked out looking pretty good and not catching eye looking out of scale.

1792043239835.png

And with planks prepared, margins glued in, it was time to start the factory work. Plank. Repeat. Repeat. Repeat.
I think many people are trying to convince themselves that it is not so bad and they acually like it. I like it too, about 10% of the time.
Yet it is performing these routine procedures that makes the model. And finding the mood and mindset where you do not mind it very much is the key.

1792044648100.png

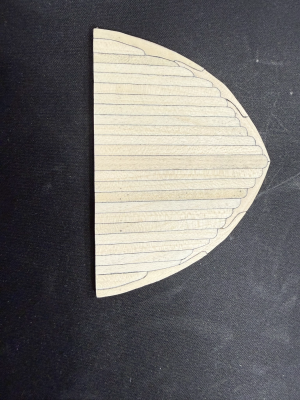
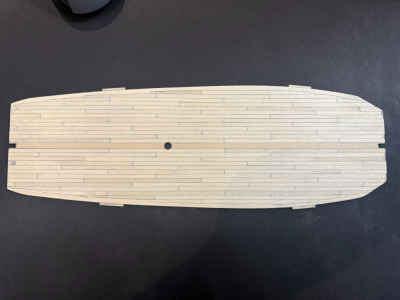
The photo before the great planking. Funnily enough prepping everything took about 90% of the time and gluing of the planks was then the quick part.
Also please notice full width plank in the middle. I thought that it would look good there. Additionally it would make the planking patten symmetrical.
 
With the deck planking complete it was pencil time again.

1792045794409.png

Please notice the different colors of the planks. I used planks from my previous Artesania Latina build.
It would be reasonable to think that some planks would age faster than others on a real ship. Also some may be replaced. Perhaps even on the sea.
Why do they look like that? It is a mystery.
Alright, silliness aside, the deck needs some variety to be more pleasing to the eye.
To do that I prefer to use the timber itself in a natural colour without the use of stains.
The hull will be almost entirely under a coat of paint and this is why I want this one part of the ship, not just look, but actually be all natural wood.

1792046443101.png

A note: I believe I mentioned before that I plan to use three butt pattern. Obviously here I used four butt pattern. I was mistakenly dividing the length ot the plank in four, not in five as I should have.
 
Last edited:
Back
Top