• Ships of Scale has incorportated an extra level of security when you log In. Please follow on-screen prompts to acknowledge that you are not a robot via a "Check Box" or a "Pictorial Check Box Puzzle". This is needed due to higher level of AI Activity Security.
  • SUBSCRIBE TO SHIPS IN SCALE TODAY!

    The beloved Ships in Scale Magazine is back and charting a new course for 2026!
    Discover new skills, new techniques, and new inspirations in every issue.

    NOTE THAT OUR NEXT ISSUE WILL BE July/August 2026
  • Win a Free Custom Engraved Brass Coin!!!
    As a way to introduce our brass coins to the community, we will raffle off a free coin during the month of August. Follow link ABOVE for instructions for entering.

HMS Beagle 1/60 OcCre kit semi-historic paint scheme by Timmy

Joined
Oct 7, 2026
Messages
7
Points
3

Location
Tallinn, Estonia
Hello and welcome to anyone interested to my first build log of the HMS Beagle in 1/60 scale model kit by OcCre.

I have been interested in making this little beautiful and so significant brig converted to barque for quite some time.

We can probably say that it is common knowledge that the Royal Navy phased out the Nelson's chequer (black and ochre) soon after the Napoleonic Wars ended since which the standard paint scheme intead beacame the black and white in which most Beagles are painted. It certainly makes sense timeline-wise.

My current plan, however, is to make it in black and ochre livery instead of conventional black and white. Hence the title for this build log. I just like this paint scheme more for some reason.
There is an American Scientist article describing her in this colour scheme:

https://www.americanscientist.org/article/h-m-s-beagle-1820-1870#

Since nothing has yet been built it is, of course, subject to possible change when the state of the build will approach the hull painting.
One may simply not know what lies ahead.

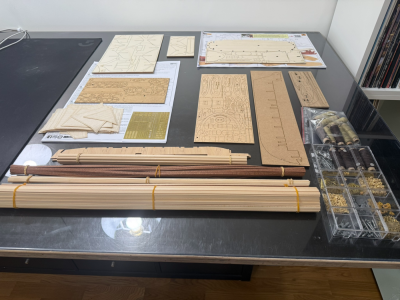
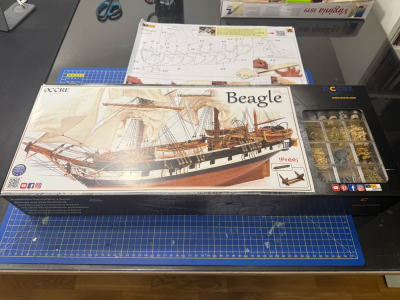
Below are some photos of me admiring the greatness that awaits.
1791429893376.png
1791429927142.png
 
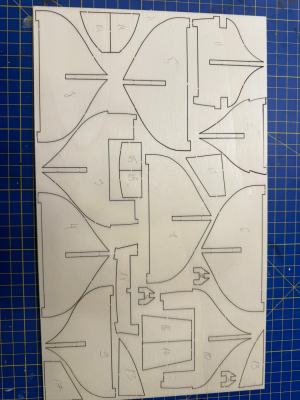
As first step I marked the bulkheads as per instruction manual in order to avoid possible mix-ups during installation.
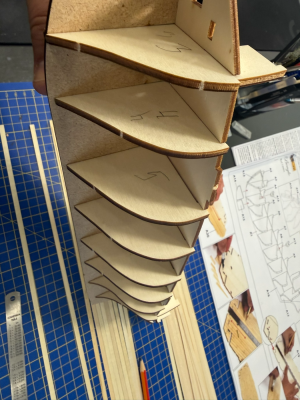
Next the bulkheads were removed from the plywood sheet and test fitted.
1791504670644.png1791504704383.png
The manual then says to start adhering the bulkheads to the keel.
Given the shape of the deck, however, mainly its recesses into which the bulkheads slide, it seems much more reasonable to glue in the keel, the bulkheads and the deck all in one go to ensure the right angles between the keel, bulkheads and deck. If the angle between the keel and its bulkheads is not exactly 90 degrees there may be a possibility of warping of the lower keel later on if bulkheads are later forced to right angle with the deck. This will also ensure best clearance between the bulkheads and the deck.

With all this said it is clear that the next thing to do is the planking of the main deck the poop deck and the forecastle deck.
 
Upon inspection of the deck planks it became clear that the single plank width is completely out of scale. Provided are standard planks of 5mm width.
In 1/60 scale that would make planks that are 12 inches wide! While I am sure planks of such impressive width could have been used somewhere I just do not see such wide planks on my ship looking any good.
1791511093453.png
What woud be a reasonable deck plank width? A quick search with Google AI gives an answer of 5'' to 9'' thus if to be narrowed down from outliers it would make sense to place planks 6'' to 8'' wide. Scaled down it would make 2.5 to 3.5mm. Sticking to the higher end of that would make it easier to place wooden nail imitations (by regular lead pencil) on it without making it look too cluttered.

The length given in the manual is 60mm. Upscaled it is 3.6m or 12ft. Since the deck is a load bearing srtuctural member of a hull I would expect to see longer timber here. A standard deck plank, upon googling, seems to be 20ft or 6m. Scaled down that is 100mm.

Thus I am looking for a plank 3 to 3.5mm wide and the plank length will be 100mm. The layout will be a simple three butt pattern.
 
A wonderful thing about living in Tallinn is that a model shop with model timber is 20min drive away open 10am to9pm every day.
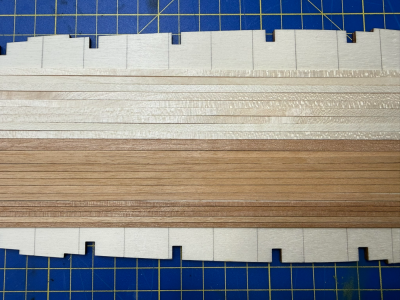
I went and bought some light mahogany strips to try out earlier today. The good thing is that they were available in 2mm, 3mm and 5mm width, thus no narrowing needed.

However upon laying them out on the plywood deck it became clear that this tone is just barely too dark for my plans for this model.
It is far enough in the future to be subject to change but the initial plan is to have the inner bulwarks painted scarlet instead of natural wood shown in the manual.
Red bulwarks look better with lighter tone of deck, more contrast between them.
1791513484515.png

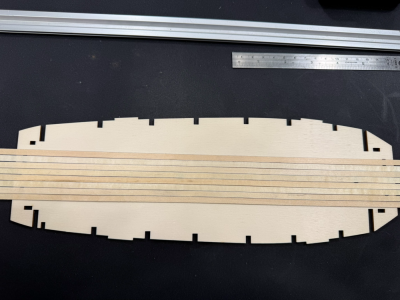
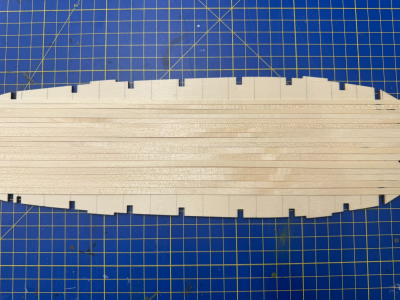
This means that the original planks provided will have to be narrowed down to 3.5mm, upscaled about 200mm or 8 inches.
Below is a comparison of original 5mm planks and new narrowed 3.5mm planks.1791514030431.png
 
I'm envious that you have such ready access to good modelling timber. Not having the equipment to prepare my own, I have to order online. Have fun with the build :).
 
I'm envious that you have such ready access to good modelling timber. Not having the equipment to prepare my own, I have to order online. Have fun with the build :).
Thanks. Will do.
Yes I happened to get lucky with this one. Funnily enogh when I went shopping there yesterday I bought just about the same assortment I would have bought online. A few strips of almost every dimension available in light shade and in mahogany. So the only real advantage is the lead time. But that can be mitigated by some preplanning. Still feels nice to be able to just walk in and get some stuff along with the groceries.
 
Hi Timmy, greetings from Athens. I have built this model and it gave me great pleasure, I trust this will be the case for you as well!

For the selection of the right timber/color, my humble advice is to not bother much with it. There's a great variety of water-based dyes and varnishes for wood, which could give you a lot of options. I usually mix them in various proportions, to achieve the color I like.
 
Back
Top