- Joined
- Oct 11, 2022
- Messages
- 14
- Points
- 58

I found some time to get started on my first kit: HM Cutter Alert by Vanguard. I am not new to model building; however, the wooden ships have always been a lofty an intimidating goal I never thought I would work my way up to until recently. Time to dive in headfirst.
Let me just say this would not have gone as smoothly as it has, if it were not for the tips and advice of all of you here on this forum. (and Olha's Youtube channel as well). I do not know what I could possibly have to contribute with this build log, but I will definitely be greatful for your words of wisdom and encouragement as I progress.
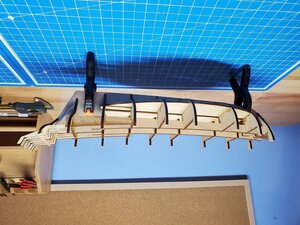
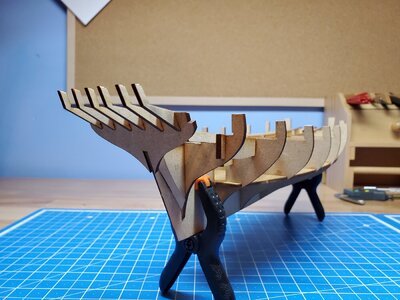
So far, I am impressed with the quality of the Vanguard kit. The laser cutting has been fairly precise, with only a minimal amount of filing needed for a smooth fit when assembling the pre-cut pieces. I was able to work my way through the initial assembly of the framing. I used the sub deck to experiment with a thinned solution of the pine tar "boat soup" that I use on my real boat. I thinned it a bit more than needed and barely got a blush of color out of it, but at least the model has that real-ship smell now.
The next phase I have to look forward to is the main deck. I would like to lay planks and simulate trunnels, using the included single-piece stamped boxwood deck piece as a subdeck or template. I would like to fill the space between frames and fair the hull before I get to try my hand at planking. I have lots of marine coosa-board on hand that I could fill the space with, but I may hold off until I can get a hold of some suitable wood instead.
Hopefully the tools and materials for my next stage will be at hand, and I will have another update in the next couple weeks!


![20221225_083027[1].jpg 20221225_083027[1].jpg](https://shipsofscale.com/sosforums/data/attachments/332/332349-05b62591eb66e0152c8a323b5013af8c.jpg)
![20221226_132935[1].jpg 20221226_132935[1].jpg](https://shipsofscale.com/sosforums/data/attachments/332/332350-eeaa870a70abc46733ae2dc4ffd38663.jpg)
![20221226_153911[1].jpg 20221226_153911[1].jpg](https://shipsofscale.com/sosforums/data/attachments/332/332351-e92c9fc25e984d90581f01717430c504.jpg)
![20221228_090956[1].jpg 20221228_090956[1].jpg](https://shipsofscale.com/sosforums/data/attachments/332/332352-9b8449462734d036bfc03900ca2d0b19.jpg)
![20221229_104509[1].jpg 20221229_104509[1].jpg](https://shipsofscale.com/sosforums/data/attachments/332/332353-e59c524620d549385c9e84f975e23645.jpg)
![20221229_145908[1].jpg 20221229_145908[1].jpg](https://shipsofscale.com/sosforums/data/attachments/332/332354-9f4dddb57a1700e62b325c80e54fe00d.jpg)
![20221229_145926[1].jpg 20221229_145926[1].jpg](https://shipsofscale.com/sosforums/data/attachments/332/332355-e04c72356349458a6b88c5fea633a51b.jpg)
![image0_(2)1[1].jpeg image0_(2)1[1].jpeg](https://shipsofscale.com/sosforums/data/attachments/332/332356-9dbea2a87e4f898848889f97c63834a5.jpg)
![Image[1].jpeg Image[1].jpeg](https://shipsofscale.com/sosforums/data/attachments/332/332357-d877f7b52d738d523bac681e07ad9819.jpg)
![20221230_104038[1].jpg 20221230_104038[1].jpg](https://shipsofscale.com/sosforums/data/attachments/332/332465-da9e50dde6718f0e1818782dd1bacf79.jpg)
![20221230_111119[1].jpg 20221230_111119[1].jpg](https://shipsofscale.com/sosforums/data/attachments/332/332466-7a9af1e0daf7ffc79c9f877c26a13b30.jpg)
