• Win a Free Custom Engraved Brass Coin!!!
    As a way to introduce our brass coins to the community, we will raffle off a free coin during the month of August. Follow link ABOVE for instructions for entering.

Airfix SEPECAT JAGUAR GR1 1/48 by Smithy

Joined
Dec 3, 2022
Messages
1,488
Points
443

IMG_2550.jpeg

Hello old friends!

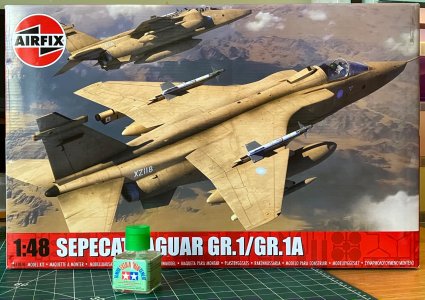
Would you like to watch me build a Jaguar? It’s a new kit from Airfix this year and has excellent reviews.

IMG_2552.jpeg

As you see, it’s a great big box full of goodies. I’ll open it later and walk you through the details.

I’ve always liked this aircraft. I like its cute lines and have enormous respect for the pilots who flew it. They were the cream of the crop during my time in the RAF. The cockpit workload of the single seat Jaguar was very high, it flew very low, very fast and gained the unfortunate nickname of the Mountain Mole due to its propensity for burrowing into the landscape in the blink of an eye.

I never worked on the big cat operationally but as a technical instructor at RAF Halton I had two bent airframes on my inventory. They were heavy landing casualties, without wings, used for training electricians. I’d like to think that makes me an expert but in fact, I can’t remember a thing about them. Perhaps it will all flood back when I see the shape develop under my quivering mandibles?

IMG_2553.jpeg

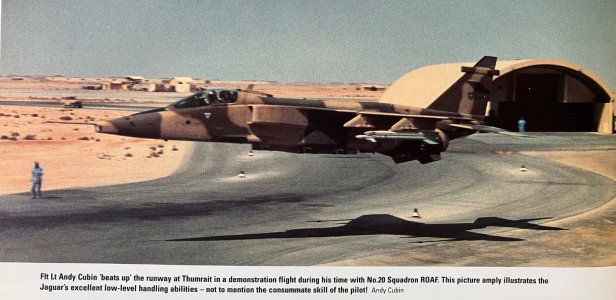
Did I mention fast and low? I hope the build will be as exciting as that!
 
Or this.

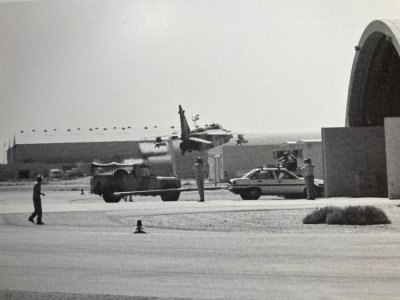
IMG_2556.jpeg

Looks like an AI image, doesn’t it? That’s a display pilot having fun flying between the hangars. I’m guessing that was before the Health and Safety at Work legislation. :)
 
This looks like a nice aircraft. Interesting it shows the ability to carry missiles on top of the wing, a unique feature. The sand color should be a good candidate for showing panel lines. I chose that variation on my P-39Q Airacobra for that very reason. :)
I will pull up a chair.
 
Let’s get that big red box open.
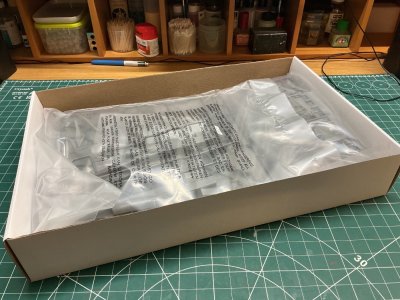
IMG_0076.jpeg

Phew, what a pong! It’s a funny thing about Airfix kits these days - they smell bad when you first open the box. Think of baby sick - a sour milky smell. It fades quickly, or perhaps I just get used to it. Presumably it’s something off-gassing from the plastic and being retained by the plastic bags. I actually did my opening survey last night, say 18 hours ago and it’s still faintly detectable but only if i sniff for it.
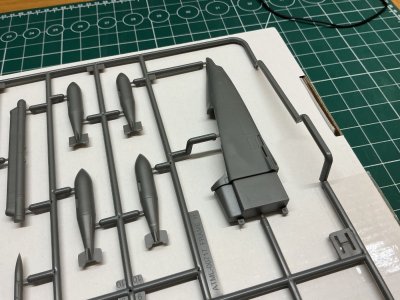
IMG_0077.jpeg

First glimpse of the plastic. They moulded the nose separated from the fuselage. This tells me that there will be a two seater version sooner or later; probably next year.
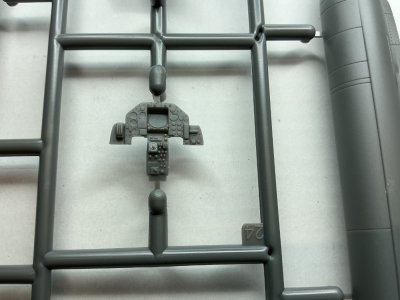
IMG_0078.jpeg

There’s my always favourite component - the inst panel. I used to be an electrical and instrument fitter in the RAF and spent a lot of time with these things. They are also the most fun to paint and really the main point of interest for the viewer of a model. It’s the keystone of the cockpit and that’s where the human interest is - where the meat meets the metal. This one’s quite good enough for me.
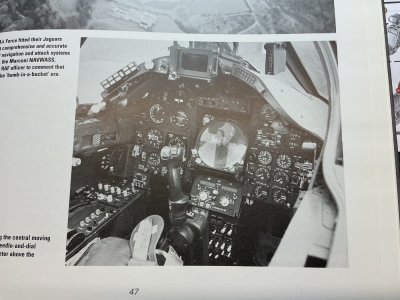
IMG_0091.jpeg

That’s the real thing. I think the Airfix version is close enough for 1:48 scale. My reference book quotes a pilot as saying they the cockpit of this aeroplane was an “ergonomic slum”, important when you are flying fast and low and don’t really want to have to look down to find a switch somewhere close to your ankles. They improved things a lot in the GR1B version.
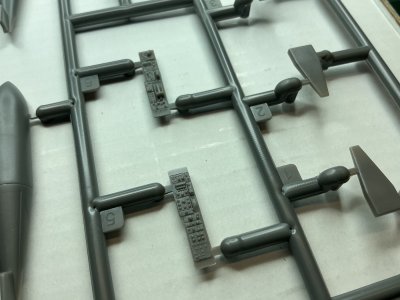
IMG_0079.jpeg

Airfix have moulded the side panels separately from the cockpit tub which will make painting them easier. Not easy, but easier.
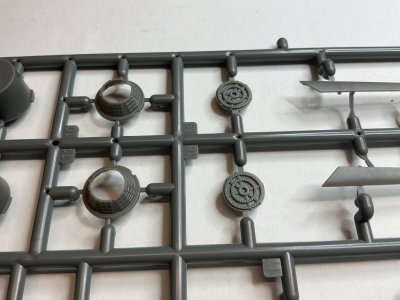
IMG_0081.jpeg

The tailpipes are another area of interest to the aircraft modeller. These are a little thick, a little simple but I must bear in mind that it’s a relatively cheap, almost mass market kit and that resin replacements will be available from half a dozen aftermarket specialists. Personally, I’ll see what I can do with the kit supplied items.
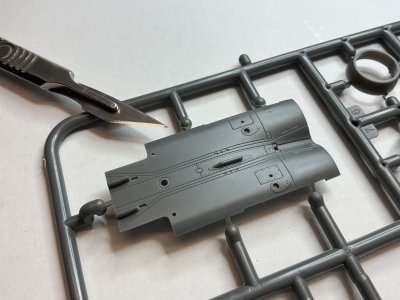
IMG_0082.jpeg

There’s a sample of the surface detail. It’s not as crisp as the more expensive Japanese brands but the panel lines are a lot finer than Airfix kits of ten years back - they are improving all the time. Note that the panel lines and rivets are still hugely over scale - this is a 1000kt capable aircraft and it was smooth.
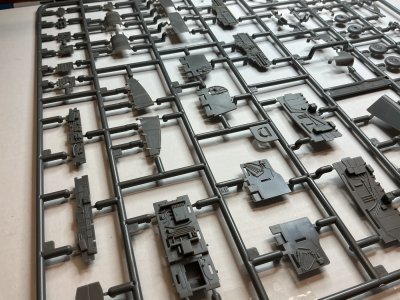
IMG_0083.jpeg

These flat panels with the details are the wheel bays, moulded in pieces. That’s another good thing and will allow me to paint them before assembly. Honest, I need all the help I can get with painting tiny details.
IMG_0084.jpeg

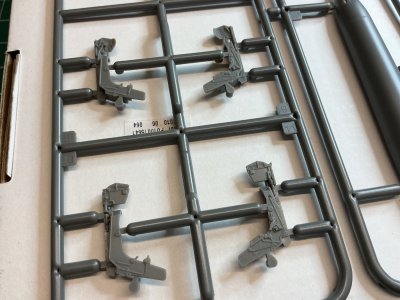
Two ejection seats are included. The GR1 and GR1A had different marks of Martin Baker seats. This is one thing for which I might buy a resin or 3D printed replacement. It’s another focus of interest and the harnesses etc are really complicated to make from scratch.
IMG_0086.jpeg

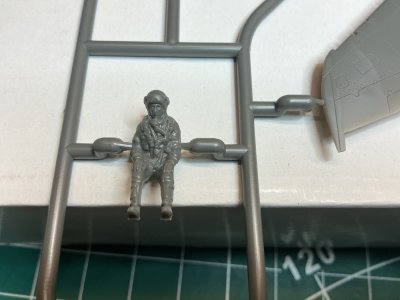
There’s Rodney. I think the moulding is too soft, rounded edges everywhere. It would be very challenging for me to paint that. So I won’t. Personally, I think models look silly with pilots inside, especially with their hands on their thighs like that are posing for a photo of their equipment for a Safety Equipment poster. I would not be surprised to find that such a poster was the source for the design.
IMG_0088.jpeg

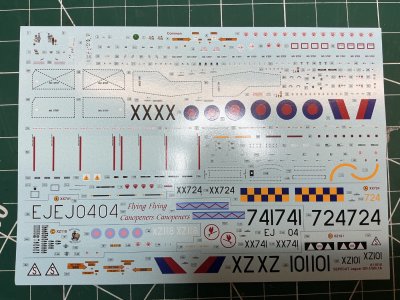
Nice decals. Plenty of stencils and four main schemes - all RAF. Two in grey/green wraparound, one in Gulf War One desert paint and one in grey/green/white which is my fave as its my period and I’ve been to Lossiemouth where it was based in 1974.
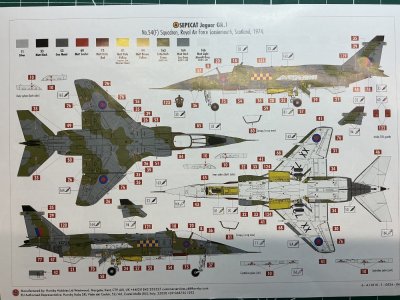
IMG_0089.jpeg

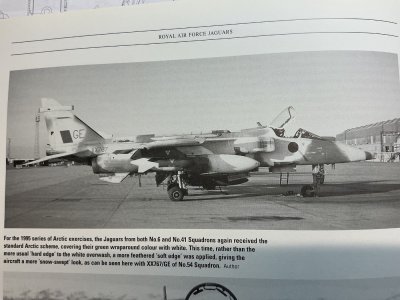
This one. Although I am tempted to over paint the green with white for the famous Norway camouflage, applied temporarily once a year for deployments to Bardufoss.
IMG_0092.jpeg

The effect is a little muted in black and white but I always thought it made a pleasant change from green and grey. Also, being soft edged, I wouldn’t have to bother with much masking.

TLDR: It’s ok and I think I can make a decent job of it. I’m a little disappointed with some of the mouldings but if they fit together, I’ll live with it. Pity that Airfix didn’t provide an engine or two or open up the huge avionics bays but the resin aftermarketeers will do it better for those who want it and standard kit buyers save money. Again, I accept the need to make a profit.

I can’t wait to begin
 
This looks like a nice aircraft. Interesting it shows the ability to carry missiles on top of the wing, a unique feature. The sand color should be a good candidate for showing panel lines. I chose that variation on my P-39Q Airacobra for that very reason. :)
I will pull up a chair.

There are only four underwing pylons and two of them were usually taken up with chaff/flare and ECM. If they had put the Sidewinders under the wings they would have had to carry the bombs on the top. That would have been amusing. (I wonder if it was ever considered?)

The GR1 versions didn’t, I think, carry missiles but the wings in the kit don’t give me any choice in the matter. I know they were retrofitted when the GR1A version came out but I didn’t think it was as early as 1974. Oh well, who cares anyway? No-one will know.
 
Last edited:
There are only four underwing pylons and two of them were usually taken up with chaff/flare and ECM. If they had put the Sidewinders under the wings they would have had to carry the bombs on the top. That would have been amusing. (I wonder if it was ever considered?)

The GR1 versions didn’t, I think, carry missiles and certainly not in 1974.
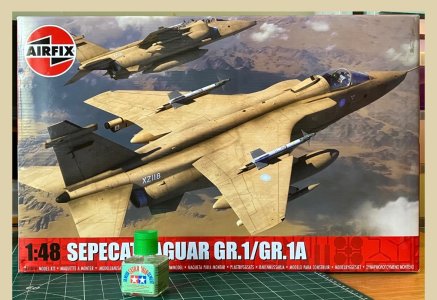
I am only looking at the box cover shown…
IMG_0603.jpeg
…which clearly shows pylons and missiles on top of the wing? Are the box photos incorrect? I’m confused…
 
The game’s afoot!

IMG_0093.jpeg

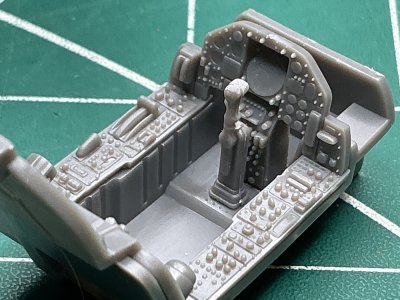
There’s the cockpit tub, mostly dry fitted together to familiarise myself with where the various bits go, and in which order, and for this photograph of course. It looks horribly blobby when enlarged to a zillion times life-size, but let’s not judge it until it’s painted, and ideally not until it’s sunk into the fuselage and barely visible. You may notice that there is something missing from that photograph?

IMG_0094.jpeg

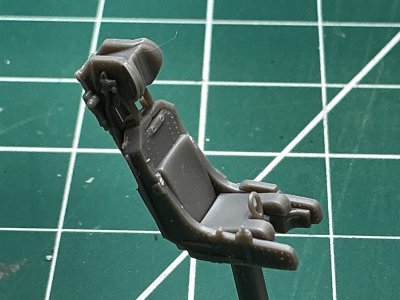
Here it is! It’s a Martin Baker type 9B Mark 2 ejection seat. It is moulded well enough to be clearly distinguishable from the Martin Baker type 9B mark three ejection seat as used in the GR1. Incidentally, for those not familiar with Royal Air Force aircraft nomenclature, the G means ground attack and the R means reconnaissance which were the main roles of the Jaguar.

Once again, the moulding is somewhat blobby and very thick in places too. The whole kit is going to be like that under magnification so I’m not going to mention it anymore. Ya pay your money, ya takes your chance! I wanted to show the seat in place in the cockpit tub but unfortunately by the time I thought of that I had alreadyglued a piece of sprue to its base to give me something to hold onto while I paint the little darling. I also have to improvise some kind of harness since that is not provided. The assumption being that I would stick Mr. Blobby the pilot onto the seat. So it’s my fault really.

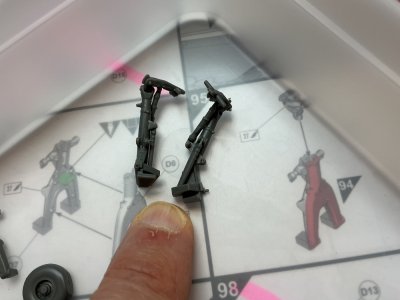
I’ll spend another half hour this evening collecting together and cleaning up all of the other parts for the nose assembly. The plan is to stick them together wherever it doesn’t make painting difficult, and then to prime and paint everything before final assembly. Knowing where to stop assembling and when to begin painting is something that I often get disastrously wrong. Usually I get carried away with the glue and only realise far too late that I can no longer get a brush into the tiny spaces I’ve created. This time I will err on the side of caution. Possibly.
 
The game’s afoot!

View attachment 555352

There’s the cockpit tub, mostly dry fitted together to familiarise myself with where the various bits go, and in which order, and for this photograph of course. It looks horribly blobby when enlarged to a zillion times life-size, but let’s not judge it until it’s painted, and ideally not until it’s sunk into the fuselage and barely visible. You may notice that there is something missing from that photograph?

View attachment 555353

Here it is! It’s a Martin Baker type 9B Mark 2 ejection seat. It is moulded well enough to be clearly distinguishable from the Martin Baker type 9B mark three ejection seat as used in the GR1. Incidentally, for those not familiar with Royal Air Force aircraft nomenclature, the G means ground attack and the R means reconnaissance which were the main roles of the Jaguar.

Once again, the moulding is somewhat blobby and very thick in places too. The whole kit is going to be like that under magnification so I’m not going to mention it anymore. Ya pay your money, ya takes your chance! I wanted to show the seat in place in the cockpit tub but unfortunately by the time I thought of that I had alreadyglued a piece of sprue to its base to give me something to hold onto while I paint the little darling. I also have to improvise some kind of harness since that is not provided. The assumption being that I would stick Mr. Blobby the pilot onto the seat. So it’s my fault really.

I’ll spend another half hour this evening collecting together and cleaning up all of the other parts for the nose assembly. The plan is to stick them together wherever it doesn’t make painting difficult, and then to prime and paint everything before final assembly. Knowing where to stop assembling and when to begin painting is something that I often get disastrously wrong. Usually I get carried away with the glue and only realise far too late that I can no longer get a brush into the tiny spaces I’ve created. This time I will err on the side of caution. Possibly.
I think it looks promising.
 
Well, I found and tidied up all of the small details without a problem. Unfortunately I then bumped into something interesting…

IMG_0095.jpeg

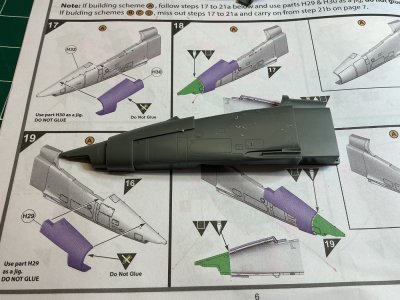
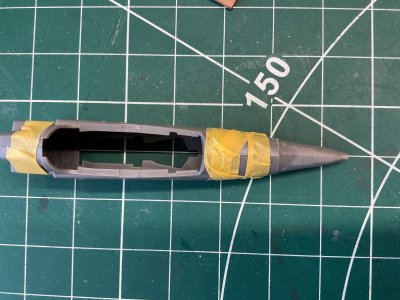
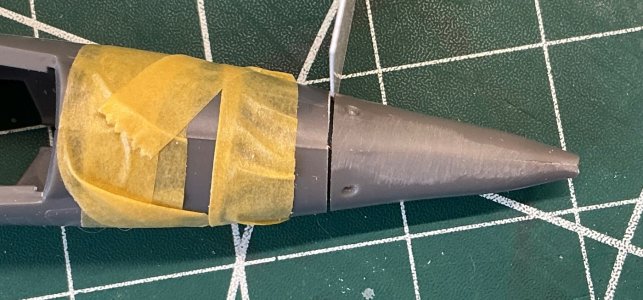
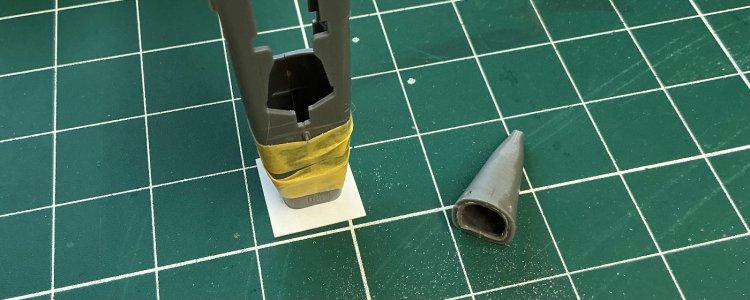
In order to build my 1974, 54 squadron option I have to cut the laser nose off and replace it with the earlier conical nose. Usually when this is required a kit manufacturer will mould a cut line on the inside of the fuselage. The model then uses a saw to hack off most of the waste and comes back accurately to the line with files and sandpaper. In this case a jig is provided to guide the cut. Foolishly I attached the jig, brought my saw next to it and hacked away. What I should have done was use a scalpel to mark the edge of the waist (waste - I dictate these updates to save time but returning to edit out all of the homonyms is tedious so you will have to put up with them in future, I’m sorry.) and then come up to it slowly with files and sandpaper. The jig is of course as soft as the rest of the plastic and my enthusiastic sawing, together with my inefficient eyeballs caused the cock up that you see in the next picture

IMG_0097.jpeg

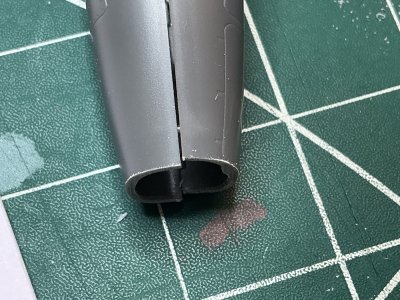
Silly me. Neither of those cuts are perpendicular and the port side is a millimetre or two too far aft at the centre line. What a marvellous start to the build.:confused:

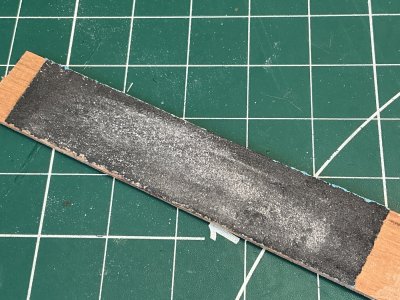
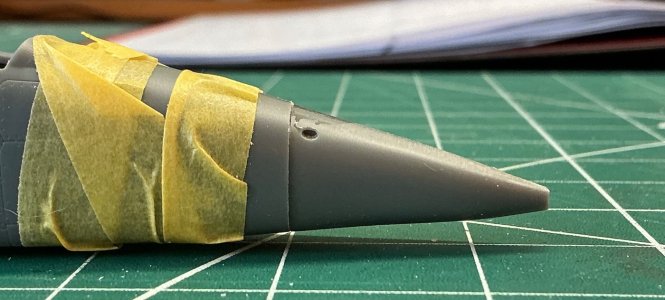
I will assemble the conical nose, which comes in two pieces, and leave it overnight to set . In the morning, I will temporarily fasten the fuselage halves together with masking tape. Only then will I know whether I have cut too much or too little. Stay tuned for the next exciting episode of ‘Smithy Gets a Little Saw’.
 
Last edited:
Back
Top