I am thinking along the same lines, I am planking with as minimal gaps as possible. I will sand smooth to get all planks on the same plane, and set the curvature up. Then putty, bondo or simular until I have an absolutely smooth surface. I am going to airbrush the hull, and mask between colors, and finish in a clear coat. As the real ship would have been polished to reduce drag. This is my step up learning model on the way to the USS Constitution. My current path is this, then a USS Constution Cut away, then the HMS Victory, then a full USS Constitution. Each model up the chain is more complex from a build perspective and I'll new skills honed on the model before.This kit is an example of requiring you to do things the hard way. Double planking? Endeavor had a steel hull!
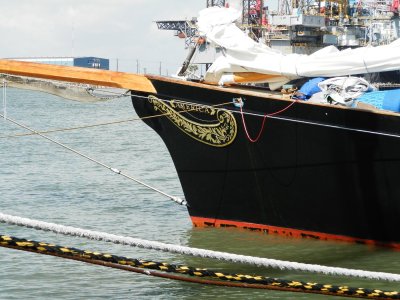
For a high quality yacht like this there would be no lapped joints like normal riveted construction. Rivets would be driven thru an internal backing strip. Or, as she was built in the 1930’s some seams might have been welded. In either case, great would have been taken to obtain a perfectly smooth hull.
If I were building this model, I would skip the second planking layer and would “butter” the hull with Bondo to end up with realistically smooth hull.
Roger
-

Win a Free Custom Engraved Brass Coin!!!
As a way to introduce our brass coins to the community, we will raffle off a free coin during the month of August. Follow link ABOVE for instructions for entering.
-

PRE-ORDER SHIPS IN SCALE TODAY!
The beloved Ships in Scale Magazine is back and charting a new course for 2026!
Discover new skills, new techniques, and new inspirations in every issue.
NOTE THAT OUR FIRST ISSUE WILL BE JAN/FEB 2026
You are using an out of date browser. It may not display this or other websites correctly.
You should upgrade or use an alternative browser.
You should upgrade or use an alternative browser.
America’s Cup Endeavour Racing Yatch (1:75) from Occre - Build Log
What do you mean "password"? and where would I look for metal rails to make
- Joined
- Nov 21, 2016
- Messages
- 76
- Points
- 78

I searched for my article at the time I saw your work. But I didn't find it. I don't know if this site archives such things. I'll check again and send you the link, if possible. I do still have the pictures I took somewhere; I'll try to post some for you.I am going to search for it. I found and ordered a book from Amazon with a ton of photos that I thought would help
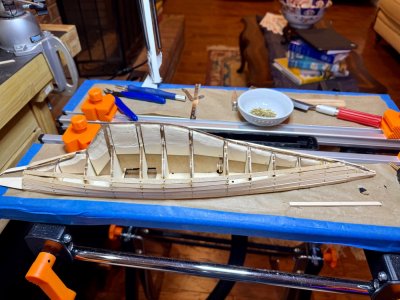
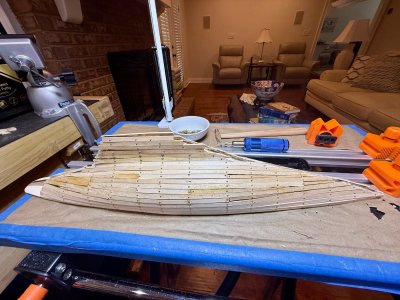
This is nowhere near the standards I have seen others achieve in SoS. However, I need to temper my expectations since this is the first time I've done Plank on Bulkhead. And it will all be hidden under the next layer. I learn something with every plank I lay, slowly improving. I think for me, that is enough for now.

- Joined
- Jun 29, 2024
- Messages
- 1,498
- Points
- 393

Although the planking is rough, it gives you a layer that defines the hull shape. Unless your vision of the finish modeI involves a bright finished wooden hull, I would liberally “butter” the hull with a surfacer that cures. Bondo automotive putty, or Durham’s Rock Water putty would work. Now you can sculpt the hull smooth to its proper shape. Now why add the second planking layer? Either of the surfaces mentioned above will provide a better surface to paint than the kit supplied second layer mystery wood.
Roger
Roger
All very valid points. I'll put the putty layer, no matter what, to give me a very smooth, paintable surface. If I do the mahogany layer, it will just be for the practice of double planking the hull.Although the planking is rough, it gives you a layer that defines the hull shape. Unless your vision of the finish modeI involves a bright finished wooden hull, I would liberally “butter” the hull with a surfacer that cures. Bondo automotive putty, or Durham’s Rock Water putty would work. Now you can sculpt the hull smooth to its proper shape. Now why add the second planking layer? Either of the surfaces mentioned above will provide a better surface to paint than the kit supplied second layer mystery wood.
Roger
Dr. Mark, I'm enjoying your build and your frustrations as well. Planking a hull can be so tedious, but you are doing a great. Take your time and visualize the beautiful end result! Magic Mike
I really appreciate that; it's my first actual build and my first build log. I am learning and hopefully perfecting as I go.Dr. Mark, I'm enjoying your build and your frustrations as well. Planking a hull can be so tedious, but you are doing a great. Take your time and visualize the beautiful end result! Magic Mike
- Joined
- Jun 29, 2024
- Messages
- 1,498
- Points
- 393

That’s looking much better
It’s getting there, I have a bunch more sanding to do, and the fill a few low spots. And then finish by hand sanding in finer grits. I am hoping my new air compressor and air brushes arrive on Friday and she is ready for a coat of primer. Seeing as the original is steel hulled, a second planking really does not do anything, putty and a smooth sanding will be a far more accurate portrayal.That’s looking much better
Oh and if anyone wonders, my VPN is what is causing my country flag to jump around.
You are all USA todayOh and if anyone wonders, my VPN is what is causing my country flag to jump around.
- Joined
- Jun 29, 2024
- Messages
- 1,498
- Points
- 393

Don’t be surprised is you wind up sanding almost all of that first coat of primer off. That’s normal. One of its jobs is to highlight little imperfections that you don’t see.
Roger
Roger
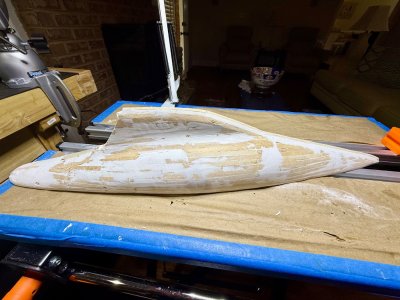
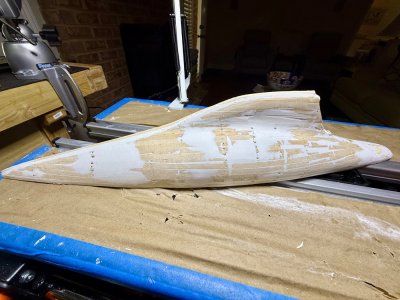
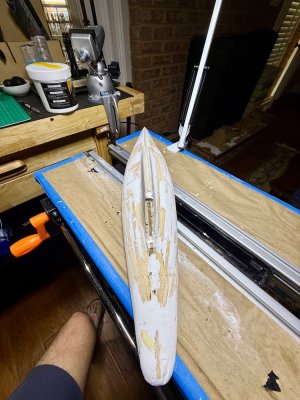
Not much progress, sanding continues. I think the last of the putty will go on today, and get a final smoothing tomorrow. I ended up pulling every brad as it was interfering with leveling the finish. I am waiting for my compressor and airbrush to arrive, I’ll prime and then a final putty on any low spots. As very accurately pointed out by another member, the Endevor was steel hulled, so really no need to plank a second time. Just do a very good job at putty, smoothing, and painting to be reasonably accurate.


- Joined
- Dec 23, 2024
- Messages
- 129
- Points
- 78

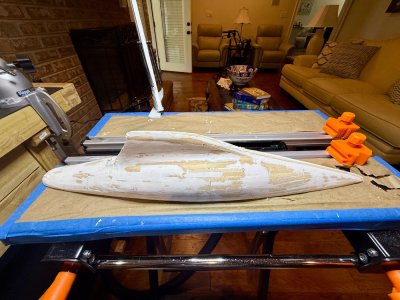
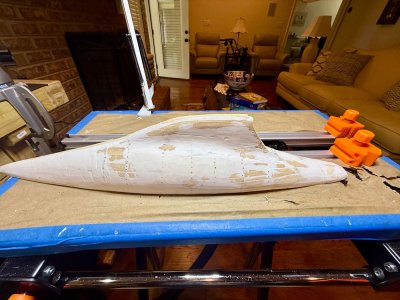
It’s interesting to read what you say regarding pulling out the nails as when I built my first model, not that long ago, I too had issues with all of the nail heads when sanding. Therefore I intend to push the nails in only half way instead of all the way. They are there only to hold the planks in place until the glue sets. Once the glue has set ie, about one day, then I will pull all the nails out.Puttying and sanding. It is starting to look like a proper sailing vessel. I imagine I have several days of sanding and puttying to go to get a near perfect finish for prime and paint. I also think I need to pull the few remaining brass brads out to get a smooth finish.
View attachment 532102
View attachment 532103
That surely has to be better than all those nails for sanding flat

