• Ships of Scale has incorportated an extra level of security when you log In. Please follow on-screen prompts to acknowledge that you are not a robot via a "Check Box" or a "Pictorial Check Box Puzzle". This is needed due to higher level of AI Activity Security.
  • SUBSCRIBE TO SHIPS IN SCALE TODAY!

    The beloved Ships in Scale Magazine is back and charting a new course for 2026!
    Discover new skills, new techniques, and new inspirations in every issue.

    NOTE THAT OUR NEXT ISSUE WILL BE July/August 2026
  • Win a Free Custom Engraved Brass Coin!!!
    As a way to introduce our brass coins to the community, we will raffle off a free coin during the month of August. Follow link ABOVE for instructions for entering.

Another Airfix 1/72 Golden Hind Build Review – Part 1

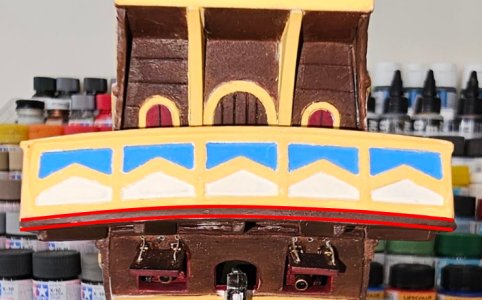
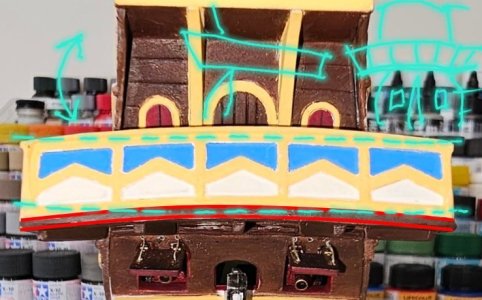
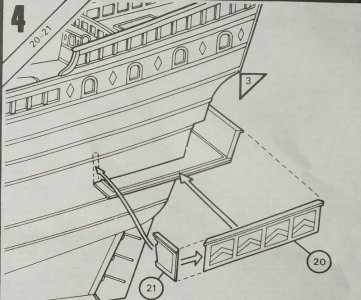
I had some ideas about this model balcony , mu intension was to rearrange position of it , to make balcony sides to follow in parralel to curving line of the wales , not in parralel to water line as it proposed by the kit, and rear panel to make in a shape of ark , a little bit...
But these ideas still in progress, far from the end

08 10 2024.jpg
 
Last edited:
Oh... so others have had this problem?

I hadn't seen that...
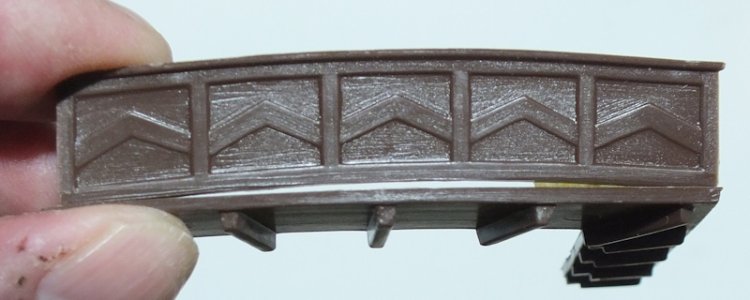
Hopefully this image shows the issue. On my example, the base of the gallery is flat while the rear section of ballustrade is clearly curved. I think that the base will need to be bent into shape to fit that curve.
ghb31.jpg
 
You could try and see how it will work... need to be bent in a very little degree...Inthink it could be done easily...
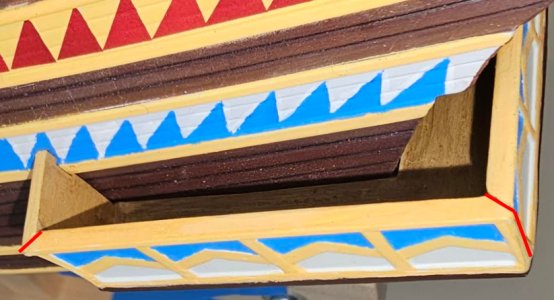
but what with the side vew? What John did wrong when assemble his model balcony ?
Rear balcony panel should be fitted with pozitive angle to outside not inside as on John's pictures?

Screenshot_20260921_130652_Gallery.jpg

Screenshot_20260921_130750_Gallery.jpg
 
They only fit together the one way, I think. And it matches the instructions. I dunno what went wrong! I will be more careful on the next Golden Hind!!!
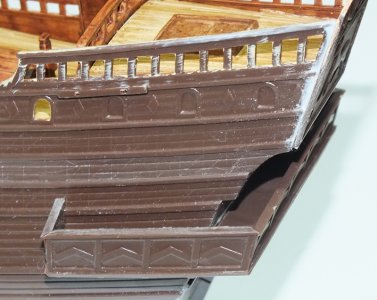
Here are a couple of pics of my version. Ther was indeed a gap in the rear-most piece, which I filled so it looks OK now. I think I had to sand the bottom so that it was curved also...

Pic-1749.jpg

The whole thing is not square. The corner joins are angled and the sides are not square either. Trying a dry fit requires the assistance of an octopus. None of the pieces have any secure joins - no pins, no slots, etc. So you need to hold it all together. I think I used Micro liquitape to hold them when I was doing the repair. But more care before painting would have been wise.
Pic-1750.jpg
 
Rear balcony panel should be fitted with pozitive angle to outside not inside as on John's pictures?
Yes, this is correct. I ended up needing it to slant the wrong way to get the pieces to fit together. Not sure how I screwed it up but I clearly did!

Just a warning to Steve not to repeat my error!
 
Good day,
When I look again at this picture, it looks like kit maker did something wrong entire with all parts of balcony, and ot couldn't be assembled correctly with these parts from the kit...
On the picture , rear panel has a slight curvavative in its upper part, but it should have it in lower part, if we want to assemble all parts together in right way...and looking at this photo , the rear pamel and may be all other parts need to be made scratch if we want to get all parts assembled like it should be - excactly how it shown in the kit manual , with all parts of balcony inclined to outside from the hull sides...

Pic-1749.jpg
 
Good day,
When I look again at this picture, it looks like kit maker did something wrong entire with all parts of balcony, and ot couldn't be assembled correctly with these parts from the kit...
On the picture , rear panel has a slight curvavative in its upper part, but it should have it in lower part, if we want to assemble all parts together in right way...and looking at this photo , the rear pamel and may be all other parts need to be made scratch if we want to get all parts assembled like it should be - excactly how it shown in the kit manual , with all parts of balcony inclined to outside from the hull sides...

Quite possibly!

I wish I had looked more carefully before I assembled it. I naively assumed it would fit...
 
Quite possibly!

I wish I had looked more carefully before I assembled it. I naively assumed it would fit...
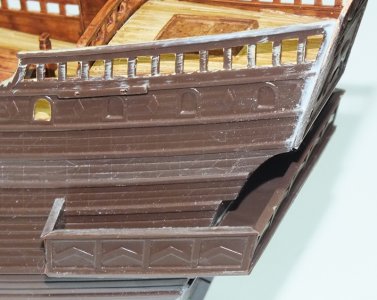
This is what I have ended up with. It is just roughly assembled and temporarily put in place and it needs to be cleaned up. The base bends easily with a little hot water to conform to the curved shape of the rear part of the gallery. The side pieces are close to vertical at one end and angled at the other. I believe that the angled end goes to the rear, so that the rear piece of the gallery angles out from the stern.

ghb33.jpg

The instructions aren’t helpful here, because they show both ends of the side pieces as being vertical, whereas the rear edge should be shown as angled.

ghb34.jpg
 
It could happened easily, specialy if someone do this architecture tricks first time and moreower instruction is quite weak in this respect, much easy to be now as watch dog and almost automaticaly notice some abnormalities in the kit galleon design , lers say , it is much easy to do, after thousands times been vewing of galleon pictures and talking about galleons every now and than during last 10 or more years...:)))
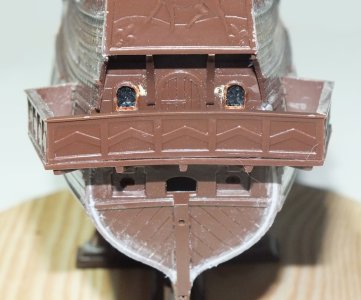
Steve, could You post picture of straight vew from the astern ? To see alignment of side- rear- bottom plates of the balcony and hull ?
As requested, and I can now see that I need to add some filler to the base of the rear part - I wish my eyes had the same resolution as my camera!

ghb35.jpg
 
Airfix 1/72 Golden Hind (A09258V) Build Review Part 2: Hull Exterior and deck fittings

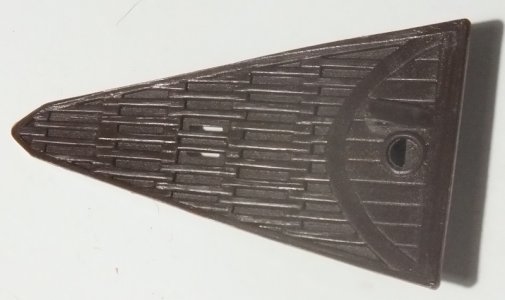
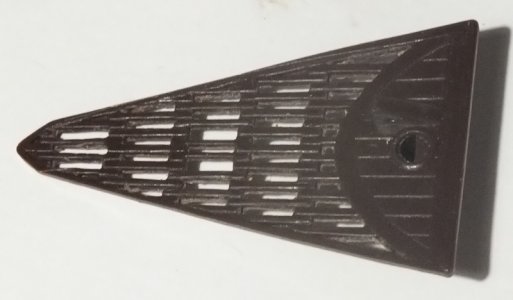
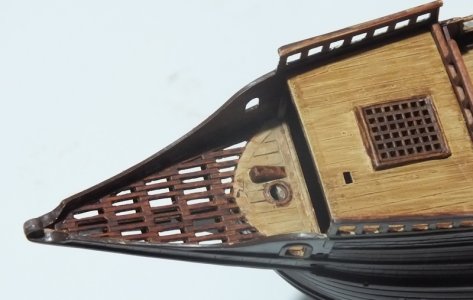
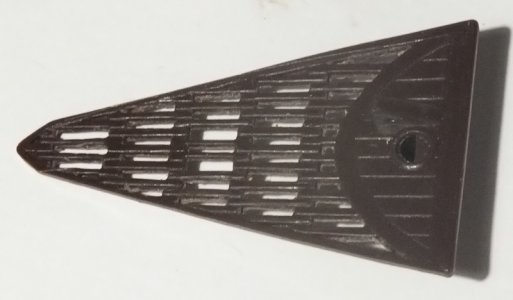
I begin by working on the head, the grating over the bow that also provides the mounting for the foremast on the Golden Hind. The problem here is that the grating itself is supplied moulded solid.

ghb21.jpg

To me, that just doesn’t look right, so I cut away the solid parts to open it up. It’s a laborious job and one that takes some time, but I do feel that the modified version looks better.

ghb22.jpg

The modified head is painted and installed in the forepeak.

ghb23.jpg

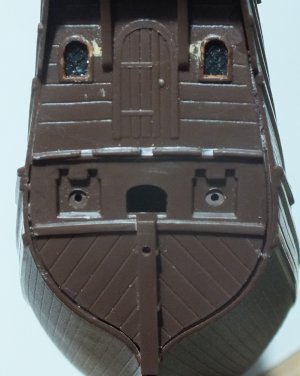
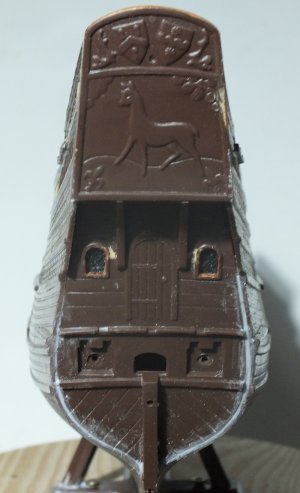
Next, it’s time to work on the opposite end of the ship and install the stern, which is provided as a single part. This should be easy, but it isn’t because the fit here is horrible. The lower part of the stern just does not fit well into the hull, with large and obvious gaps on both sides.

ghb24.jpg

The upper part of the stern seems to be twisted and is projecting much too far on the starboard side even though the lower part is straight (you can also see that I have scribed some planking detail on the upper interior of the stern – as provided, it’s completely blank).

1790842818955.jpeg

Once again, clamping and taping is required to get the stern just about straight and sprue goo is used to fill the substantial gaps between the stern piece and the hull.

ghb26.jpg

With the stern ready for painting, I added the remaining fittings to the deck. I have also added a white metal bilge pump from HiS next to the base for the mainmast as this isn’t provided with the kit. No scale is given for the pump, but it’s around 15mm tall and looks plausible next to the 25mm figures.

ghb27.jpg

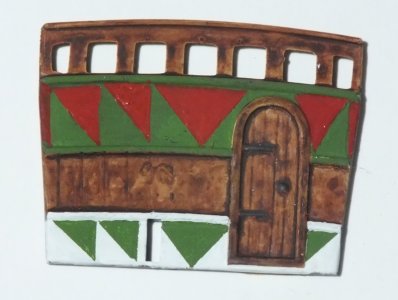
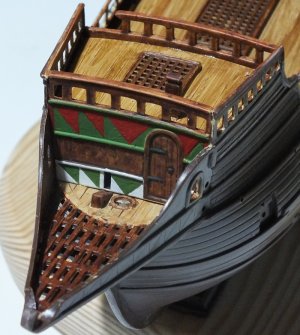
Then, I worked on the bulkhead at the forepeak. This means tackling the coloured external design for the first time. There are several ways of doing this, including paint pens, coloured sticky paper or self-coloured decal sheets cut to shape. I have decided to paint and mask this design just because I’m more familiar with that approach and it gives me more flexibility over the colours. I have also simplified the design Airfix suggest, replacing the three rows of coloured triangles with just two with a plain wood strip between. On the hull, that means carefully sanding down the raised panel lines on the middle row of decoration, and on this bulkhead, it means filling and sanding the deeply engraved panel lines in the middle section.

ghb28.jpg

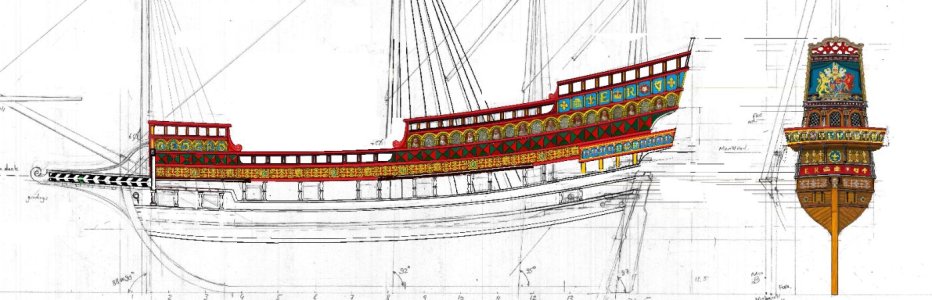
For colours, I’m taking inspiration from the drawing of a race-built English warship of the late 16th century, published in the 17th century and based on earlier Matthew Baker drawings. This shows an upper row of green and red triangles and a lower row of green and white triangles, so that’s what I’m going with, using Vallejo Olive Green, Bloody Red and White. The green and red are both quite muted colours and I prefer that to some of the more vivid builds of this that I’ve seen – I don’t suppose that Elizabethan paints were particularly bright or fade-resistant. It looks OK and I’ll try the same approach on the hull exterior, though masking will be more challenging there due to the raised plank detail.

ghb30.jpg

I then install the bulkhead in the forepeak – fit is great here.

ghb29.jpg

Next, I start work on the hull exterior. I really don’t care for the simplified chainplate/deadeye/lanyard/chain assemblies provided with the kit, nor for the unfeasibly thin plastic shrouds and ratlines, so I intend to replace everything except the supplied chainplates with something more accurate.

ghb32.jpg

Here’s what’s supplied – the instructions suggest threading the ends of the plastic shrouds through the holes in the upper deadeyes (though only four of the holes are actually moulded open on my example) and then tying them off.​

It’s very possible that I’ll regret this down the line, but I cut the chains and lanyards/deadeyes off and attached only the chainplates (drilled out in appropriate places) to the hull. That’s a little tricky because the main chainplates are moulded straight while the hull is slightly curved, so some sanding is required to achieve a good join.

ghb36.jpg

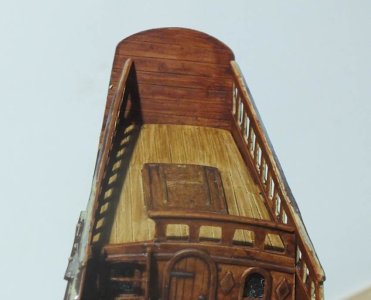
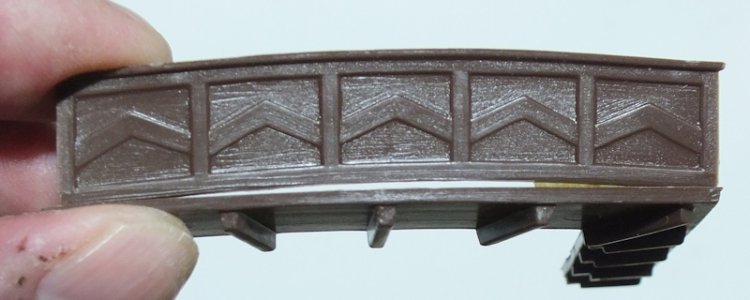
Next, I take a look at the rear gallery. I don’t plan to attach this yet, but I have read in other builds that there are fit problems here. A quick check confirms that while the rear balustrade of the gallery is curved (which I believe is correct) the base on to which it fits is completely flat.

ghb31.jpg

I bend the base into a curved shape with the help of hot water and assemble all parts. I temporarily attached it to the hull to check the fit and it seems to be OK.

ghb33.jpg

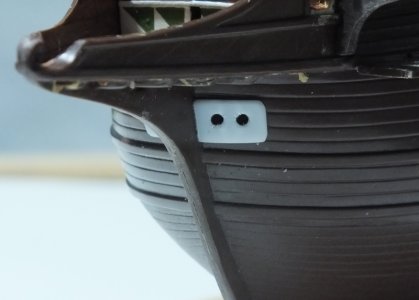
Next, I work on the covers for the hawse pipes (if these really were called “hawse pipes” back in the 16th century…). One of these was missing from this kit when I received it, so I made two replacements that include large diameter holes for the anchor ropes.

ghb37.jpg

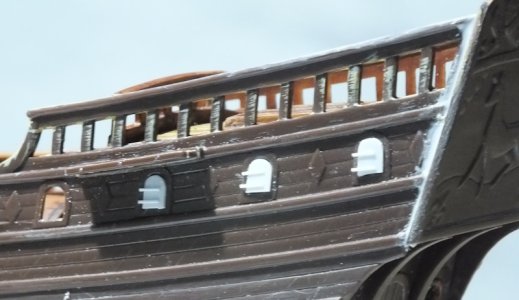
Finally, I made some simple shutters for the three windows on either side of the upper sterncastle.

ghb38.jpg

That’s pretty much it for main hull construction. In the next installment I will be working on the painting of the hull exterior.

Thanks for reading. If you want to see more detail and pics of this second stage of the build, please see the build log on my blog site:

https://modelkitworld49141446.wordp...eview-part-2-hull-exterior-and-deck-fittings/

ghb22.jpg
 
Excellent stuff Steve. I did the same with the beakhead.

I like your colour scheme better than mine...

Wood scribing on the stern is also great. Coming along nicely. I will be doing the channels soon so I note your comments!
 
Correct choice of the colors for english galleon - Tudor 's colors...!
This place for the water pump , I have big doubts it is correct here, most likely it should be placed on the gun deck/ bellow open deck, and there used to be pair of them near main mast , water pump never fitted alone due to its importance for the ship life saving and considering that vessel always has a list to one of the side when sailing and draining water collected in the left or right side of the central line....more about ancient vessel's pumps could be read in profile books...
 
Last edited:
Correct choice of the colors for english galleon - Tudor 's colors...!
This place for the water pump , I have big doubts it is correct here, most likely it should be placed on the gun deck/ bellow open deck, and there used to be pair of them near main mast , water pump never fitted alone due to its importance for the ship life saving...
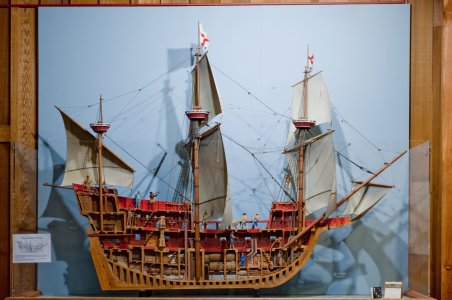
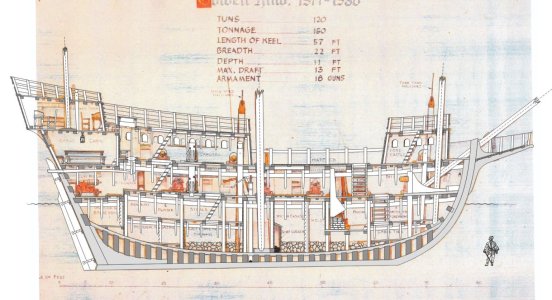
I think Susan Constant and Mayflower had pumps below deck, as you say. I decided not to add to my GH.
 
Good day John,
For small vessels , with one deck , probably they could be fitted on open decks, for the big vessels with a few decks they seems to be installed below open deck ... to avoid " guessing" nedd to dig trough the profile books or drawings of similar size/ historic period vessels....
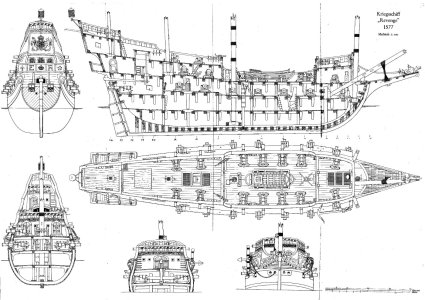
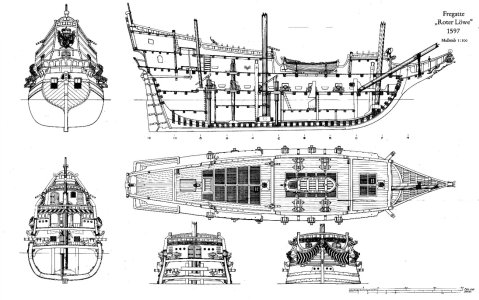
What I have fast findigs - R. Hoeckel drawings ... w.pumps location
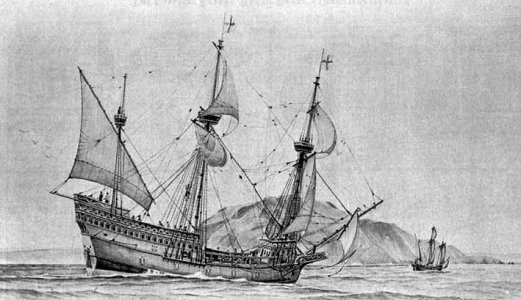
There are drawings of Roter Lewe and Revenge with similar decks layout... no w.pumps on open deck

Фрегаты _Revenge_1577.jpg

Фрегаты _Roter_Lewe_1597_1.jpg
 
I note that there’s another in-progress Airfix Golden Hind build log in this forum (and very impressive it’s looking…). I don’t want to duplicate, but I believe that my build is sufficiently different that it may provide additional information/inspiration for anyone who is considering tackling this venerable (it’s coming up for 50 years old!) kit.

There are three versions of this kit. The original was released in 1977 and sold unchanged for 20 years. The Special Edition was sold from 1997 – 2018 when the current Vintage Classics version was released. The Special Edition and Vintage Classics versions differ from the original only in having additional detail on some mouldings, most notably raised lines on the hull exterior that define the pattern of coloured triangles. As far as I know, there is no difference in the mouldings for these two later versions other than that the Special Edition that I’m working on is moulded in dark, chocolate brown plastic while the more recent Vintage Classics version appears to be provided in a lighter, tan-coloured plastic.

View attachment 637112

I bought this Special Edition of the Golden Hind on eBay for an absurdly low price and I have no idea how old it actually is: the Special Edition was released in 1997, so this example could be anything from almost 30 years old to less than ten. The box has been opened, but almost everything seems to be there – the only part I can see that’s missing is the cover for one of the hawse pipes (Part 14) though I would probably have replaced those anyway. This is my first attempt at a sailing ship kit, though I’m a fairly experienced plastic modeller. I don’t plan to make major changes to the basic kit, though I will add some detail and at least attempt rigging.

I’ll keep these reports fairly brief, covering just the high (and low…) points of each stage of the build. If you want more information and additional pics, I will include a link to the more detailed build log on my blog site (Model Kit World) at the end of each part.

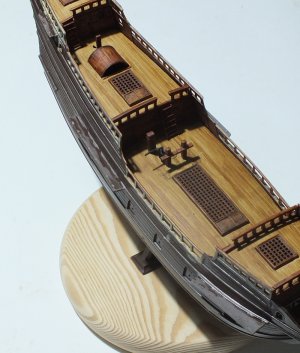
OK, let’s get started. I begin with the stand. The small plastic stand provided is, IMHO, much too narrow to be stable and the hull simply rests in two shallow indentations for the keel with two rather thin side supports that are intended to be butt-joined to the lower hull sides. I screwed the kit stand to a larger and heavier circular wooden base and replaced the kit side supports with heavy-duty replacements made from thick sprue from the kit – these were drilled and tapped at the top and bottom. They are screwed into the kit stand from underneath and I’ll also put screws from inside the hull into the top of these supports. I’ll be painting the stand and varnishing the wooden base eventually, but for the moment, this is what I have.

View attachment 637113

Next, the hull halves. These are completely devoid of detail on the inside, where the hull interior will be visible above the main decks. I have added some simple internal structure using plastic strip and scribed some lines to represent planking.

View attachment 637114

I then painted the inside part of the hull where it will be visible. I used acrylic paints and I generally use Vallejo products simply because these are widely available here in Spain where I live. I used the same approach I have used for wood in the past: I first painted it with a base coat of Vallejo Dark Sand (a very light tan) and added lighter and darker areas to provide visual interest – these will show through the translucent top coat. I then gave it several diluted washes using a dark brown semi-transparent paint, Vallejo Mahogany Ink. This gives a variable finish that I hope reproduces the look of aged wood. I then joined the hull halves which were slightly warped and it took a fair amount of clamping and taping to get everything aligned. I then screwed the completed hull to the base.

View attachment 637115

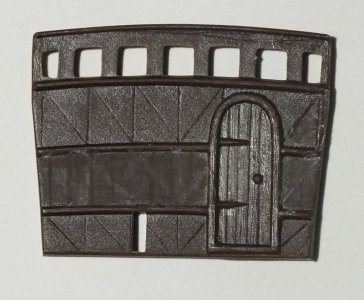
I then work on the internal bulkheads. I use the same approach for painting as on the hull, but I have made some changes here. Airfix suggest that these bulkheads are painted in the same triangular coloured pattern as used on the hull exterior. I find that hard to imagine. This was, after all, a warship, and I just can’t see that the interior would have been painted with such elaborate decoration. This is one of the bulkheads, as provided.

View attachment 637116

I have filled and sanded the deeply engraved panel lines that delineate the coloured pattern, scribed some vertical planking instead and painted them to look like plain wood. I have also made gaps in the balustrades under which I will add access ladders – none are provided here. I also opened out the small windows in the aft bulkhead and I’ll be creating something to represent mullioned glass to use here. One of the nice things about working on a model of the Golden Hind is that we don’t know what it looked like, so having plain wood internal bulkheads is certainly possible.

View attachment 637117

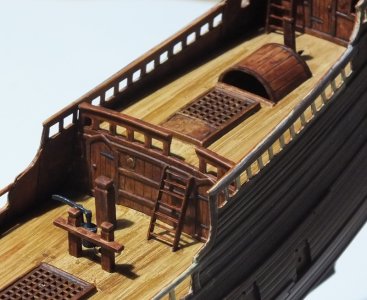
Then I turned my attention to the main deck. The principal issue here is that Airfix have moulded hatches on each of the four levels. I think that gratings would have been much more likely on at least the lower three decks, to allow light and air to the decks below. I obtained these plastic gratings from HiS Model in the Czech Republic (they stock lots of useful accessories for ship models and you’ll find a link to their website at the end of this article), and I think they will just about work in 1/72.

View attachment 637118

I cut out the existing hatches, leaving the coamings intact and the front hatches, which I imagine would have given access to a ladder leading to the deck below.

View attachment 637119

I then inserted the three gratings, using a little sprue goo to fill some small gaps at the edges.

View attachment 637120

Then I painted the main deck using a similar approach to the hull and internal bulkheads, but using a lighter translucent paint, Vallejo Smoke, to give some visual contrast between the decks and the main structure. I installed the deck in the hull and discovered that it’s rather warped, perhaps due to the age of this particular kit? It took some wrestling and clamping to get it in position.

View attachment 637122

I added the internal bulkheads to complete the main construction of this first part of the build.

View attachment 637123

Finally, I added some simple ladders made from strips of plastic card to give access to each deck.

View attachment 637124

And that’s it for this part of the build. Other than for some minor issues with getting the hull halves to join accurately and getting the warped main deck into position, there was nothing too challenging here. It’s entirely possible that both these issues are due to the fact that this is an old kit that may have been lying around in someone’s attic for the last 25 years – if you buy the more recent Vintage Classics version you may not have these problems.

In the next thrilling instalment, I’ll be working on the hull exterior and adding the stern, head and main deck fittings.

Thanks for reading. If you want to see more detail and pics of this first stage of the build, please see the build log on my blog site:

https://modelkitworld49141446.wordp...9258v-build-review-part-1-hull-and-main-deck/

Links

HiS Model
– in addition to a range of ship kits and accessories, HiS also provide useful information on a range of topics including rigging diagrams on specific ships and advice on things like choosing appropriate blocks and colouring brass cannon.

https://www.hismodel.com/en/

View attachment 637121

Please allow me to make a small recommendation. I use hot water to correct any warps. It's easy. It's permanent, And, it works. But, you are doing a magnificent job!
 
Back
Top