Anteo Harbour Tug. Panart

Ken

Joined
Dec 16, 2016
Messages
1,004
Points
493

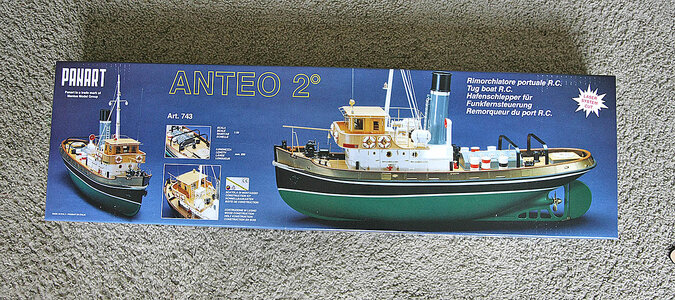
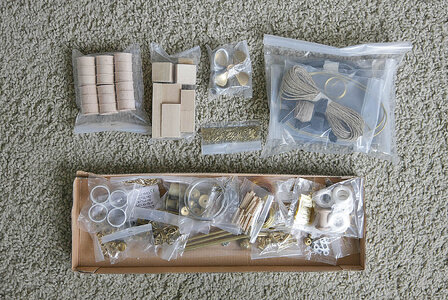
Hello modellers. As some of you will know I have just finished a Sopwith Camel, my most delicate model to date, never again such a fragile build for me. Talking to a friend about this he suggested I make him a harbour tug, this would be a more substantial build, one that I should be able to handle easier. I’ve never built a model like this before so I agreed, as it will be something different. I didn’t want to make one with a pre formed hull so we chose Panarts’ Antio, a plank on bulkhead kit that looks quite nice, although it is designed as a RC. model it will only be built for static display.

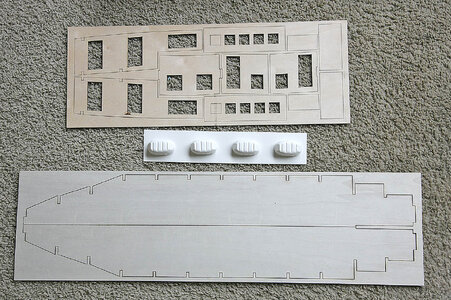
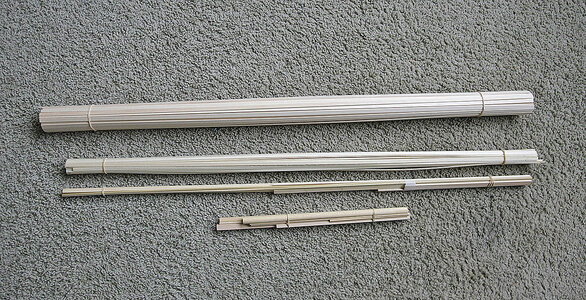
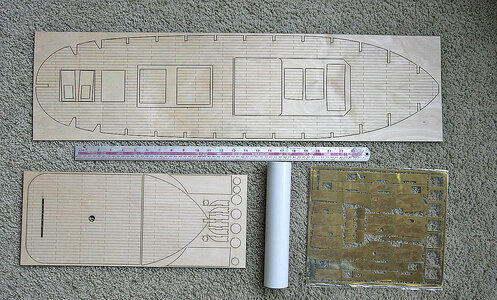
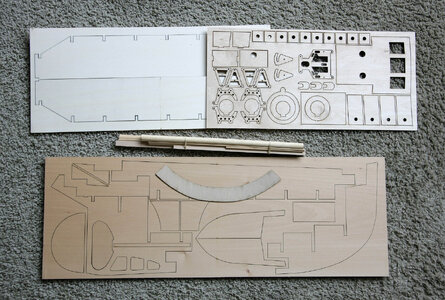
On getting the kit my first impressions were a little disappointing, there were no hardwoods at all only soft white wood throughout, the ply didn’t look like very good quality and the second planking strips looked like they had been rough sawn and the deck is just printed ply. Very disappointedly the brass sheet for the side wall isn’t brass as it was on my Amerigo Vespucci but just very bright coated metal and looks wrong, this would have made a nice feature as on my A.V but now I’ll have to paint it. I remember Panart being one of the better kit manufactures, I think that cost cutting may be responsible for the lowering of quality, just my opinion.

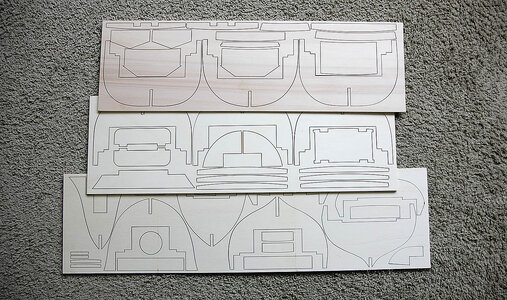
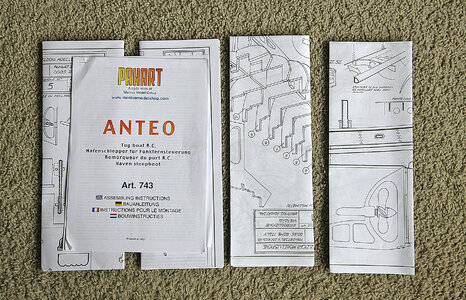
I’ve shown the box contents, it looks like with a bit of effort there is enough to make a fairly nice model, the plans are in Italian but look to be easier to follow than most Chinese kits, there are some instructions but these are pretty limited. One thing that surprised me is the size of the model, it’s huge, to give you an idea I’ve included a picture of the funnel next to my Ajax, I think that I’ll be planking forever. As there isn’t a great deal of fine detailing just lots of planking I only intend to post occasional updates when there is something to show, so there it is my next build, not the usual type posted here but something different, wish me luck.
001.jpg

002.jpg

003.jpg

004.jpg

005.jpg

006.jpg

007.jpg

008.jpg

009.jpg
 
Last edited:
That is a wonderful kit!! I built the kit many years ago, it was enjoyable to build. the kit I built was probably the original kit. Beautiful when done:)
 
  • Like
Reactions: Ken
That is a wonderful kit!! I built the kit many years ago, it was enjoyable to build. the kit I built was probably the original kit. Beautiful when done:)
Hi Bandido. Thanks for that, it’s encouraging to hear that it makes up into a nice model. I hope that I can do it justice.
 
Hello modellers. As some of you will know I have just finished a Sopwith Camel, my most delicate model to date, never again such a fragile build for me. Talking to a friend about this he suggested I make him a harbour tug, this would be a more substantial build, one that I should be able to handle easier. I’ve never built a model like this before so I agreed, as it will be something different. I didn’t want to make one with a pre formed hull so we chose Panarts’ Antio, a plank on bulkhead kit that looks quite nice, although it is designed as a RC. model it will only be built for static display.

On getting the kit my first impressions were a little disappointing, there were no hardwoods at all only soft white wood throughout, the ply didn’t look like very good quality and the second planking strips looked like they had been rough sawn and the deck is just printed ply. Very disappointedly the brass sheet for the side wall isn’t brass as it was on my Amerigo Vespucci but just very bright coated metal and looks wrong, this would have made a nice feature as on my A.V but now I’ll have to paint it. I remember Panart being one of the better kit manufactures, I think that cost cutting may be responsible for the lowering of quality, just my opinion.

I’ve shown the box contents, it looks like with a bit of effort there is enough to make a fairly nice model, the plans are in Italian but look to be easier to follow than most Chinese kits, there are some instructions but these are pretty limited. One thing that surprised me is the size of the model, it’s huge, to give you an idea I’ve included a picture of the funnel next to my Ajax, I think that I’ll be planking forever. As there isn’t a great deal of fine detailing just lots of planking I only intend to post occasional updates when there is something to show, so there it is my next build, not the usual type posted here but something different, wish me luck.

View attachment 436271

View attachment 436272

View attachment 436273

View attachment 436274

View attachment 436275

View attachment 436276

View attachment 436277

View attachment 436278

View attachment 436279
Good evening Ken. Good to have you back building a tug boat. I must have a look at your Sopwith log. A tug boat is always a good viewing piece. Enjoy. Cheers Grant
 
  • Like
Reactions: Ken
I will love to follow along. Tugs are a favorite of mine. I had a great time building Bluejackets Seguin.

Jan
Hi Jan, I much prefer your Seguin to this Antio, you’ve made a very nice model, I think the quality of the Bluejacket kit seems to be much better than this Panart tug.
 
I wish you a lot of fun with this project :cool:
 
  • Like
Reactions: Ken
Hello and thanks for your interest in my Antio build. As I mentioned I’m not doing a very detailed step by step account but just showing it at various stages of the build so that you can get an idea of the kit and how it goes together.

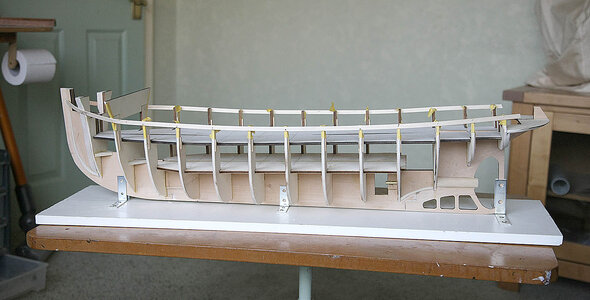
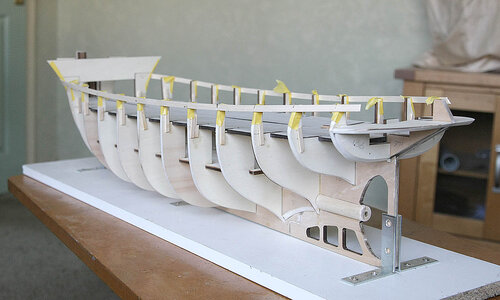
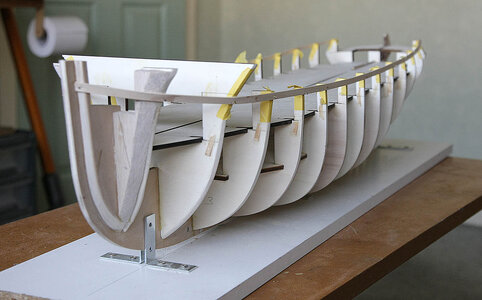
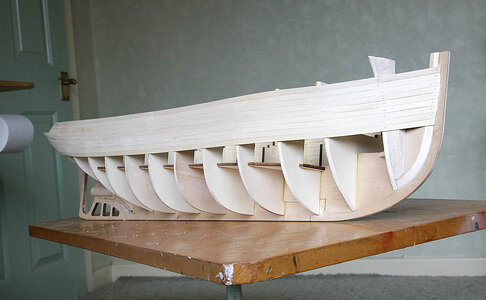
I made a start by making a very simple but effective support from an old kitchen shelf and some angled brackets. The keel and bulkheads went together without issues, the interior decks all fitted well without the need for any corrections, the decks are only for support and will be removed after planking which would then leave room for RC gear if needed. The prop housing was made up from two rectangular pieces and shaped before fitting into place, I think a dowel would have been much easier. I added just one extra balsa filing on the first bulkhead to give the planks a bit of extra support where it most needs it, then after sanding everything to a good shape I put on the first plank, many more to come. I now have a better idea of the size of this thing, it’s huge, certainly the biggest I’ve built, and it doesn’t really fit on my bench so it’s going to be a bit of a struggle.

010.jpg

011.jpg

012.jpg
 
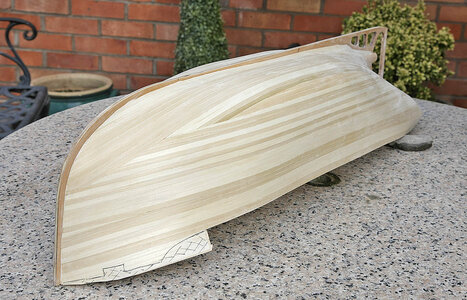
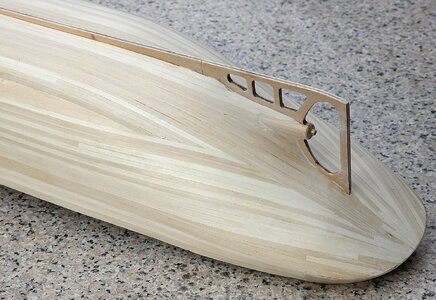
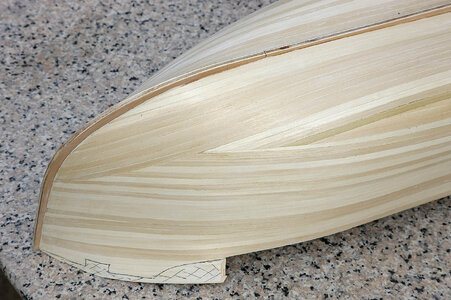
Hi, A small progress update. I have now completed the first layer of planks, quite a lot of them and so far so good. The bulbous shape of the hull and the unusual stern meant that I couldn’t follow a conventional pattern, it was just a matter of filling the gap with planks and hoping for the best. I used filler and a lot of sanding but in the end I think it was successful. Now onto the second layer.


015.jpg

017.jpg

018.jpg

019.jpg

020.jpg

And after filling and sanding.

021.jpg

022.jpg

023.jpg

024.jpg

025.jpg
 
Hi, A small progress update. I have now completed the first layer of planks, quite a lot of them and so far so good. The bulbous shape of the hull and the unusual stern meant that I couldn’t follow a conventional pattern, it was just a matter of filling the gap with planks and hoping for the best. I used filler and a lot of sanding but in the end I think it was successful. Now onto the second layer.


View attachment 439407

View attachment 439408

View attachment 439409

View attachment 439410

View attachment 439411

And after filling and sanding.

View attachment 439412

View attachment 439413

View attachment 439414

View attachment 439415

View attachment 439416
Good evening Ken. I never thought how planking would go on a tug boat. Looking good- now to the second layer. Cheers Grant
 
  • Like
Reactions: Ken
Good evening Ken. I never thought how planking would go on a tug boat. Looking good- now to the second layer. Cheers Grant
Hi Grant, Thanks. I must admit that I had no idea how I should do the planks, I just did them one at a time and let them follow their natural path before fixing them and moving on to the next one. Around the prop shaft was interesting but I got there in the end with a fair amount of stealers.
 
Great looking plank work, the pattern it is laid in doesn't matter as much on a fully painted hull, so keep pressing on and we will be watching.
Hi Kurt. I agree, it’s the finished surface that’s important, not how it’s achieved. I think that if I planked this hull many times it would be done differently each time but with the same result.
 
Looks very good Ken. Really interested to see your progress. I love Tug boats and this kit really looks amazing. Should turn out to be a great addition to your collection.
Hi Laysend. Thanks for your interest in my build. When I first got the kit I wasn’t very enthusiastic about doing it and was a bit reluctant about starting, but now that I’ve done a little research and have got my mind around this type of model I’m very happy to be doing it, it’s different and there’s more to the build than I first thought, I think it will be an interesting and enjoyable project
 
Very good work on the first planking - you are getting a fine prepared hull - really very good work
 
  • Like
Reactions: Ken
Good morning, Thanks for taking the time to view my build and for the likes and comments given, all very much appreciated.

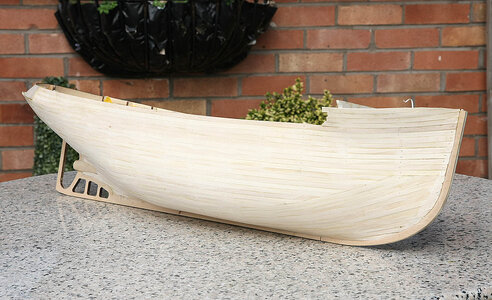
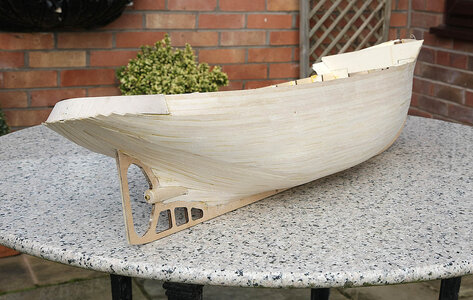
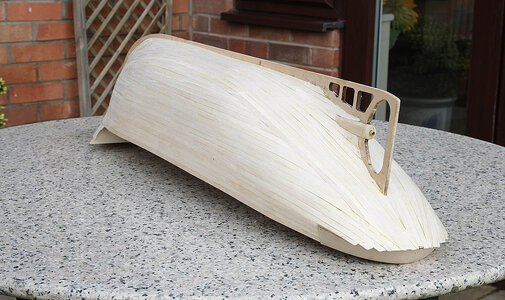
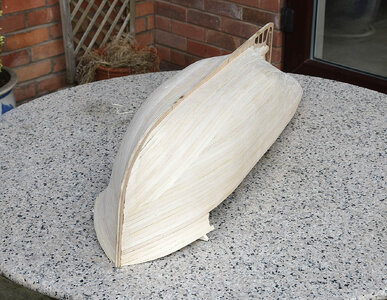
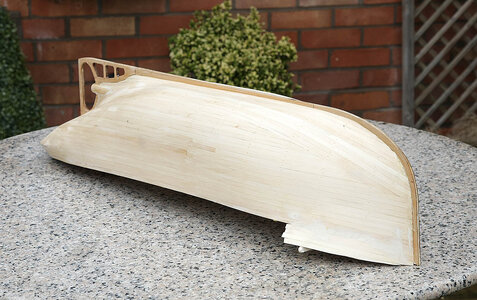
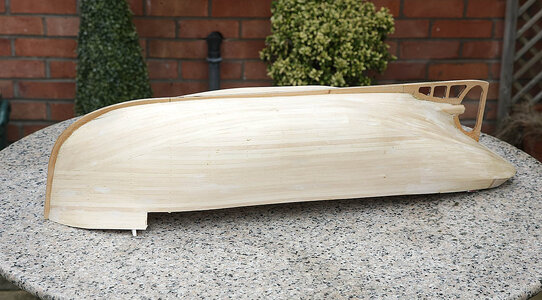
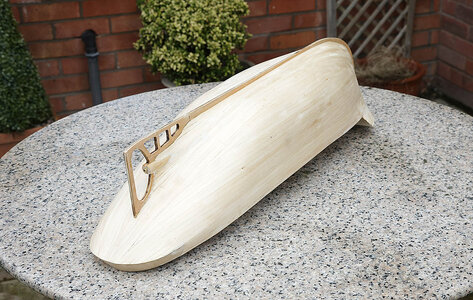
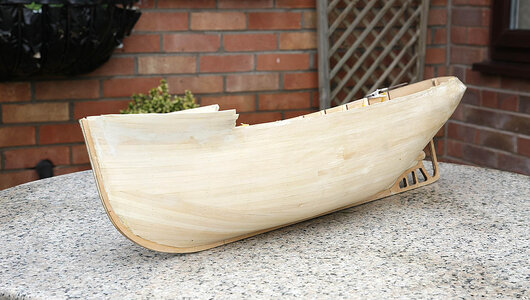
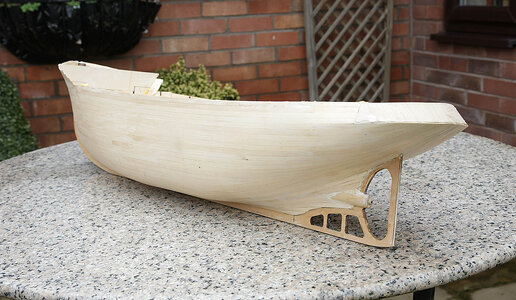
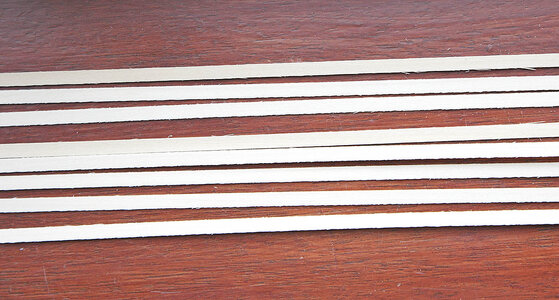
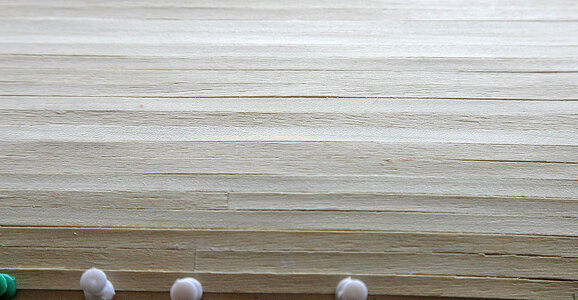
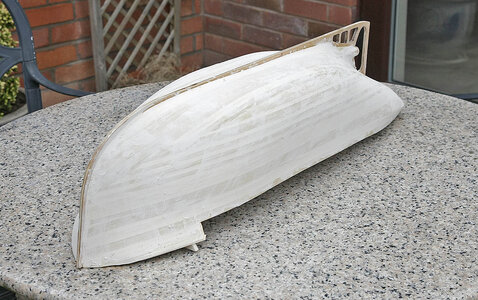
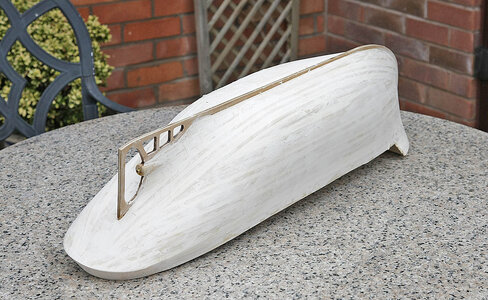
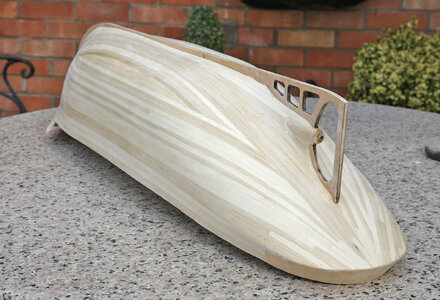
I have now completed the second planking to a standard that I’m pretty pleased with. Although it ended up good it wasn’t without issues, the planks supplied were awful and had no place in a kit, many were very rough with poor edges which splintered easily even after sanding them. I’ve shown a photo of the planks and what they initially looked like on the hull, I’m sure that you’ll realise the effort it took to get a good finished surface.

When planked I first used scrapers to level the surface, then gave a liberal coating of good quality wood filler, when dry I gave it its first good sanding, 120 grit. I then brushed on a coat of cellulose sanding sealer to harden the surface and fill the fine grain, and again sanded, I did this three times ending up using 400 grit. It was a lot of work but I must admit to enjoying it, seeing it slowly improving each time was encouraging, it was almost therapeutic, and I think more satisfying than putting on perfect pre cut planks.

I mentioned that this was not my normal type of build and I was somewhat hesitant in starting, but I must admit that it’s growing on me and I’m spending more time with it than I expected, happy days.


013.jpg

027.jpg

028.jpg

029.jpg

034.jpg

035.jpg

036.jpg

037.jpg
 
Back
Top