• LUCZORAMA SHIPWRECK SCAVENGER HUNT GIVEAWAY. 4 Weeks of Fun • 1 Legendary Prize ((OcCre’s Fram Ship)) • Global Crew Welcome!
    **VIEW THREAD HERE**

Blocks

Joined
Apr 17, 2020
Messages
40
Points
48

Location
Pittsburgh PA
I give up!!! I am half-way through rigging my HMS Ontario by Maris Stella. I up-graded the kit to include "beautiful blocks" which, indeed, are beautiful and very realistic. However, I find that these blocks (probably because of their smoothness and material (ebony?) are slippery little buggers that literally leap off the workbench, similar to those lawn weeds that pop seeds all over if merely touched. Their manufacture may involve the use of a lubricant as well? I can handle these new blocks if they are 5mm or larger, but find it almost impossible to prep for use if they are 3mm or smaller. In my younger days I had been able to handle even 2mm blocks (made out of cast metal) but eyes and arthritis have eroded my abilities in this area. I have an ample supply of older blocks that I can still handle at the smaller sizes.

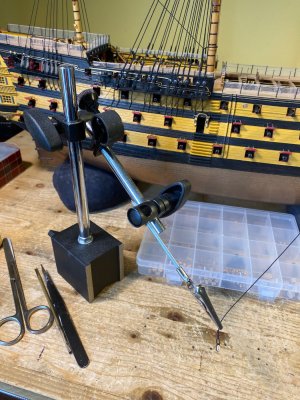
One another matter (still involving rigging of blocks), I typically use a tool that has a couple of alligator clips, attached to metal adjustable rods that themselves are attached to a heavy metal base (I am sure that you get the idea, but I simply don't know this tool's proper name). This tool extends its reach to, perhaps, 8-10 inches. However, when stropping a block, say at the top gallant level, it is useless. I am forced to do it with my fingers alone resulting in a less than perfect job. Are there any ideas out there as to how one can strop a block or whip a stay at the higher elevations?
 
bead forceps
 
I give up!!! I am half-way through rigging my HMS Ontario by Maris Stella. I up-graded the kit to include "beautiful blocks" which, indeed, are beautiful and very realistic. However, I find that these blocks (probably because of their smoothness and material (ebony?) are slippery little buggers that literally leap off the workbench, similar to those lawn weeds that pop seeds all over if merely touched.
I always thought this was by design! I have to order at least 30% extra blocks because of the magnetic floor attraction problem. But not just blocks: I'd say at least half of the parts of my builds have been on the floor at least once. My son helped me out last weekend with some wiring under my desk, and with what he found I have a new kit started!

I can commiserate about the arthritis and vision problems. I use multiple strengths of reading glasses (3, 4.5 and 6 diopters), but that doesn't seem to help with the dropping.
 
Paul I have some of your issues and work in larger scales and don't do too much with rigging, but I will steal Y. T. 's modified tweezers idea.
 
I always thought this was by design! I have to order at least 30% extra blocks because of the magnetic floor attraction problem. But not just blocks: I'd say at least half of the parts of my builds have been on the floor at least once. My son helped me out last weekend with some wiring under my desk, and with what he found I have a new kit started!

I can commiserate about the arthritis and vision problems. I use multiple strengths of reading glasses (3, 4.5 and 6 diopters), but that doesn't seem to help with the dropping.
I had to get a plastic chair mat to put under my chair and desk. otherwise, the little buggers would be lost forever in the carpet.
Vic
 
I put everything on the mast including the yards and all the blocks before installing on the ship. Rigging blocks afterwards is impossible with my shaking fingers
 
One another matter (still involving rigging of blocks), I typically use a tool that has a couple of alligator clips, attached to metal adjustable rods that themselves are attached to a heavy metal base (I am sure that you get the idea, but I simply don't know this tool's proper name). This tool extends its reach to, perhaps, 8-10 inches. However, when stropping a block, say at the top gallant level, it is useless. I am forced to do it with my fingers alone resulting in a less than perfect job. Are there any ideas out there as to how one can strop a block or whip a stay at the higher elevations?
I believe most people call those tools with the heavy base "helping hands".

Rob
 
I love your tweezer modification. I will do the same thing with a pair I no longer use since they were bent out of shape (but of course I haven't thrown away! ;)}

Rob
We all know as soon as something is thrown away, especially after being stored idle for years, a use for it will be found and it will be needed the very next day…never fails…..
 
I give up!!! I am half-way through rigging my HMS Ontario by Maris Stella. I up-graded the kit to include "beautiful blocks" which, indeed, are beautiful and very realistic. However, I find that these blocks (probably because of their smoothness and material (ebony?) are slippery little buggers that literally leap off the workbench, similar to those lawn weeds that pop seeds all over if merely touched. Their manufacture may involve the use of a lubricant as well? I can handle these new blocks if they are 5mm or larger, but find it almost impossible to prep for use if they are 3mm or smaller. In my younger days I had been able to handle even 2mm blocks (made out of cast metal) but eyes and arthritis have eroded my abilities in this area. I have an ample supply of older blocks that I can still handle at the smaller sizes.

One another matter (still involving rigging of blocks), I typically use a tool that has a couple of alligator clips, attached to metal adjustable rods that themselves are attached to a heavy metal base (I am sure that you get the idea, but I simply don't know this tool's proper name). This tool extends its reach to, perhaps, 8-10 inches. However, when stropping a block, say at the top gallant level, it is useless. I am forced to do it with my fingers alone resulting in a less than perfect job. Are there any ideas out there as to how one can strop a block or whip a stay at the higher elevations?
1. The key is not the tools themselves.
2. The key is to use the tools under a magnifying system of some sort in the range 3x to about 5x.
I use a Bausch and Lomb 0.3x to 3.0x binocular microscope with 10x eyepieces available on eBay. I don't know what they cost today, but I used to be able to buy them used for about a hundred bucks.
3. There is an old saying that goes, "you cannot work on what you cannot see".
4. Being able to actually see what you are doing is a game changer. All kinds of options open up both in making your own specialty tools as well as in using them with new techniques. Most of your work with blocks will then be done with needle files and #70 to#80 drills. With this new approach, block making becomes essentially trivial.
5. The details of all the above appeared in 2 articles in the NRJ (about 10 years ago); look it up.
6. good luck
 
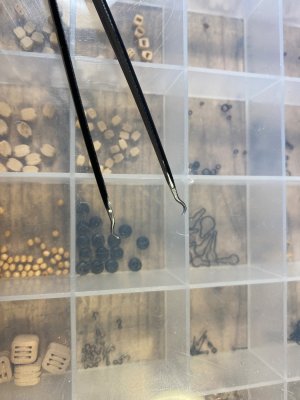
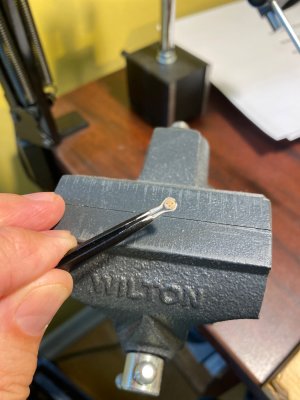
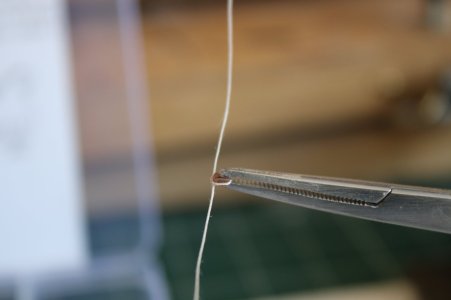
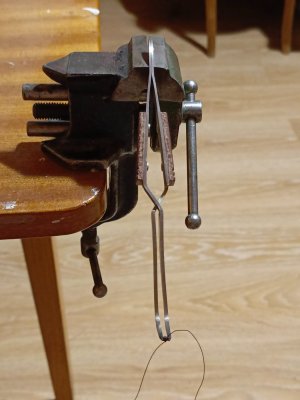
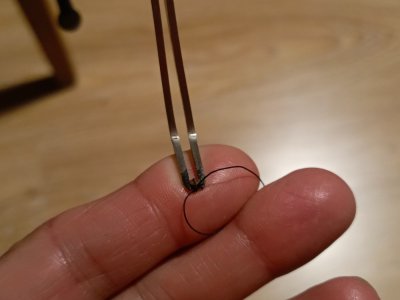
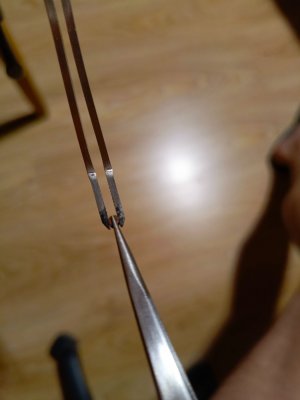
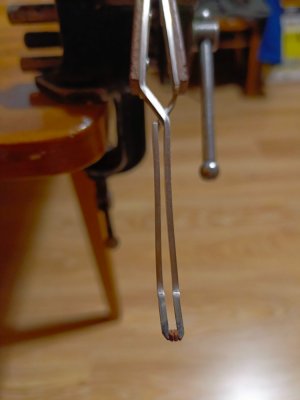
make my own blocks. To handle them I modified some tweezers into this tool. Works well for me. I am able to smooth and polish them no problem.
Great looking blocks! I agree that the "right tool for the job" is a "pearl tweezers," or something like your shop-made equivalent.
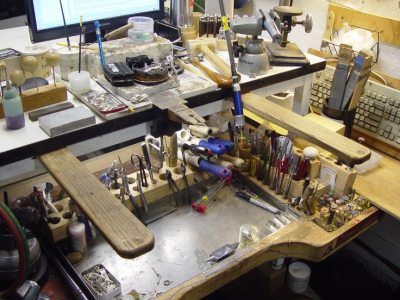
I would also add that for the sort of work addressed in this thread, a modeler would find the use of a "jeweler's" or "watchmaker's" bench most helpful. Such benches are designed for working with a short viewing distance to the work and with design features which minimize the "escape" of small parts, as well as keeping essential tools handy. When we have a block the size of a pea go flying into the ether, we're out a few cents or a bit of time to replace it. When a jeweler has a flawless cut natural diamond the size of a pea go flying into the either, it could be $25,000 or more, so they've figured out a dedicated type of bench that provides for working close in (without back strain) on small parts with a catch tray or cloth catch "net" when parts do fall. The characteristic "U" shaped cutout in the front of these benches serves to allow sitting close to the work so the user's body blocks falling parts and directs their fall into the catch tray or "net." These benches usually also have some provision for forearm and/or hand rests which greatly reduce fatigue and maximize steadiness of hand. (See bottom photo.) Online there are lots of plans for DIY construction of full benches and partial bench "boxes" that sit on top of a regular table or bench.
1748814626806.png
1748814703027.png
Note arm rests extended and metal catch tray and working surface. The "bench peg" is used for sawing with a jeweler's saw, as well as any other task requiring a sacrificial cutting surface. The wooden "fork" of the pin is easily replaceable when it gets too chewed up. The back surface of the bench pin style shown is a solid metal for use as an anvil.
1748814934952.png
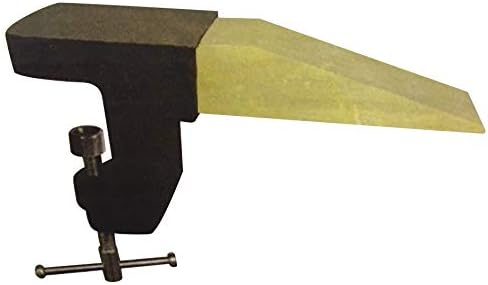
Jeweler's anvil and bench pin holders with wooden pins start around $20. These along with their companion jeweler's saw and blades are basic tools that should be part of every modeler's armament, although it appears few are unaware of this standard jeweler's essential tool. Note that it can entirely replace the relatively expensive "self-healing cutting mats" that seem to be used by so many ship modeler's. (Note in the picture below the wooden pin is inserted in the holder upside down from usual practice, although there's no reason it can't be used in that position at the user's convenience.) https://www.amazon.com/Bench-Jewele...a413b4061450d115493140&qid=1748816379&sr=8-10
1748816583541.png

So, how do you make such good-looking blocks?

I have long thought about how to mass-produce good looking blocks with a minimum of tedious hand finishing. Everybody is familiar with the old "whittle them out of a stick" method, but in addition to being very time and labor intensive, producing uniform sized and shaped blocks is a further challenge, although not insurmountable. Short of CNC machining, how do you do it? I recall there was once maybe ten years or more ago on another modeling forum a thread that described a jig system that enabled making a lot of blocks at a time, but I stupidly never saved it and have never been able to find it again. I'd love to see some folks who make their own quality blocks show us how they do it.

Thanks in advance!
 
Back
Top