-

Win a Free Custom Engraved Brass Coin!!!
As a way to introduce our brass coins to the community, we will raffle off a free coin during the month of August. Follow link ABOVE for instructions for entering.
You are using an out of date browser. It may not display this or other websites correctly.
You should upgrade or use an alternative browser.
You should upgrade or use an alternative browser.
Bluejacket Tug Sequin 1/4” scale
- Thread starter Pathfinder65
- Start date
- Watchers 23
-
- Tags
- bluejacket tug sequin
Taking a chair, and will watch you build with interest.
Yes it looks very interesting and I love tugs so I will follow along as well,
best regards John.
best regards John.
Quick "jig" for Frames:
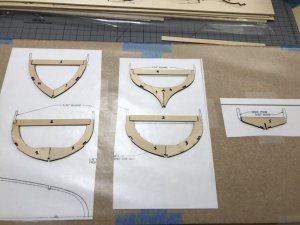
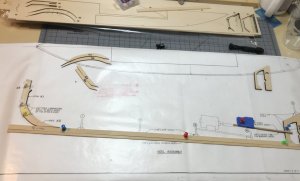
I found some 12 X 12 X .5 inch cork squares on line. Decided that they would make a good base to hold the frames for the Tug while I worked on them.
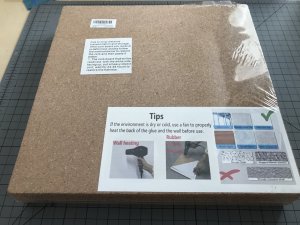
They came in a four pack. They have a sticky side to be mounted on a non rough surface. Since I only need them to aid in the assembly of the Frames and the Keel I taped two of them to my workbench. The patterns for the Frames are taped to the cork and covered with wax paper.

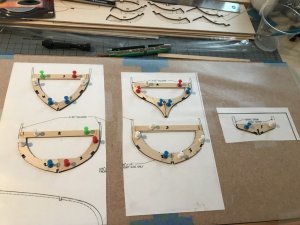
The final assembly and dry fit of the Frames. I can now use push pins to hold the frame parts while gluing.
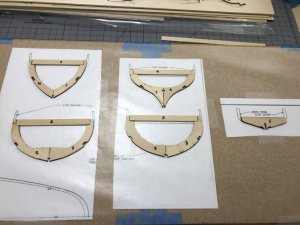
I found some 12 X 12 X .5 inch cork squares on line. Decided that they would make a good base to hold the frames for the Tug while I worked on them.

They came in a four pack. They have a sticky side to be mounted on a non rough surface. Since I only need them to aid in the assembly of the Frames and the Keel I taped two of them to my workbench. The patterns for the Frames are taped to the cork and covered with wax paper.

The final assembly and dry fit of the Frames. I can now use push pins to hold the frame parts while gluing.

Attachments
You are off to a good start, and a great idea to use the cork for pining the frames,
Best regards John,
Best regards John,
Quick building jig to keep the Keel straight:
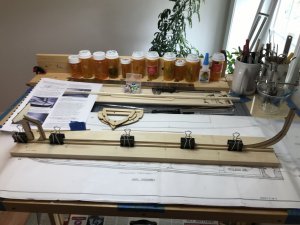
The main keel piece is a piece of 3/32in X 3/8in stock. A piece of stock 1/16in X 3/16in is glued to the main keel piece and 1/16in thick pieces are glued to the stern and stem on both sides. The addition of these pieces create a rabbet in which the planking will fit.
The 3/8in keel height with the 3/16in added lamination doesn't allow much wiggle room for a keel holding jig. my solution was to mount a piece of 3/16in square stock to a 24in long piece of Poplar and use another piece 3/16in square stock on the opposite side with spring clamps holding everything in place.
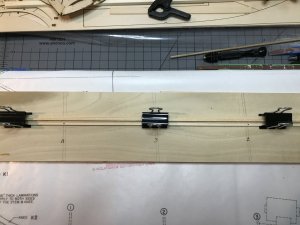
The next step is to manufacture pieces for the stem and stern and add them to the jig. Temporarily this solution is keeping the keel from bowing.

The main keel piece is a piece of 3/32in X 3/8in stock. A piece of stock 1/16in X 3/16in is glued to the main keel piece and 1/16in thick pieces are glued to the stern and stem on both sides. The addition of these pieces create a rabbet in which the planking will fit.
The 3/8in keel height with the 3/16in added lamination doesn't allow much wiggle room for a keel holding jig. my solution was to mount a piece of 3/16in square stock to a 24in long piece of Poplar and use another piece 3/16in square stock on the opposite side with spring clamps holding everything in place.

The next step is to manufacture pieces for the stem and stern and add them to the jig. Temporarily this solution is keeping the keel from bowing.
Keel and Frames:
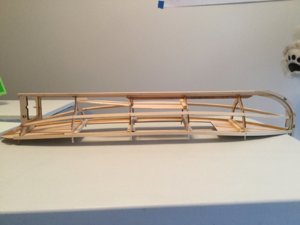
Dry fitting the frames I noticed that not much of the sub deck would be in contact with the frame crosspieces.
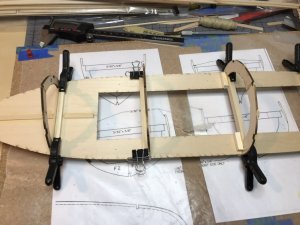
I added 1/4 X 1/4 inch square cross pieces to the top of the frames. The sub deck joints at frame 3 are butt glued and needed some type of support.
The next step was to dry fit the keel, frames and sub deck. I found that I didn’t have enough hands, fingers or toes to try to hold all that together.
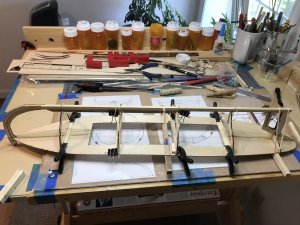
Eventually, using assorted clamps, wire, string and rubber bands it all came together.
The final result, glued and squared, ready for the next step.
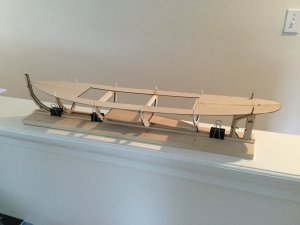
The butt joint of the sub deck is visible above at frame #3.
Even though this will be a static model not RC, for more rigidity I added the battery and motor mound platforms.
Dry fitting the frames I noticed that not much of the sub deck would be in contact with the frame crosspieces.

I added 1/4 X 1/4 inch square cross pieces to the top of the frames. The sub deck joints at frame 3 are butt glued and needed some type of support.
The next step was to dry fit the keel, frames and sub deck. I found that I didn’t have enough hands, fingers or toes to try to hold all that together.

Eventually, using assorted clamps, wire, string and rubber bands it all came together.
The final result, glued and squared, ready for the next step.

The butt joint of the sub deck is visible above at frame #3.
Even though this will be a static model not RC, for more rigidity I added the battery and motor mound platforms.
Last edited:
Looks good but also looks very fragile at this point. Good plan adding some reinforcements
Looking good, can see a nice hull shape forming,
Best regards John,
Best regards John,
Start of Planking the Hull:
The instructions are fairly simple “ soak or steam these pieces until pliable and pin them in place to dry, them apply final glue”.
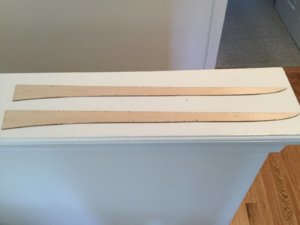
Unfortunately the pieces are almost two feet long and I need to figure out 1) how to soak or steam them and 2) how to pin and clamp them to the hull.
Jan
The instructions are fairly simple “ soak or steam these pieces until pliable and pin them in place to dry, them apply final glue”.

Unfortunately the pieces are almost two feet long and I need to figure out 1) how to soak or steam them and 2) how to pin and clamp them to the hull.
Jan
If you have a bath lay them in there with the hot water for awhile,Start of Planking the Hull:
The instructions are fairly simple “ soak or steam these pieces until pliable and pin them in place to dry, them apply final glue”.
View attachment 107217
Unfortunately the pieces are almost two feet long and I need to figure out 1) how to soak or steam them and 2) how to pin and clamp them to the hull.
Jan
Best regards John,
If you have a bath lay them in there with the hot water for awhile,
Best regards John,
I thought of that, I even tried to bribe the local real estate manager, but she was adamant that I find another method.
The first planks:
I think this will be a careful one plank at a time process.

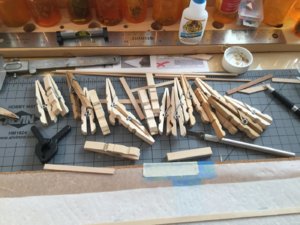
The planks need to butt up against each other snuggly. The DIY clamps help hold the plank follow the shape of the hull. They provide just enough overlap to clamp plank edge to plank edge.
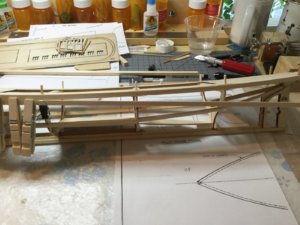
Since the frames are so far apart I decided to work on about six to eight inches at a time.
I think this will be a careful one plank at a time process.

The planks need to butt up against each other snuggly. The DIY clamps help hold the plank follow the shape of the hull. They provide just enough overlap to clamp plank edge to plank edge.

Since the frames are so far apart I decided to work on about six to eight inches at a time.
Great progress and she is getting the shape... love this build stage! 
Great progress and she is getting the shape... love this build stage!
Indeed, this stage of the build is more about thinking of how to do it.
Thank you to all who are following the build.
Jan
Last edited:


