Build log: HMS Surprise 1:48 based on a kit from ZHL

Joined
Sep 20, 2020
Messages
20
Points
48

I have made a separate kit presentation of this 1:48 HMS Surprise where I go through the pros and cons of this kit.

Model making is my hobby for the dark winter months. I started this project last year, and for the start of this new “season” I will present the construction report from last season. I have a lot of experience of working with wood - but not at this scale! A huge part of the fun is learning this new skill, and researching the historical detail of how these ships were made. And of course a huge thanks to all the wonderful model makers on this forum from whom I learn so much!


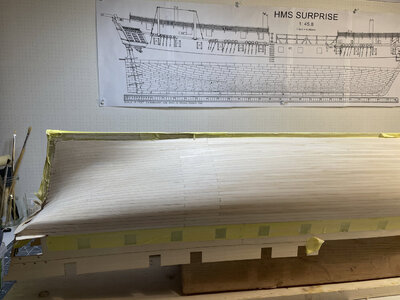
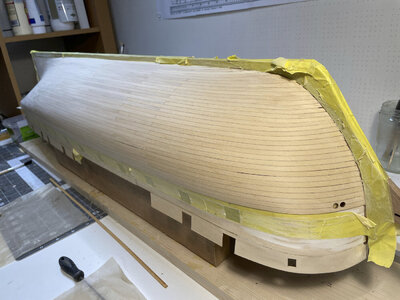
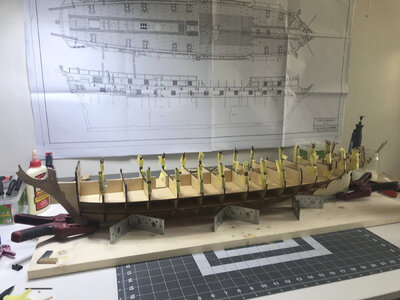
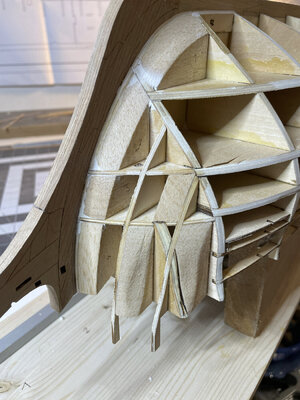
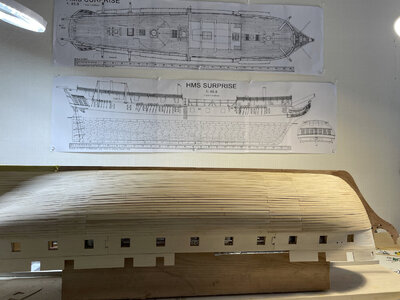
The frame of the kit is quite rigid, but the plywood is thin. I filled in the gaps with balsa at the bow and the stern. From stupidity and laziness I only filled them in partially!
IMG_2033-2.jpg
IMG_2715-2.jpg


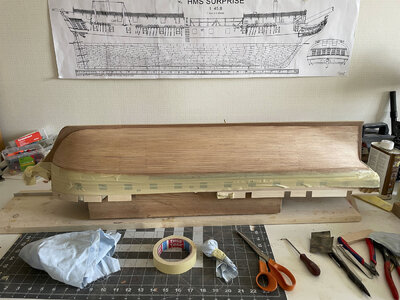
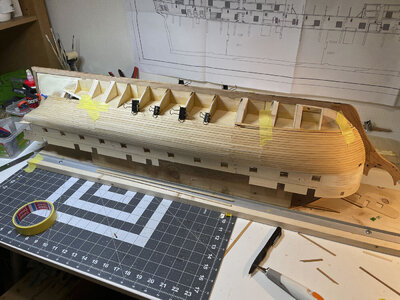
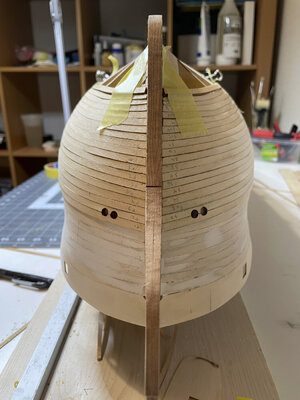
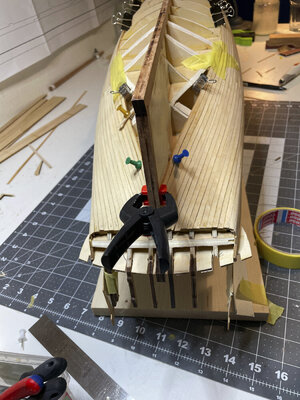
The hull planks are made from basswood and are ready splined, so one only needs to do some fairing to achieve an acceptable result, even for a beginner.
IMG_2853-2.jpg
IMG_2855-2.jpgIMG_2891-2.jpgIMG_2856-2.jpgIMG_2897-2.jpgIMG_2899-2.jpg

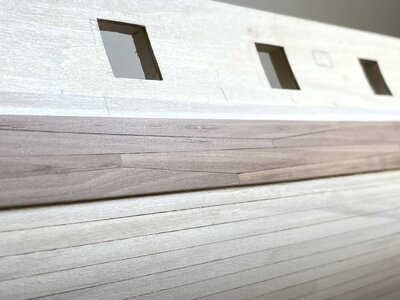
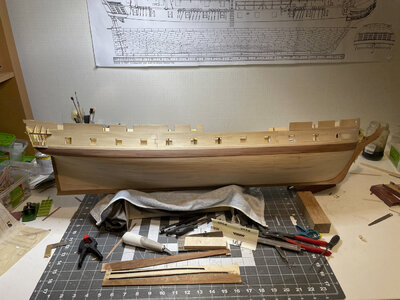
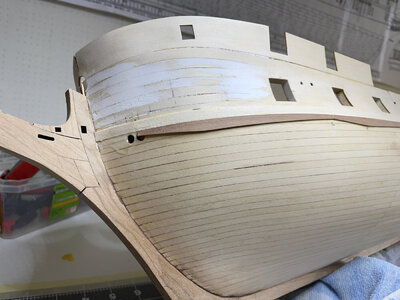
The kit ignores the wales so I made the main wale from cherry in anchor stock. Here it is covering the hawse holes that are in the wrong place in the kit.
IMG_2970-2.jpgIMG_2974-2.jpgIMG_2975-2.jpg

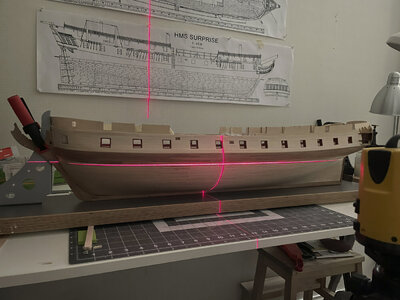
I used a laser level to get the water line - I had seen this done on another forum and seems like a fun way to do it!

IMG_3051-2.jpg
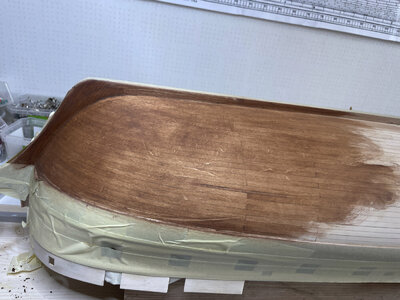
I decided to make the hull below the waterline asymmetrical - wood on one side and copper plating on the other.cFor the wooden side I abandoned scale for the beauty wood grain. I used a fine grain filler to give a light stain and fill in some of the unforgivable cracks in my planking attempt.
IMG_3088-2.jpgIMG_3091-2.jpg

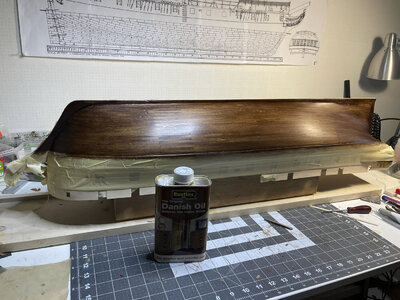
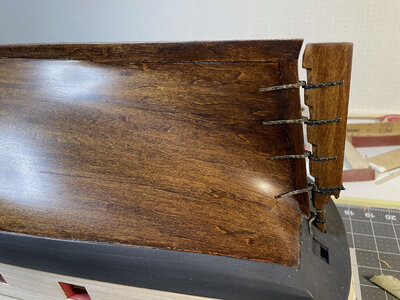
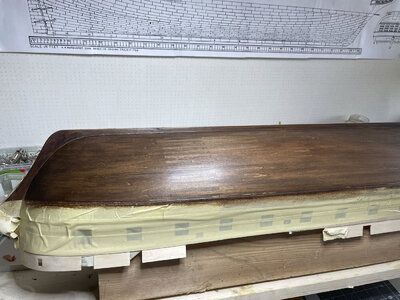
I used walnut juice to give the final dark stain that would highlight the grain but hide the incorrect division of the planks. Then I treated it with Danish oil and finally a few coats of wipe on poly to seal in the walnut stain.
IMG_3093-2.jpgIMG_3094-2.jpgIMG_3140-2.jpg

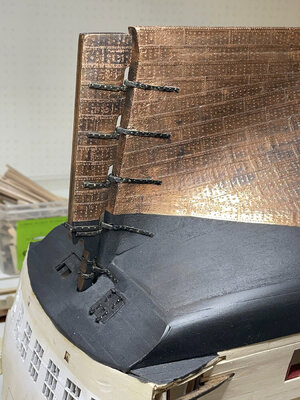
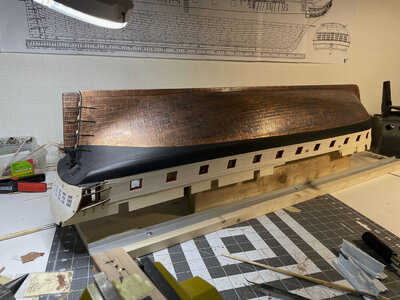
I used the copper plate stickers that came with the kit and treated them with liver of sulphur to age them (potassium sulphide, K2S). I know the order of the plates is wrong - keel to waterline and not waterline to keel - but once again I had to balance accuracy with the level of skill.
IMG_3160-2.jpgIMG_3159-2.jpg
 
Last edited:
Many Thanks for starting this interesting building log - and thanks for the photos - everywhere some informative details.
I like the copper plates of the kit - looking very good - do they have a selfadhesive folio or how did you fix them ?
Also your wale construction with the anchorstock pattern - very good and accurate - well done!
 
WOW !!!

those copper plates are a work of art. did you make the rivet dings yourself, or were they supplied like that?
 
Many Thanks for starting this interesting building log - and thanks for the photos - everywhere some informative details.
I like the copper plates of the kit - looking very good - do they have a selfadhesive folio or how did you fix them ?
Also your wale construction with the anchorstock pattern - very good and accurate - well done!
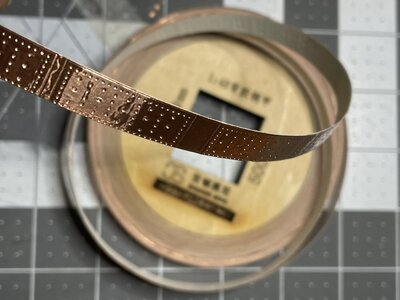
The copper plates are supplied as a roll of copper foil with the plates stamped in to them. Some of the plates are incomplete. They have to be individually cut - about 750 of them in this case. There is an adhesive, but I didn't quite trust it putting them directly on the sanded, untreated wood so I first applied a thin layer of wood glue (Titebond) before attaching each plate.IMG_3969.JPG.
 
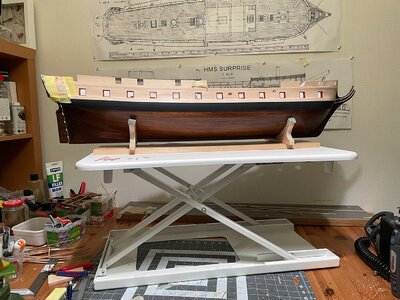
I wanted to share what is a bit of a game changer for me. I'm working on the hull and my back and my neck is killing me. Inspired by @archjofo's scissor lift I got this desk top lift designed for the home office. It has a small hydraulic piston which makes height adjustment from 5 to 40cm easy and has a maximum load of 15kg. Very stable and a dream to work with!
Scissor_lift.jpg
 
I have made a separate kit presentation of this 1:48 HMS Surprise where I go through the pros and cons of this kit.

Model making is my hobby for the dark winter months. I started this project last year, and for the start of this new “season” I will present the construction report from last season. I have a lot of experience of working with wood - but not at this scale! A huge part of the fun is learning this new skill, and researching the historical detail of how these ships were made. And of course a huge thanks to all the wonderful model makers on this forum from whom I learn so much!


The frame of the kit is quite rigid, but the plywood is thin. I filled in the gaps with balsa at the bow and the stern. From stupidity and laziness I only filled them in partially!

View attachment 266000
View attachment 266001


The hull planks are made from basswood and are ready splined, so one only needs to do some fairing to achieve an acceptable result, even for a beginner.
View attachment 266002
View attachment 266003View attachment 265999View attachment 265998View attachment 265997View attachment 265996

The kit ignores the wales so I made the main wale from cherry in anchor stock. Here it is covering the hawse holes that are in the wrong place in the kit.
View attachment 265995View attachment 265994View attachment 265993

I used a laser level to get the water line - I had seen this done on another forum and seems like a fun way to do it!

View attachment 265992
I decided to make the hull below the waterline asymmetrical - wood on one side and copper plating on the other.cFor the wooden side I abandoned scale for the beauty wood grain. I used a fine grain filler to give a light stain and fill in some of the unforgivable cracks in my planking attempt.
View attachment 265991View attachment 265990

I used walnut juice to give the final dark stain that would highlight the grain but hide the incorrect division of the planks. Then I treated it with Danish oil and finally a few coats of wipe on poly to seal in the walnut stain.
View attachment 265989View attachment 265988View attachment 265987

I used the copper plate stickers that came with the kit and treated them with liver of sulphur to age them (potassium sulphide, K2S). I know the order of the plates is wrong - keel to waterline and not waterline to keel - but once again I had to balance accuracy with the level of skill.
View attachment 265985View attachment 265986
Beautiful work all round. Congratulations. Even though I'm trying to build from scratch I can learn a lot from you and will now follow.
 
I wanted to share what is a bit of a game changer for me. I'm working on the hull and my back and my neck is killing me. Inspired by @archjofo's scissor lift I got this desk top lift designed for the home office. It has a small hydraulic piston which makes height adjustment from 5 to 40cm easy and has a maximum load of 15kg. Very stable and a dream to work with!
View attachment 269737
Great idea with this lifting table - I just checked out the post from Johann alias @archjofo and found it

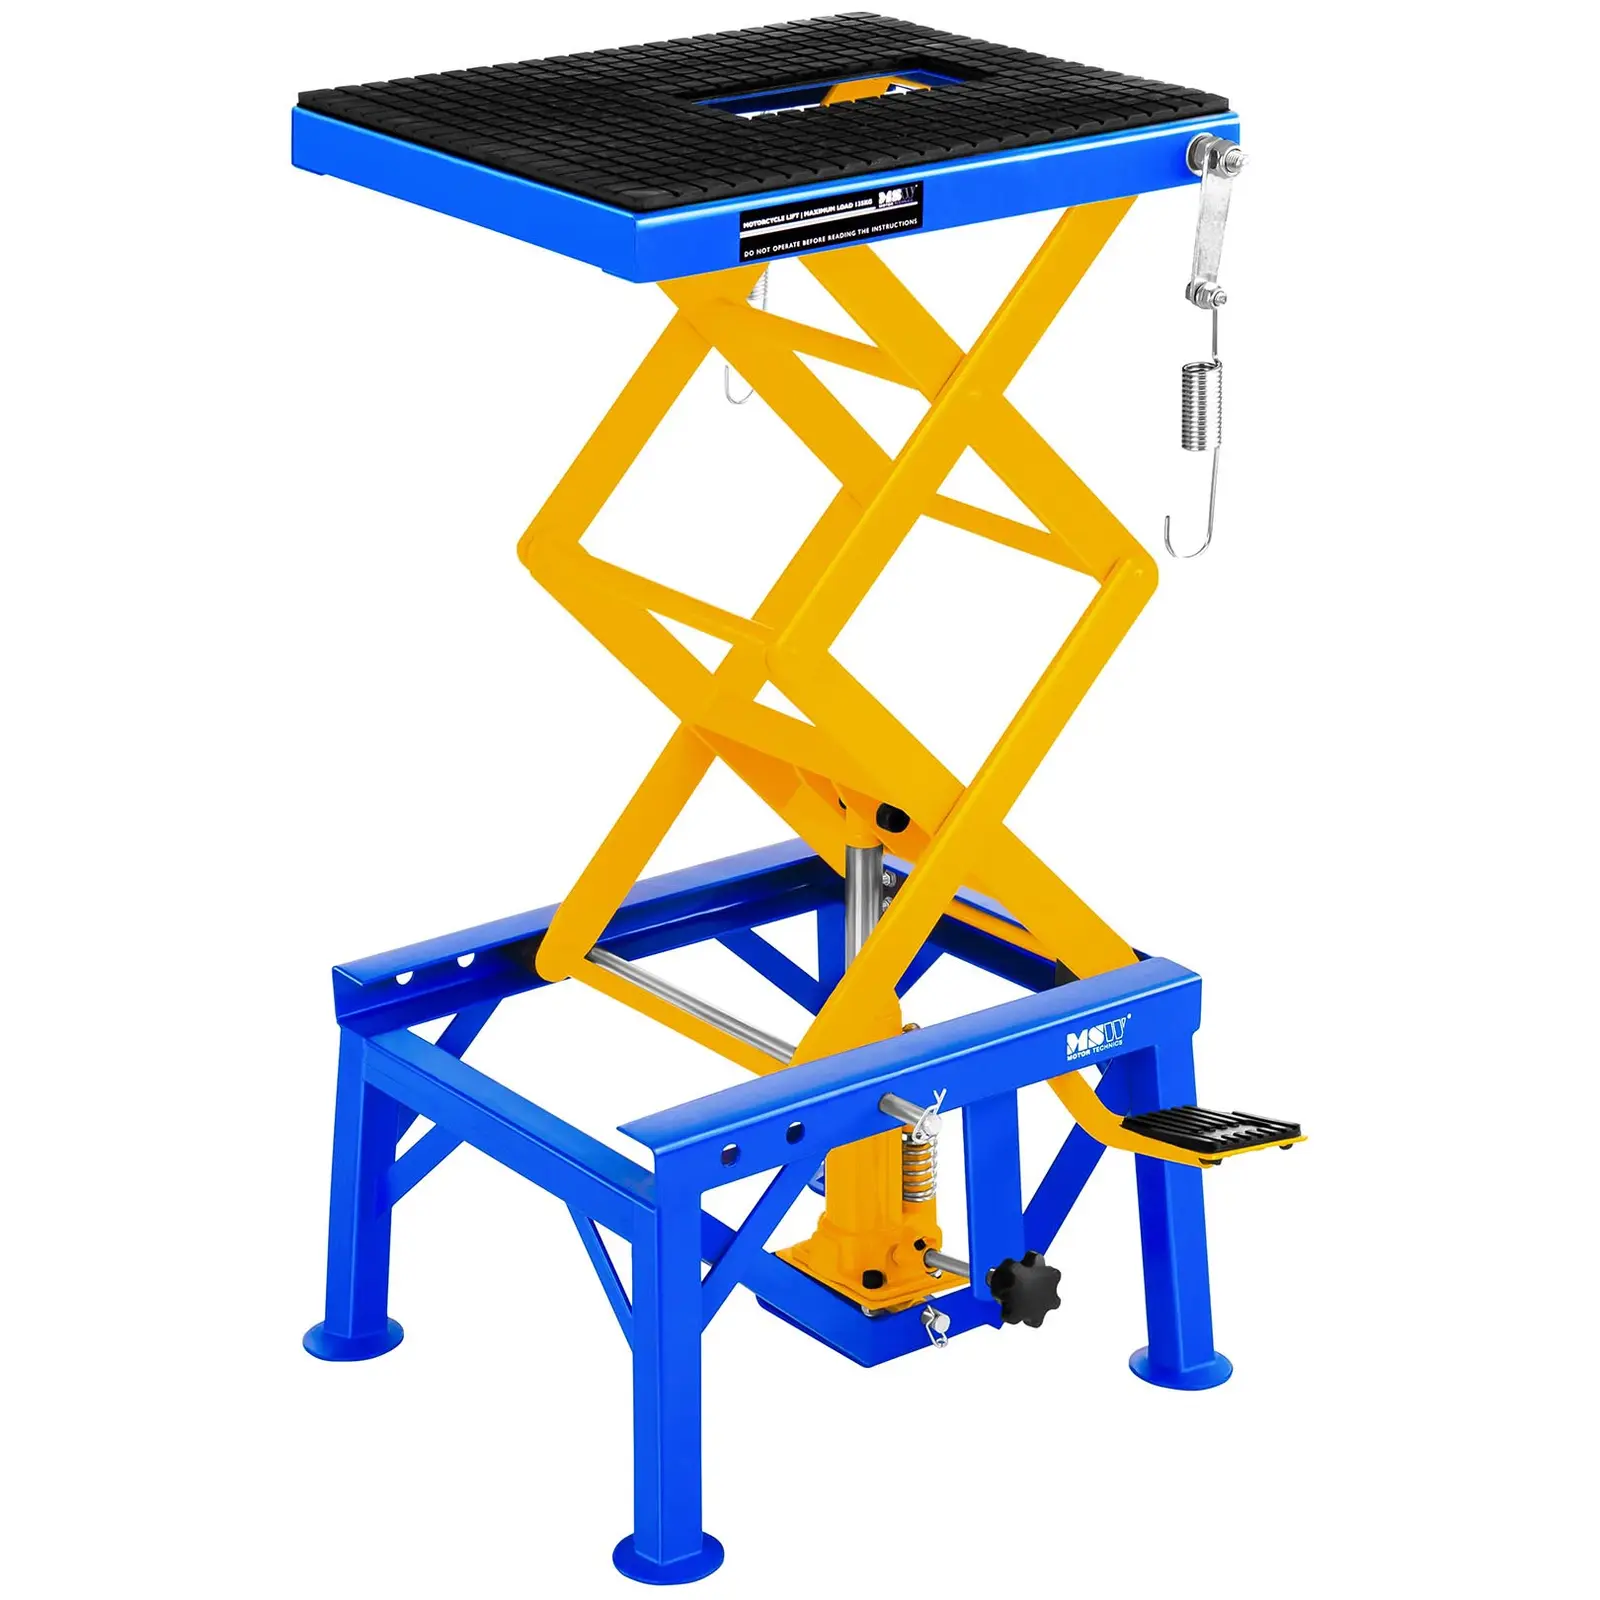
based on this I made a short search in the web and found the table and a dealer

10060972-1.jpg

available with 150kg or 135 kg, with or without wheels - the cheapiest combination costs 139 Euro - and when you agree to get the newsletter you get a coupon for 20% - so realy a very good deal, especially to reduce the pain in the back - Many Thanks for the hints
I just ordered one with wheels, but 135 kg (I guess enough for the models), but I can use it also f.e. to put a power tool on top
 
Great idea with this lifting table - I just checked out the post from Johann alias @archjofo and found it

based on this I made a short search in the web and found the table and a dealer

View attachment 269980

available with 150kg or 135 kg, with or without wheels - the cheapiest combination costs 139 Euro - and when you agree to get the newsletter you get a coupon for 20% - so realy a very good deal, especially to reduce the pain in the back - Many Thanks for the hints
I just ordered one with wheels, but 135 kg (I guess enough for the models), but I can use it also f.e. to put a power tool on top
Mine was something like these:

Cora desk converter
Desk on desk
 
I have made a separate kit presentation of this 1:48 HMS Surprise where I go through the pros and cons of this kit.

Model making is my hobby for the dark winter months. I started this project last year, and for the start of this new “season” I will present the construction report from last season. I have a lot of experience of working with wood - but not at this scale! A huge part of the fun is learning this new skill, and researching the historical detail of how these ships were made. And of course a huge thanks to all the wonderful model makers on this forum from whom I learn so much!
The frame of the kit is quite rigid, but the plywood is thin. I filled in the gaps with balsa at the bow and the stern. From stupidity and laziness I only filled them in partially!
The hull planks are made from basswood and are ready splined, so one only needs to do some fairing to achieve an acceptable result, even for a beginner.
The kit ignores the wales so I made the main wale from cherry in anchor stock. Here it is covering the hawse holes that are in the wrong place in the kit.
I used a laser level to get the water line - I had seen this done on another forum and seems like a fun way to do it!
I decided to make the hull below the waterline asymmetrical - wood on one side and copper plating on the other.cFor the wooden side I abandoned scale for the beauty wood grain. I used a fine grain filler to give a light stain and fill in some of the unforgivable cracks in my planking attempt.
I used walnut juice to give the final dark stain that would highlight the grain but hide the incorrect division of the planks. Then I treated it with Danish oil and finally a few coats of wipe on poly to seal in the walnut stain.
I used the copper plate stickers that came with the kit and treated them with liver of sulphur to age them (potassium sulphide, K2S). I know the order of the plates is wrong - keel to waterline and not waterline to keel - but once again I had to balance accuracy with the level of skill.
Hallo @Jweb
we wish you all the BEST and a HAPPY BIRTHDAY
Birthday-Cake
 
I have made a separate kit presentation of this 1:48 HMS Surprise where I go through the pros and cons of this kit.

Model making is my hobby for the dark winter months. I started this project last year, and for the start of this new “season” I will present the construction report from last season. I have a lot of experience of working with wood - but not at this scale! A huge part of the fun is learning this new skill, and researching the historical detail of how these ships were made. And of course a huge thanks to all the wonderful model makers on this forum from whom I learn so much!


The frame of the kit is quite rigid, but the plywood is thin. I filled in the gaps with balsa at the bow and the stern. From stupidity and laziness I only filled them in partially!

View attachment 266000
View attachment 266001


The hull planks are made from basswood and are ready splined, so one only needs to do some fairing to achieve an acceptable result, even for a beginner.
View attachment 266002
View attachment 266003View attachment 265999View attachment 265998View attachment 265997View attachment 265996

The kit ignores the wales so I made the main wale from cherry in anchor stock. Here it is covering the hawse holes that are in the wrong place in the kit.
View attachment 265995View attachment 265994View attachment 265993

I used a laser level to get the water line - I had seen this done on another forum and seems like a fun way to do it!
View attachment 265992
I decided to make the hull below the waterline asymmetrical - wood on one side and copper plating on the other.cFor the wooden side I abandoned scale for the beauty wood grain. I used a fine grain filler to give a light stain and fill in some of the unforgivable cracks in my planking attempt.
View attachment 265991View attachment 265990

I used walnut juice to give the final dark stain that would highlight the grain but hide the incorrect division of the planks. Then I treated it with Danish oil and finally a few coats of wipe on poly to seal in the walnut stain.
View attachment 265989View attachment 265988View attachment 265987

I used the copper plate stickers that came with the kit and treated them with liver of sulphur to age them (potassium sulphide, K2S). I know the order of the plates is wrong - keel to waterline and not waterline to keel - but once again I had to balance accuracy with the level of skill.
View attachment 265985View attachment 265986
Hallo @Jweb
we wish you all the BEST and a HAPPY BIRTHDAY
Birthday-Cake
 
Back
Top