Hi, I have finished planking the hull (Badly as it is my first go at a model, not sanded yet) and am at a loss as to how to attache the bulwark's.
I ca get the stern end attached to the transom but how to fix the rest along the deck is a mystery.
The bulwark is a long strip of ply. I have glued vertical strips to the inside and need to cut the canon ports.
Should the outside of the bulwark be inline with the hull and the planking be continuous. In this case I would need t cut back the deck planks.
Is there anyway using some tempoarry support while the glue sets.
Regards
Bill


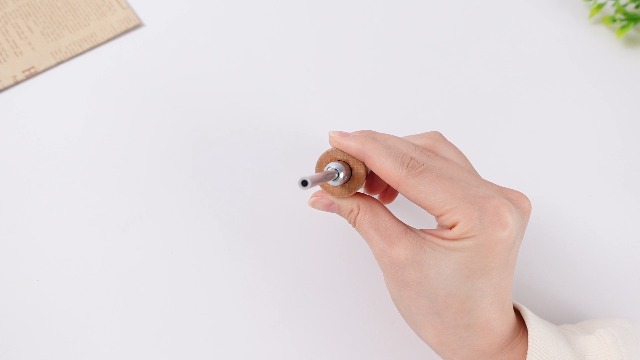
") Brass pins are really not a very practical fastening device on ship models. As you've discovered, they aren't strong enough to be driven into most modeling wood. To avoid bending and splitting the wood, a hole slightly smaller than the pin's diameter to receive the pin should first be drilled. A pin driver can be of some help, but it must be the proper size to fit the pin and finding properly sized pins can be a bit of a problem, as well.
Brass pins are really not a very practical fastening device on ship models. As you've discovered, they aren't strong enough to be driven into most modeling wood. To avoid bending and splitting the wood, a hole slightly smaller than the pin's diameter to receive the pin should first be drilled. A pin driver can be of some help, but it must be the proper size to fit the pin and finding properly sized pins can be a bit of a problem, as well.