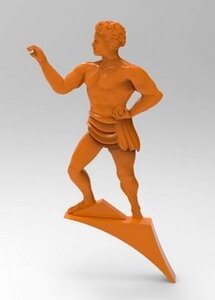
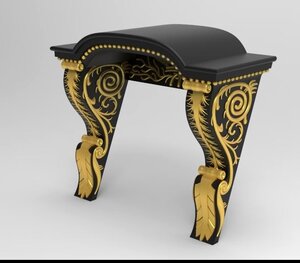
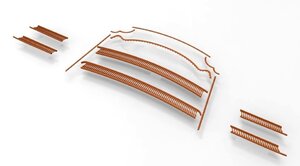
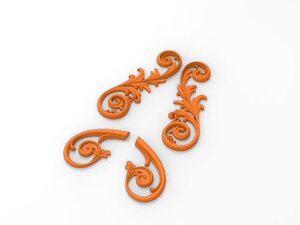
I'm sure all the DeAgostini SotS customers would buy them! I would in a heartbeat.Kurt@ - What is your price for a full set of the carvings to model SotS in scale 1:84?
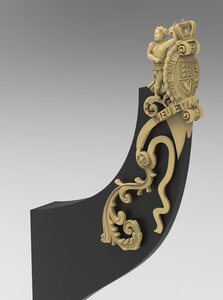
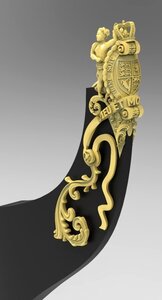
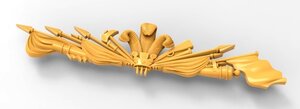
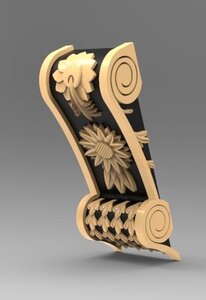
From the technical side there is no problem, but I need about 3 years to do it. The quality as shown below bow figures for the model VASA.
View attachment 160554
I think, that it's better to design a completely new kit HMS "Sovereign of the Seas" in scale 1:72 than make all the carvings in 1:84.
-

Win a Free Custom Engraved Brass Coin!!!
As a way to introduce our brass coins to the community, we will raffle off a free coin during the month of August. Follow link ABOVE for instructions for entering.
-

PRE-ORDER SHIPS IN SCALE TODAY!
The beloved Ships in Scale Magazine is back and charting a new course for 2026!
Discover new skills, new techniques, and new inspirations in every issue.
NOTE THAT OUR FIRST ISSUE WILL BE JAN/FEB 2026
You are using an out of date browser. It may not display this or other websites correctly.
You should upgrade or use an alternative browser.
You should upgrade or use an alternative browser.
- Joined
- Oct 15, 2017
- Messages
- 1,190
- Points
- 443

Hello All,
I want to share my experience with working with Kris ( @SZKUTNIK) to fabricate some stern artwork for my current project. I will provide a little background for context and then right into it.
Recently, during my Santisima Trinidad 1/90 (OcCre) project I approached the task of deciding what I wanted to do about her stern, galleries, quarter galleries and stern plate art-work. My first ship project was the Albotros (OcCre), which I progressed to the point of rigging. Unfortunately, Rex, my German Sheppard, rambunctiously decided to play with it, reducing it to a pile of toothpicks and the garbage bin. So the ST is pretty much the first project I will actually complete.
 This would not stop me from bashing it where I was not happy with the supplied materials, etc. Unfortunately, those familiar with OcCre's ST, know that the stern plate, and quarter galleries are made of "white metal" or what we call sometimes "pot metal". And the gallery window panes and frames are made of brass photo-etched material.
This is the point of where I learned, first handed about the "paralysis through analysis" phenomena. I was keen to improve the quality, but no idea where to start. So I started to do some research and decided I would build it from scratch. The finished version will not be historically accurate, but somewhat of a hybrid. The artwork I chose was not present on her when she had open galleries, only after a refit when the galleries were subsequently closed. So this is the disclaimer.
I used the supplied stern plate (metal) to create a few templates for later use. One of the first lessons I learned in this hobby is, if you need to fabricate/replicate 100 identical items, make 110. I don't have images of the original stern plate, but offer other photos to help relate the steps and progress.
I found the artwork I wanted to use and created prints in the correct scale.
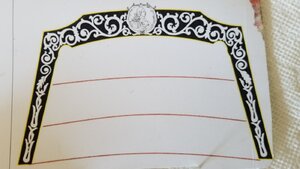
After fabricating the stern plate out of hard wood, I cut out the artwork and overlaid it to check scale and fitment.
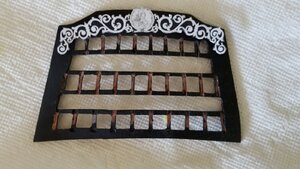
I then used template, along with a layer of black carbon paper to transfer the artwork onto some Boxwood to carve. Well to carve this intricate work at 1/90th scale was asking TOO MUCH of my limited skill set. You can see the results below, right before I stopped carving.
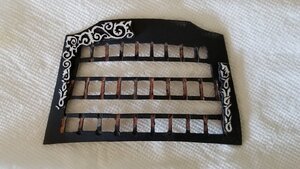
Maybe one day with a few more years of practice.... So I decided to pursue another solution. And as usual, I found it right here on the SoS site, and the post of @SZKUTNIK who we all know as "Kris". After PMing Kris, he came back to me with very specific questions of his own, including versions of the artwork, as he spent the time doing his own research FOR ME and MY project!!!! Needless to say, I was impressed and I think at that moment I knew I was working with the right person.
Kris asked for some scale information for the artwork and stern plate, which I supplied.
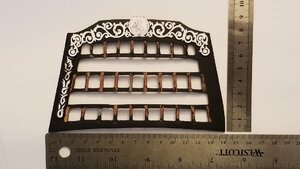
His resin printer was unavailable as it was out for service, which didn't matter as I was in no rush. Kris let me know that he got his printer back and the next day shipped out the artwork. A couple of days later Kris let me know the company who serviced his printer reset the unit to default parameters which resulted in the first set of artwork being slightly larger in scale and would not fit on my stern plate. I received the correct set today and after inspection, was VERY HAPPY. The quality and intricacy of the artwork at this scale is very high. I traced the stern plate onto some card stock to check fitment and as you can see from the photos below, they are spot on with pretty tight tolerances.
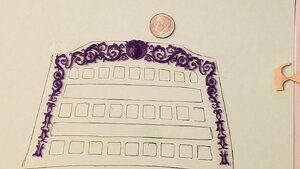
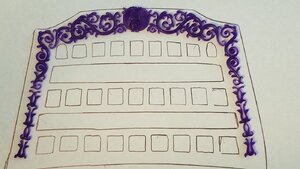
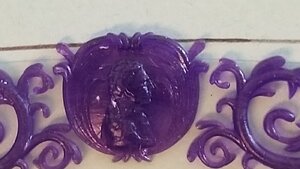
Kris suggested that the artwork should be primed using enamel or lacquer paint. A recommendation I will follow.
I will be airbrushing with Testor's enamel grey primer, with about a 50/50 dilution with mineral spirits @ about 15psi. I will layer VERY thin coverage, most likely 3 coats of primer, as each coat in itself will not provide 100% coverage. This will be followed by, most likely 2 coats of Testor's flat white. I will attempt to enhance the portrait with some detail I have a couple of brushes that literally have 1 or 2 hairs for something like this. I will practice on the portrait sent in the first set and make a decision after that.
I will post some photos, hopefully showing that you can improve kit models, with a vision, the right planning, quality components (this case artwork), regardless of your skill-set.
If you are looking for some quality production in the area of artwork, decorations or figureheads, Kris will take care of you. Just reach out and speak with him. He made me feel like I was his only customer. KUDOS Kris, thanks for your help. Apologies for the long post.
Photos of finished work will be posted soon.
Cheers!
Ken
I want to share my experience with working with Kris ( @SZKUTNIK) to fabricate some stern artwork for my current project. I will provide a little background for context and then right into it.
Recently, during my Santisima Trinidad 1/90 (OcCre) project I approached the task of deciding what I wanted to do about her stern, galleries, quarter galleries and stern plate art-work. My first ship project was the Albotros (OcCre), which I progressed to the point of rigging. Unfortunately, Rex, my German Sheppard, rambunctiously decided to play with it, reducing it to a pile of toothpicks and the garbage bin. So the ST is pretty much the first project I will actually complete.
This is the point of where I learned, first handed about the "paralysis through analysis" phenomena. I was keen to improve the quality, but no idea where to start. So I started to do some research and decided I would build it from scratch. The finished version will not be historically accurate, but somewhat of a hybrid. The artwork I chose was not present on her when she had open galleries, only after a refit when the galleries were subsequently closed. So this is the disclaimer.
I used the supplied stern plate (metal) to create a few templates for later use. One of the first lessons I learned in this hobby is, if you need to fabricate/replicate 100 identical items, make 110.
I found the artwork I wanted to use and created prints in the correct scale.

After fabricating the stern plate out of hard wood, I cut out the artwork and overlaid it to check scale and fitment.

I then used template, along with a layer of black carbon paper to transfer the artwork onto some Boxwood to carve. Well to carve this intricate work at 1/90th scale was asking TOO MUCH of my limited skill set. You can see the results below, right before I stopped carving.

Maybe one day with a few more years of practice....
Kris asked for some scale information for the artwork and stern plate, which I supplied.

His resin printer was unavailable as it was out for service, which didn't matter as I was in no rush. Kris let me know that he got his printer back and the next day shipped out the artwork. A couple of days later Kris let me know the company who serviced his printer reset the unit to default parameters which resulted in the first set of artwork being slightly larger in scale and would not fit on my stern plate. I received the correct set today and after inspection, was VERY HAPPY. The quality and intricacy of the artwork at this scale is very high. I traced the stern plate onto some card stock to check fitment and as you can see from the photos below, they are spot on with pretty tight tolerances.


Kris suggested that the artwork should be primed using enamel or lacquer paint. A recommendation I will follow.
I will be airbrushing with Testor's enamel grey primer, with about a 50/50 dilution with mineral spirits @ about 15psi. I will layer VERY thin coverage, most likely 3 coats of primer, as each coat in itself will not provide 100% coverage. This will be followed by, most likely 2 coats of Testor's flat white. I will attempt to enhance the portrait with some detail I have a couple of brushes that literally have 1 or 2 hairs for something like this.
 I will practice on the portrait sent in the first set and make a decision after that.
I will post some photos, hopefully showing that you can improve kit models, with a vision, the right planning, quality components (this case artwork), regardless of your skill-set.
If you are looking for some quality production in the area of artwork, decorations or figureheads, Kris will take care of you. Just reach out and speak with him. He made me feel like I was his only customer. KUDOS Kris, thanks for your help. Apologies for the long post.
Photos of finished work will be posted soon.
Cheers!
Ken
Those decorations look great Ken.I can only back up what you say regarding Kris's work.I have received two consignments from him and I am blown away by the quality of his work.
I have not posted pictures of the 400 Fleur de Lys carvings he made for Saint Philippe although Kris has shown a picture of the frets earlier in this thread.I will have to take some closeups at the weekend, they are 6mm by 8mm and the detail is astounding.At only 1mm or so thick they did cause him some head scratching to begin with so the cutter did not obliterate them, but he was determined to do it.
Kind Regards
Nigel
have you added the new parts to your ships . could you show a pic.
- Joined
- Oct 15, 2017
- Messages
- 1,190
- Points
- 443

I have not yet added the stern decorations. I in the 2 days since I've received them, I have applied 2 coats of Testor's grey primer and 1 coat of Testor's flat white. I can place the decorations on the stern plate to showcase how they will look, but I have much work yet to do before I finish the stern plate and main galleries, ie., gallery windows, and intermediary columns, balconies and their balustrades. So it my be a while. I will post what I can shortly, at least to provide an image of what is to come.
- Joined
- Oct 15, 2017
- Messages
- 1,190
- Points
- 443

Hello, once again Kris! You will definitely hear from me again in the future as I do have Caldercraft's Victory in dry dock "storage closet" currently, in 1/72, if I recall correctly. I will PM you long before I start her to give us a chance to talk about things. With the work you are putting out I will expect you will be getting more work every day!
Cheers,
Ken
Cheers,
Ken
- Joined
- Oct 15, 2017
- Messages
- 1,190
- Points
- 443

Hi Janos,Ken,
Can you post a picture about the decorations as they ere at the moment (flat white after primer). It would be nice to see the details.
János
Yes I will post tomorrow most likely. I have one more coat of flat white to add and allow to dry prior to my carefully removing them from the double sided tape they currently sit on. I will mount temporarily onto the stern plate just for contrast and post.
Cheers,
Ken
OH YES, HAVE GIVEN KRIS MY ORDER FOR THE HARBOR DREGE FROM ANCRE, MORE TO FOLLOW. GOD BLESS STAY SAFE YOU AND YOURS DON
Absolutely love it, Kris! It is amazing what human and technology can do today, I am sure the decor will be on-demand as many people are love to build Victories. Bravo!
Those are gorgeous!
amazing quality - great work


