-

Win a Free Custom Engraved Brass Coin!!!
As a way to introduce our brass coins to the community, we will raffle off a free coin during the month of August. Follow link ABOVE for instructions for entering.
-

PRE-ORDER SHIPS IN SCALE TODAY!
The beloved Ships in Scale Magazine is back and charting a new course for 2026!
Discover new skills, new techniques, and new inspirations in every issue.
NOTE THAT OUR FIRST ISSUE WILL BE JAN/FEB 2026
You are using an out of date browser. It may not display this or other websites correctly.
You should upgrade or use an alternative browser.
You should upgrade or use an alternative browser.
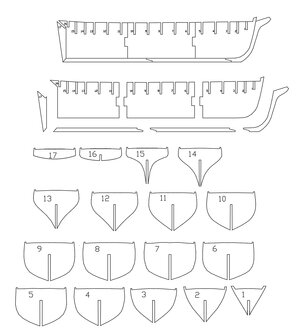
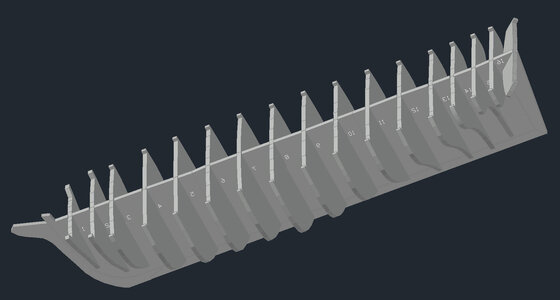
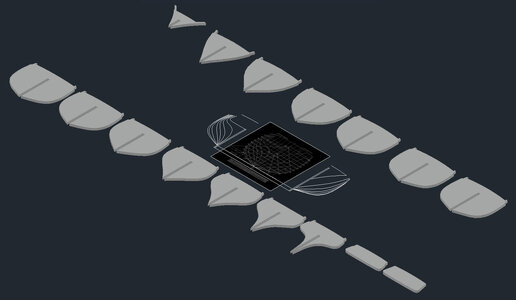
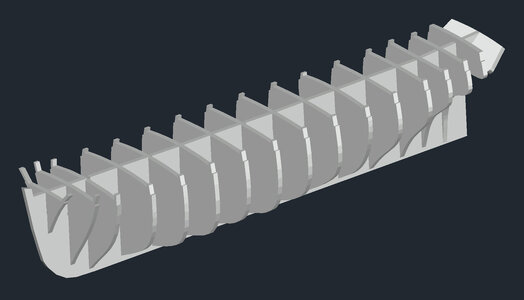
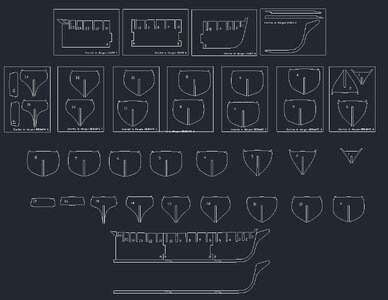
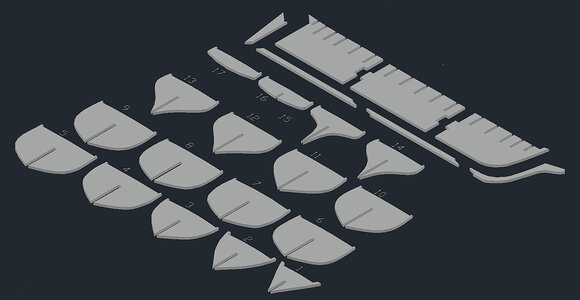
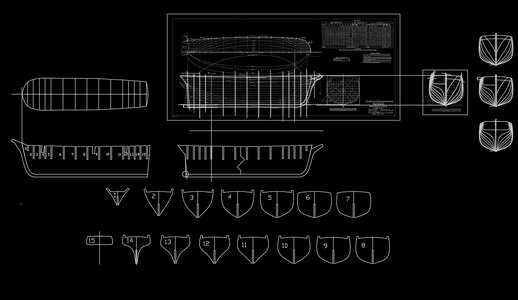
And here are all the 3D pieces that are 6mm thick like my plywood.
It was a... mental undertaking... given that the microscopic inaccuracies in the 2D drawing prevented the CAD from extruding the pieces in 3D...
The false keel is divided into 3 parts to be able to be printed on an A4 format... sooner or later I will be able to transfer the design from a laser copy to wood.
Now I have to understand how the details rotate and move in the 3D drawing... I'll succeed!

I'm glad everything worked out for you ;-). By the way, you are excellent at working in graphics programs - I personally cannot boast of the same 
to each their own..I'm glad everything worked out for you ;-). By the way, you are excellent at working in graphics programs - I personally cannot boast of the same
I'm good at drawing, but not at construction.
He means that we will create a company... I design and you build..
Your CAD work looks terrific! Is there a reason you are not using the plans from Mystic Seaport? They appear to be quite detailed and complete, albeit, not free.I ask you to post any drawings by Charles W. Morgan here.
https://store.mysticseaport.org/ships-plans/morgan.html Considering the ship is located there and the Museum's reputation I would hope they are as accurate as any in existence.
Allan
In fact the first attempt was using the design you mentioned.Your CAD work looks terrific! Is there a reason you are not using the plans from Mystic Seaport? They appear to be quite detailed and complete, albeit, not free.
https://store.mysticseaport.org/ships-plans/morgan.html Considering the ship is located there and the Museum's reputation I would hope they are as accurate as any in existence.
Allan
To tell the truth, I made a lot of mistakes having never transferred a PDF to dwg.
I therefore set aside that solution.
Now I've picked it up again also because I've learned to use the SPLINE function to make curves and then transform them into polylines.
Why don't I buy the drawing?...simple..$175 for a game seems too much to me.
If it had cost around $30 I probably would have bought it.
Now that I have greater mastery of 3D CAD, I go back to drawing the lines you mention.
Now I'm enlarging it 110%, then 110% .. 110% .. 110% .. ect ect .. until I have a usable size. Why 110%? because I discovered that by enlarging it by that percentage, the drawing grains very little and therefore with patience the operation is repeated N times.
Eugenio
I am going to have to give that a try. Thanks for the tip.Now I'm enlarging it 110%, then 110% .. 110% .. 110% .. ect ect .. until I have a usable size. Why 110%? because I discovered that by enlarging it by that percentage, the drawing grains very little and therefore with patience the operation is repeated N times.
Allan
Allan..
you made me feel guilty... I redid everything by copying the ordinate lines as best I could, obtained from the drawing found on the URL you reported to me...
Unfortunately, once the drawing was finished, I realized that I had forgotten a piece.... I'll invent something.. or rather I'll try to find out how CAD can resolve my mistake.
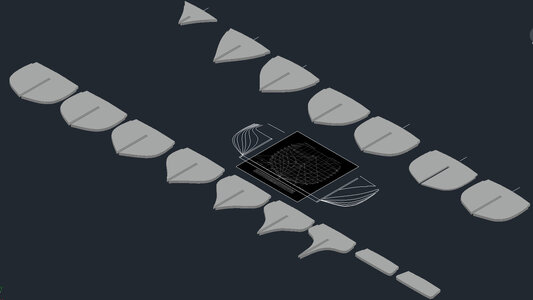

After heated discussions, with my "landlady" and the unveiled threat of "... you, your she-cat (Morghy) and your boats, go and sleep in the garage..", we came to the conclusion that the 1:43 scale meant a model too large for the permitted shelf. The negotiations led to the painful decision to move to 1:72 scale. I don't know if this value makes sense in the modeling environment, but the threat of the garage ... this has led.
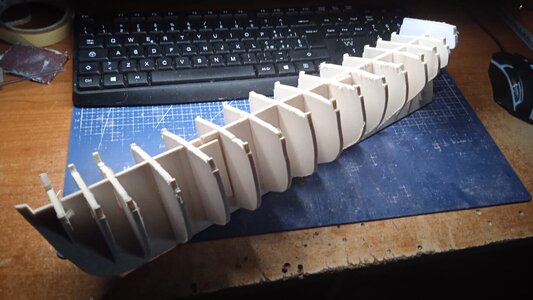
I abandoned the idea of transferring drawings from copies directly onto plywood. I then glued the various A4 sheets directly onto the plywood
The plywood went from 6mm to 4mm thick.
After cutting the pieces, I noticed some errors that I didn't see in the 3D... so I did a test assembly and I know what changes will need to be made.
However, I discovered online that sailors exist in 1:72 scale, so I don't rule out the possibility that I will eventually purchase a handful of them to enrich the model.
Now I will disassemble the pre-assembly and refine the various pieces.

.... don't count your chickens before they're hatched.
In the end I had to use the drawings that I had always discarded due to their size.
In practice the other drawings of the frames were wrong... or at least done very roughly.
Long story short the planking would not have followed the frames.
Things should be fine now...
However the adventure continues...
Yes, I know.. if I bought a kit I would have avoided a lot of problems and headaches... but I remain of the opinion "Kits? no thanks!""
I forgot... the blanket will be 450 mm long so you can use 500 mm long wood.. (made in China)

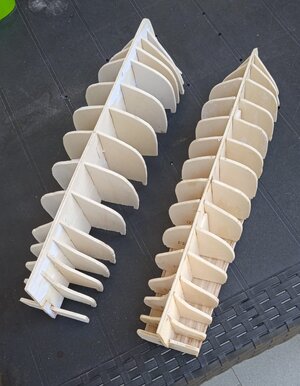
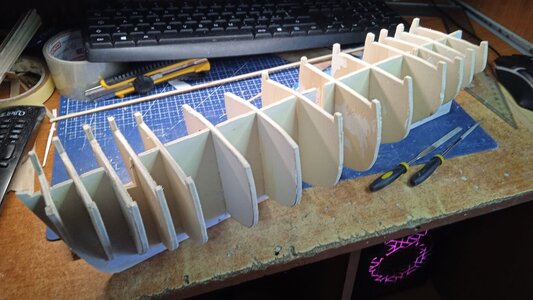
This time the planking strips follow the profile of the frames quite well.
Corrected all the errors, only frames #6 and #7 leave me with some doubts, but I'm sure I followed the original drawing online exactly. by Hillman, Jethro & Zachariah.
There must be some reason, at most I redo the two frames.
CONFIRM... THE SCALE IS 1:72
Corrected all the errors, only frames #6 and #7 leave me with some doubts, but I'm sure I followed the original drawing online exactly. by Hillman, Jethro & Zachariah.
There must be some reason, at most I redo the two frames.
CONFIRM... THE SCALE IS 1:72

Last edited:


