- Joined
- Apr 3, 2023
- Messages
- 104
- Points
- 88

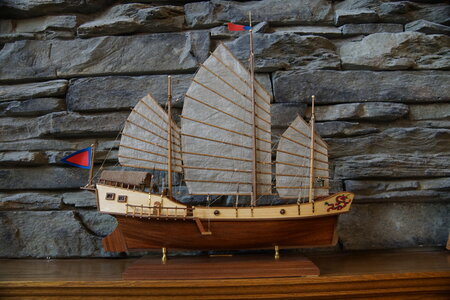
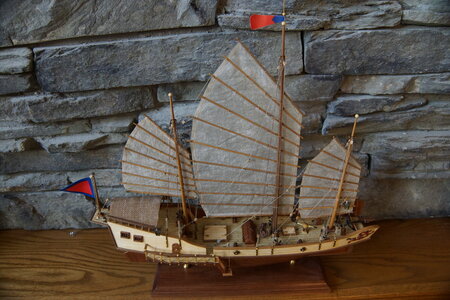
Artesania Latina “Red Dragon” 紅龍 (Chinese Junk style ship)
1:60 Scale
Artesania Latina
Build Completion: 2023.11.08
Build Duration: Approx. 8 months
General Notes:
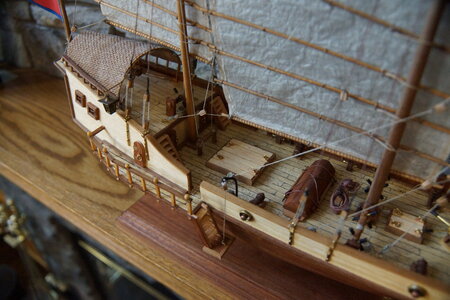
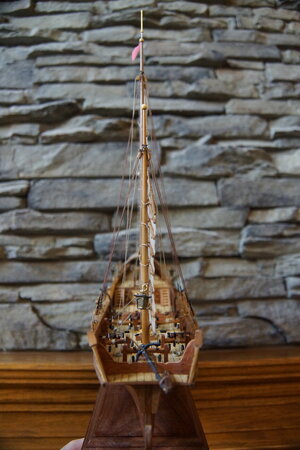
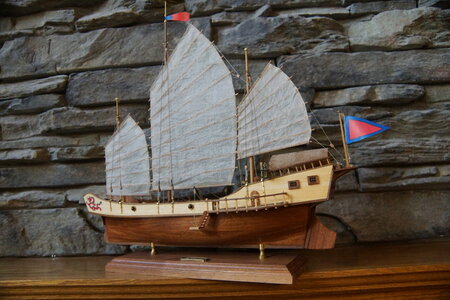
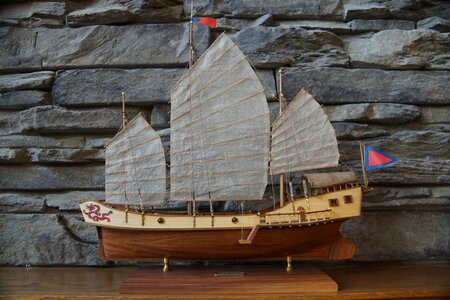
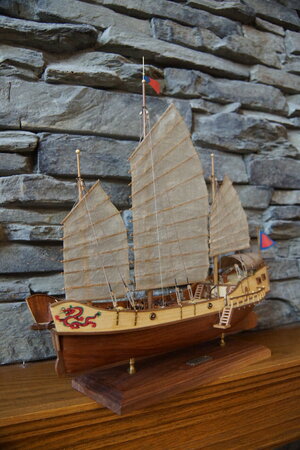
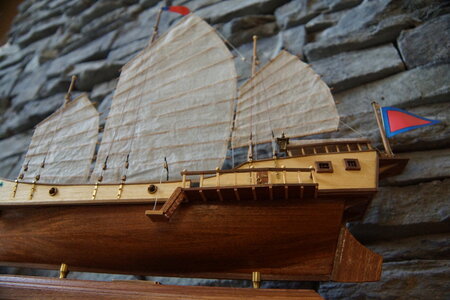
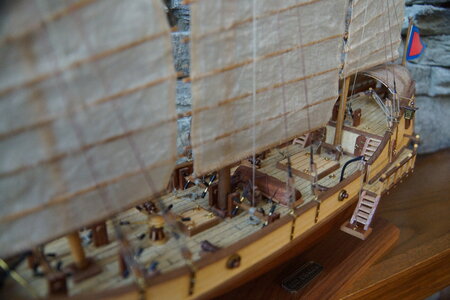
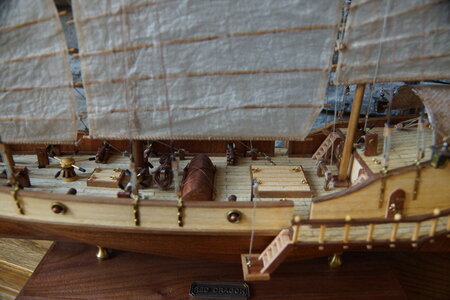
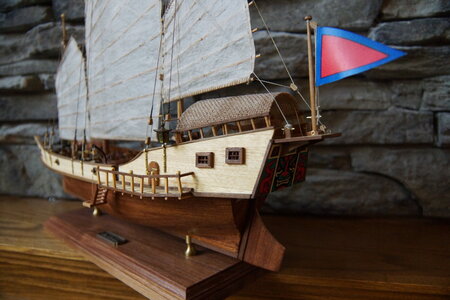
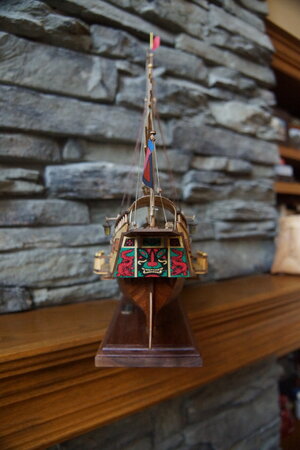
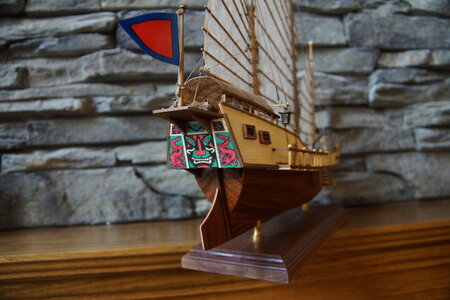
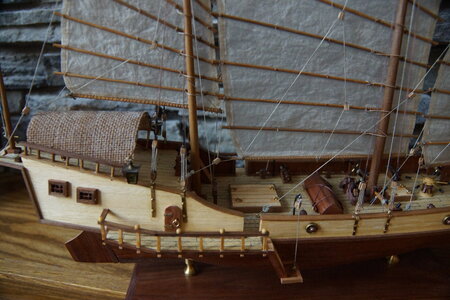
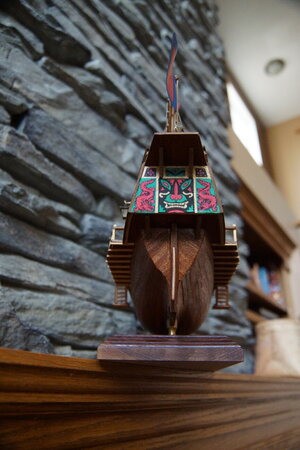
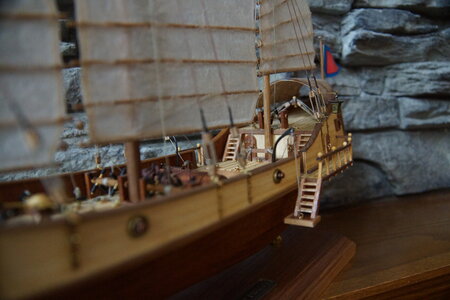
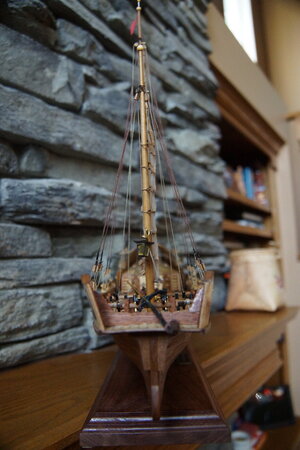
1:60 Scale
Artesania Latina
Build Completion: 2023.11.08
Build Duration: Approx. 8 months
General Notes:
- This is my version of the Artesania Latina kit, Red Dragon, at 1:60 scale.
- It’s not intended to be historically accurate in any regard. I followed (for the most part), the manufacturer’s build instructions. My goals were more aesthetic than historical accuracy.
- I have deviated from their plans and materials in a few areas, which are:
- I replaced the sail material with drafting linen, which is a much finer material and tighter weave than the material provided with the kit. It also provides a bit of translucency which I wanted, so the bamboo spars would show through.
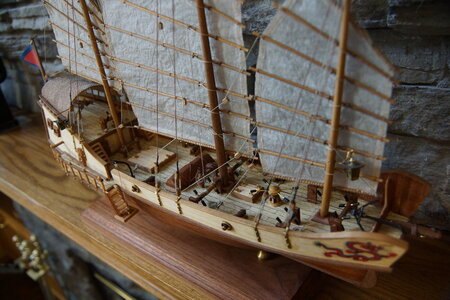
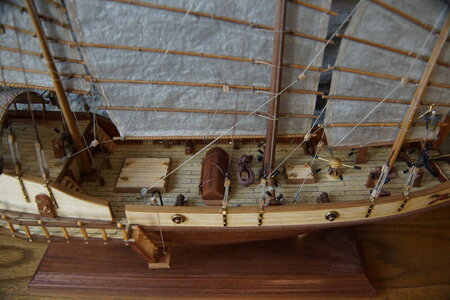
- I used charcoal art sticks to coat the edges of the deck planking before they were glued to the false deck sheet. After sanding, the dark residue worked its way into the grain of the deck planks which I believe adds a nice aged appearance to the deck.
- I built the four wooden framed windows, using spare wood in the kit, some acrylic sheeting for the glass, and backed with matt black paper. This replaces the cast white metal windows that are provided with the kit.
- Shrink wrap tubing was used to cover the ends of the various brass fittings used to represent pawl bars in the kit. Again, out of scale, but I decided that wrapping the ends with thread would be more than I was willing to tackle.
- I replaced all the single and double blocks with walnut versions, which provided a darker colour than the boxwood blocks that are provided with the kit. Yes, they’re all larger than they should be for accurate scale representation.
- The decals provided in the kit for the bow and stern ornamentation were a vinyl stick on type material. I was concerned about how they would remain in place over a longer period of time, how thick they would appear on the wood, as well as potential discolouring. I chose to scan the decal sheet, and then laser printed them on a plastic model decal transfer sheet. These were then applied to the model after the wood has been finished, and a decal softening agent applied to have the decals adhere and sink into the wood more tightly.
- The double blocks that connect the shrouds to the hull have been seized with a dark brown thread. I also seized the upper part of the shrouds where they wrap around the mast tops.
- The strops for the double blocks affixed to the hull are shown to be placed at some odd (to my eyes) angles in relation to the masts. I chose to mount them in a more perpendicular to the deck orientation.
- I opted to line the inside of the bulwarks, the underside of the deck where it extends over the outside of the hull, and the rudder… with the same material provided for the second layer of hull planking.
- I also chose to plank the working boat affixed to the deck with the same wood strip material, and build a couple of oars to mount beside the boat.
- After final sanding, all of the wood has been treated with a brushed on coating of Floquil Glaze. I really like how this glaze darkens and enriches the colour of wood material, and was fortunate enough to have bought two boxes of six bottles of the product back a few decades ago. I’m down to my last box now, so am unsure what I might end up using as an alternative when my stock runs out… since this product is no longer manufactured or sold.
- Regarding the kit itself, I consider most of the materials acceptable. The instructions and plans leave a bit to be desired. You have a double sided plan sheet, which with the exception of some inaccuracies in rigging locations is good enough. The instructions start off not too badly, but once you’re about half way through the build, they just tell you to follow the pictures to complete the kit. Which would be great if there were more pictures or some indication of how some aspects of the final details are to be crafted. I’m seeing with the newer kits that Artensania Latina is producing, that they’re now providing step by step detailed photos of the entire build process, and that is truly an excellent change in philosophy for them. If you want to see an example of what I’m talking about, go to their website and look at the build instructions for the King of the Mississippi. It literally looks like how a LEGO Technic build instruction looks like, and I consider it excellent. Well done AL.
- Overall, I’m pleased with my final results. I started this kit as a side gig while I was working on the first layer of planking on a Corel HMS Victory model (still in progress). I’d lay on two planks on each side of the hull, and then sit it aside and work on the Red Dragon for an hour. After the Victory’s first layer of planking was complete, it was shelved for the summer and my efforts focused entirely on finishing the Red Dragon. Now I can get back to the Victory as winter approaches.


Last edited:
