Bill, I look forward to you build, should be fun. Looks like you got your work bench at Harbor Freight also! Magic Mike
-

Win a Free Custom Engraved Brass Coin!!!
As a way to introduce our brass coins to the community, we will raffle off a free coin during the month of August. Follow link ABOVE for instructions for entering.
-

PRE-ORDER SHIPS IN SCALE TODAY!
The beloved Ships in Scale Magazine is back and charting a new course for 2026!
Discover new skills, new techniques, and new inspirations in every issue.
NOTE THAT OUR FIRST ISSUE WILL BE JAN/FEB 2026
You are using an out of date browser. It may not display this or other websites correctly.
You should upgrade or use an alternative browser.
You should upgrade or use an alternative browser.
Hello Mike,
Thanks for looking in. I’m looking forward to the journey very much. Yes it’s from Harbor Freight. It was even on a close out sale. Couldn’t pass it up.
I have been looking for information on the Galley Washington, but there doesn’t seem to be much. If anyone has any ideas where I could look for information I would greatly appreciate it.
Bill
- Joined
- Sep 14, 2020
- Messages
- 152
- Points
- 88

Just google GALLEY WASHINGTON, that will give most of what you might need.
Hello Learner,
I have been able to find operational history for the Washington, but I have found very little information on the actual ship. What information I have found is conflicting as to the actual ship’s construction.
Bill
I have been able to find operational history for the Washington, but I have found very little information on the actual ship. What information I have found is conflicting as to the actual ship’s construction.
Bill
Hello everyone,
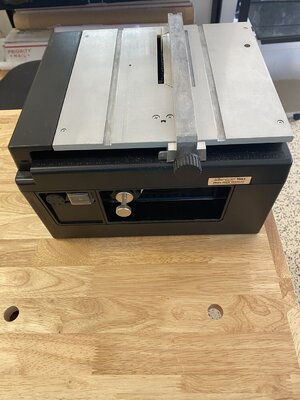
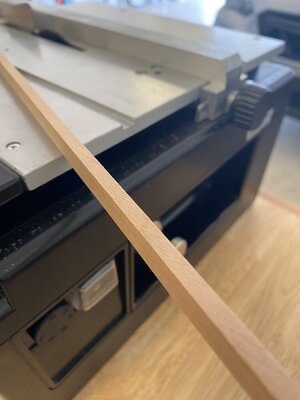
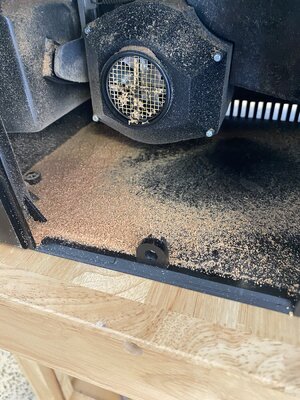
I just wanted to do a first impression of the MicroLux mini table saw that I bought. I am cutting cherry right now. The cuts have been very sharp and smooth. The picture below is how it cut with no finish sanding. The saw collects most all of the dust inside the saw. I will definitely have to get a vacuum to hook to the dust port .
Bill


- Joined
- Jun 17, 2021
- Messages
- 3,199
- Points
- 588

Nice saw. Lately I've been using mine with a slotting blade, which requires a spacer when mounted on the arbor And a correspondingly narrowed slot cut into one of the plexiglass table saw slot adapters to narrow the slot surrounding the blade. This can be achieved by mounting the plexiglass table saw slot adaptor over the lowered blade well below the plexiglass adaptor ,turning the saw on , and VERY SLOWLY raising the saw blade allowing the blade to cut a new slot into the adaptor. It is essential to do this a very little at a time. Otherwise the plexiglass will melt , fouling the blade and will shatter. This blade is very effective when cutting repeated narrow strips out of no more than about 1/8"thick material. It too cuts very cleanly.
Attaching the vacuum is noisy, but effective.
Pete
Attaching the vacuum is noisy, but effective.
Pete
Last edited:
Hello everyone. Thanks for looking in.
Hello Shota. That is good to hear about your saw.
Hello Peter. I am not sure if I know what a slotting blade is, but it sounds like it would be very useful.
Bill
Hello Shota. That is good to hear about your saw.
Hello Peter. I am not sure if I know what a slotting blade is, but it sounds like it would be very useful.
Bill
- Joined
- Jun 17, 2021
- Messages
- 3,199
- Points
- 588

It is a very narrow blade good for cutting narrow slots in wood ,or for slicing off narrow strips of wood repeatedly without wasting a lot of material. Any time a very narrow, discreet kerf is desired.(As in making strips for deck planks.) It is also good for cutting veneer or delicate thin wood without shattering, or shredding it. Also cutting battens, rubrails , or any similarly skinny and fragile strips of wood required on a model.
Micro Mark carries the blades and necessary accessories.
Micro Mark carries the blades and necessary accessories.
Last edited:
Hello everyone,
I've gotten a little work done. I work in my garage and it has been very as of late, so progress has been slow.
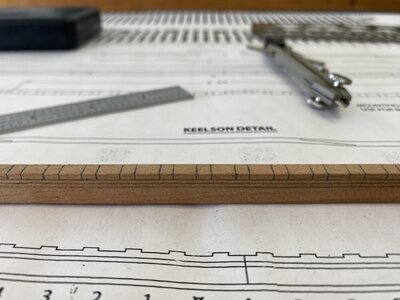
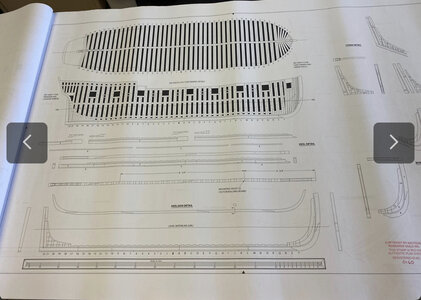
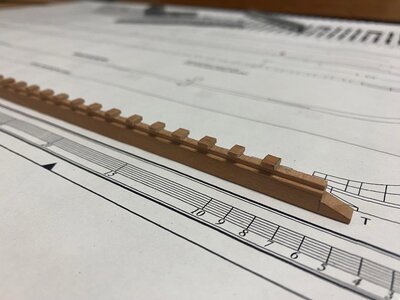
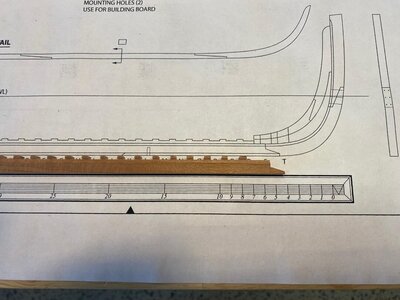
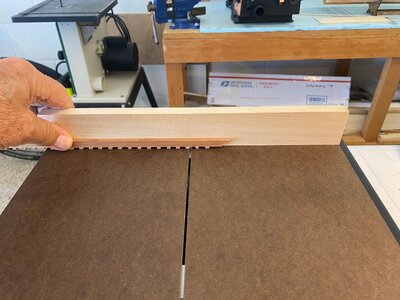
I have made some progress on the keel. I used my miniature table saw with a sliding table to cut the notches in the keel. I also cut the scarf in the forward end of the keel. I have some cleanup to do, but I am happy with my first attempt.
Bill


Thanks for the likes guys.
Good result - Bravo
I do not know the plans you are working with, but I have a question related to the shown excerpt of the drawing
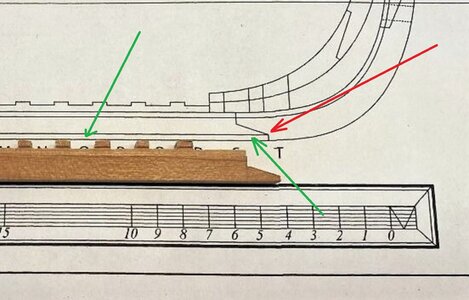
The green marked area is looking like the false keel ? - if yes I have my doubts, that the keel element would end in a point (red arrow) -> Is there maybe an error in the drawing? This question is only important, if you want to install a false keel also on your model - it is just a question of interest
I do not know the plans you are working with, but I have a question related to the shown excerpt of the drawing

The green marked area is looking like the false keel ? - if yes I have my doubts, that the keel element would end in a point (red arrow) -> Is there maybe an error in the drawing? This question is only important, if you want to install a false keel also on your model - it is just a question of interest
- Joined
- Jun 17, 2021
- Messages
- 3,199
- Points
- 588

Your part looks very well thought out and cleanly made in its execution. A complex part, with a lot of cuts to arrive at that complex shape. That took a lot of time and forethought. Time well spent in measuring repeatedly and careful layout before "cutting once". Nice work! Very instructive and a useful reminder to impatient guys like me to take the time to take all the time necessary to get it right the first time. Thanks for the reminder! Well done!
Pete
Pete
Hello everyone,
Thanks for the comments and encouragement. They are very helpful and welcome any time.
Hello Uwek. Yes you are correct. It is a false keel. I will be installing it into place.
I made a trial piece for the keel to get it right. I purchased extra wood knowing I would need it for my first POF. I will probably need to buy more.
Thanks, Bill
Hello Peter,
Thanks for the encouragement. It took me about a week to get the keel correct for me. I have never been a patient person, so this is a very enjoyable learning experience in many ways.
Bill
Thanks for the encouragement. It took me about a week to get the keel correct for me. I have never been a patient person, so this is a very enjoyable learning experience in many ways.
Bill
Hello Uwek and Tobias,
To make the keel, I cut the piece the entire height of the keel and false keel. I then cut the frame notches and the rabet. Next, I am going to cut off the bottom of the keel the thickness of the false keel and add the false keel. I think this will make it look correct.
Thanks, Bill
To make the keel, I cut the piece the entire height of the keel and false keel. I then cut the frame notches and the rabet. Next, I am going to cut off the bottom of the keel the thickness of the false keel and add the false keel. I think this will make it look correct.
Thanks, Bill
- Joined
- Jun 17, 2021
- Messages
- 3,199
- Points
- 588

Thanks for the detailed breakdown of the process, And the reminder to make tests and disposable mockups. You can F#@! up a lot of those before having to throw the final iteration into the bin! Again, a point well taken! 
Pete
Pete
Hello everyone,
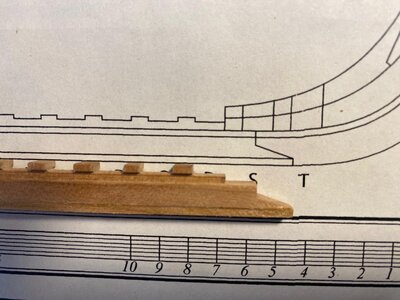
I was very happy to get the false keel in place without any problems. Then I noticed I built the keel wrong. When I sat the keel on the plans, I noticed that I made the rabbet in the wrong area. The way I made the keel was to cut the frame notches and just below the notches I cut the rabbet. The construction of the keel should be, the frame notches first. Below the notches is 1/16" of keel material and then the rabbet. Time to do over. Did I say I purchased extra wood. You can also see that I did not do a very good job getting the false keel aligned with the keel. I wasn't happy with that either.
Bill


