-

Win a Free Custom Engraved Brass Coin!!!
As a way to introduce our brass coins to the community, we will raffle off a free coin during the month of August. Follow link ABOVE for instructions for entering.
-

PRE-ORDER SHIPS IN SCALE TODAY!
The beloved Ships in Scale Magazine is back and charting a new course for 2026!
Discover new skills, new techniques, and new inspirations in every issue.
NOTE THAT OUR FIRST ISSUE WILL BE JAN/FEB 2026
You are using an out of date browser. It may not display this or other websites correctly.
You should upgrade or use an alternative browser.
You should upgrade or use an alternative browser.
De Zeven Provincien 1665 - 1.100, Fa. Seahorse (Tomasz Weremko)
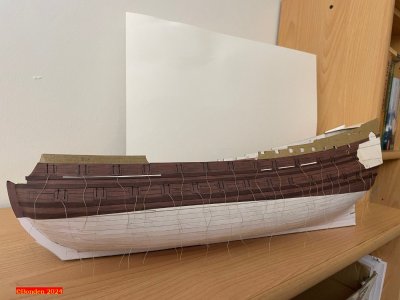
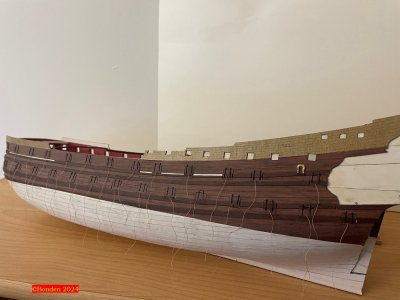
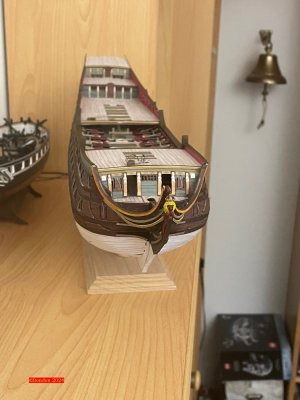
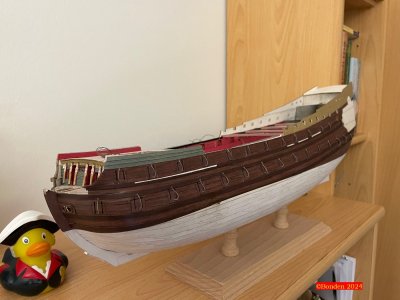
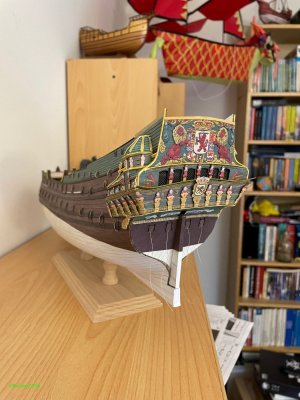
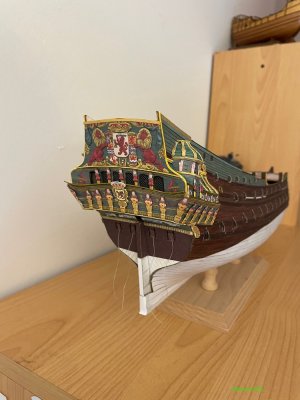
In Lelystad (Holland) in the Batavia shipyard you could admire the stern of the ZP in 1:1 for many years. And then I thought to myself: Bonden, you can do that too. Your ship is nowhere near ready for the transom to be added, but never mind - build it! At this point, a big thank you to Tomasz for having this great variant in his kit that allows you to build the transom in 3D.


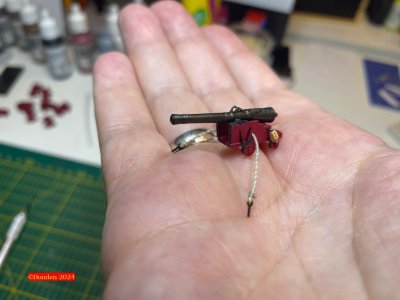
I have been working on the color scheme for the gun barrels. The guns were made of bronze back then. They were certainly cleaned a lot, and they probably had a certain patina. I experimented with different colors and finally got a result that I really like. This dark, dirty green color looks exactly like most of the cannon barrels you see in museums around the world.
And please don't look so critically at the gun carriage - it hasn't been painted and designed yet.
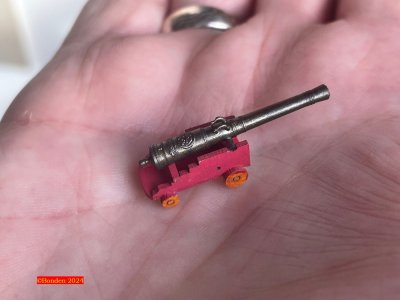
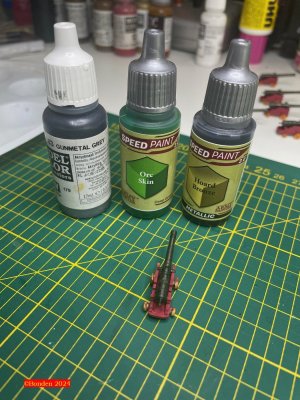
And what's more: the quality of the 3D gun barrels is excellent!


And please don't look so critically at the gun carriage - it hasn't been painted and designed yet.


And what's more: the quality of the 3D gun barrels is excellent!


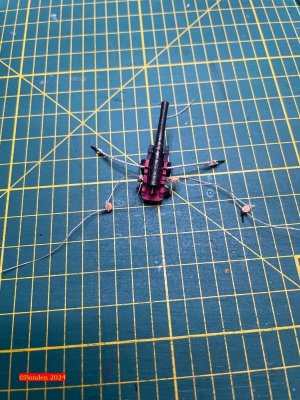
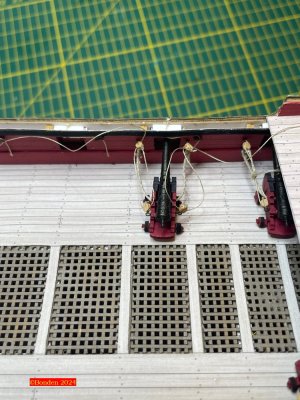
I started my first attempts at rigging the cannons today. The first gun on the left - it took me two hours. Then number 2 on the right - that was up and running in less than an hour. And it looks better too. I now have an idea of how it might look in the end everywhere (or where you can see the guns later). I think it's too much to show all the necessary ropes on this scale, so I'll make do with the broktau and the loading rigging. The tiny blocks (3/32'') are quite a challenge - threading a 0.1mm thick thread through the tiny holes is often very time-consuming...
But I still have a few places on the main deck where I can practise rigging the cannons, as you can only see half of the guns really well later on. But it has to look good at the end.
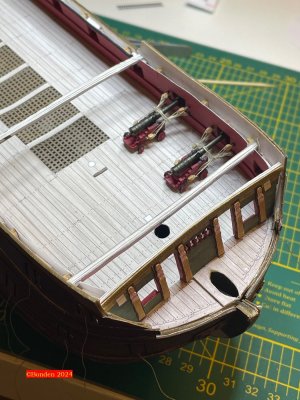
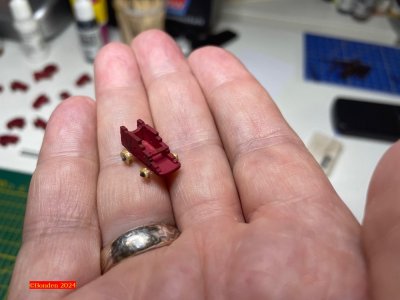
A nice bit of fun at the end: When building the gun carriages, the axles also had to be represented. I had absolutely no desire to roll up tiny strips of paper to make tiny cylinders. So I went to the bakery and bought myself a roll.
Now people in different places on this planet might be wondering what I'm trying to say. Well, I know from some of the trips I've made that not all countries have the variety of bread and rolls that we have here in Germany. So here's the explanation: we also have poppy seed rolls at the bakery - and the poppy seeds make wonderful axes! And I had a delicious breakfast beforehand.
But I still have a few places on the main deck where I can practise rigging the cannons, as you can only see half of the guns really well later on. But it has to look good at the end.


A nice bit of fun at the end: When building the gun carriages, the axles also had to be represented. I had absolutely no desire to roll up tiny strips of paper to make tiny cylinders. So I went to the bakery and bought myself a roll.
Now people in different places on this planet might be wondering what I'm trying to say. Well, I know from some of the trips I've made that not all countries have the variety of bread and rolls that we have here in Germany. So here's the explanation: we also have poppy seed rolls at the bakery - and the poppy seeds make wonderful axes! And I had a delicious breakfast beforehand.

Last edited:
Axles from poppy seeds? Are you sure? Don't you mean cannonballs?
I don't get it Bonden.
I don't get it Bonden.
@Ab Hoving
Oh, I didn't mean to confuse you, sorry. But I really mean axes made from poppy seeds. At the normal viewing distance, you can't see later on the model that there are “only” poppy seeds and not real axles. I first glue the seeds to the wheels and then paint them; the paint corrects some unevenness here.
Here is another photo:

Ah, now I get it. Brilliant solution!
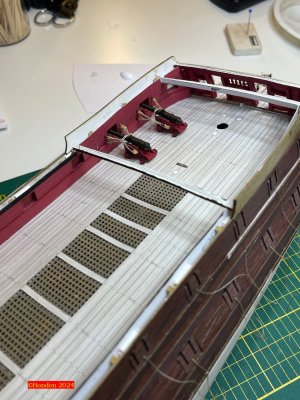
Hello everyone, here's another little update from my yard. I've done something for the look and neatly finished the many free-hanging ropes. They are called Pfortenreeps (oh, DeepL doesn't know how to translate that!). I attached the ones that lead into the visible areas of the main deck to small cleats on the inside.
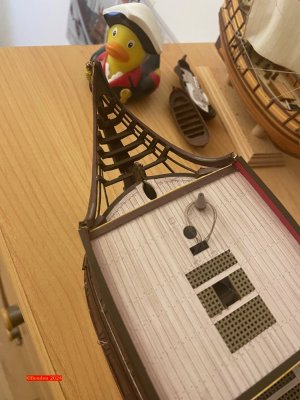
The forecastle deck is now fitted and I can continue with the cannons. The rigging is very time-consuming, but if it looks good in the end, the work will have been worth it. I'm attaching a few pictures to show you how I go about it.
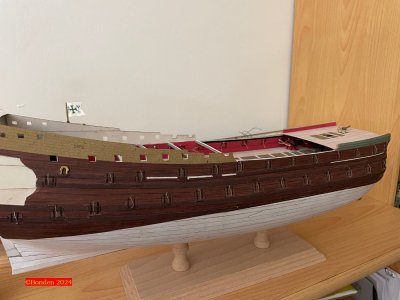
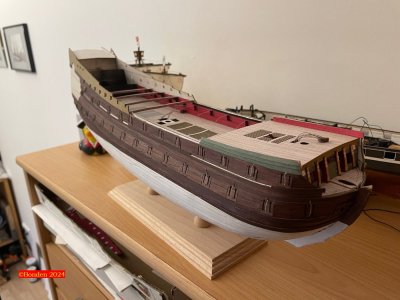
Oh yes - the first green parts of the outer planking are also on - I like this clinker construction method.
As you can see, the visit to the Batavia shipyard in Lelystad has motivated me enormously, and it's great fun to continue working on this model.
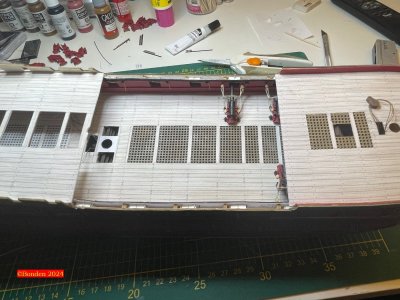


Every time I looked at the building instructions, I got stuck here:
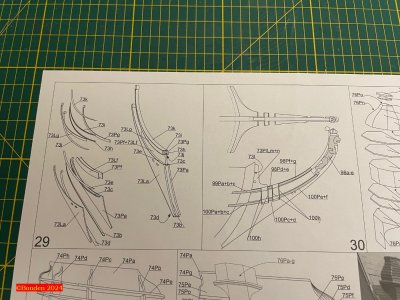
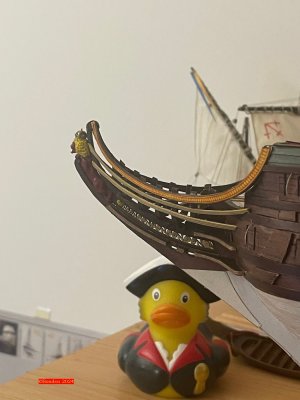
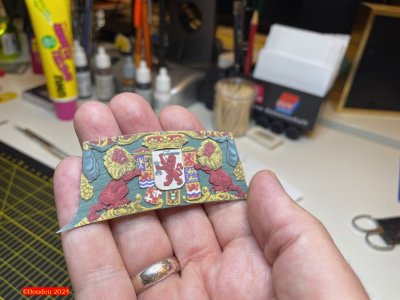
This is the supporting part of the whole knee of the head, (“Scheg” in German), and even though I'm not going to attach it now, I've been meaning to build it. I have to say, it was a real challenge! Two things were very helpful and improve the overall impression of this assembly enormously: the openwork centerpiece is built from four laser-cut parts, and the proud lion is available as a 3D print. And I love painting figures!
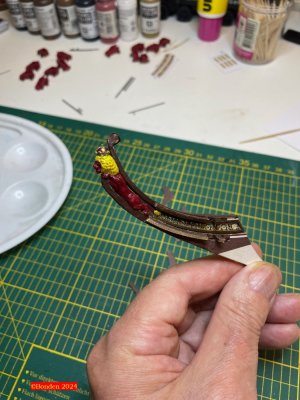
I'm happy with the result, and here I'm already holding the part where I want it to go later.
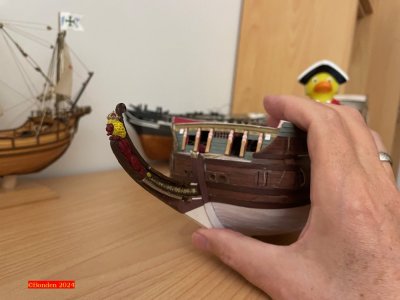
@0Seahorse The tassel of the lion's tail is too long and the inner distance between the two parts is too narrow. But as a model maker you (almost) always find a solution: I broke it off so that everything would fit, but then glued it onto the laser-cut part so that it wasn't noticeable at all.

This is the supporting part of the whole knee of the head, (“Scheg” in German), and even though I'm not going to attach it now, I've been meaning to build it. I have to say, it was a real challenge! Two things were very helpful and improve the overall impression of this assembly enormously: the openwork centerpiece is built from four laser-cut parts, and the proud lion is available as a 3D print. And I love painting figures!

I'm happy with the result, and here I'm already holding the part where I want it to go later.

@0Seahorse The tassel of the lion's tail is too long and the inner distance between the two parts is too narrow. But as a model maker you (almost) always find a solution: I broke it off so that everything would fit, but then glued it onto the laser-cut part so that it wasn't noticeable at all.
@0Seahorse
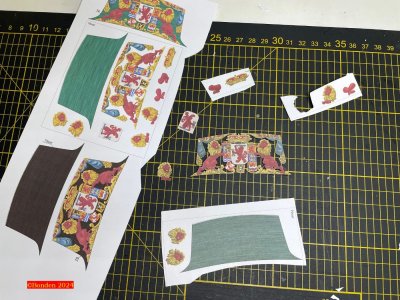
Hello Tomasz, I have a small problem: This is a photo of the parts for the outer planking in the upper area on the port side. What is missing on these parts are the markings for the piece ports to be cut out. These markings were on the starboard side.
Is there possibly an errata file for this? If not, I can do it that way, but it is helpful if the markings are on it.
Best regards
Bonden
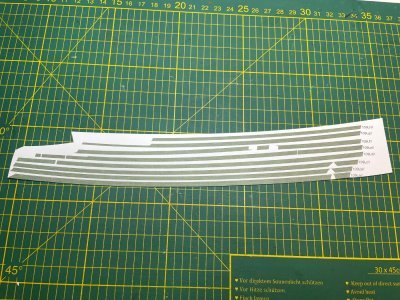

Help is on the way - thanks, Tomasz! 


@0Seahorse Hello Tomasz,
I need your help again, sorry. The construction of the galion is puzzling me. I don't know what to do with the parts 104. Somehow they correspond with the 103 parts, I realize that, but which one with which? I can't find a picture of parts 104 in the instructions, and the text in the written instructions doesn't help me either. I read that you should either use the 103 parts or the 104 parts, but that's probably a translation error, isn't it? Are there perhaps more pictures of your test build?
Thank you for helping!
Here is my current work status for the parts of the Galion:
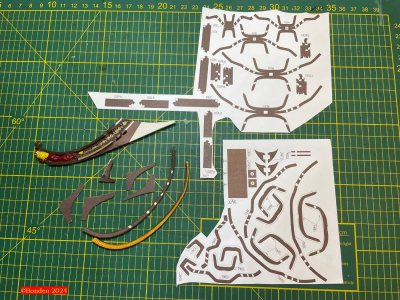

Hi Boden
Well, this part of the instructions really looks like I was expecting modelers to guess what was hiding in my head. Additionally, the markings (although correct) can also be confusing.
The brackets needed to glue the grating and side rails can be made in two ways. Either as in figure 46, by gluing together "empty" profiles from the appropriate 103 parts, or by gluing together the appropriate 104 parts glued to 1 mm cardboard, and then giving the edges the right bevels by cutting off the white areas with a knife and a file. In the case of part 104, at the end, you should glue the brackets with appropriate 104 strips to mask the cut and sanded edges.
And this is probably where the biggest embarrassment appears, because unfortunately parts 103 and the interchangeable parts 104 have no logical numbering. Parts 103e, g, i, k, l are interchangeable with parts 104a-b, 104c-d, 104e-f, 104g-h, 104i-j respectively. You use the remaining parts 103 (all P/L and horizontal beams 103f,h,j) regardless of the version chosen.
In other words, instead of complicated and difficult parts 103 (which resemble 4-legged spiders) you can glue them from parts 104 in the form of thick layers of cardboard, make appropriate chamfers and mask the edges with stripes (or paint). In my model I used parts 103, but many modelers suggested to make a simpler version from thick cardboard. (I am personally not sure if such a version is simpler, but I agreed with the modelers' expectations)
I've searched the photo gallery and unfortunately I don't have any others, but maybe this construction render will help.
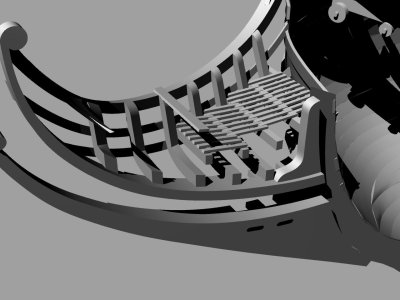
Greetings
Tomek
Well, this part of the instructions really looks like I was expecting modelers to guess what was hiding in my head. Additionally, the markings (although correct) can also be confusing.
The brackets needed to glue the grating and side rails can be made in two ways. Either as in figure 46, by gluing together "empty" profiles from the appropriate 103 parts, or by gluing together the appropriate 104 parts glued to 1 mm cardboard, and then giving the edges the right bevels by cutting off the white areas with a knife and a file. In the case of part 104, at the end, you should glue the brackets with appropriate 104 strips to mask the cut and sanded edges.
And this is probably where the biggest embarrassment appears, because unfortunately parts 103 and the interchangeable parts 104 have no logical numbering. Parts 103e, g, i, k, l are interchangeable with parts 104a-b, 104c-d, 104e-f, 104g-h, 104i-j respectively. You use the remaining parts 103 (all P/L and horizontal beams 103f,h,j) regardless of the version chosen.
In other words, instead of complicated and difficult parts 103 (which resemble 4-legged spiders) you can glue them from parts 104 in the form of thick layers of cardboard, make appropriate chamfers and mask the edges with stripes (or paint). In my model I used parts 103, but many modelers suggested to make a simpler version from thick cardboard. (I am personally not sure if such a version is simpler, but I agreed with the modelers' expectations)
I've searched the photo gallery and unfortunately I don't have any others, but maybe this construction render will help.

Greetings
Tomek
Well, it has worked a few times with this model.Well, this part of the instructions really looks like I was expecting modelers to guess what was hiding in my head.
Your explanation clears up my confusion, thank you very much.
 Then I'll see which option I choose. Cardboard that is 1mm or thicker and cutting thin strips isn't necessarily my favorite hobby either - let's see how I manage it.
don't forget to show us the resultsWell, it has worked a few times with this model.
Your explanation clears up my confusion, thank you very much.Then I'll see which option I choose. Cardboard that is 1mm or thicker and cutting thin strips isn't necessarily my favorite hobby either - let's see how I manage it.

Don't worry, I won't forget that. Here are the first results.don't forget to show us the results
I opted for the pure 103 variant - although it's not that “pure”, I cheated a bit.
The spider-shaped parts became the frames for the Galion.
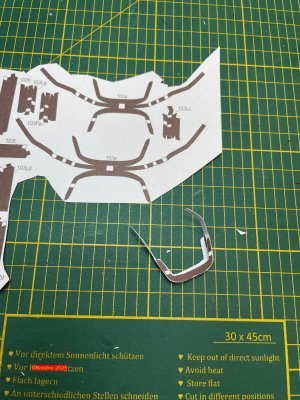
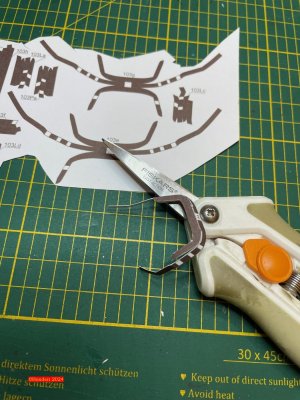
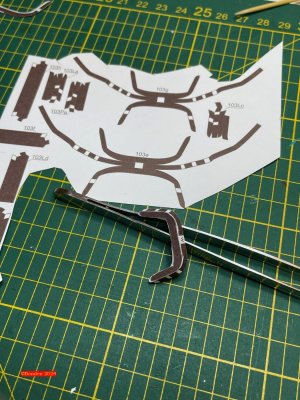
And now my new toy comes into play: I've bought myself a 3D printer. What I can't do yet is all this CAD stuff. But I tried, and at least I managed to get narrow strips, which the printer then produced for me. These are used to make the crossbars that you have to build from parts 103j, f and h. In plastic-green they still look like a foreign body, but once they are painted, they look as intended.
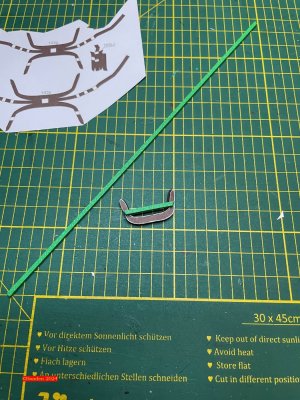
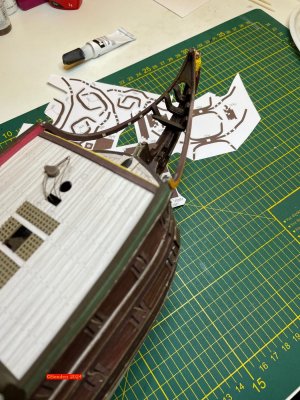
I am anything but a cardboard purist, and if there are other ways to build a part better, I use them. Let's see how the 3D printer can help me in the future. Yes, with the many small parts 106 for example! I've already printed out matching strips.
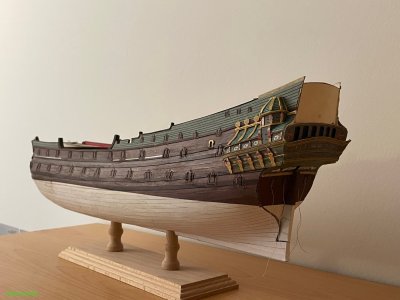
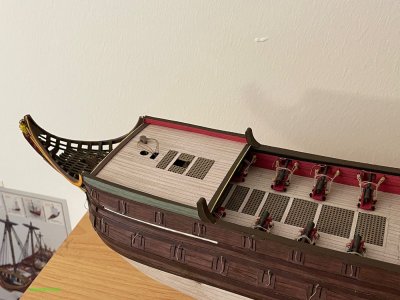
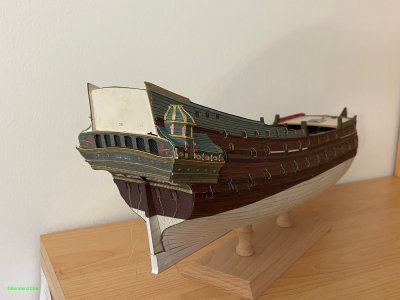
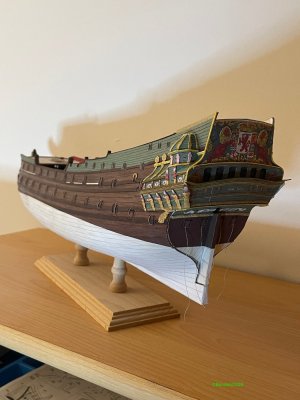
Ahoy everyone, I'm still here! It's been quiet at my shipyard for a long time – but that wasn't the quiet of a graveyard, it was an intense creative break. Among other things, I used this time to move from theory back into practice: My lovely wife and I spent a week sailing under palm trees in the Caribbean on the two-masted schooner Twister, and then we celebrated our first wedding anniversary in Martinique. And I think that alone is worth a break from the shipyard. I invite you to take a look here. (Even though the site is only in German, I think it's worth taking a look at this particular travel report.)
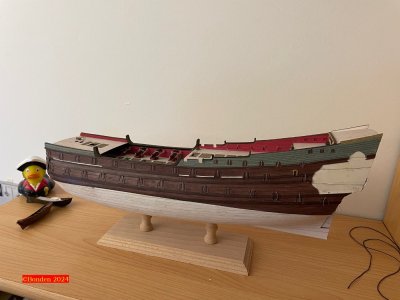
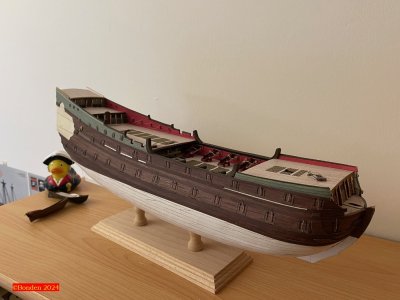
Now we're finally moving forward again. For the past few days, there has been busy work going on at my shipyard almost every day. The following pictures show my progress in stages:
Translated with DeepL.com (free version)
Now we're finally moving forward again. For the past few days, there has been busy work going on at my shipyard almost every day. The following pictures show my progress in stages:


Translated with DeepL.com (free version)
The noble Dutchwoman's bottom is becoming increasingly attractive. Therefore, it is important to give her a little more defence against unwanted advances. 
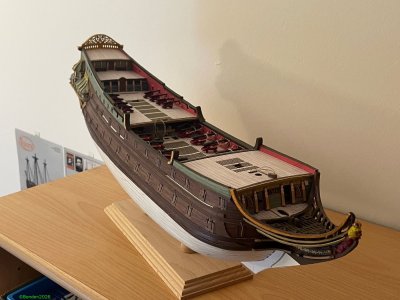
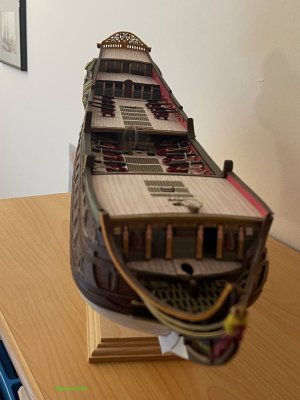
I decided to build the small 6-pounders using only the troot brail and not the complete rigging. Even my smallest blocks and thinnest ropes seemed too bulky for these tiny guns – on this scale, less is often more. The remaining guns will arrive later.


I decided to build the small 6-pounders using only the troot brail and not the complete rigging. Even my smallest blocks and thinnest ropes seemed too bulky for these tiny guns – on this scale, less is often more. The remaining guns will arrive later.


