Deck Planking repair needed

Joined
Aug 1, 2014
Messages
253
Points
128

Location
Tennessee
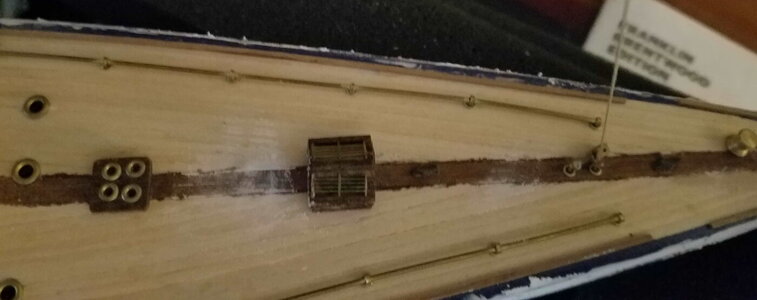
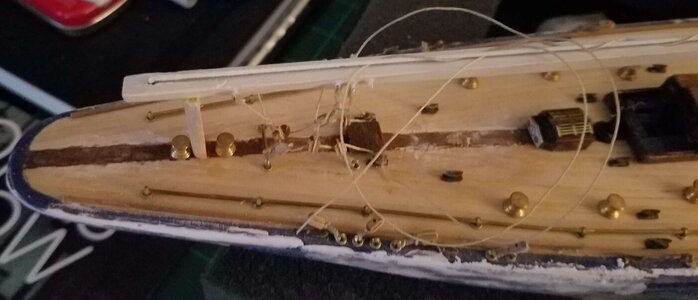
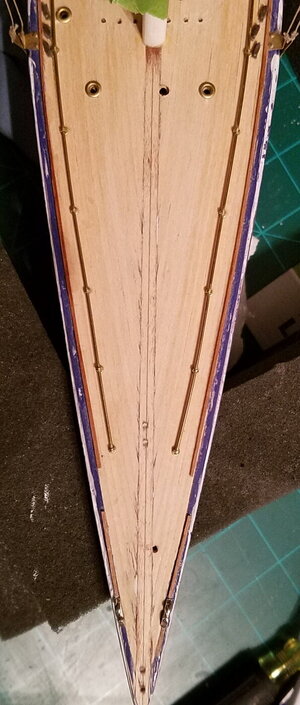
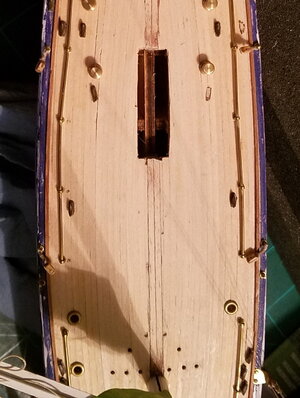
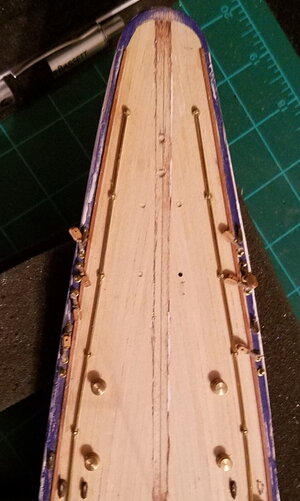
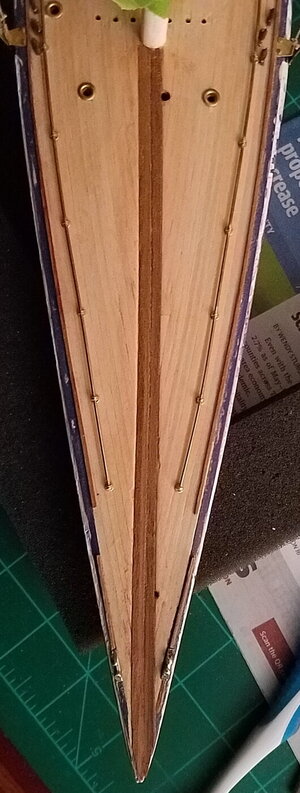
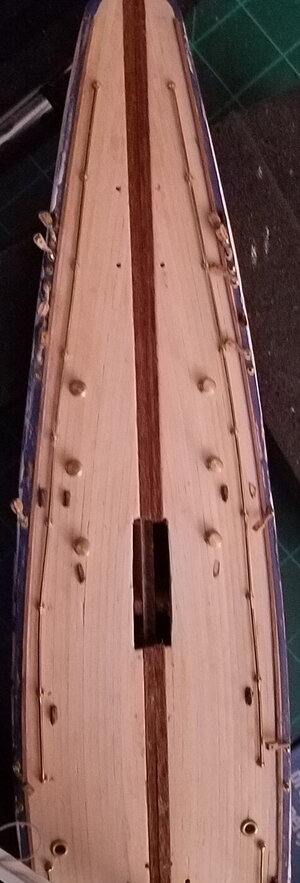
Can anyone suggest a way for me to repair the deck planking on the Amati J-class Endeavor? I tried staining the planks running down the center a number of years back when I first started building this model. The stain seeped off the two middle planks and there were also some gaps I was trying to fix with putty. Now I think I may have messed it up beyond repair. At least for my skill level.
Thank you,
Jeff
 

Attachments

  • deck at Bow.jpg
    deck at Bow.jpg
    87.8 KB · Views: 87
  • Deck at stern.jpg
    Deck at stern.jpg
    112.5 KB · Views: 88
Jeff, the deck is also varnished, I think. Then you need to remove the superstructures from the deck and clean everything up. Another option is to try to wash the varnish and paint with a solvent. But there will probably be a lot of dirty work. I would do 1 option.
 
Another option I would try is to use very thin wood strips to apply another, clean, layer of planking. It will take some fitting and cutting so patience is called for. Use very thin wood strips to avoid over-thick planking. These veneer type wood strips are available at hobby and modeling wood supply web sites. You can try to remove any deck structures you can, but try not to damage them or you may need to rebuild. Better to leave in place and fit the thin planks around the structures. Plan B…paint the existing deck planks with a very light grey acrylic. This simulates a salt washed deck while using paint to cover the mistakes. I have used a light grey paint a number of times.
 
I have currently removed the deck hardware that was near the center line, except for the mast. I am sanding down the deck to see what it looks like.
 
I ended up removing more deck hardware and then sanding to see how it looks.
 

Attachments

  • Bow being sanded.jpg
    Bow being sanded.jpg
    169.1 KB · Views: 30
  • midships sanded.jpg
    midships sanded.jpg
    310.3 KB · Views: 30
  • Stern sanded.jpg
    Stern sanded.jpg
    191.7 KB · Views: 30
Jim, can you point me to any pictures of what using the light gray acrylic might look like?

Thank you both.
 
Jim, can you point me to any pictures of what using the light gray acrylic might look like?

Thank you both.
Just saw your note…been traveling…I think this photo might work…let me know if you need a close up…note how the decks look almost white…but they are a flat light grey. This a photo of a stylized pirate ship I did for my daughter last year based on the Black Pearl.


324E7EE1-9085-4648-80CD-EB135D3E7C48.jpeg
 
Last edited:
Thank you for the pics. Here is what I ended up doing. I removed all deck furniture from the area. I chiseled out the middle section and sanded the slot. I then put down some darker walnut colored strips. I am now sanding that down.
 

Attachments

  • Replanked bow.jpg
    Replanked bow.jpg
    155.4 KB · Views: 9
  • Replanked stern.jpg
    Replanked stern.jpg
    115.2 KB · Views: 9
The repairs will make for nice looking accent in deck down the center.

Well done so far, now to finish and reinstall the deck furniture!

The other Kurt!
 
Another option I would try is to use very thin wood strips to apply another, clean, layer of planking. It will take some fitting and cutting so patience is called for. Use very thin wood strips to avoid over-thick planking. These veneer type wood strips are available at hobby and modeling wood supply web sites. You can try to remove any deck structures you can, but try not to damage them or you may need to rebuild. Better to leave in place and fit the thin planks around the structures. Plan B…paint the existing deck planks with a very light grey acrylic. This simulates a salt washed deck while using paint to cover the mistakes. I have used a light grey paint a number of times.
best and easiest way
 
Back
Top