





- Joined
- Mar 20, 2026
- Messages
- 59
- Points
- 78

Hello Everyone,
My son started an Eduard’s FW 190 A-5 Light Fighter in 1/48 scale before COVID. But since then he only completed a couple of sub units before he stopped and the kit sat for 6 years. He purchased the Big Ed accessories that included the engine, panels, flaps, seat belts, and instrument panels. He had cemented the piston portions together and bent the flaps. So there will be no unboxing other than the boxes themselves.
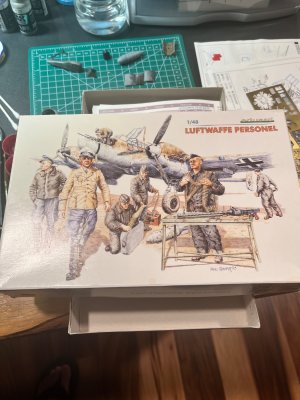
I found a BMW 327 cabriolet in 1/48 scale at a cheap price with a KA accessories for the car for the same price as just one kit. So… Priller’s car and plane it is. But I didn’t want to just do the same famous scene. Plus finding the figures to replicate the scene is a journey in itself. So the diorama I am creating will be in July 1943 instead of June 1943 when the photo was taken. Same airfield (so I need to make a WW2 Western European tarmac). The plane has seen a lot of combat in the month of June and July as the Americans ramp up their bombing strategy.
I will have his car at one side and the plane both pointing in a V. Priller figure will be in the center with the mechanics working on the plane, conducting the next maintenance and the panels are open and the engine exposed. The plane will have “some” weathering but more dirty than anything (Priller being the Commander of JG 26 in France at this time, his plane was well looked after).
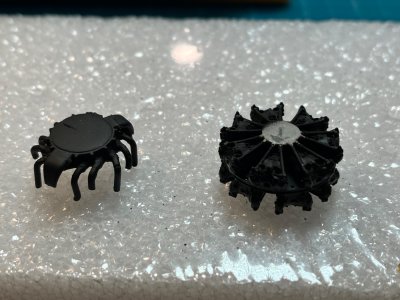
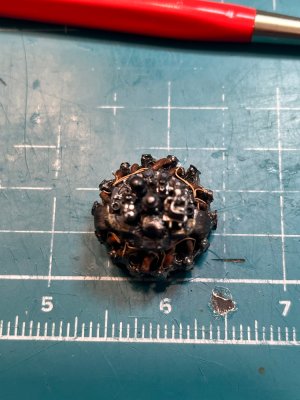
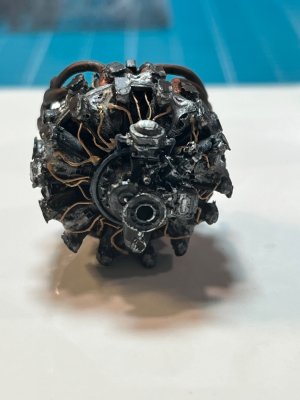
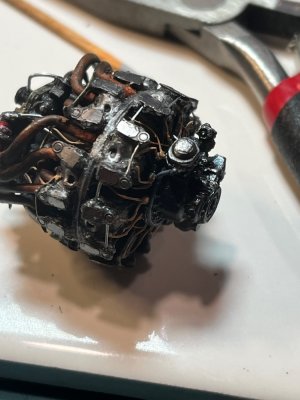
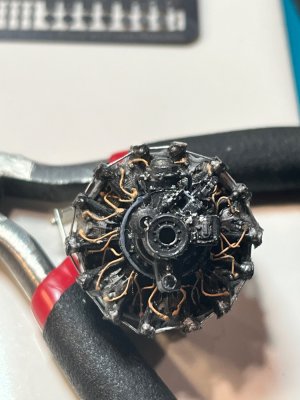
I will start with the BMW 801 engine sub unit. There were some complications with the piece that my son did was squashed and needed some repairs. The other issue was that the cylinder parts were cemented together without adding the appropriate accessory PE pieces. I separated the pieces and scratch built some of the exhaust pipes that were damaged. Then I started installing parts, but I found the casting of the cylinder heads was not up to Eduard’s usual high quality detailing. Luckily, I have some extra PE parts that mimic the top of the cylinder heads and had the realistic engineering look.
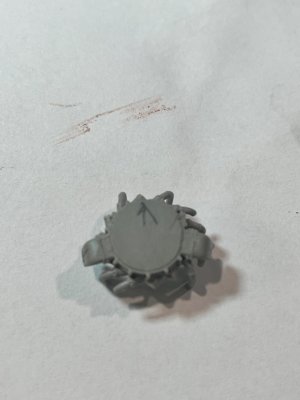
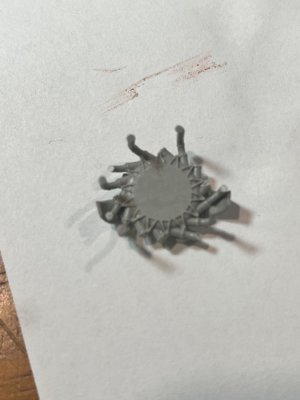
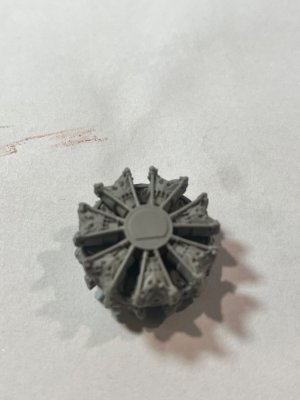
I painted the base pieces in NATO Black and then with aluminum drybrush the engine pieces. I wanted the darker vibe with the black because the BMW 801 engine notoriously leaked oil like crazy.
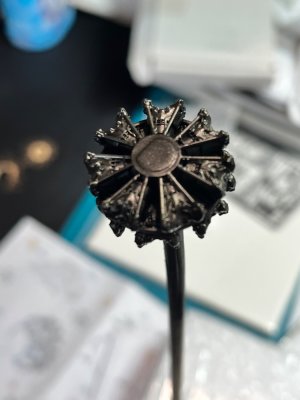
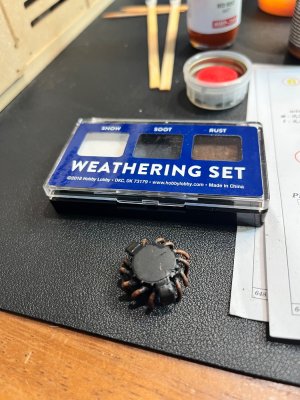
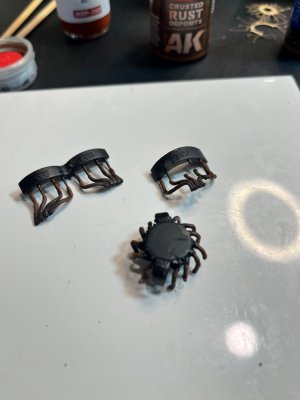
I used AK interactive rust paint on the exhaust pipes after laying a base red/brown coat. I finished off with rust colored and cordite like soot weathering powder for texture as those exhaust pipes reach super high temps performing high speed maneuvers in the aerial combat arena.
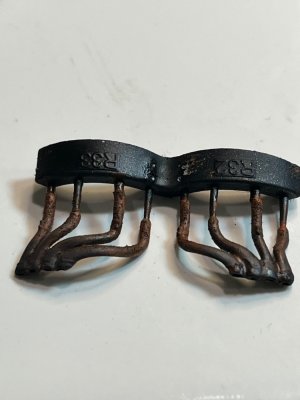
Then I adding the rest of the resin and PE parts to finish out the engine. Instead of using the flat “pipes” that connected the heads and its supports brackets that was integrated into the engine, I substituted both .20 mm and .30 mm metal wiring to replace the flat pieces. I also added some extra wiring with the engine assembly. Connecting items like the fuel pump and fire extinguishers lines to the heads.
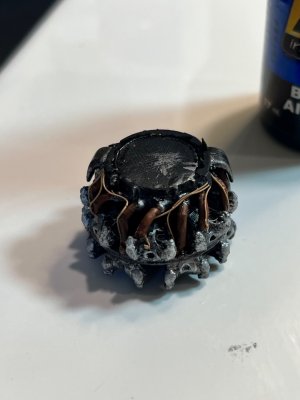
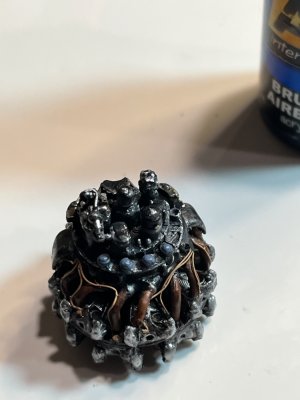
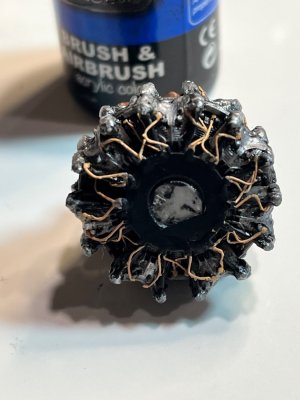
I finished the final assembly and here we are
Next will be the cockpit, flaps, and other sub units before bringing everything together.
More later and Happy Modeling
View attachment 642406
My son started an Eduard’s FW 190 A-5 Light Fighter in 1/48 scale before COVID. But since then he only completed a couple of sub units before he stopped and the kit sat for 6 years. He purchased the Big Ed accessories that included the engine, panels, flaps, seat belts, and instrument panels. He had cemented the piston portions together and bent the flaps. So there will be no unboxing other than the boxes themselves.
I found a BMW 327 cabriolet in 1/48 scale at a cheap price with a KA accessories for the car for the same price as just one kit. So… Priller’s car and plane it is. But I didn’t want to just do the same famous scene. Plus finding the figures to replicate the scene is a journey in itself. So the diorama I am creating will be in July 1943 instead of June 1943 when the photo was taken. Same airfield (so I need to make a WW2 Western European tarmac). The plane has seen a lot of combat in the month of June and July as the Americans ramp up their bombing strategy.
I will have his car at one side and the plane both pointing in a V. Priller figure will be in the center with the mechanics working on the plane, conducting the next maintenance and the panels are open and the engine exposed. The plane will have “some” weathering but more dirty than anything (Priller being the Commander of JG 26 in France at this time, his plane was well looked after).
I will start with the BMW 801 engine sub unit. There were some complications with the piece that my son did was squashed and needed some repairs. The other issue was that the cylinder parts were cemented together without adding the appropriate accessory PE pieces. I separated the pieces and scratch built some of the exhaust pipes that were damaged. Then I started installing parts, but I found the casting of the cylinder heads was not up to Eduard’s usual high quality detailing. Luckily, I have some extra PE parts that mimic the top of the cylinder heads and had the realistic engineering look.
I painted the base pieces in NATO Black and then with aluminum drybrush the engine pieces. I wanted the darker vibe with the black because the BMW 801 engine notoriously leaked oil like crazy.
I used AK interactive rust paint on the exhaust pipes after laying a base red/brown coat. I finished off with rust colored and cordite like soot weathering powder for texture as those exhaust pipes reach super high temps performing high speed maneuvers in the aerial combat arena.
Then I adding the rest of the resin and PE parts to finish out the engine. Instead of using the flat “pipes” that connected the heads and its supports brackets that was integrated into the engine, I substituted both .20 mm and .30 mm metal wiring to replace the flat pieces. I also added some extra wiring with the engine assembly. Connecting items like the fuel pump and fire extinguishers lines to the heads.
I finished the final assembly and here we are
Next will be the cockpit, flaps, and other sub units before bringing everything together.
More later and Happy Modeling
View attachment 642406
Last edited: