- Joined
- Dec 14, 2021
- Messages
- 370
- Points
- 238

I thought it might be helpful to anyone new to FDM (filament) 3D printing to show the value of using a filament dryer. When I began 3D printing I would regularly become bemused, confused and maddened when I'd load a brand new spool of filament, print something beautifully, then go to reprint the next day only to get garbage. I spent hours and hours fiddling with the slicer settings, taking advice from anyone and everyone on the web to change this or that parameter, really just chasing my tail.
I then bought a filament dryer and my FDM printing experience changed overnight. On the very rare occasions when I have a sticking failure or get spaghetti, the first thing I do is re-dry that reel because it almost always immediately fixes the problem. I had previously tried drying my filaments in the oven, using the lowest possible setting, only to semi-fuse them, so I'd recommend skipping that learning exercise! I use the dryer all the time i.e. I keep it running while printing. As I have two FDM's and sometimes have both running simultaneously, I have two dryers; one is the basic Sunlu S1, the other is the more expensive Creality Space Pi. While the Sunlu is okay, the Creality is better as it tells you what the humidity is inside the box, so you get a good idea whether your filament is dry enough for printing. Anything below about 20 % humidity is good.
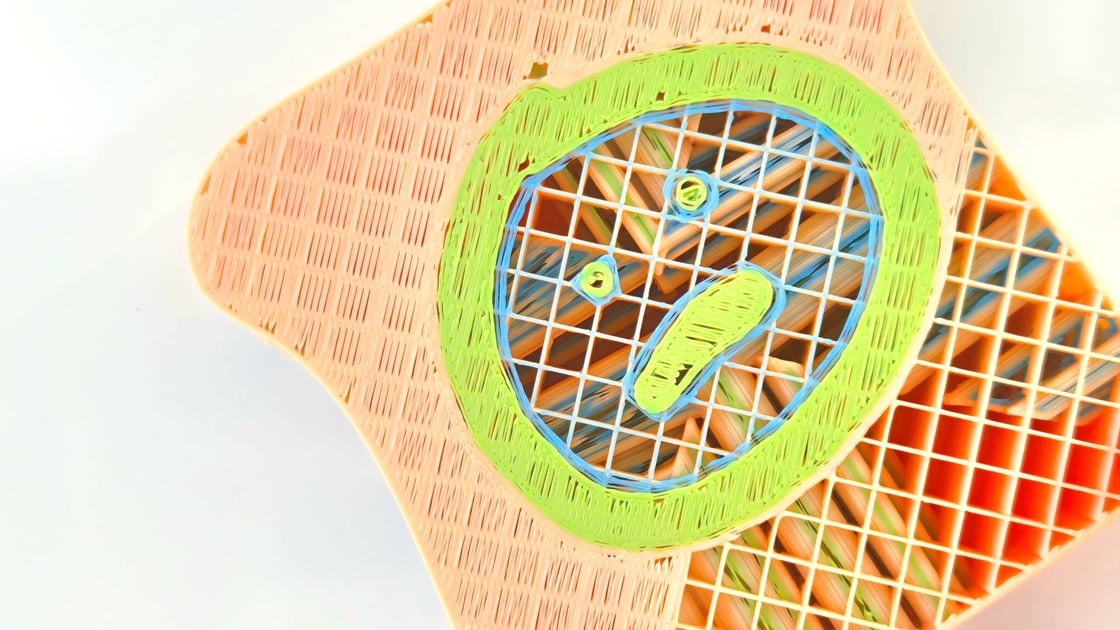
On to the illustration. This is a quick'n'dirty tool I needed and I figured on using up the leftovers of a roll of PLA than has been sitting around for months if not years. It's sliced for a quick print, I didn't need a fine finish. I didn't dry it out first, largely to see whether storing part-used reels in an airing cupboard does anything useful. It doesn't. So, on the right, un-dried filament, on the left, the same after about an hour of pre-drying.

I then bought a filament dryer and my FDM printing experience changed overnight. On the very rare occasions when I have a sticking failure or get spaghetti, the first thing I do is re-dry that reel because it almost always immediately fixes the problem. I had previously tried drying my filaments in the oven, using the lowest possible setting, only to semi-fuse them, so I'd recommend skipping that learning exercise! I use the dryer all the time i.e. I keep it running while printing. As I have two FDM's and sometimes have both running simultaneously, I have two dryers; one is the basic Sunlu S1, the other is the more expensive Creality Space Pi. While the Sunlu is okay, the Creality is better as it tells you what the humidity is inside the box, so you get a good idea whether your filament is dry enough for printing. Anything below about 20 % humidity is good.
On to the illustration. This is a quick'n'dirty tool I needed and I figured on using up the leftovers of a roll of PLA than has been sitting around for months if not years. It's sliced for a quick print, I didn't need a fine finish. I didn't dry it out first, largely to see whether storing part-used reels in an airing cupboard does anything useful. It doesn't. So, on the right, un-dried filament, on the left, the same after about an hour of pre-drying.