Joe, I needed that bit of encouragement, Thanks!! I'm going to keep plugging away at this one but I need to save the pennies and buy a good starter kit. That way I can put all the good advice and theory to use and see how these things should really be built.
-

Win a Free Custom Engraved Brass Coin!!!
As a way to introduce our brass coins to the community, we will raffle off a free coin during the month of August. Follow link ABOVE for instructions for entering.
-

PRE-ORDER SHIPS IN SCALE TODAY!
The beloved Ships in Scale Magazine is back and charting a new course for 2026!
Discover new skills, new techniques, and new inspirations in every issue.
NOTE THAT OUR FIRST ISSUE WILL BE JAN/FEB 2026
You are using an out of date browser. It may not display this or other websites correctly.
You should upgrade or use an alternative browser.
You should upgrade or use an alternative browser.
hello Ron0909, this is a very interesting project that you are making, first I did not understand exactly what you were doing, I think this was because of the photo of shipyard (I first thought it was a cardboard kit) but by rereading your first post too good I saw that it is a wooden scratch construction (sorry but I'm a bit slow in understanding jajajajaja).
Unfortunately, I will never be able to make anything like that, because I do not have the slightest idea of how to do it from Corel drow or anything like that.
and to my knowledge there is no company here with such a lacer printer.
I will keep track of your project because it looks very instructive
Greetings Ron
Willy
Willy, thanks for watching  As long as you have a scanner and a regular letter size - a4 printer, it will work, The way I did it was to trace the formers (bulkheads in ship speak) in Corel Draw after scanning the original. You can use any vector based drawing program such as Adobe Illustrator or the free Inkscape as well. Once you have the bulkheads traced, you can enlarge or reduce them to any size you like without loss of quality. Should you have access to a laser cutter, it can read those vector based drawings and then you are only limited to the size of the plywood sheet that the laser can handle. If you wanted to give it a try I'd be more than happy to help out.
Here we go my friends, the continuing saga of 'How not to do things and especially, not 3.5 times over'
It's been a long time since I glued that pile of strips to Bellona and for some reason I had a hard time getting this wee ship planked. The first side
was done literally 3.5 times before I got it only OK. Thankfully the second side went a lot smoother. Excuse the images as my lighting is terrible
and I'm a really bad photographer!
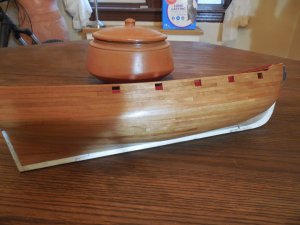
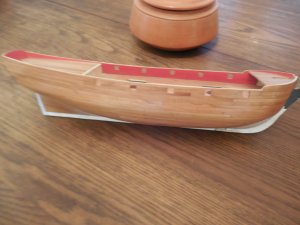
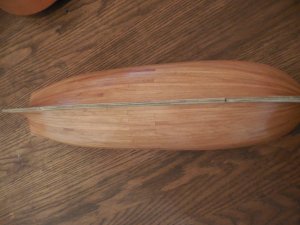
Before I finished the first side, I had decided to lay down the wales using the same veneer strips I was using, only painted black and 3 layers deep.
This I think really looked terrible so off it came. Here is a pic of what it was about before that got ripped away.The picture doesn't look so bad but can you remember that old saying 'nice from far but far from nice'?
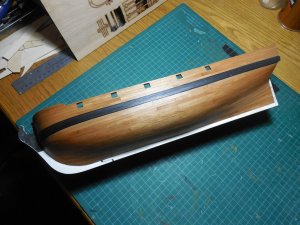
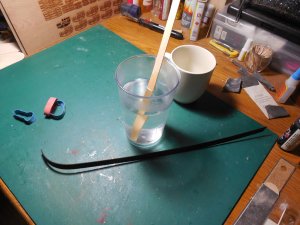
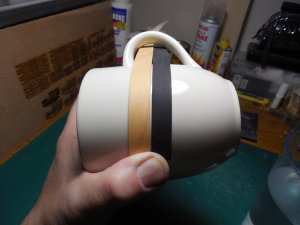
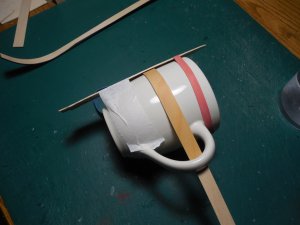
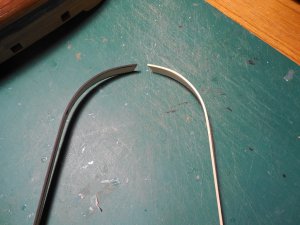
Anyways, long story short I created the wales from a single sheet of basswood. I know it isn't really correct but to me it looked better. I have some small burnishing tools that I might use to 'draw' in the plank lines. The following is a 'shoemaker's wale bending apparatus'. Surprisingly, it worked out ok
And finally, wales on! (but still in need of a trim). I wish my son would get rid of that darn dummy! Every time I turn around I see that thing in my peripheral vision and it makes me jump!
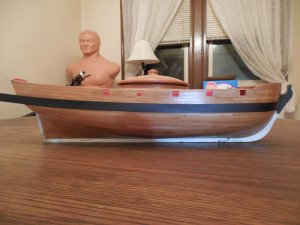
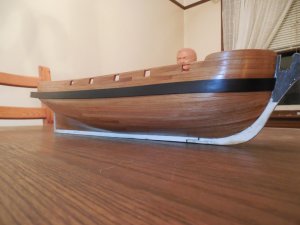
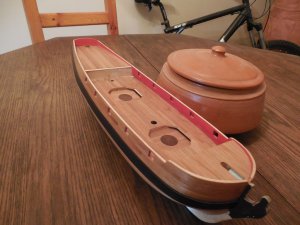
It's been a long time since I glued that pile of strips to Bellona and for some reason I had a hard time getting this wee ship planked. The first side
was done literally 3.5 times before I got it only OK. Thankfully the second side went a lot smoother. Excuse the images as my lighting is terrible
and I'm a really bad photographer!


Before I finished the first side, I had decided to lay down the wales using the same veneer strips I was using, only painted black and 3 layers deep.
This I think really looked terrible so off it came. Here is a pic of what it was about before that got ripped away.The picture doesn't look so bad but can you remember that old saying 'nice from far but far from nice'?

Anyways, long story short I created the wales from a single sheet of basswood. I know it isn't really correct but to me it looked better. I have some small burnishing tools that I might use to 'draw' in the plank lines. The following is a 'shoemaker's wale bending apparatus'. Surprisingly, it worked out ok


And finally, wales on! (but still in need of a trim). I wish my son would get rid of that darn dummy! Every time I turn around I see that thing in my peripheral vision and it makes me jump!


Very nice work planking looks awesome and everything looks nice and clean. lines are crisp this is a good looking build so far brother
Sharp and clean, just keep going!
Greetings Ron,
I am a bit late to the party, but very interesting and very nice build
best,
Jim
I am a bit late to the party, but very interesting and very nice build
best,
Jim
It's looking good Ron, I like your idea of using Mugs (Tea Cups) to bend planks, if you filled them with boiling water it might help dry out a damp plank and hold the bend.
Cheers Andy
Cheers Andy
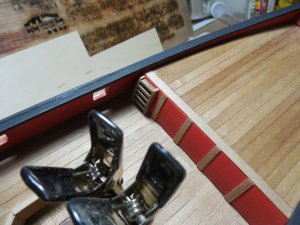
Thanks so very much for the kind words and encouragement! The last couple of days have turned this little bit of wood into something that is starting to resemble a ship (sort of  ). I've rebuilt that silly curved bulkhead again. I think I got it right this time as the curves in the ladders (yet to be installed) match up pretty well. The trim running down the length of the ship was made of some walnut and painted black after abusing it a tad with my new Microshapers.
I am happy to say that those little scrapers hold up well and they do a really nice job. When I get the mortar tubs in I am going to follow Jim's tutorial and make some of my own mouldings to close them in nicely with the deck. Just a few more pics to say yeah...I'm still grinding away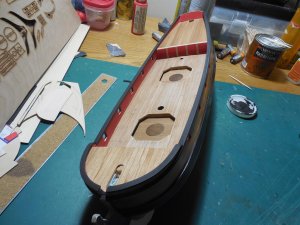
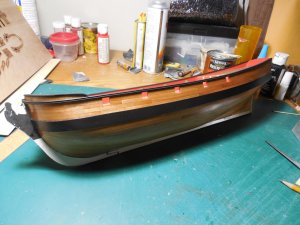
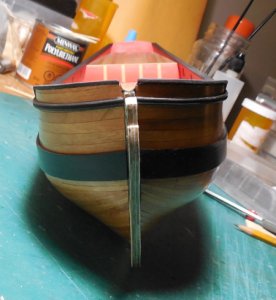
I am happy to say that those little scrapers hold up well and they do a really nice job. When I get the mortar tubs in I am going to follow Jim's tutorial and make some of my own mouldings to close them in nicely with the deck. Just a few more pics to say yeah...I'm still grinding away


Outstanding job.
Thanks Mike! You just can't see her close up like I canOutstanding job.
Hi all, just a few pics to let you know I'm still banging away slowly. I managed to get the octagonal mortar pit walls in place and added a bit of trim around one of them. I can't feel my thumbs after scraping away with my micro shapers once again. I was going to use basswood for the trim because of ease but figured lets do it properly and use some cherry. Cutting anything with my stupid little aluminum hobby miter box and razor saw is a challenge at best. I created the original octagons from 1/8 cherry and then veneered both inside and out to increase the thickness to what was needed. I've also added the first of 3 ladders on deck. I'll probably end up taking this one out and do a bit more work on it as it looks a bit chunky to me.
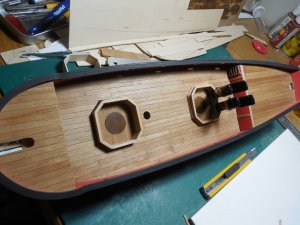
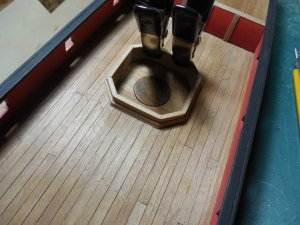
Hallo ron0909,
I want to send you all the best for your Birthday - Happy Birthday
I want to send you all the best for your Birthday - Happy Birthday
Happy birthday !!
Happy Birthday, Ron!! Wishing you the best!! 

Happy Birthday, hope you had a good day!
Happy Birthday Brother


