-

Win a Free Custom Engraved Brass Coin!!!
As a way to introduce our brass coins to the community, we will raffle off a free coin during the month of August. Follow link ABOVE for instructions for entering.
-

PRE-ORDER SHIPS IN SCALE TODAY!
The beloved Ships in Scale Magazine is back and charting a new course for 2026!
Discover new skills, new techniques, and new inspirations in every issue.
NOTE THAT OUR FIRST ISSUE WILL BE JAN/FEB 2026
You are using an out of date browser. It may not display this or other websites correctly.
You should upgrade or use an alternative browser.
You should upgrade or use an alternative browser.
So you have TWO chances... but only two. 
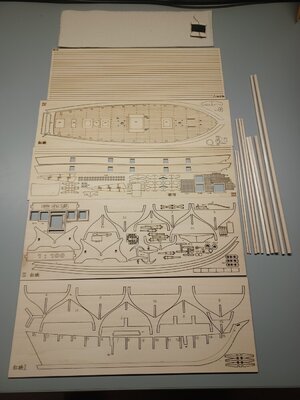
I have this kit too. Let's see what we can do with it.

I have this kit too. Let's see what we can do with it.
- Joined
- Jun 24, 2023
- Messages
- 44
- Points
- 78

You Lucky Bast.... ,
,
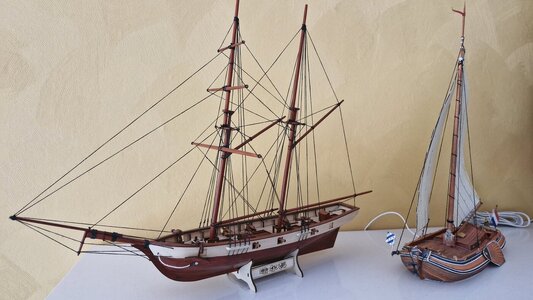
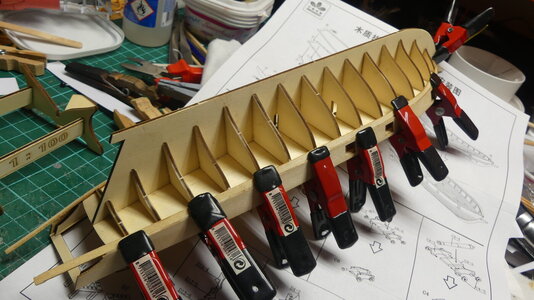
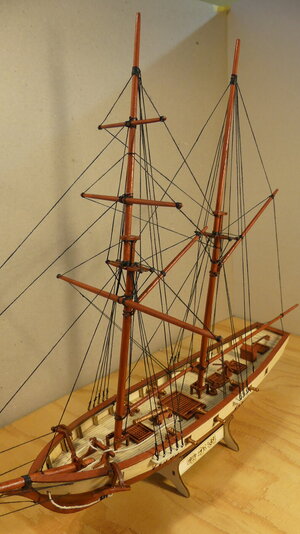
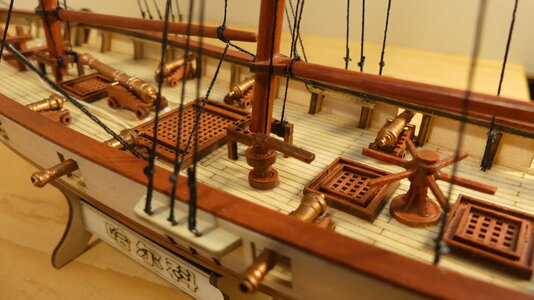
Just finished the same kit as my first real wooden one. More experienced in plastic....
Nevertheless I came to a satisfying result. Probably not a museum-quality and historical exact ship...
The instructions are minimal and poor, but Google is your friend. There are a lot of buildlogs with additional info.
Look in the SOS-section of this forum to see my result and others.
Goodluck!


- Joined
- Oct 5, 2023
- Messages
- 39
- Points
- 48

Ain't not bad!!You Lucky Bast....,
Just finished the same kit as my first real wooden one. More experienced in plastic....
Nevertheless I came to a satisfying result. Probably not a museum-quality and historical exact ship...
The instructions are minimal and poor, but Google is your friend. There are a lot of buildlogs with additional info.
Look in the SOS-section of this forum to see my result and others.
Goodluck!
View attachment 399909
View attachment 399910
View attachment 399911
I’d put that on my shelf! Nicely done.
Oh, you've only begun collecting new tools. Every time I think I have everything I need...$$$ happens...
- Joined
- Oct 5, 2023
- Messages
- 39
- Points
- 48

I've been eyeballing laser cutters. If for no other reason than for bragging rights. lolOh, you've only begun collecting new tools. Every time I think I have everything I need...$$$ happens...
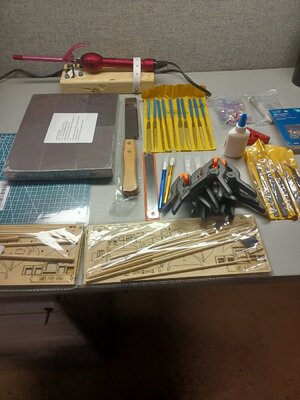
Hallo @GhostJust received a good bit of the tools I ordered. They goofed and actually sent me 2 model kits. Plenty more I'm waiting on. Going out this weekend to get the stains and paints. Feels like Christmas!
we wish you all the BEST and a HAPPY BIRTHDAY

- Joined
- Oct 5, 2023
- Messages
- 39
- Points
- 48

Been forever since I last posted. Hospital stays, work, etc. I'm finally to the point where I'd like to get back to my model. I'm having a real difficult time trying to figure out how to plank the transom. Any and all suggestions are MOST appreciated!
My quandary is how to best do around the rudder. Thanks in advance!
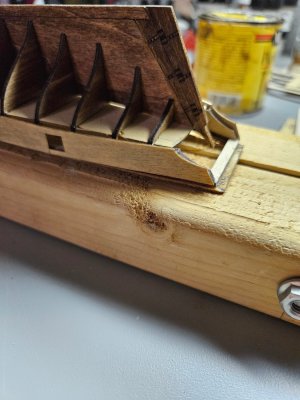
My quandary is how to best do around the rudder. Thanks in advance!

The sharp bend of the planks near the stern to meet the counter may require soaking and pre-bending. I was able to get the planks to stay with CA glue even though they were springy.
Here are the deadwood planks prior to sanding the planks at the deadwood to fair them into the sternpost and keel. Bevel the planks to a shallow angle as shown, but make sure the edges of the ends of the planks line up with the forward edge of the sternpost.
Sand the planks with rough sandpaper on a sanding block, such that the planks are faired properly. Be careful not to sand right through a plank and expose the plywood underneath, or sand the laser drawn details on the rudder or sternpost. Move the sanding block from fore to aft, and stopping short of the stern post and you won't wipe out the laser engraving.
The next plank shown is begun in the same matter as the previous ones. The front end of the plank is anchored to the bow first, then the plank is attached one firm of time working rearward. Test fit the plank before trimming and shaping the rear end of the plank, taking care NOT to cut it too short!
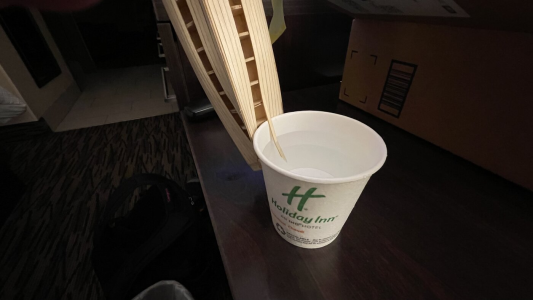
Holding the end of the plank in hot water, softens it, so can make that hard bend up toward the counter without splintering or fraying.
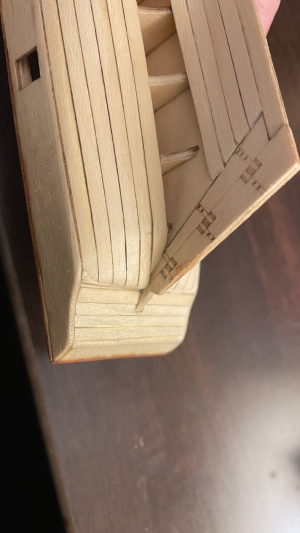
The rearmost tip of this plank is carefully trimmed and beveled such that when it curves at the end, the edge runs along the line of the sternpost, closing up any holed in the hull.
As the gap in the hull closes, trim both the installed planks and the loose planks you are about to install to keep the plank seams running as close to parallel to each other as possible. The front end of the last plank (whiskey plank) will be formed as a drop plank at the front end. The rear end of the gap will require a stealer plank to fill the hole there. Your planking pattern will probably come out a bit differently, but the application of drop planks and stealers is the same. You don't want the last plank to be just a narrow sliver of wood or it will look like crap. So, pre-plan the widths of the last three planks carefully and size them accordingly.
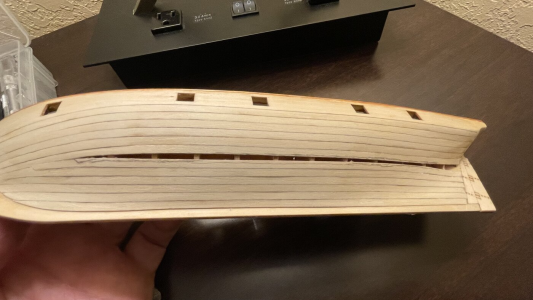
After sanding, the hull looks really nice, even for a toy boat made from crappy basswood. Because it is crappy basswood, forget about staining it. It will stain blotchy and ugly. Ask me how I know. Either coat this hull with clear or amber varnish, or paint it.
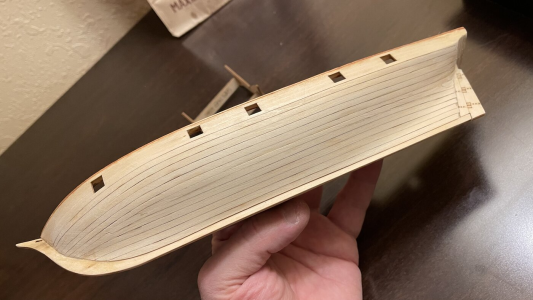
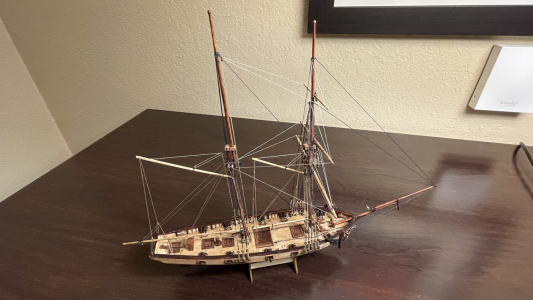
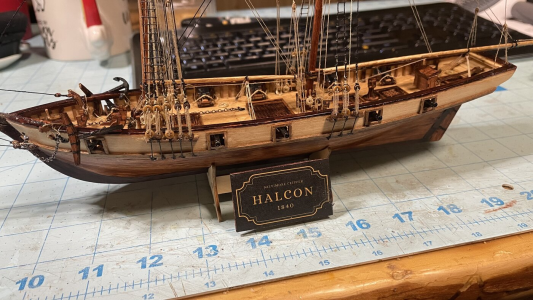
This is how my boat turned out. The hull bottom finish kinda sucks. Everything above the waterline turned out great. You can certainly do better. See my build log for how I super detailed the rigging.

Here are the deadwood planks prior to sanding the planks at the deadwood to fair them into the sternpost and keel. Bevel the planks to a shallow angle as shown, but make sure the edges of the ends of the planks line up with the forward edge of the sternpost.

Sand the planks with rough sandpaper on a sanding block, such that the planks are faired properly. Be careful not to sand right through a plank and expose the plywood underneath, or sand the laser drawn details on the rudder or sternpost. Move the sanding block from fore to aft, and stopping short of the stern post and you won't wipe out the laser engraving.

The next plank shown is begun in the same matter as the previous ones. The front end of the plank is anchored to the bow first, then the plank is attached one firm of time working rearward. Test fit the plank before trimming and shaping the rear end of the plank, taking care NOT to cut it too short!

Holding the end of the plank in hot water, softens it, so can make that hard bend up toward the counter without splintering or fraying.

The rearmost tip of this plank is carefully trimmed and beveled such that when it curves at the end, the edge runs along the line of the sternpost, closing up any holed in the hull.

As the gap in the hull closes, trim both the installed planks and the loose planks you are about to install to keep the plank seams running as close to parallel to each other as possible. The front end of the last plank (whiskey plank) will be formed as a drop plank at the front end. The rear end of the gap will require a stealer plank to fill the hole there. Your planking pattern will probably come out a bit differently, but the application of drop planks and stealers is the same. You don't want the last plank to be just a narrow sliver of wood or it will look like crap. So, pre-plan the widths of the last three planks carefully and size them accordingly.

After sanding, the hull looks really nice, even for a toy boat made from crappy basswood. Because it is crappy basswood, forget about staining it. It will stain blotchy and ugly. Ask me how I know. Either coat this hull with clear or amber varnish, or paint it.

This is how my boat turned out. The hull bottom finish kinda sucks. Everything above the waterline turned out great. You can certainly do better. See my build log for how I super detailed the rigging.

Last edited:
- Joined
- Oct 5, 2023
- Messages
- 39
- Points
- 48

Wow - that's really helpful! I've not been able to find many closeup pics of the hull and transom. Thank you so much!!!The sharp bend of the planks near the stern to meet the counter may require soaking and pre-bending. I was able to get the planks to stay with CA glue even though they were springy.
View attachment 489287
Here are the deadwood planks prior to sanding the planks at the deadwood to fair them into the sternpost and keel. Bevel the planks to a shallow angle as shown, but make sure the edges of the ends of the planks line up with the forward edge of the sternpost.
View attachment 489285
Sand the planks with rough sandpaper on a sanding block, such that the planks are faired properly. Be careful not to sand right through a plank and expose the plywood underneath, or sand the laser drawn details on the rudder or sternpost.
View attachment 489286
The next plank shown is begun in the same matter as the previous ones. The front end of the plank is anchored to the bow first, then the plank is attached one firm of time working rearward. Test fit the plank before trimming and shaping the rear end of the plank, taking care NOT to cut it too short!
View attachment 489288
Holding the end of the plank in hot water, softens it, so can make that hard bend up toward the counter without splintering or fraying.
View attachment 489290
The rearmost tip of this plank is carefully trimmed and beveled such that when it curves at the end, the edge runs along the line of the sternpost, closing up any holed in the hull.
View attachment 489289
As the gap in the hull closes, trim both the installed planks and the loose planks you are about to install to keep the plank seams running as close to parallel to each other as possible. The front end of the last plank (whiskey plank) will be formed as a drop plank at the front end. The rear end of the gap will require a stealer plank to fill the hole there. Your planking pattern will probably come out a bit differently, but the application of drop planks and stealers is the same. You don't want the last plank to be just a narrow sliver of wood or it will look like crap. So, pre-plan the widths of the last three planks carefully and size them accordingly.
View attachment 489291
After sanding, the hull looks really nice, even for a toy boat made from crappy basswood. Because it is crappy basswood, forget about staining it. It will stain blotchy and ugly. Ask me how I know. Either coat this hull with clear or amber varnish, or paint it.
View attachment 489292
This is how my boat turned out. The hull bottom finish kinda sucks. Everything above the waterline turned out great. You can certainly do better. See my build log for how I super detailed the rigging.
View attachment 489299

